Skip to content

4 days on Berliner Höhenweg trail in Tyrol Alps, Austria

Distance (km)
0
Days on the trail
0
Highest point (m)
0

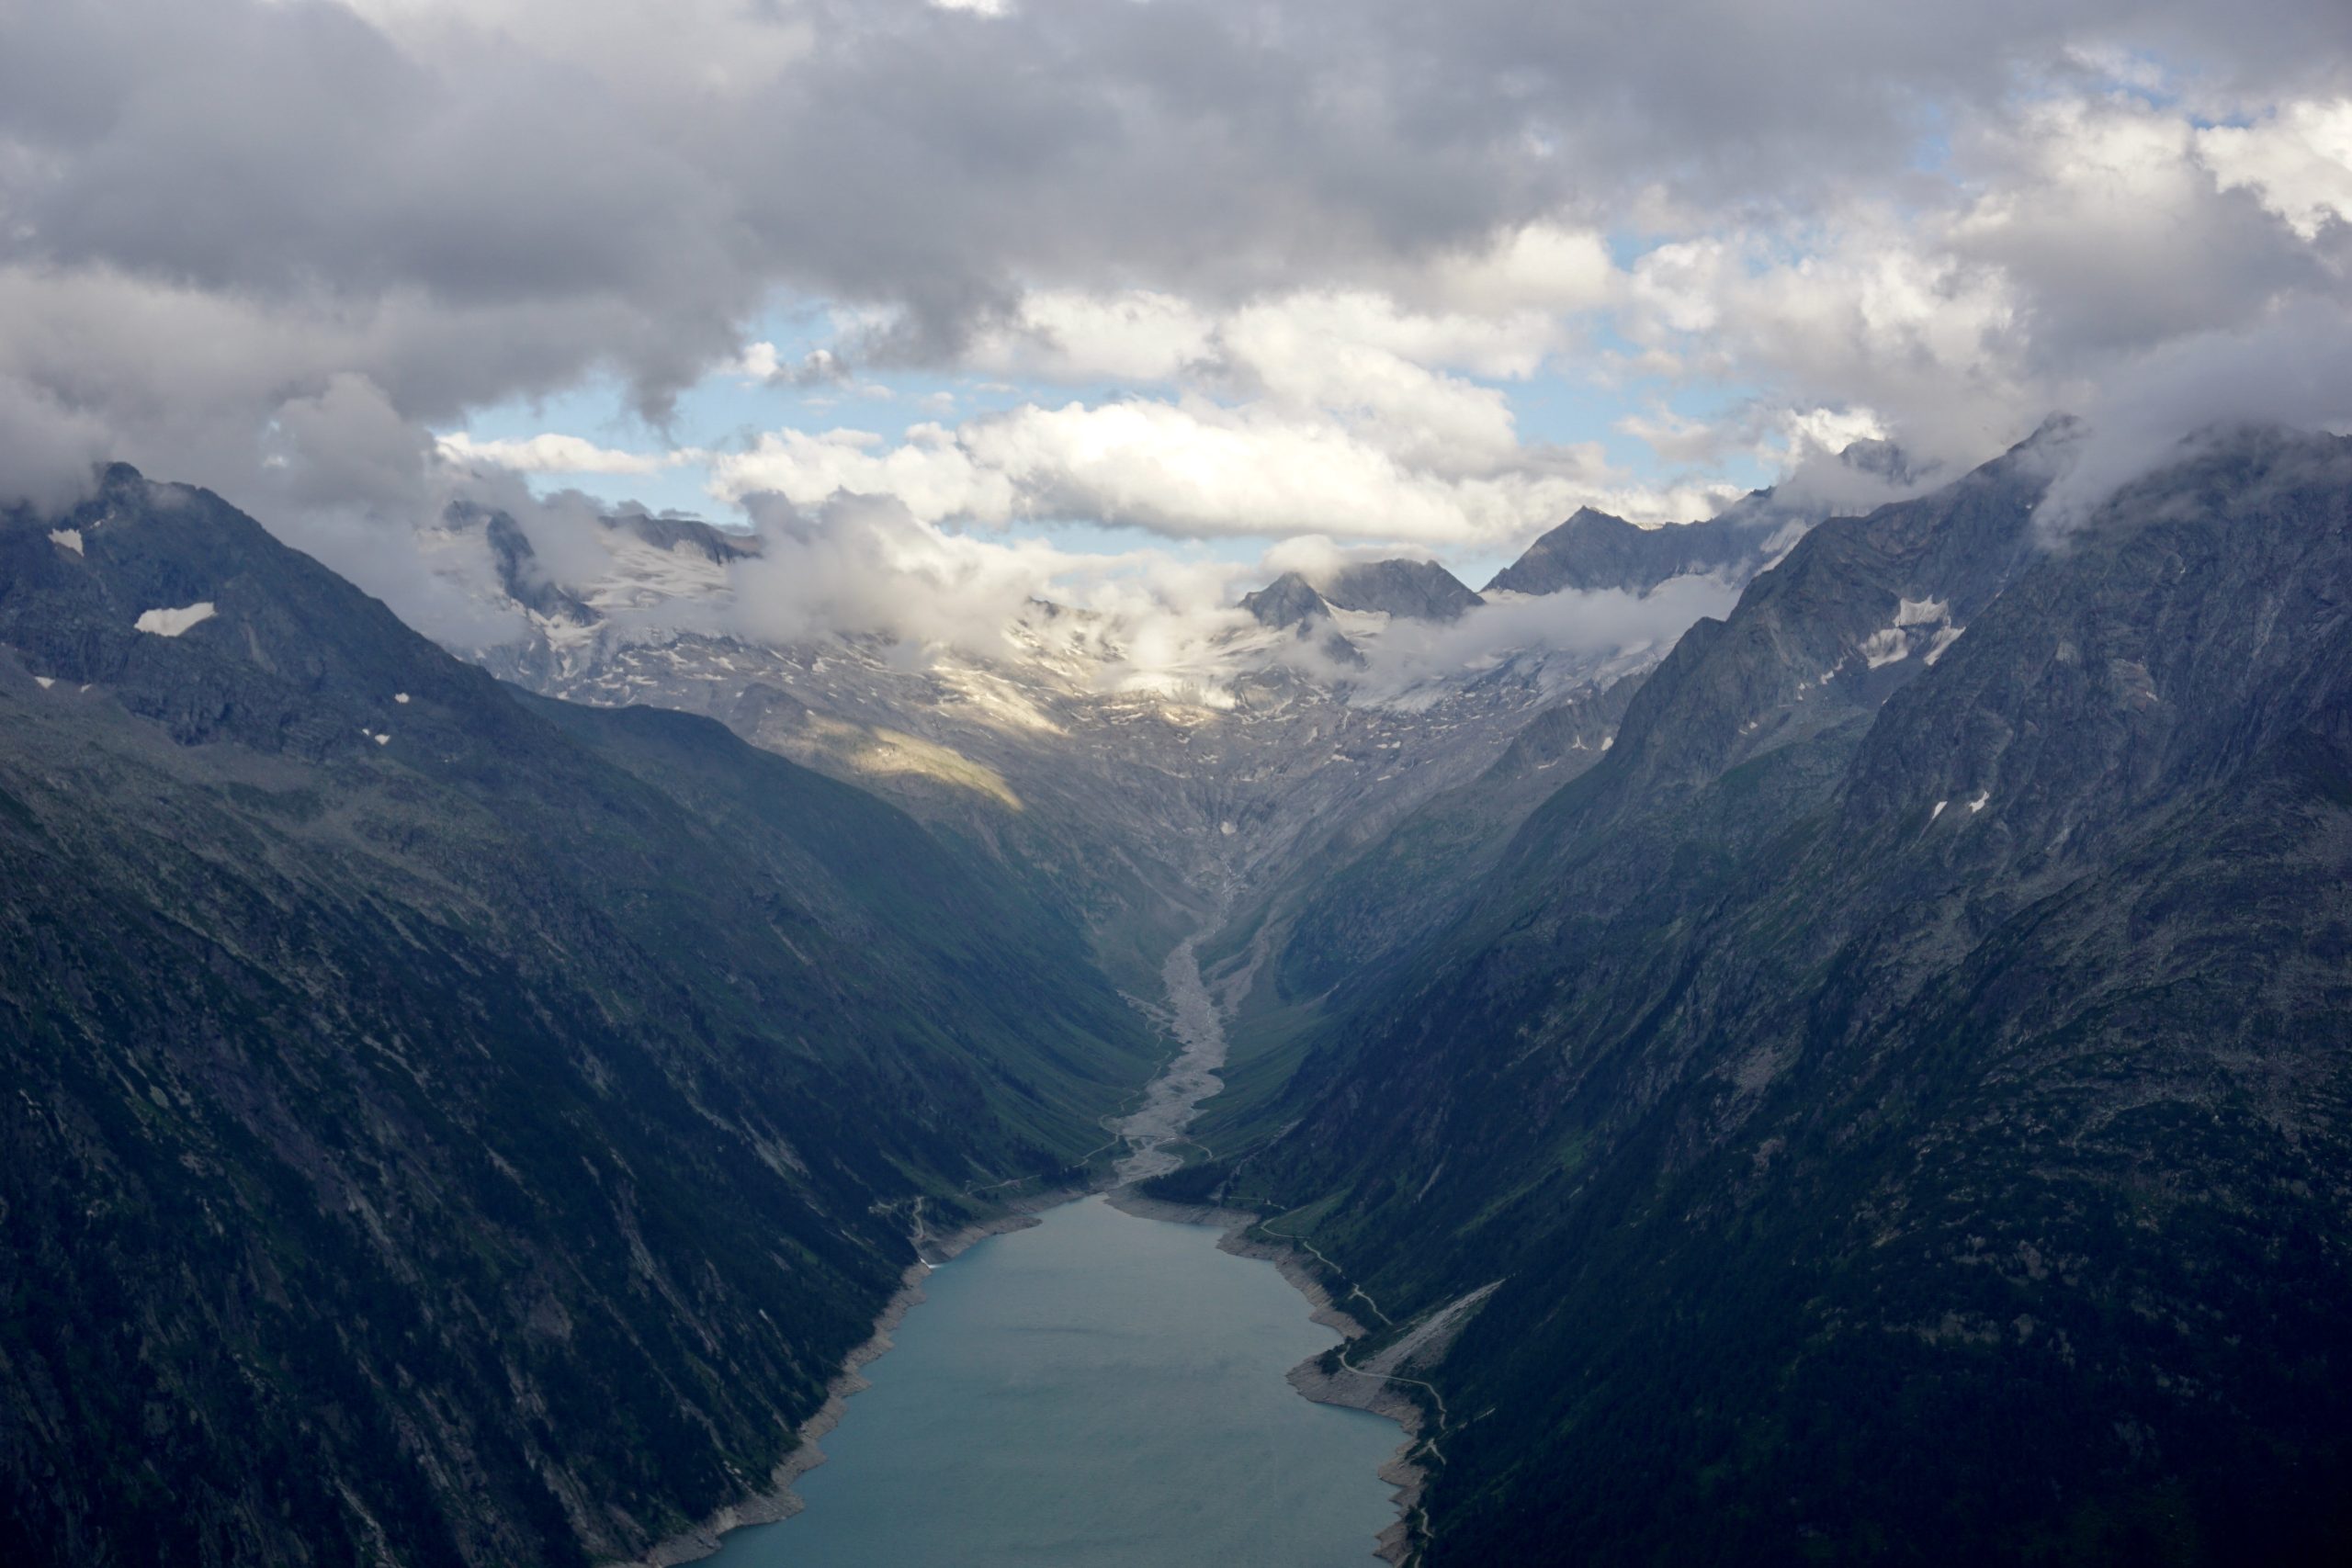
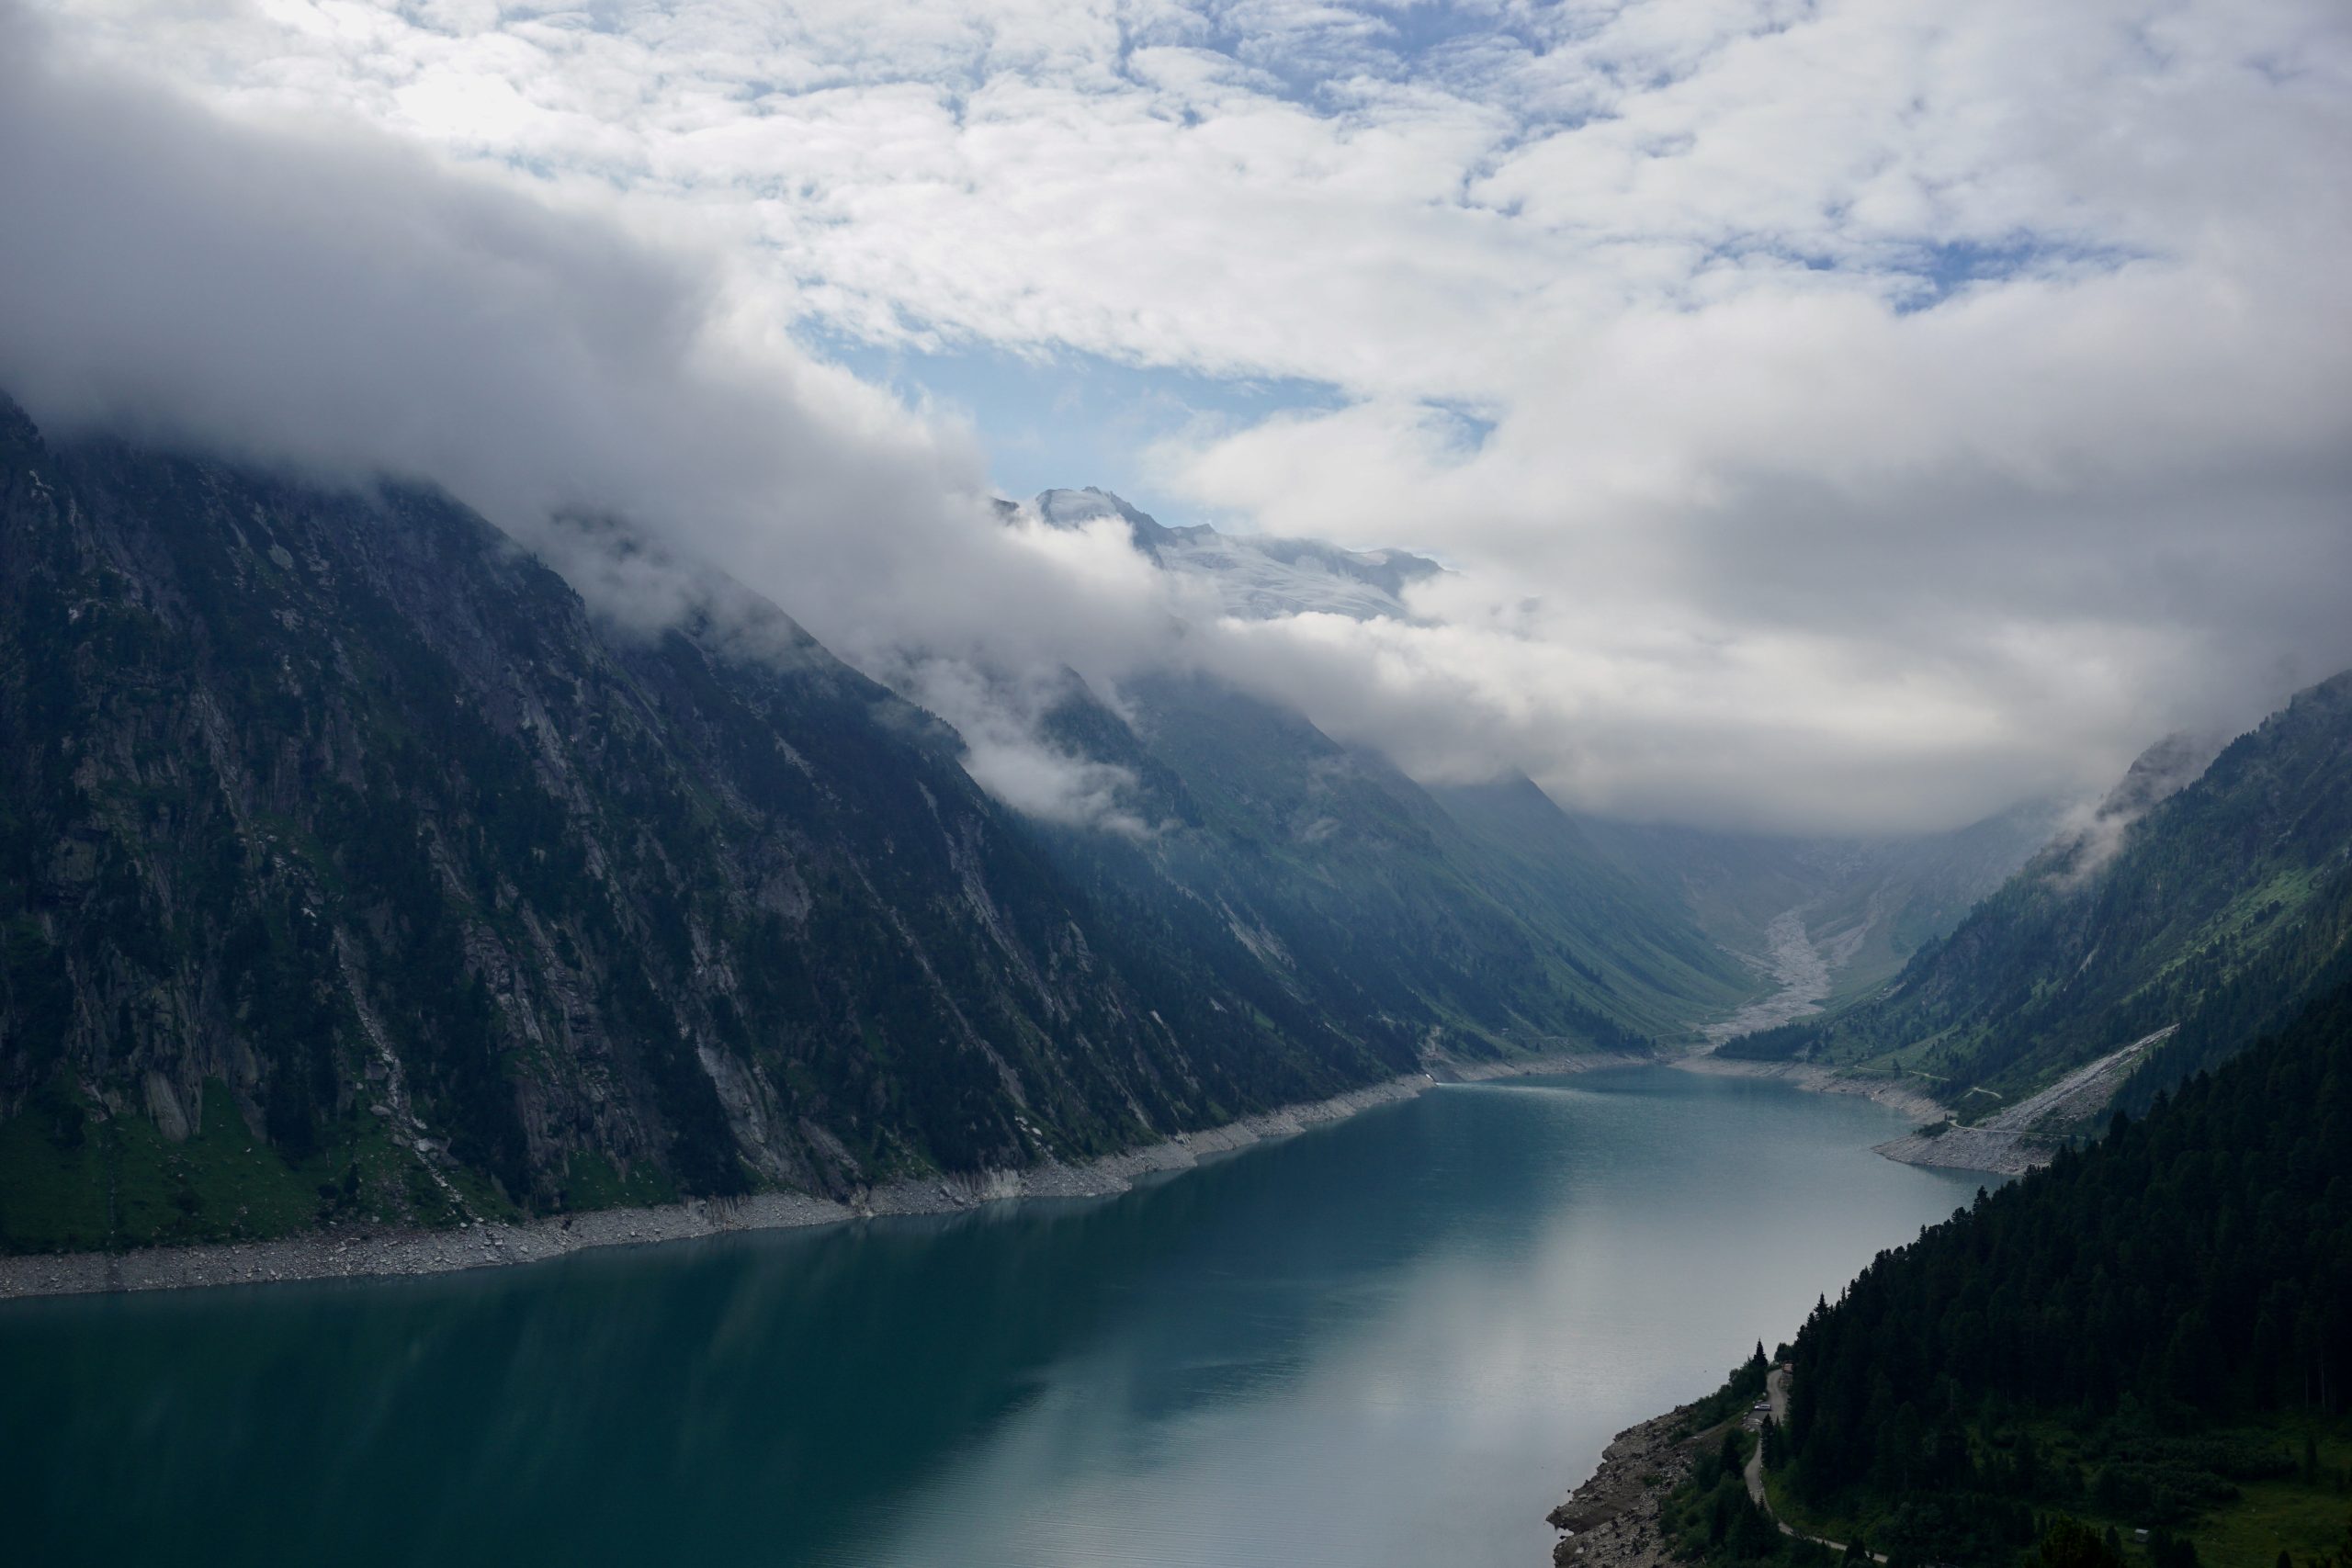
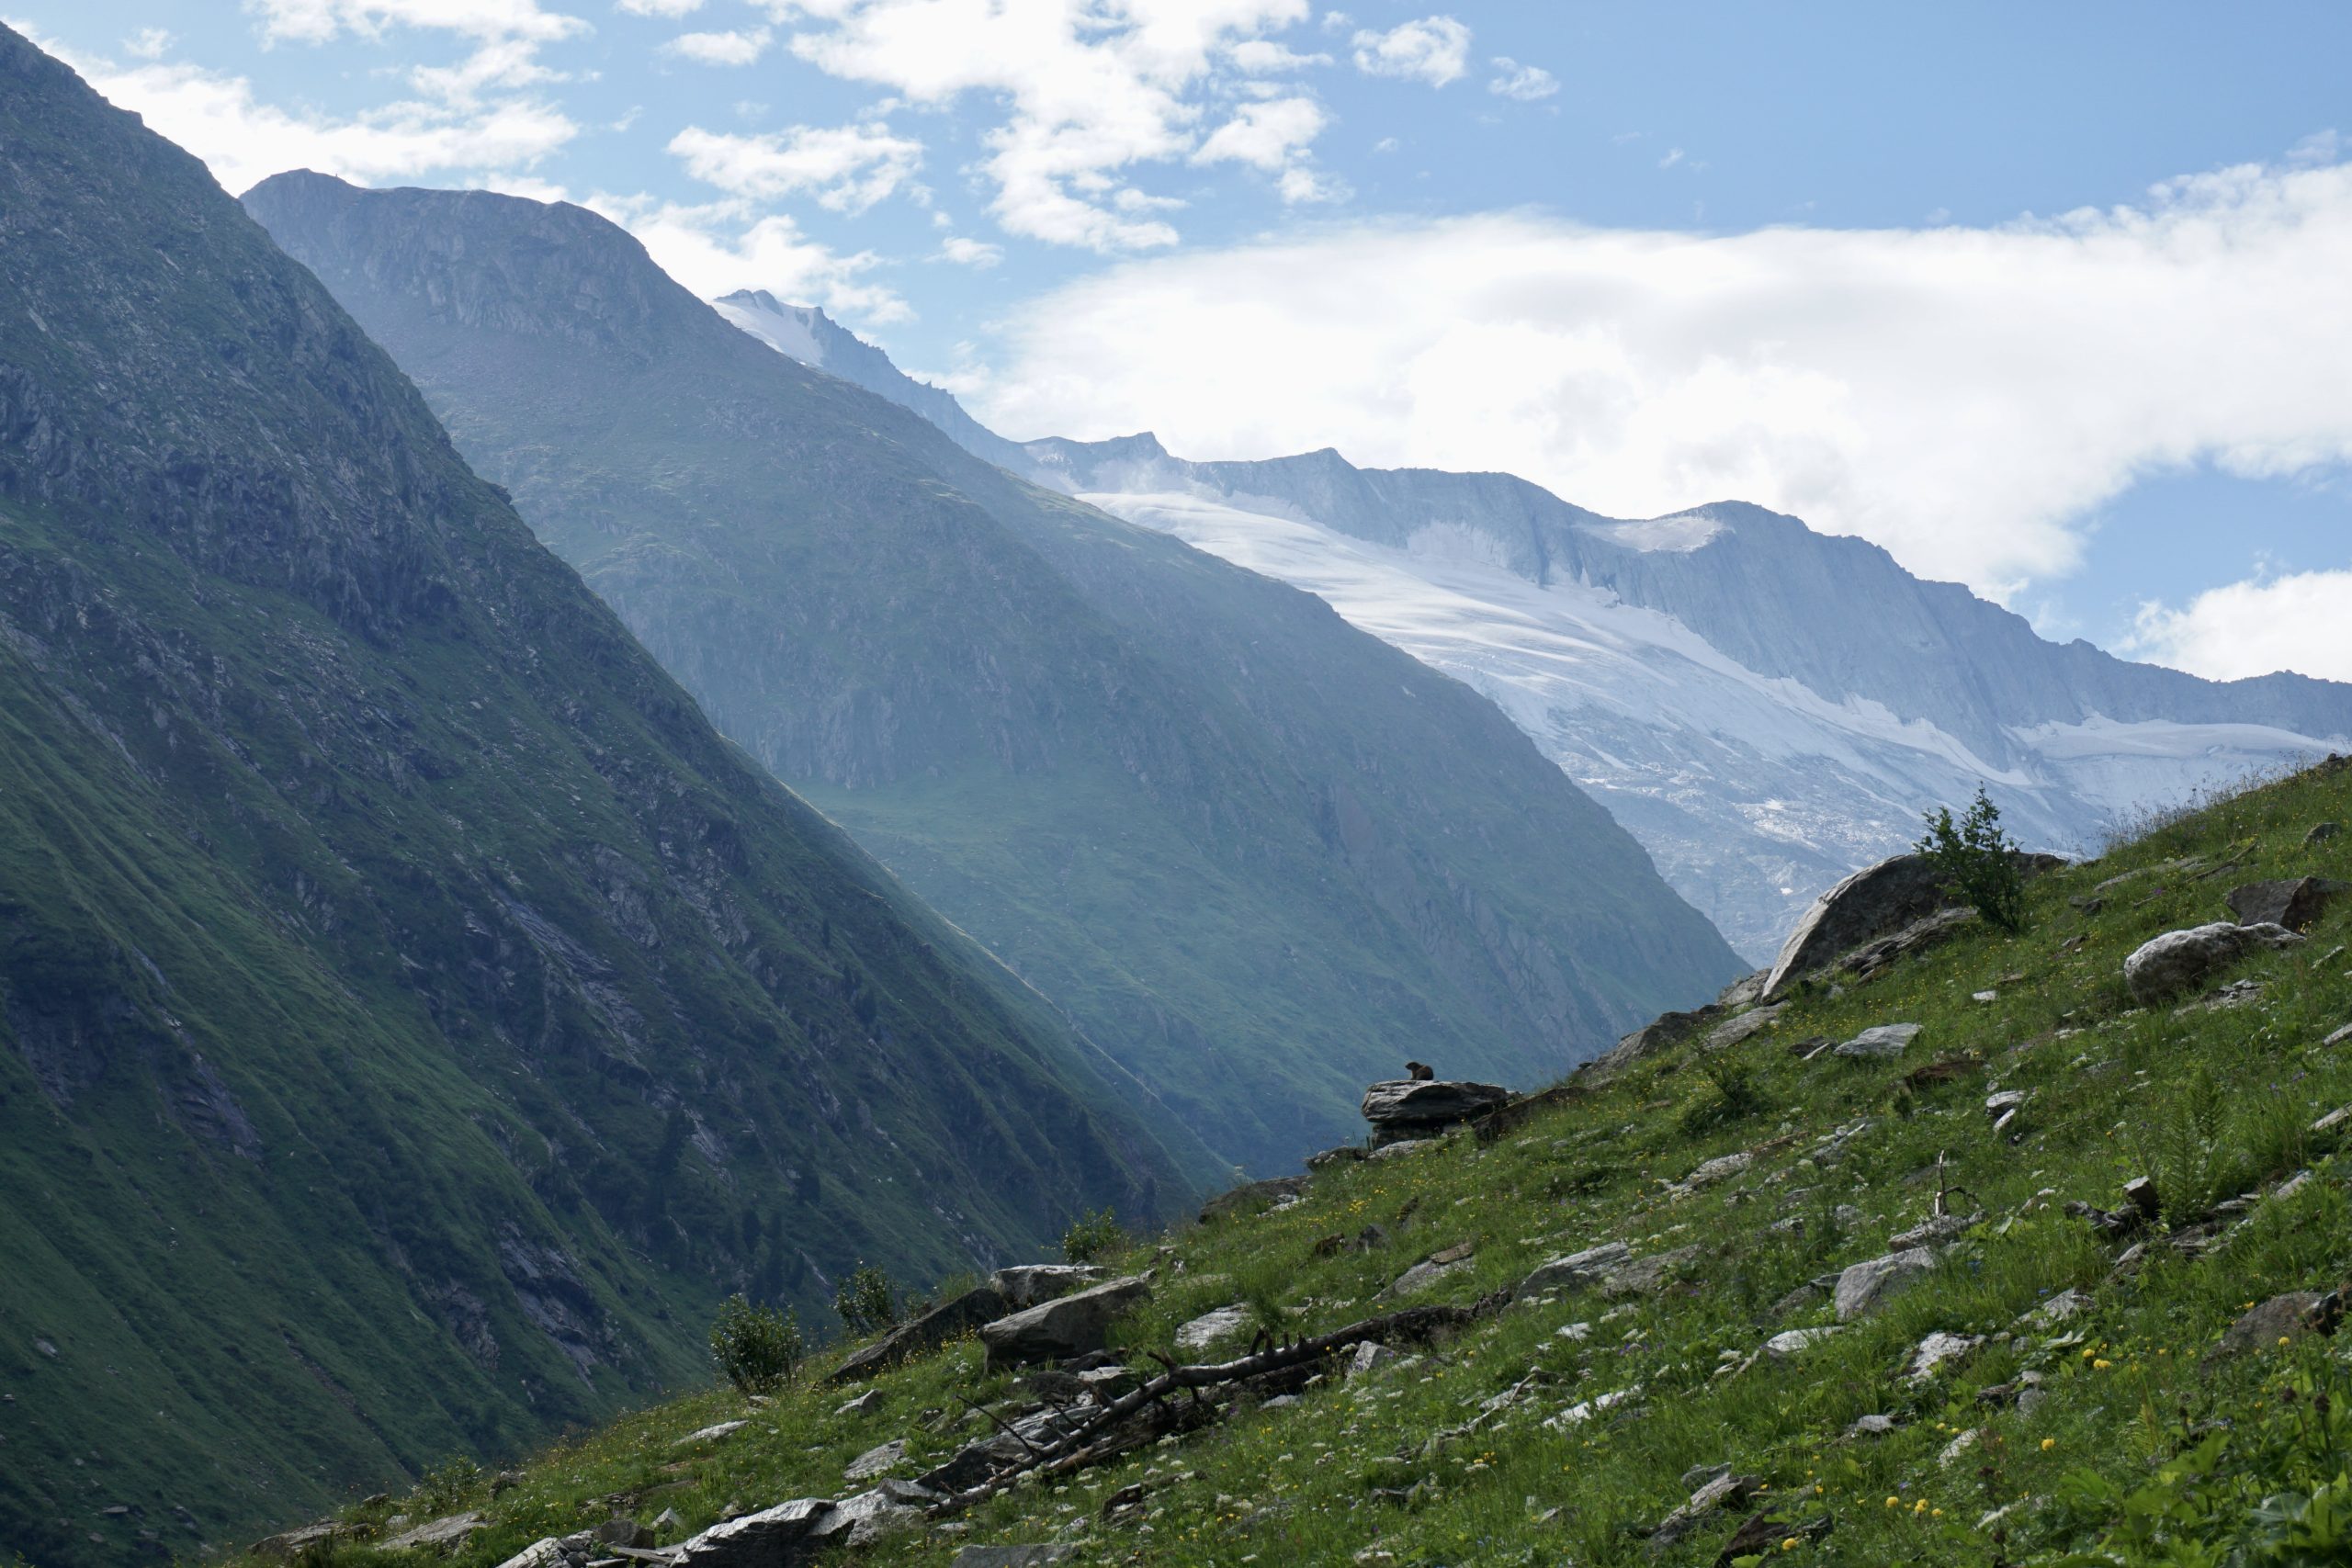
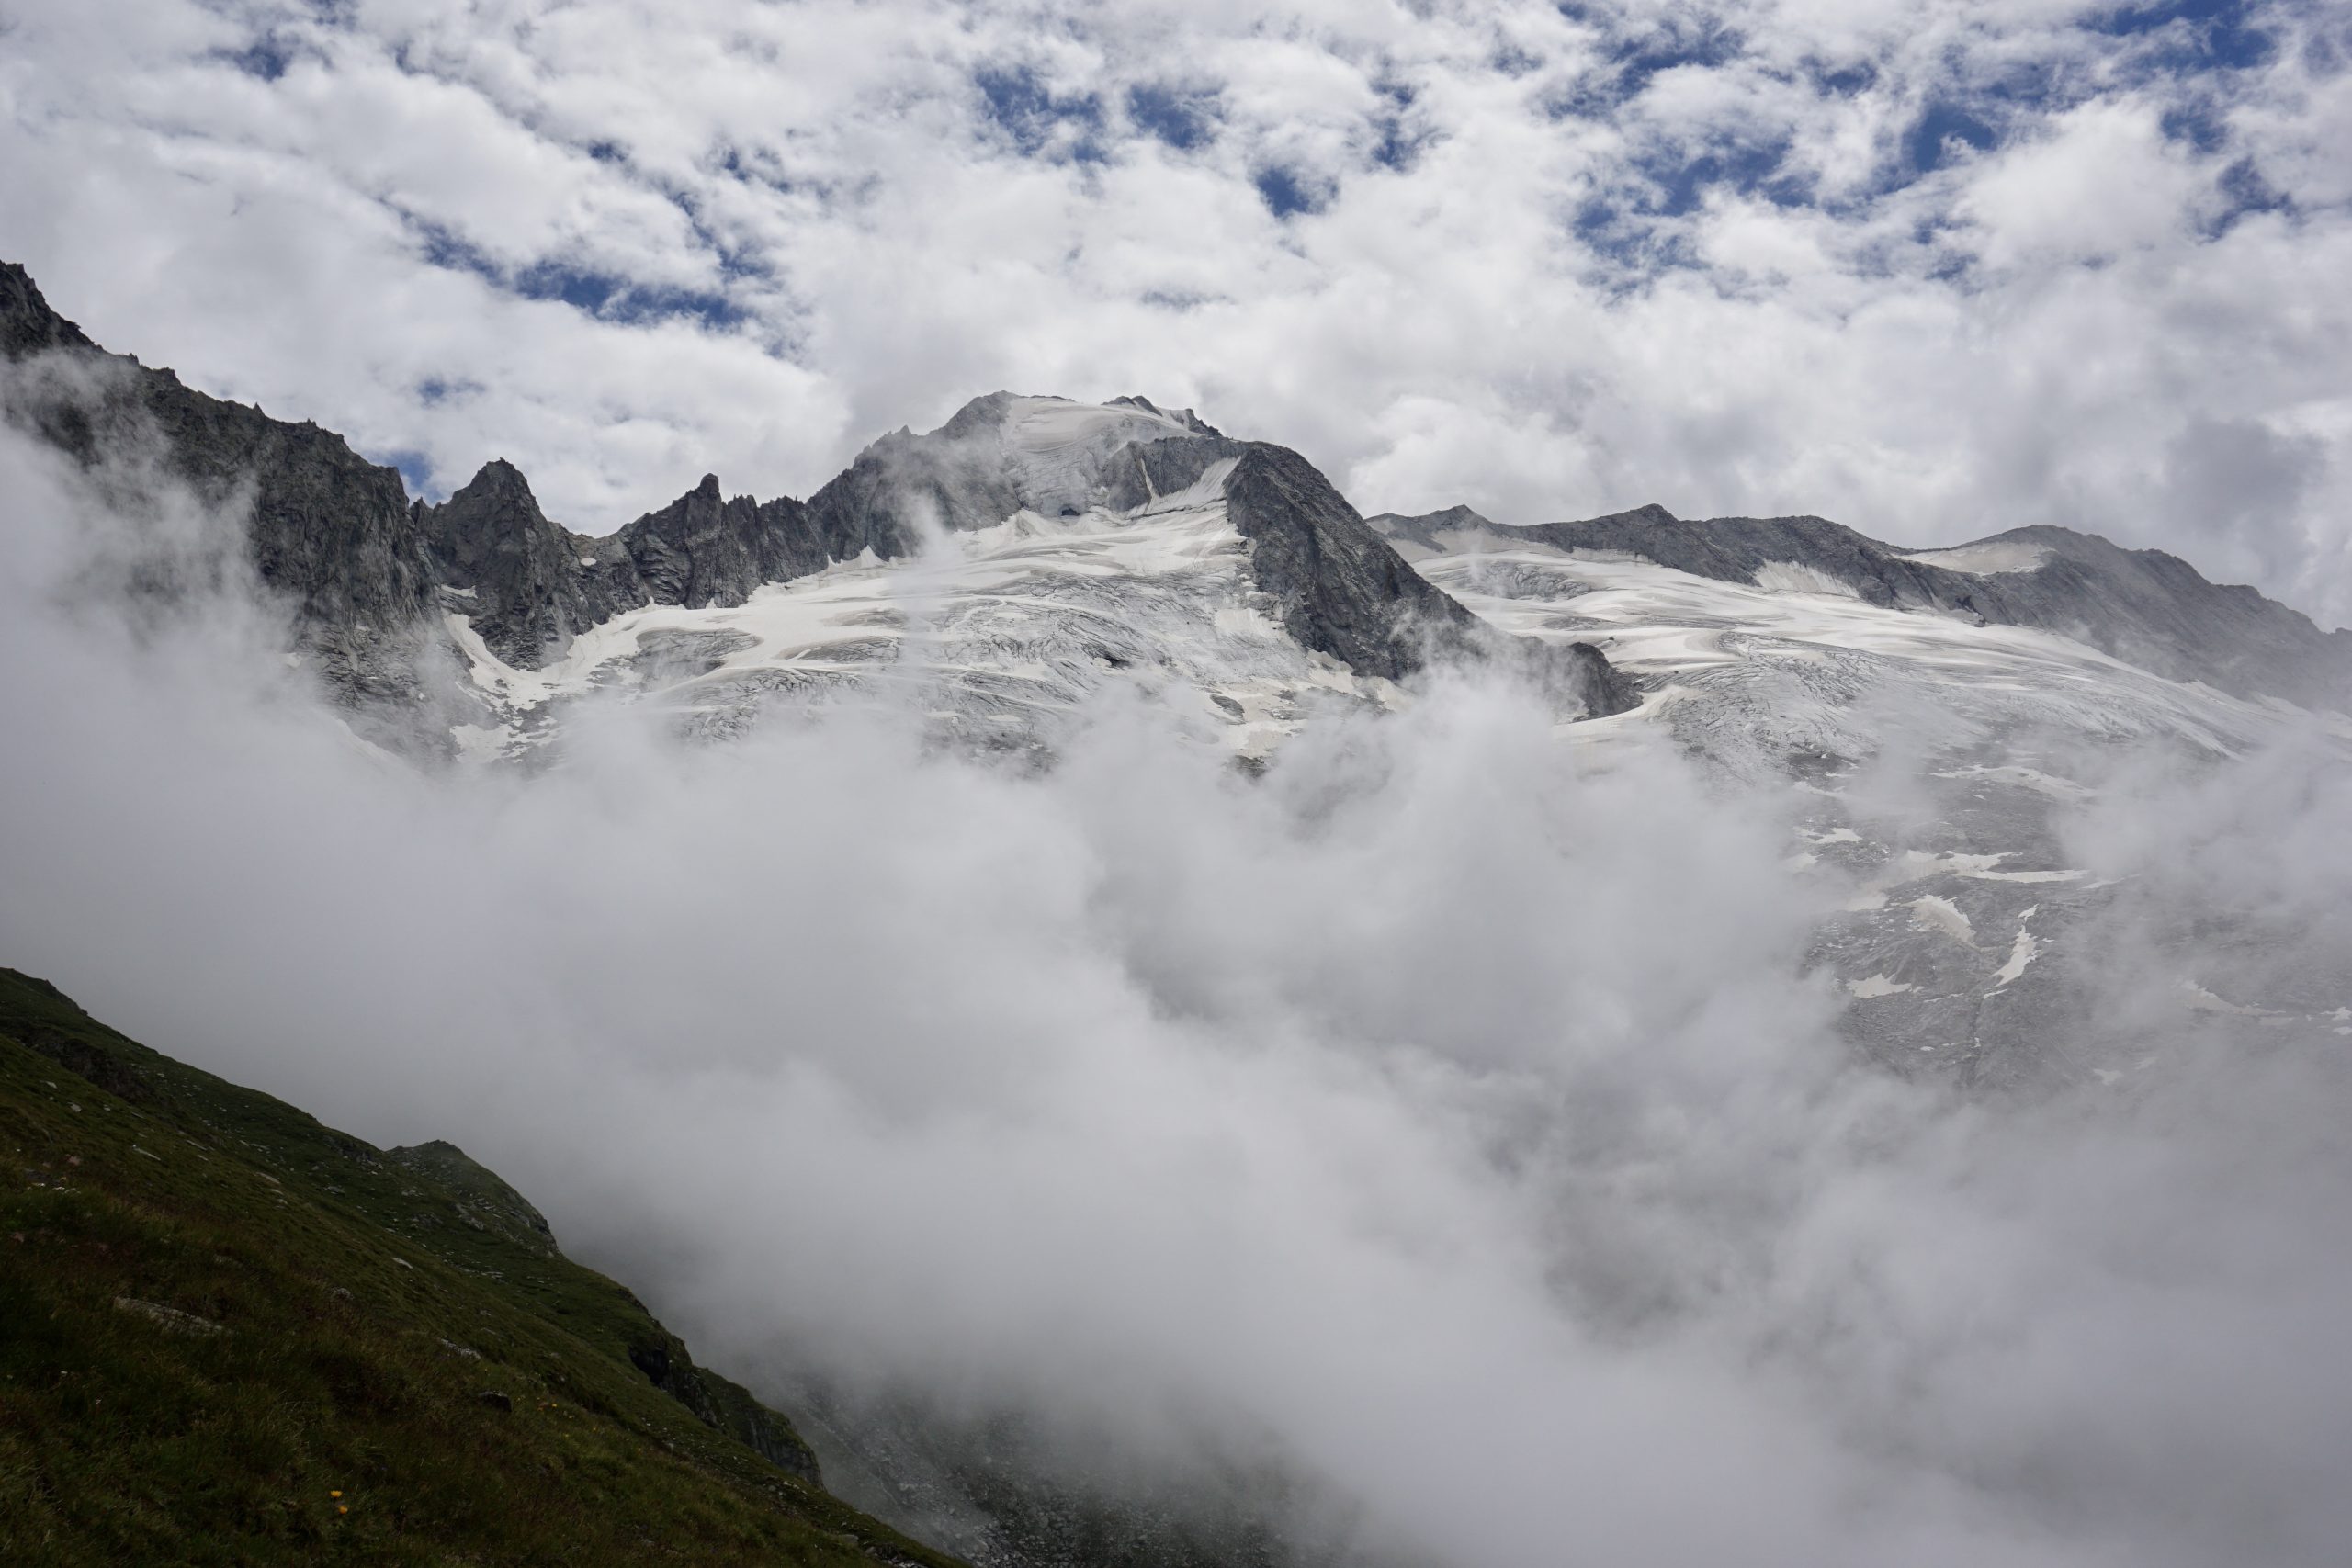
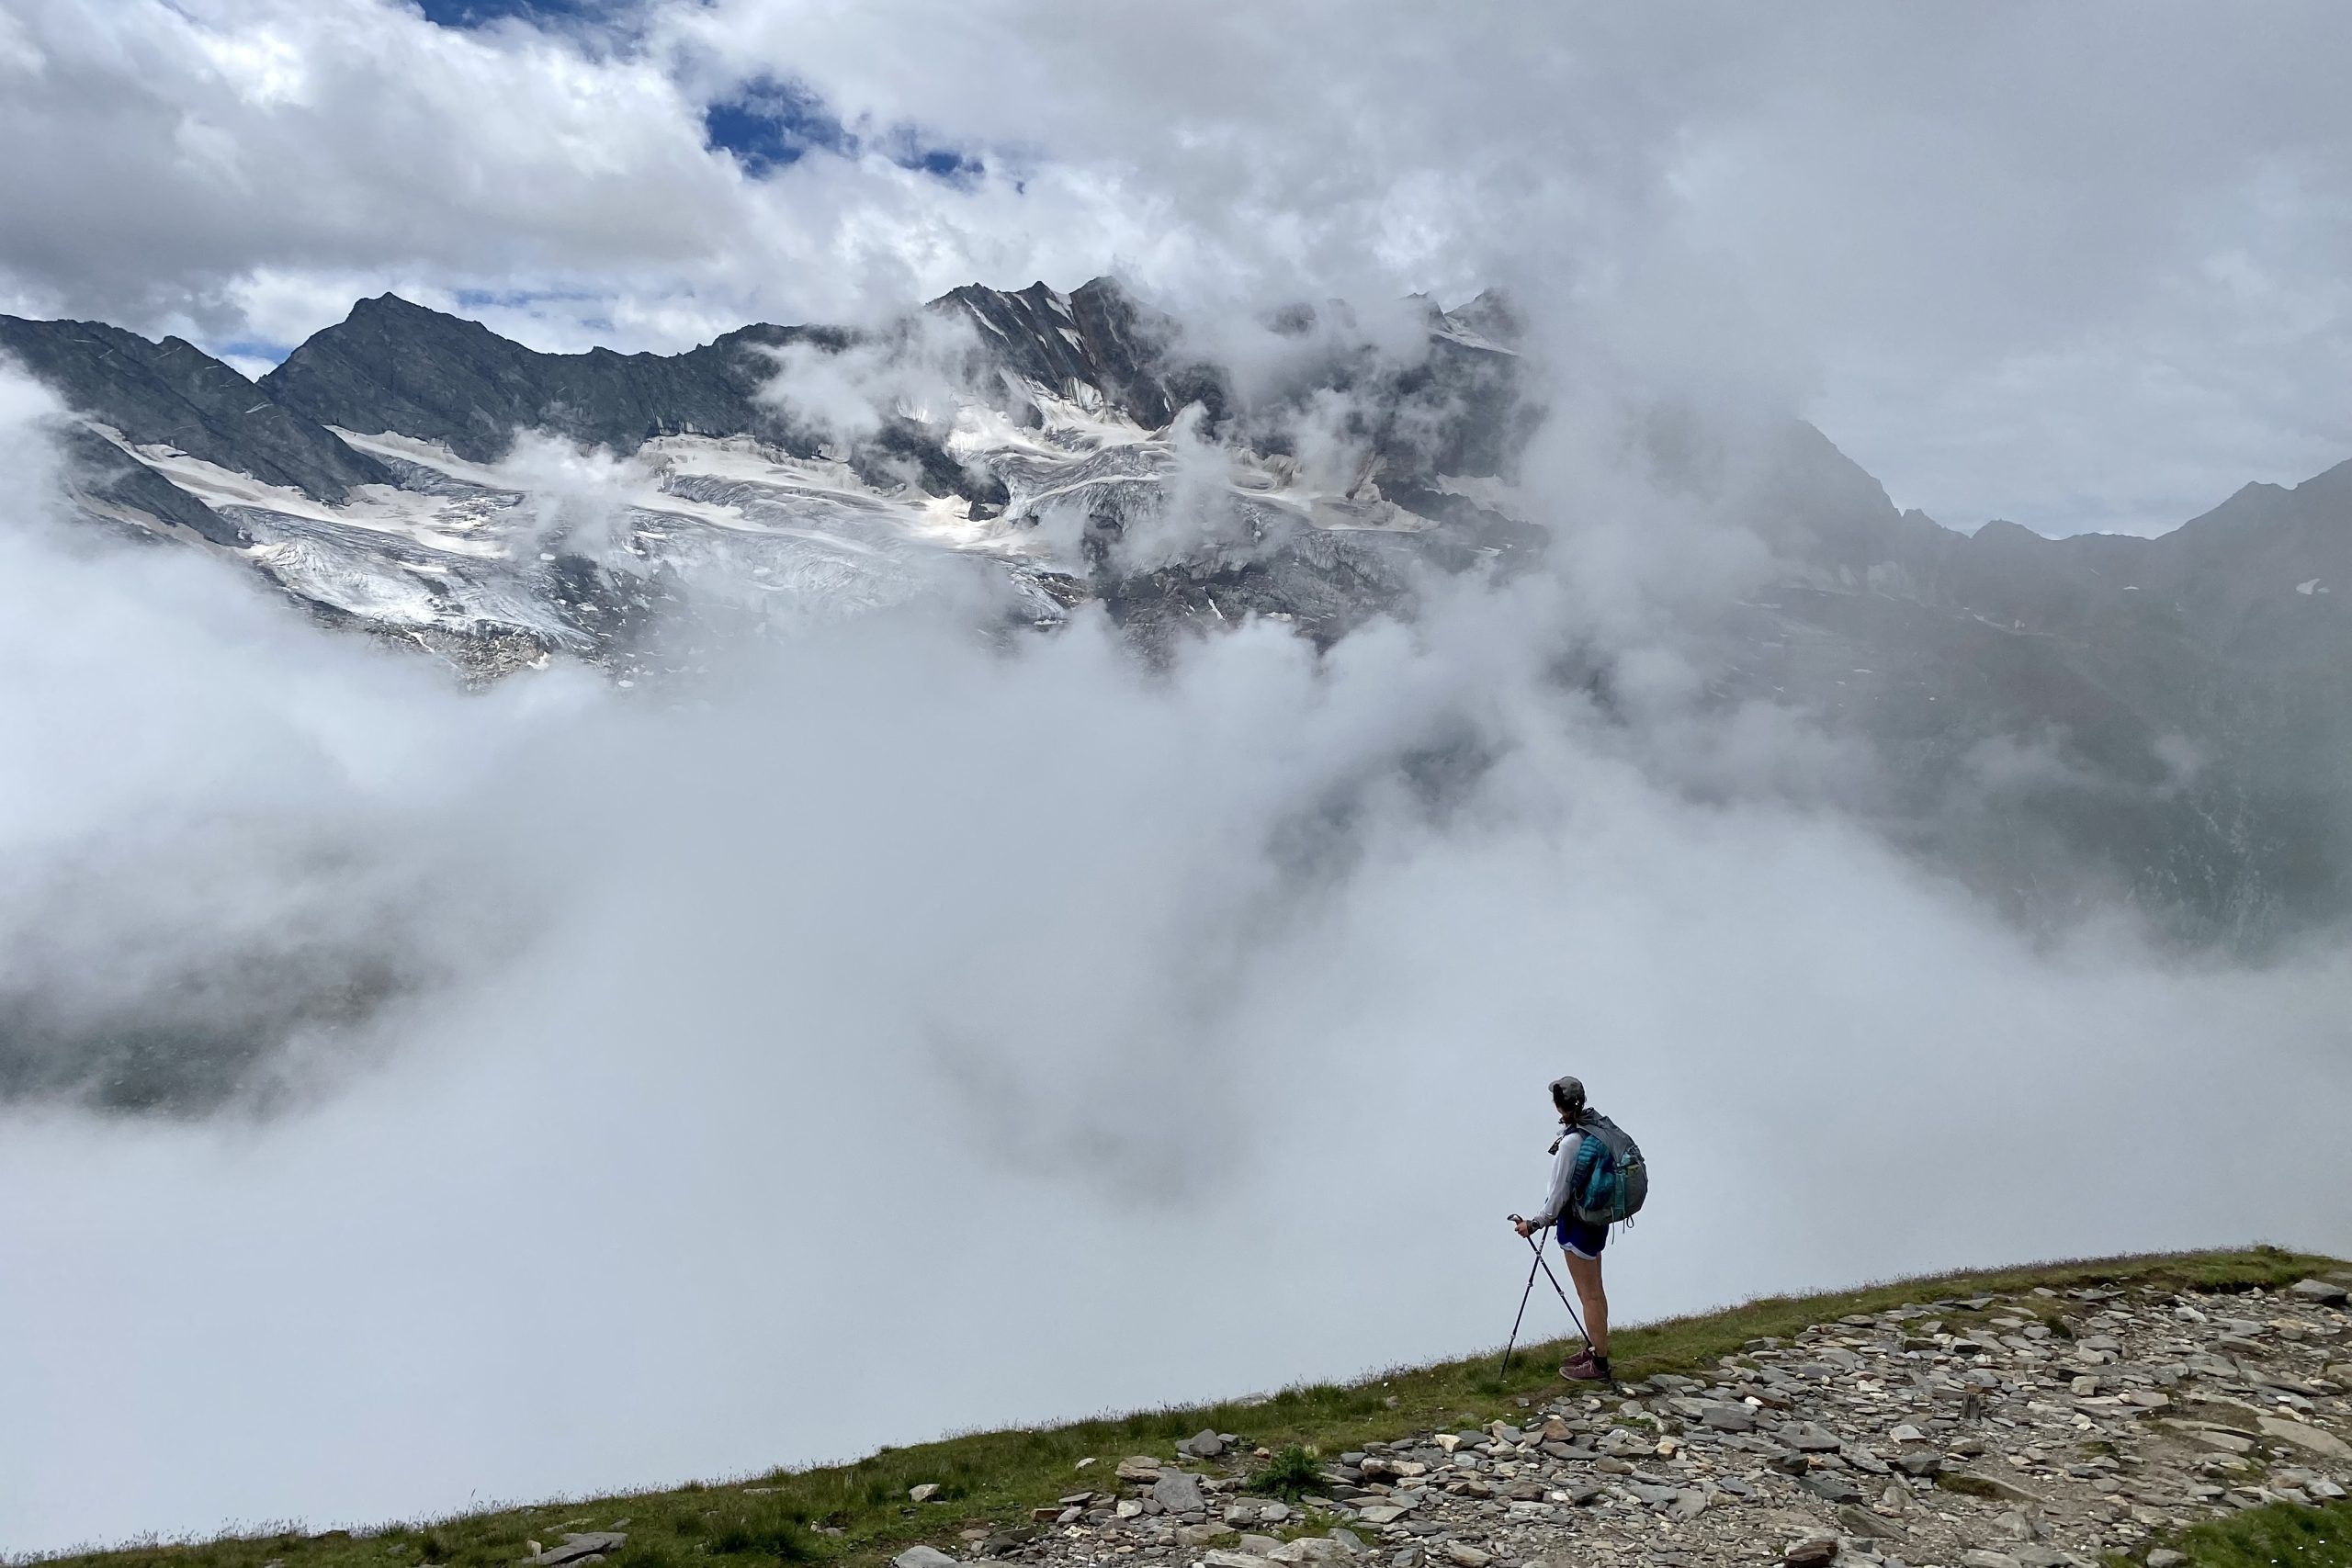
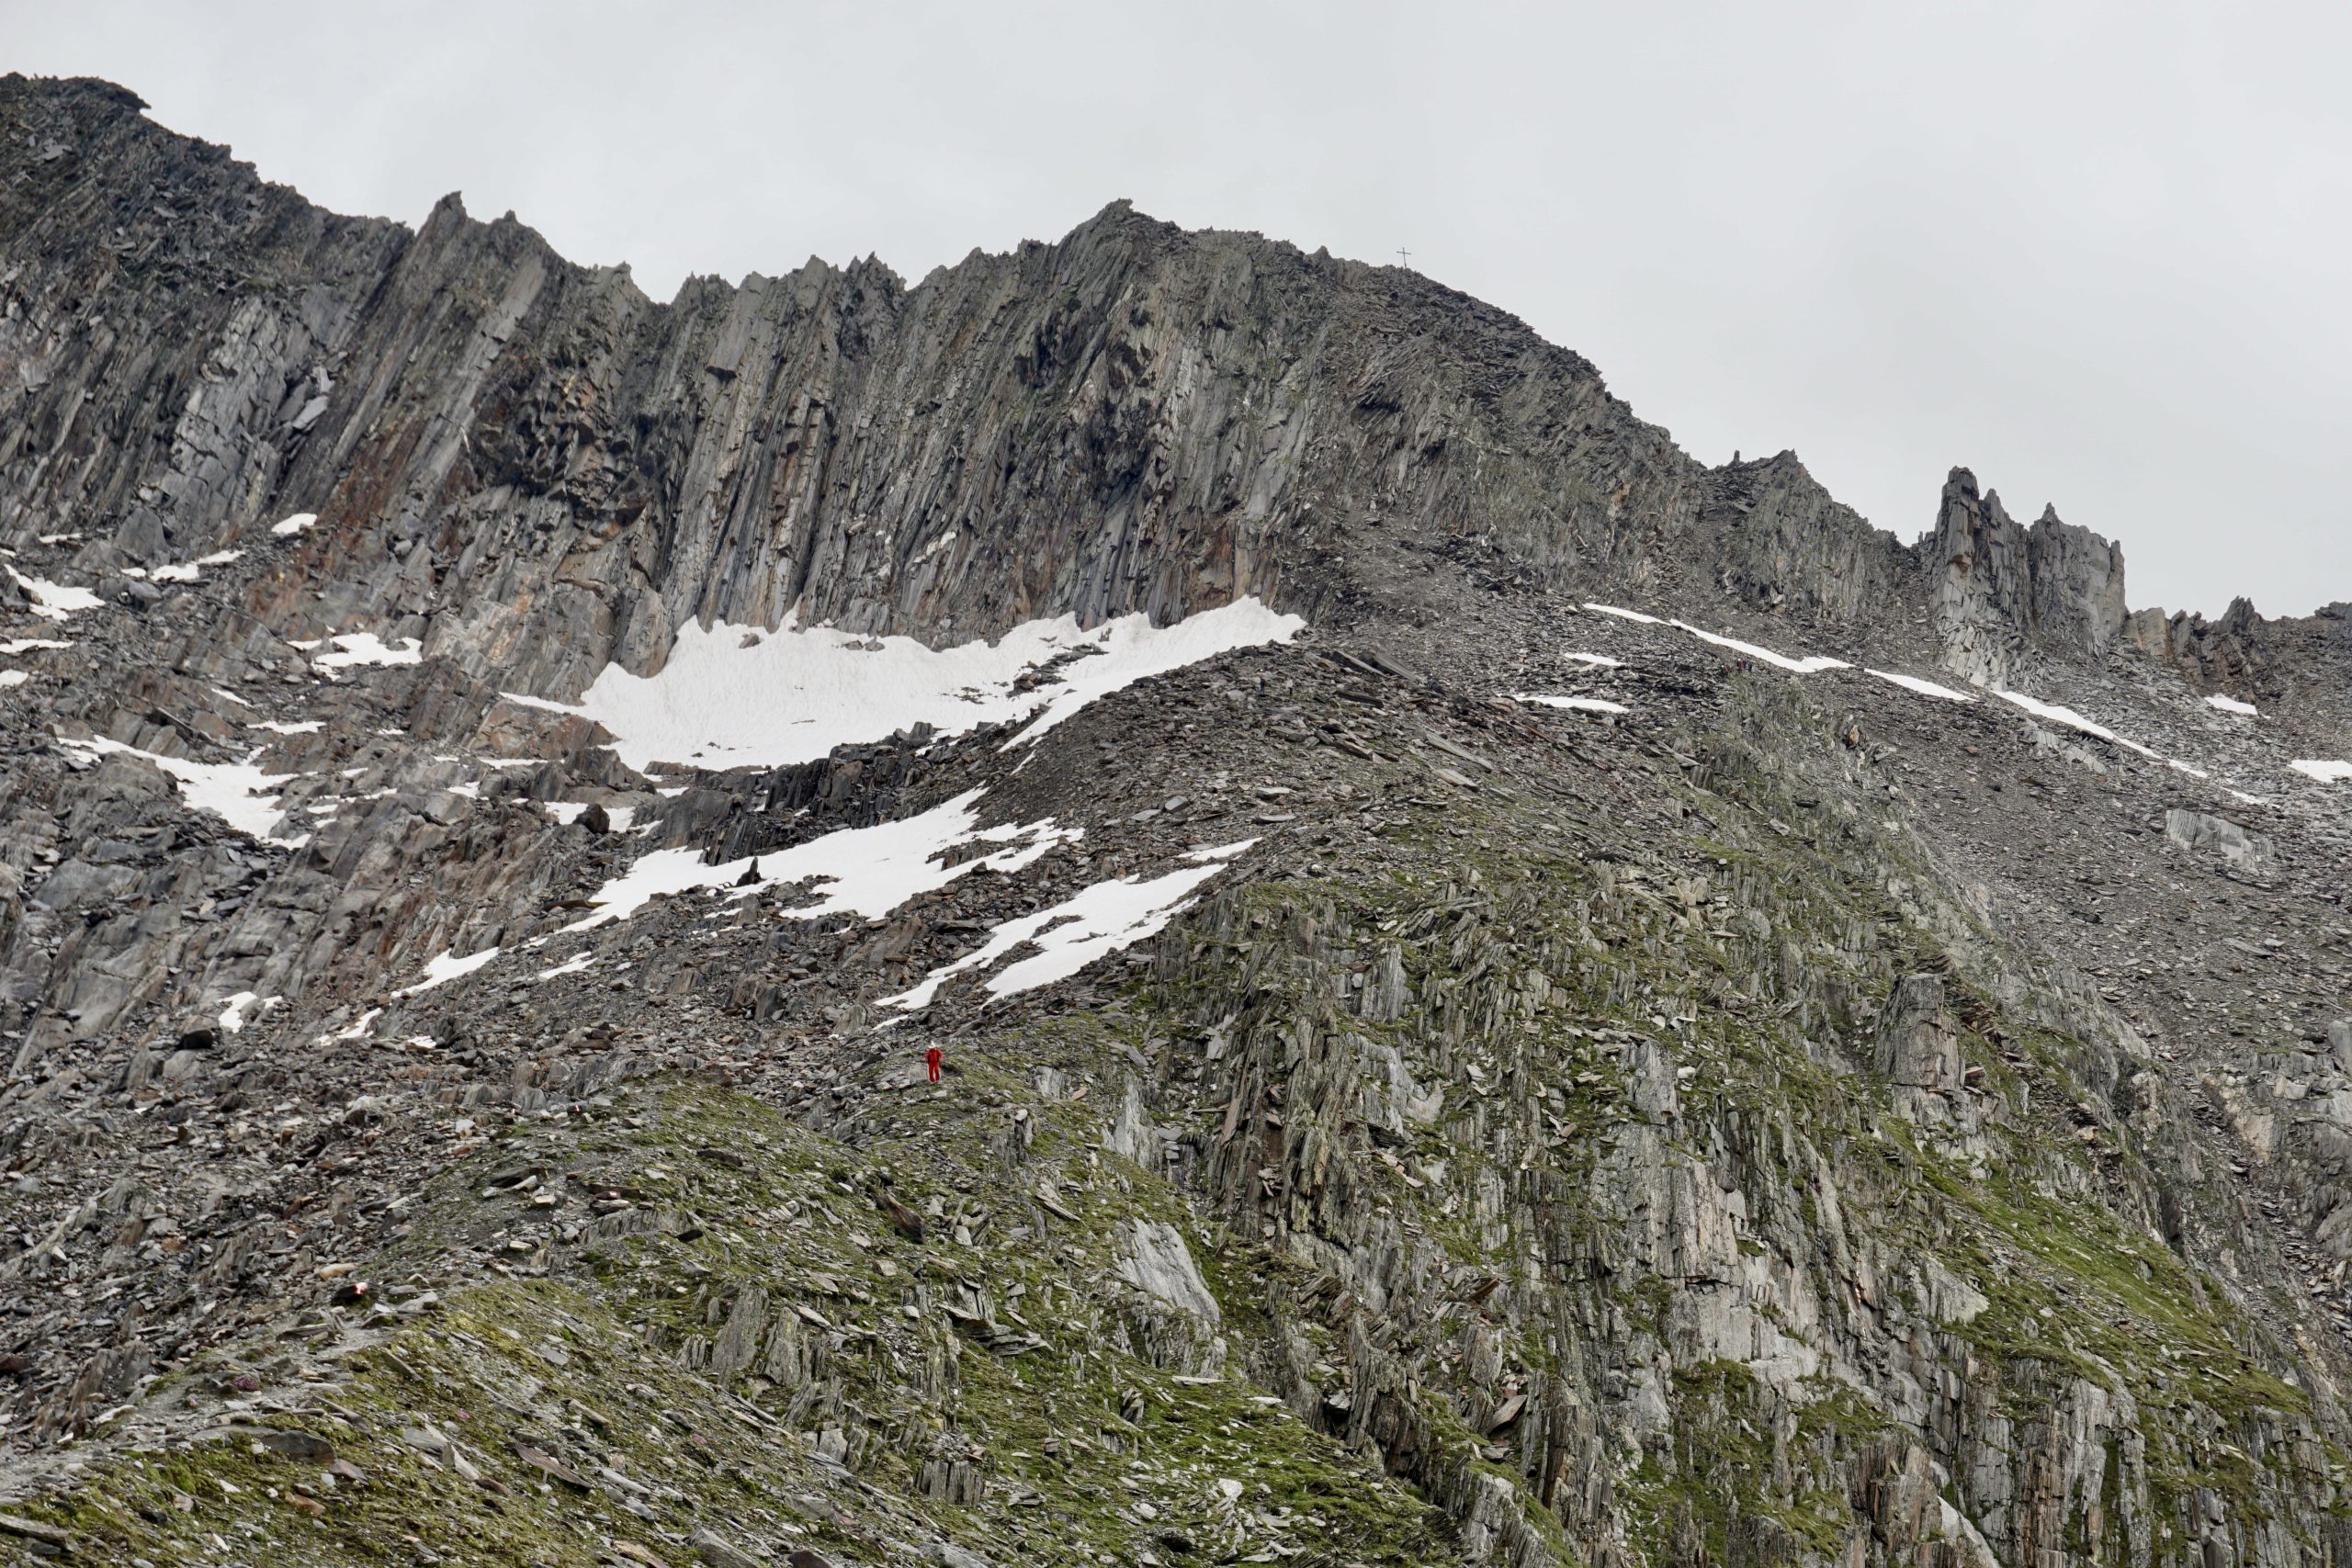
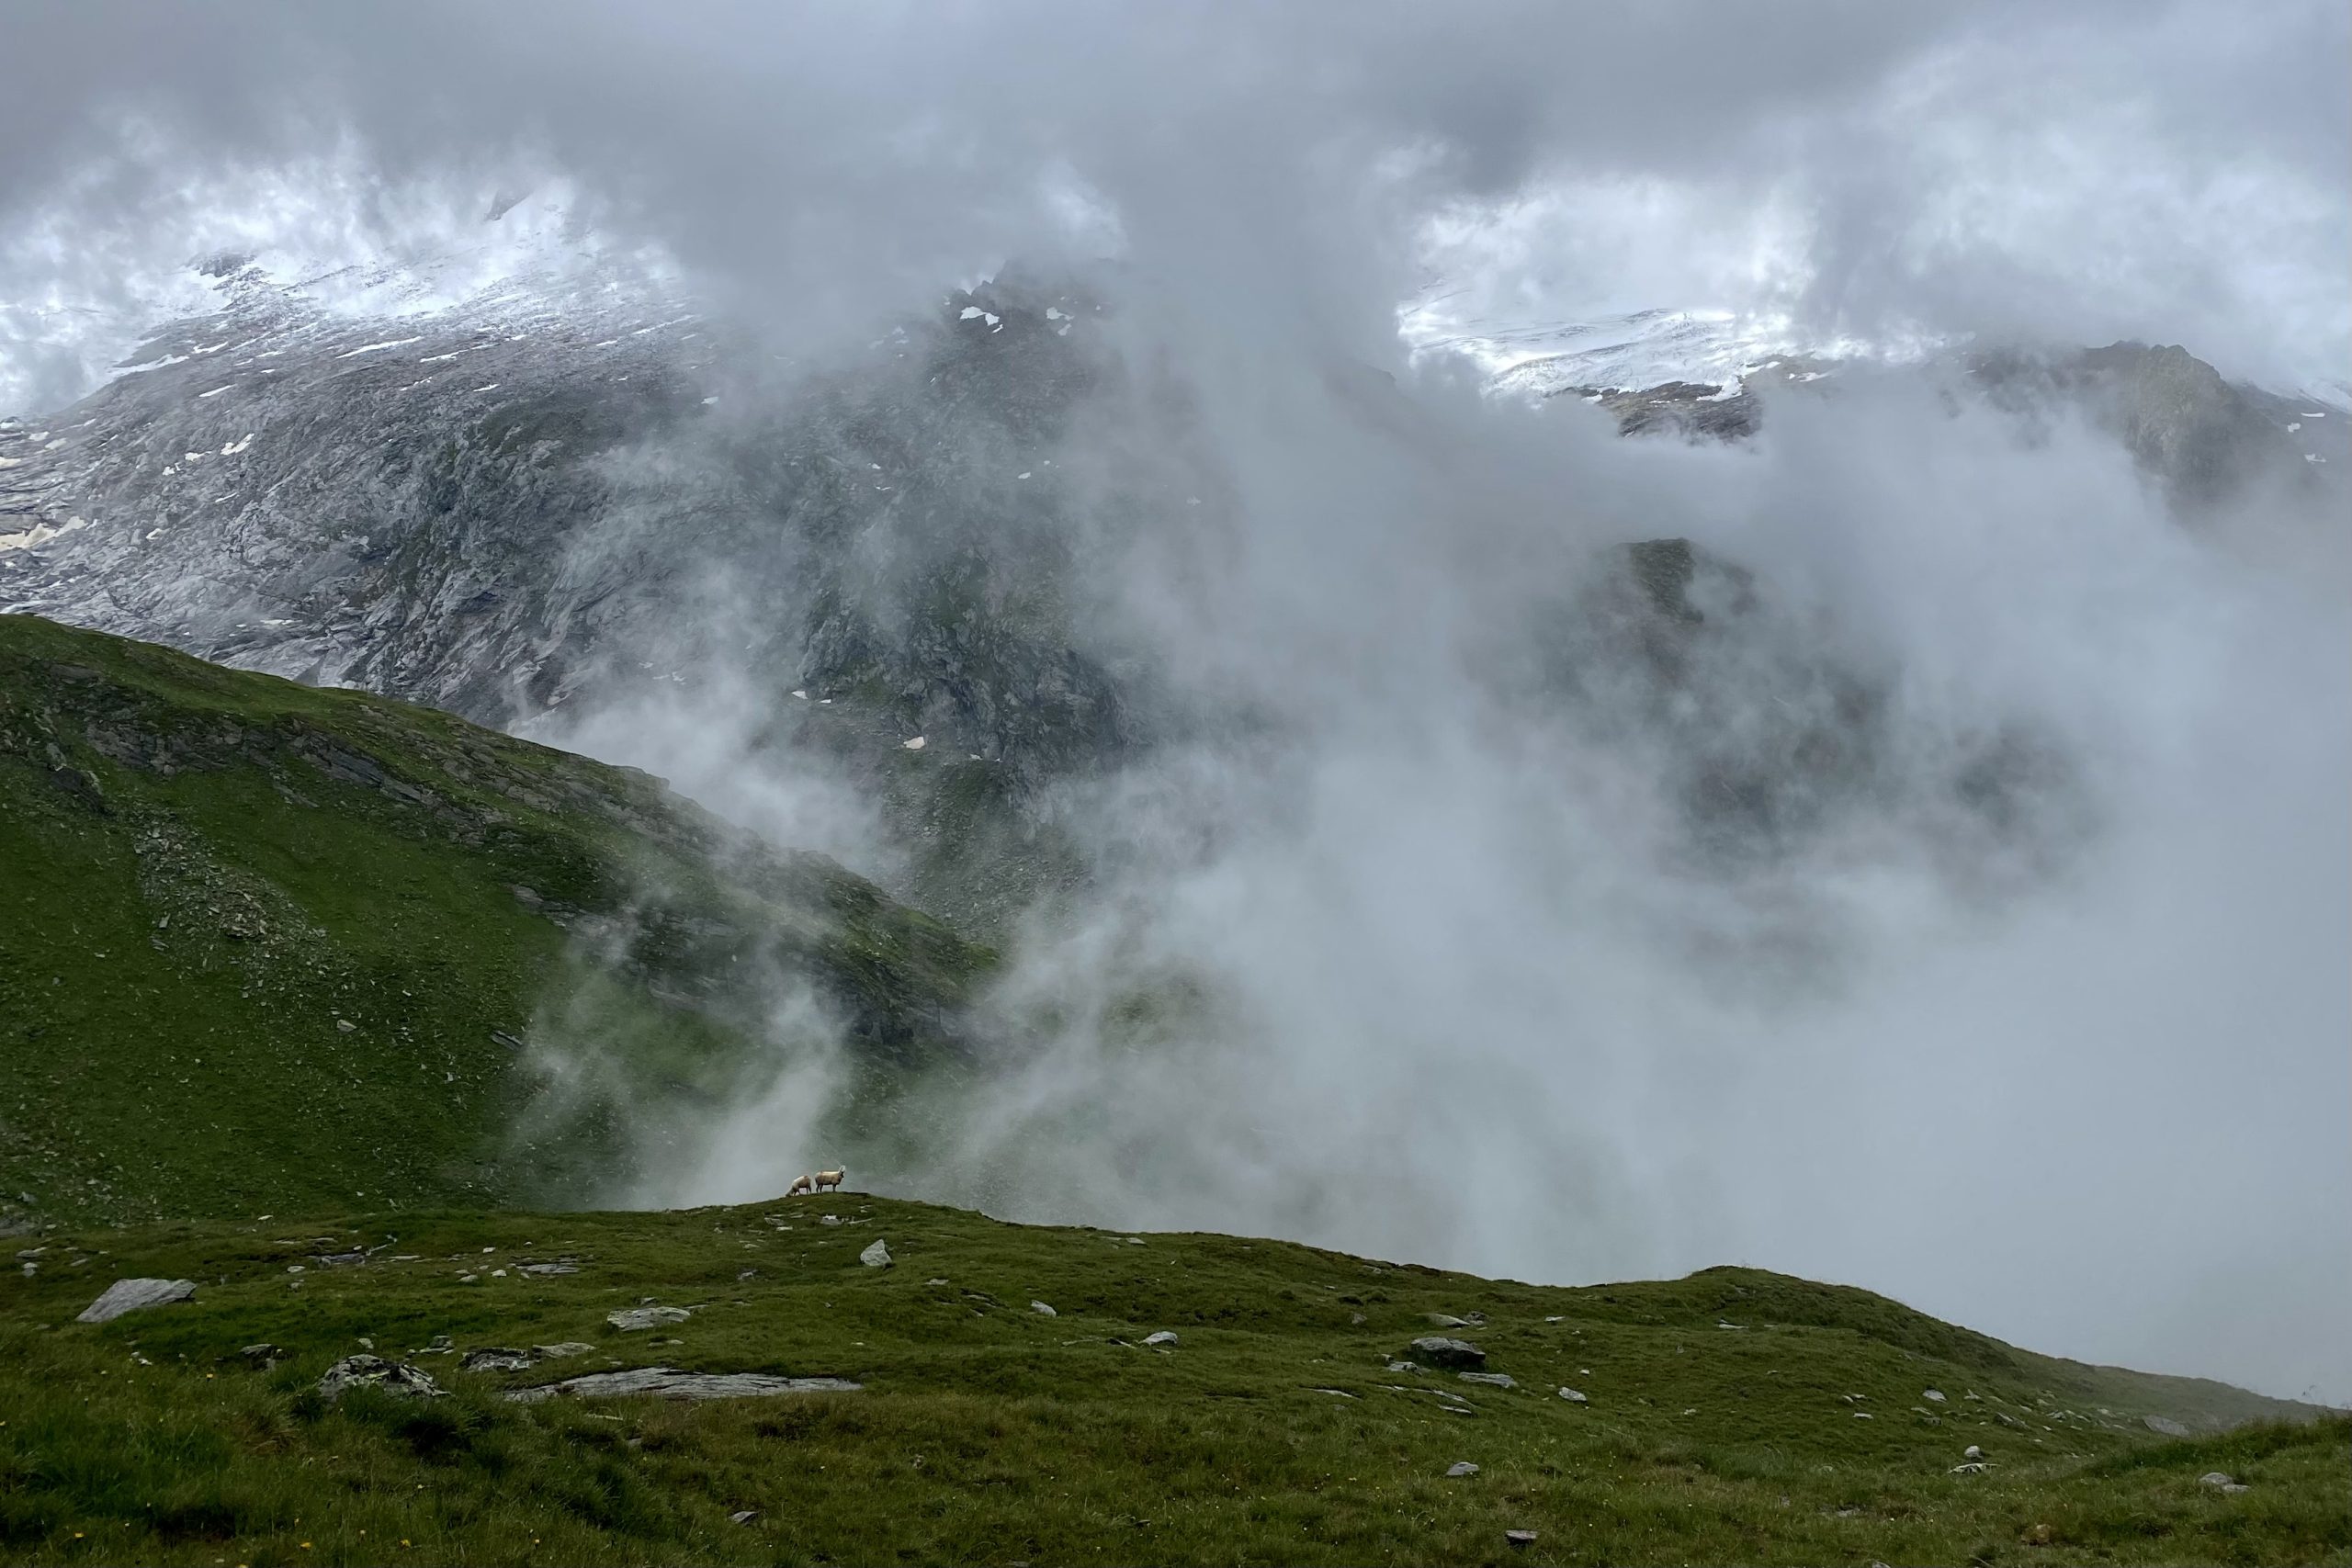
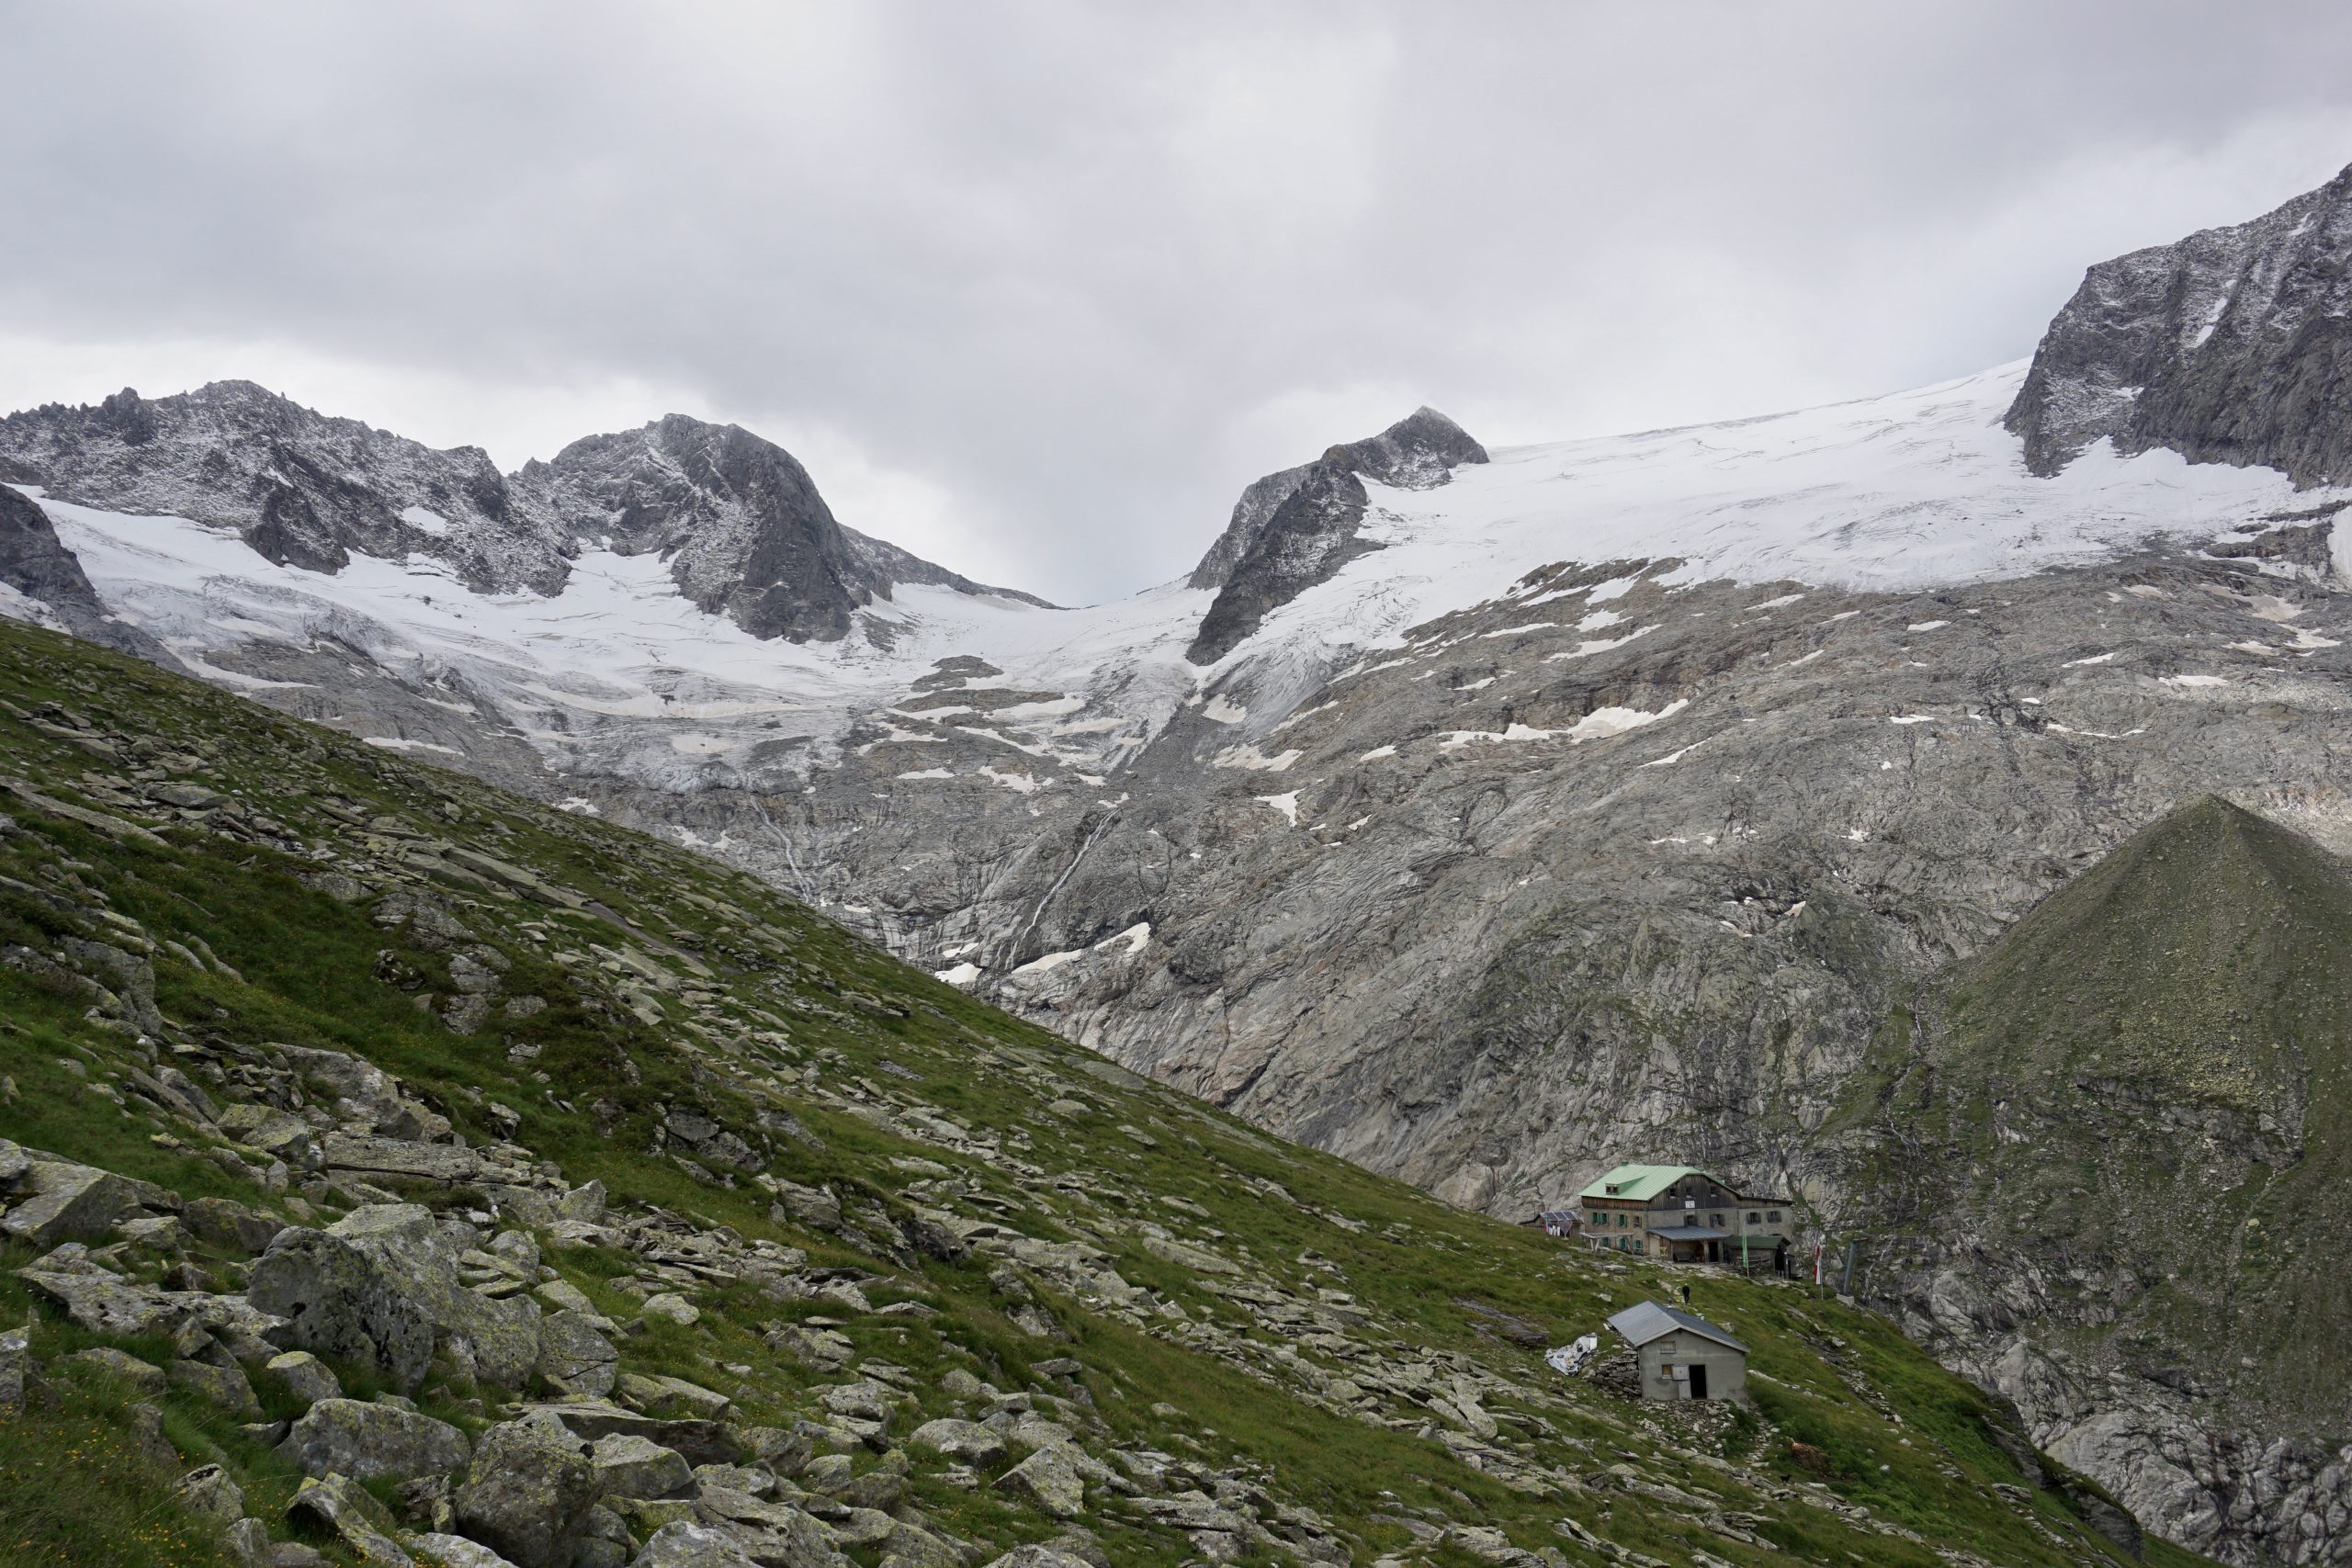
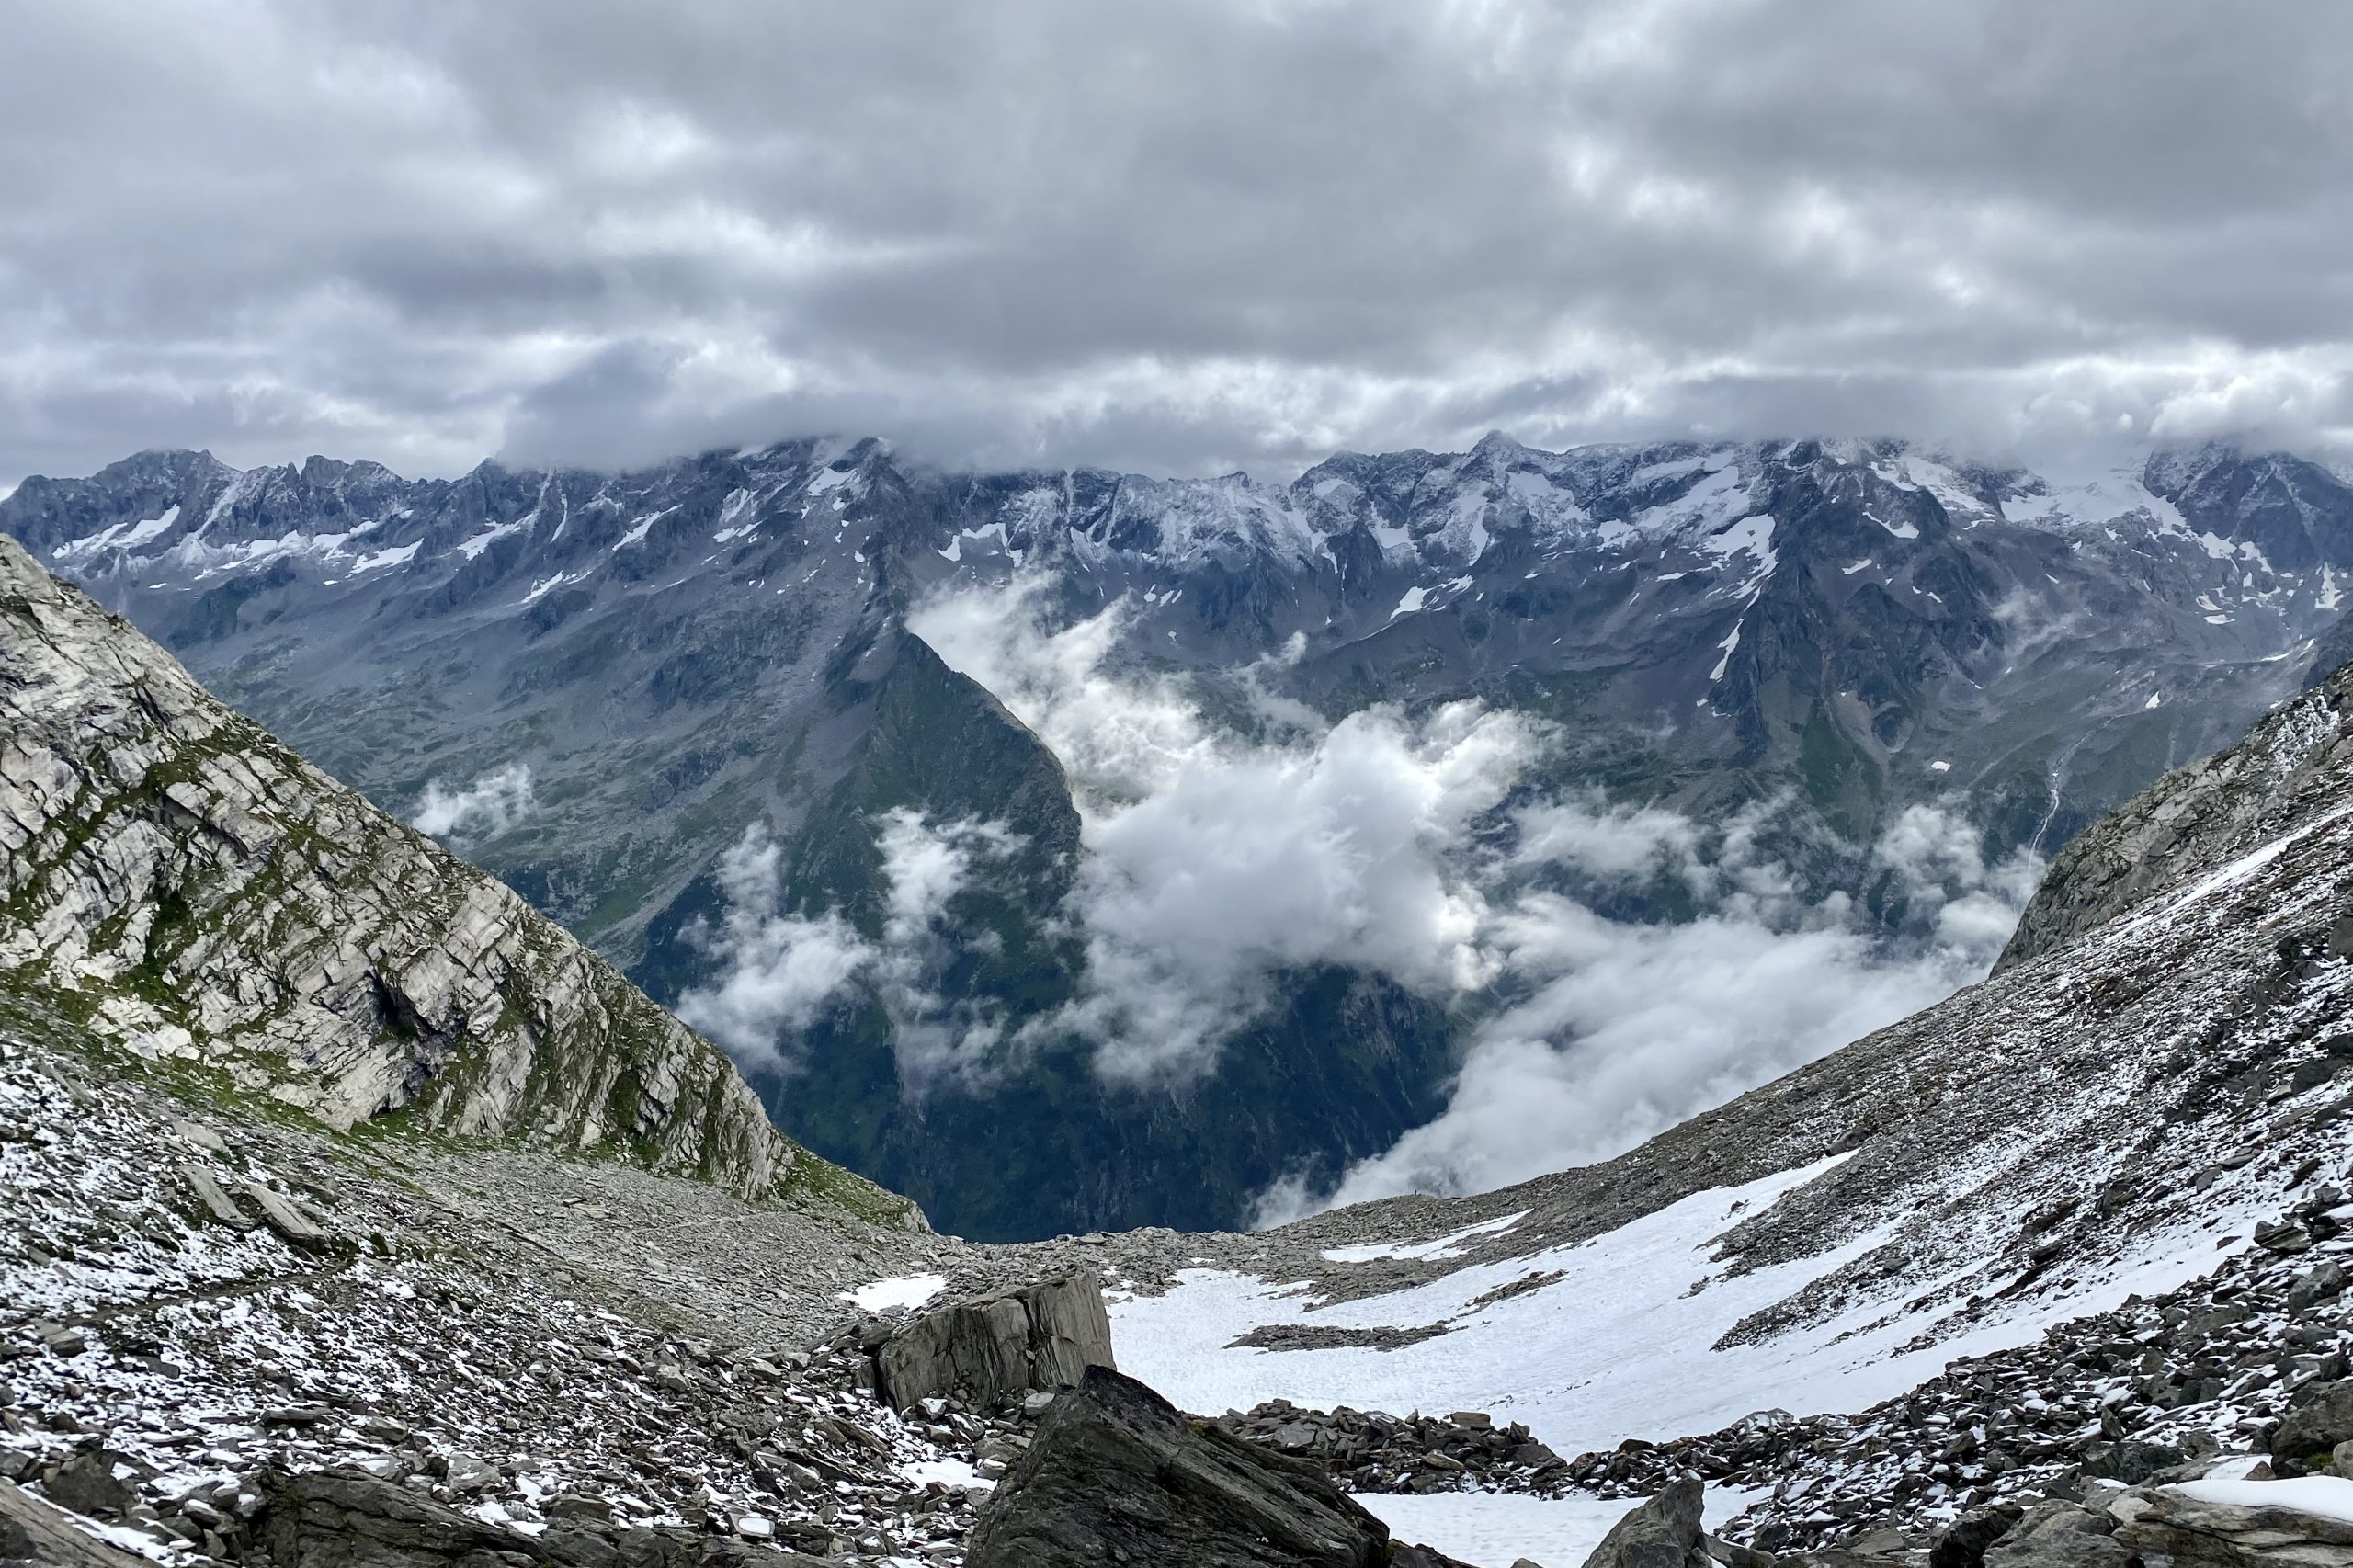
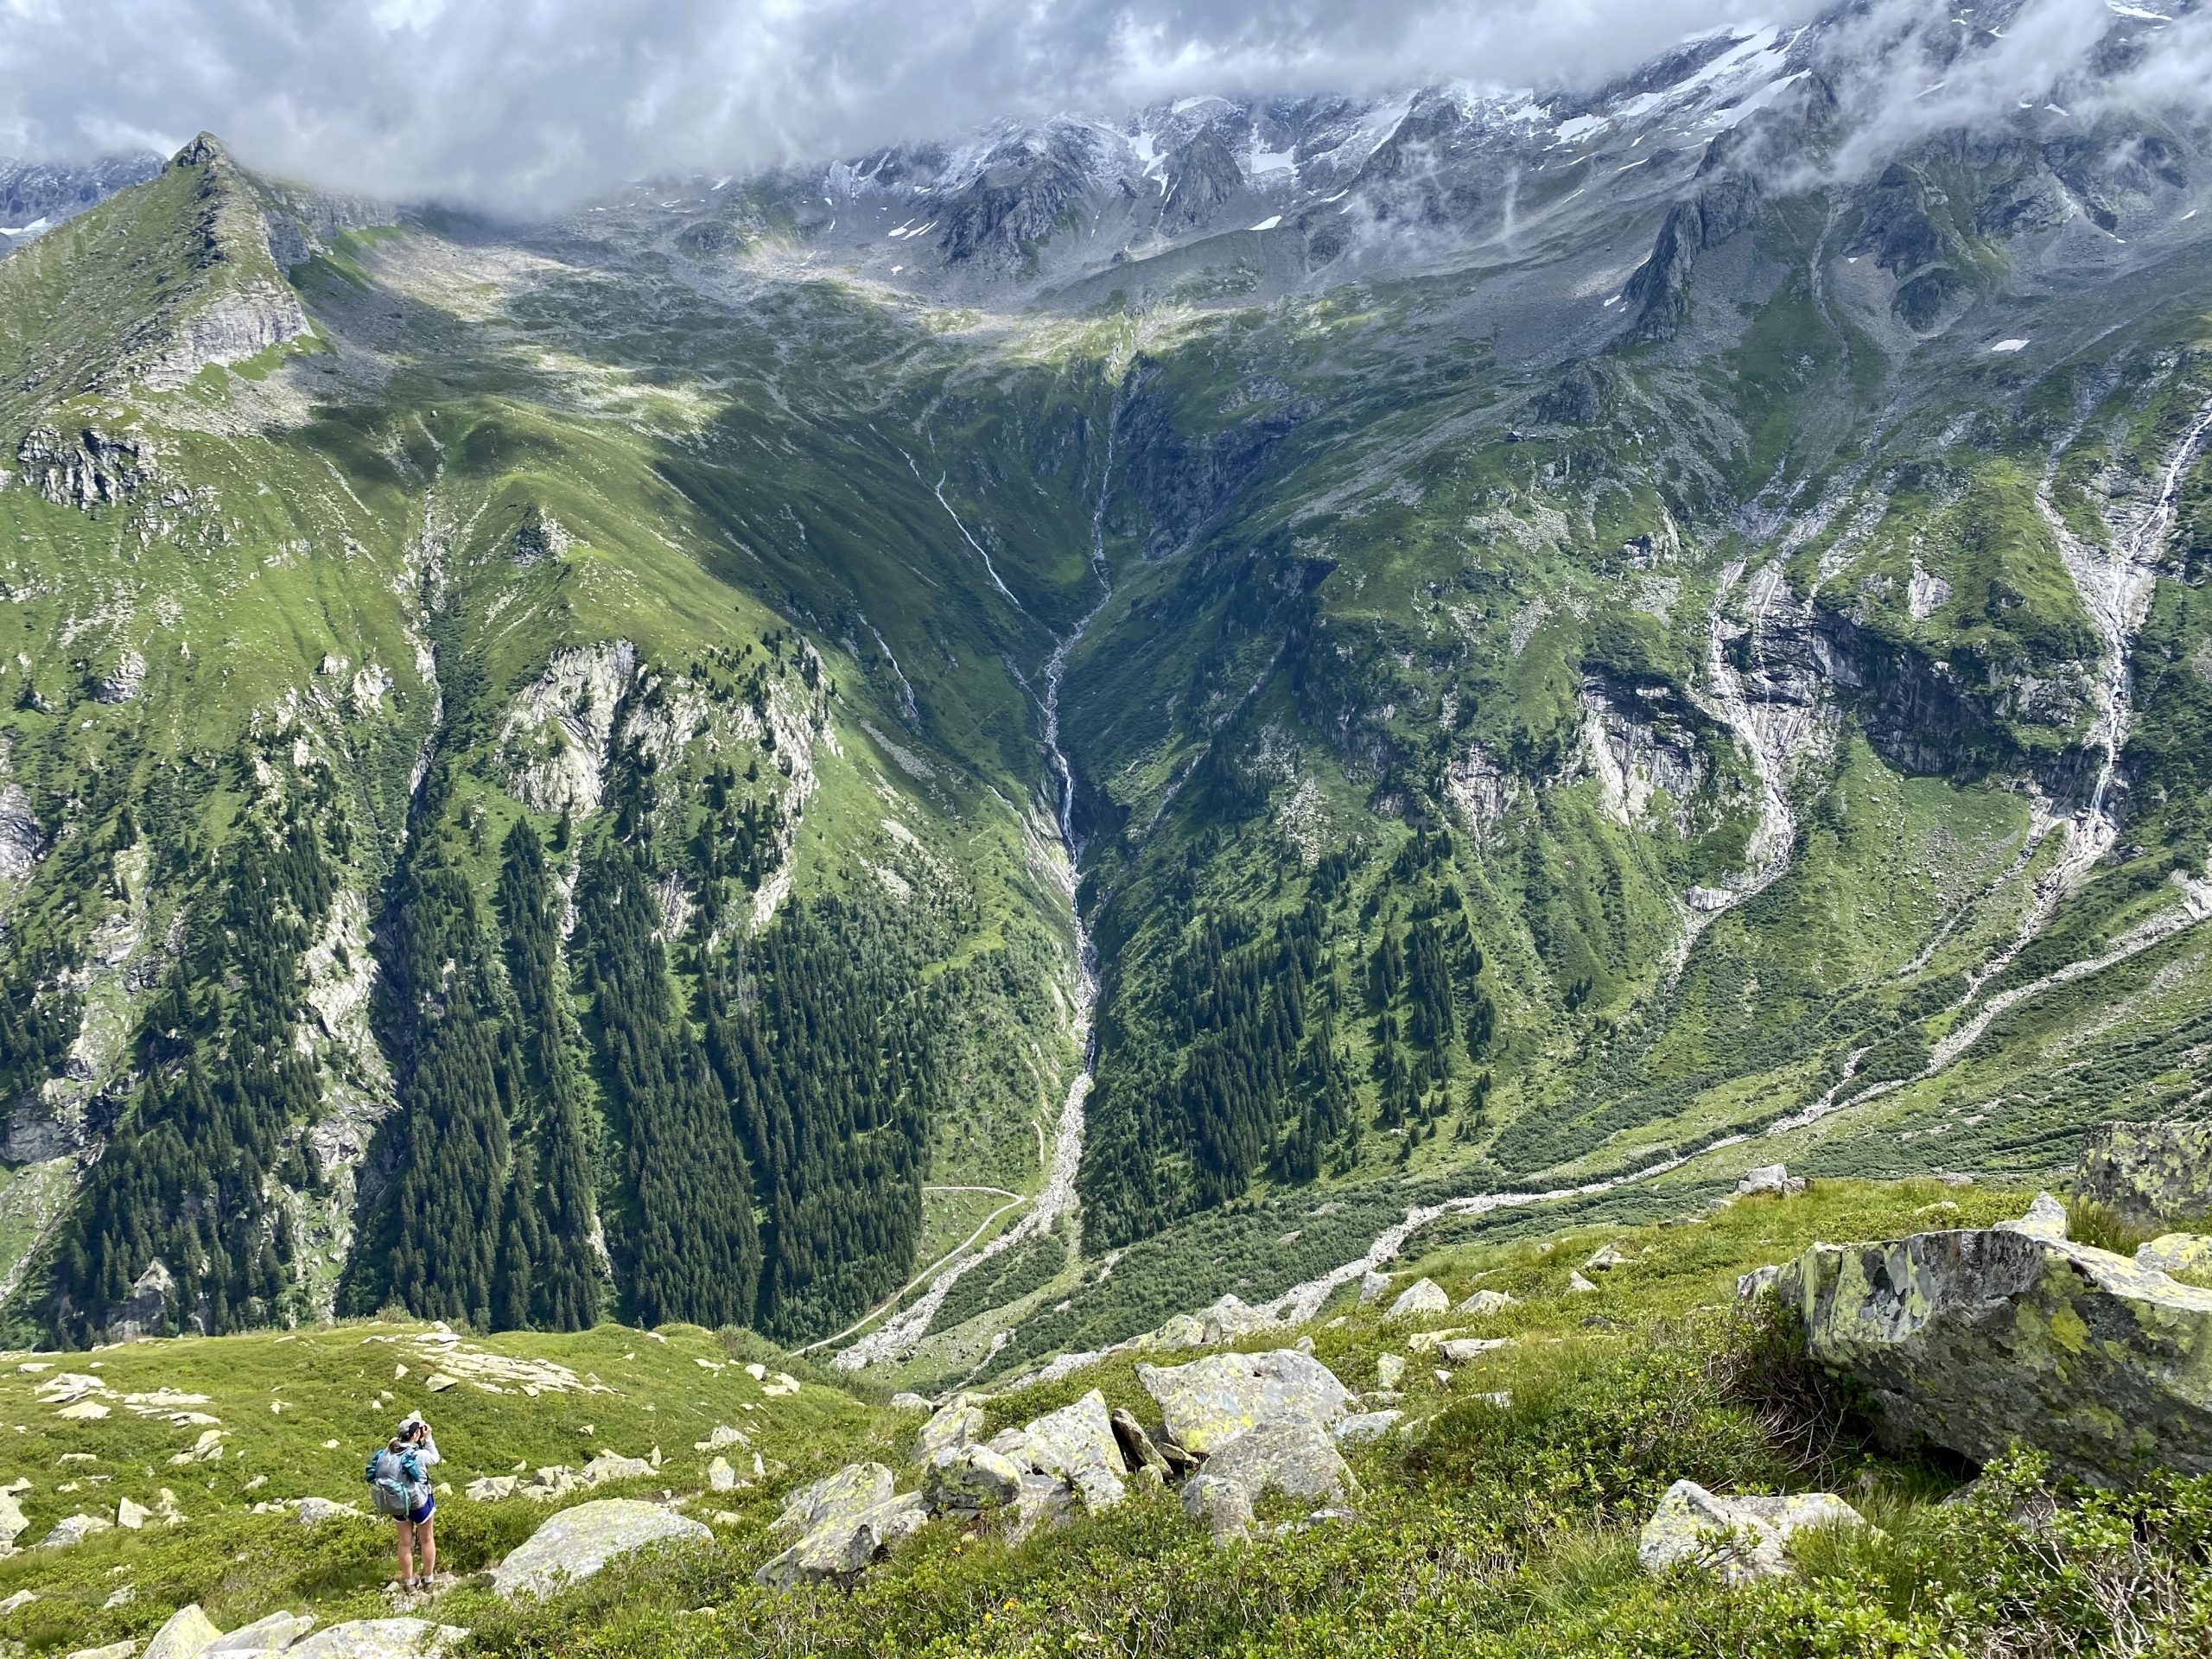
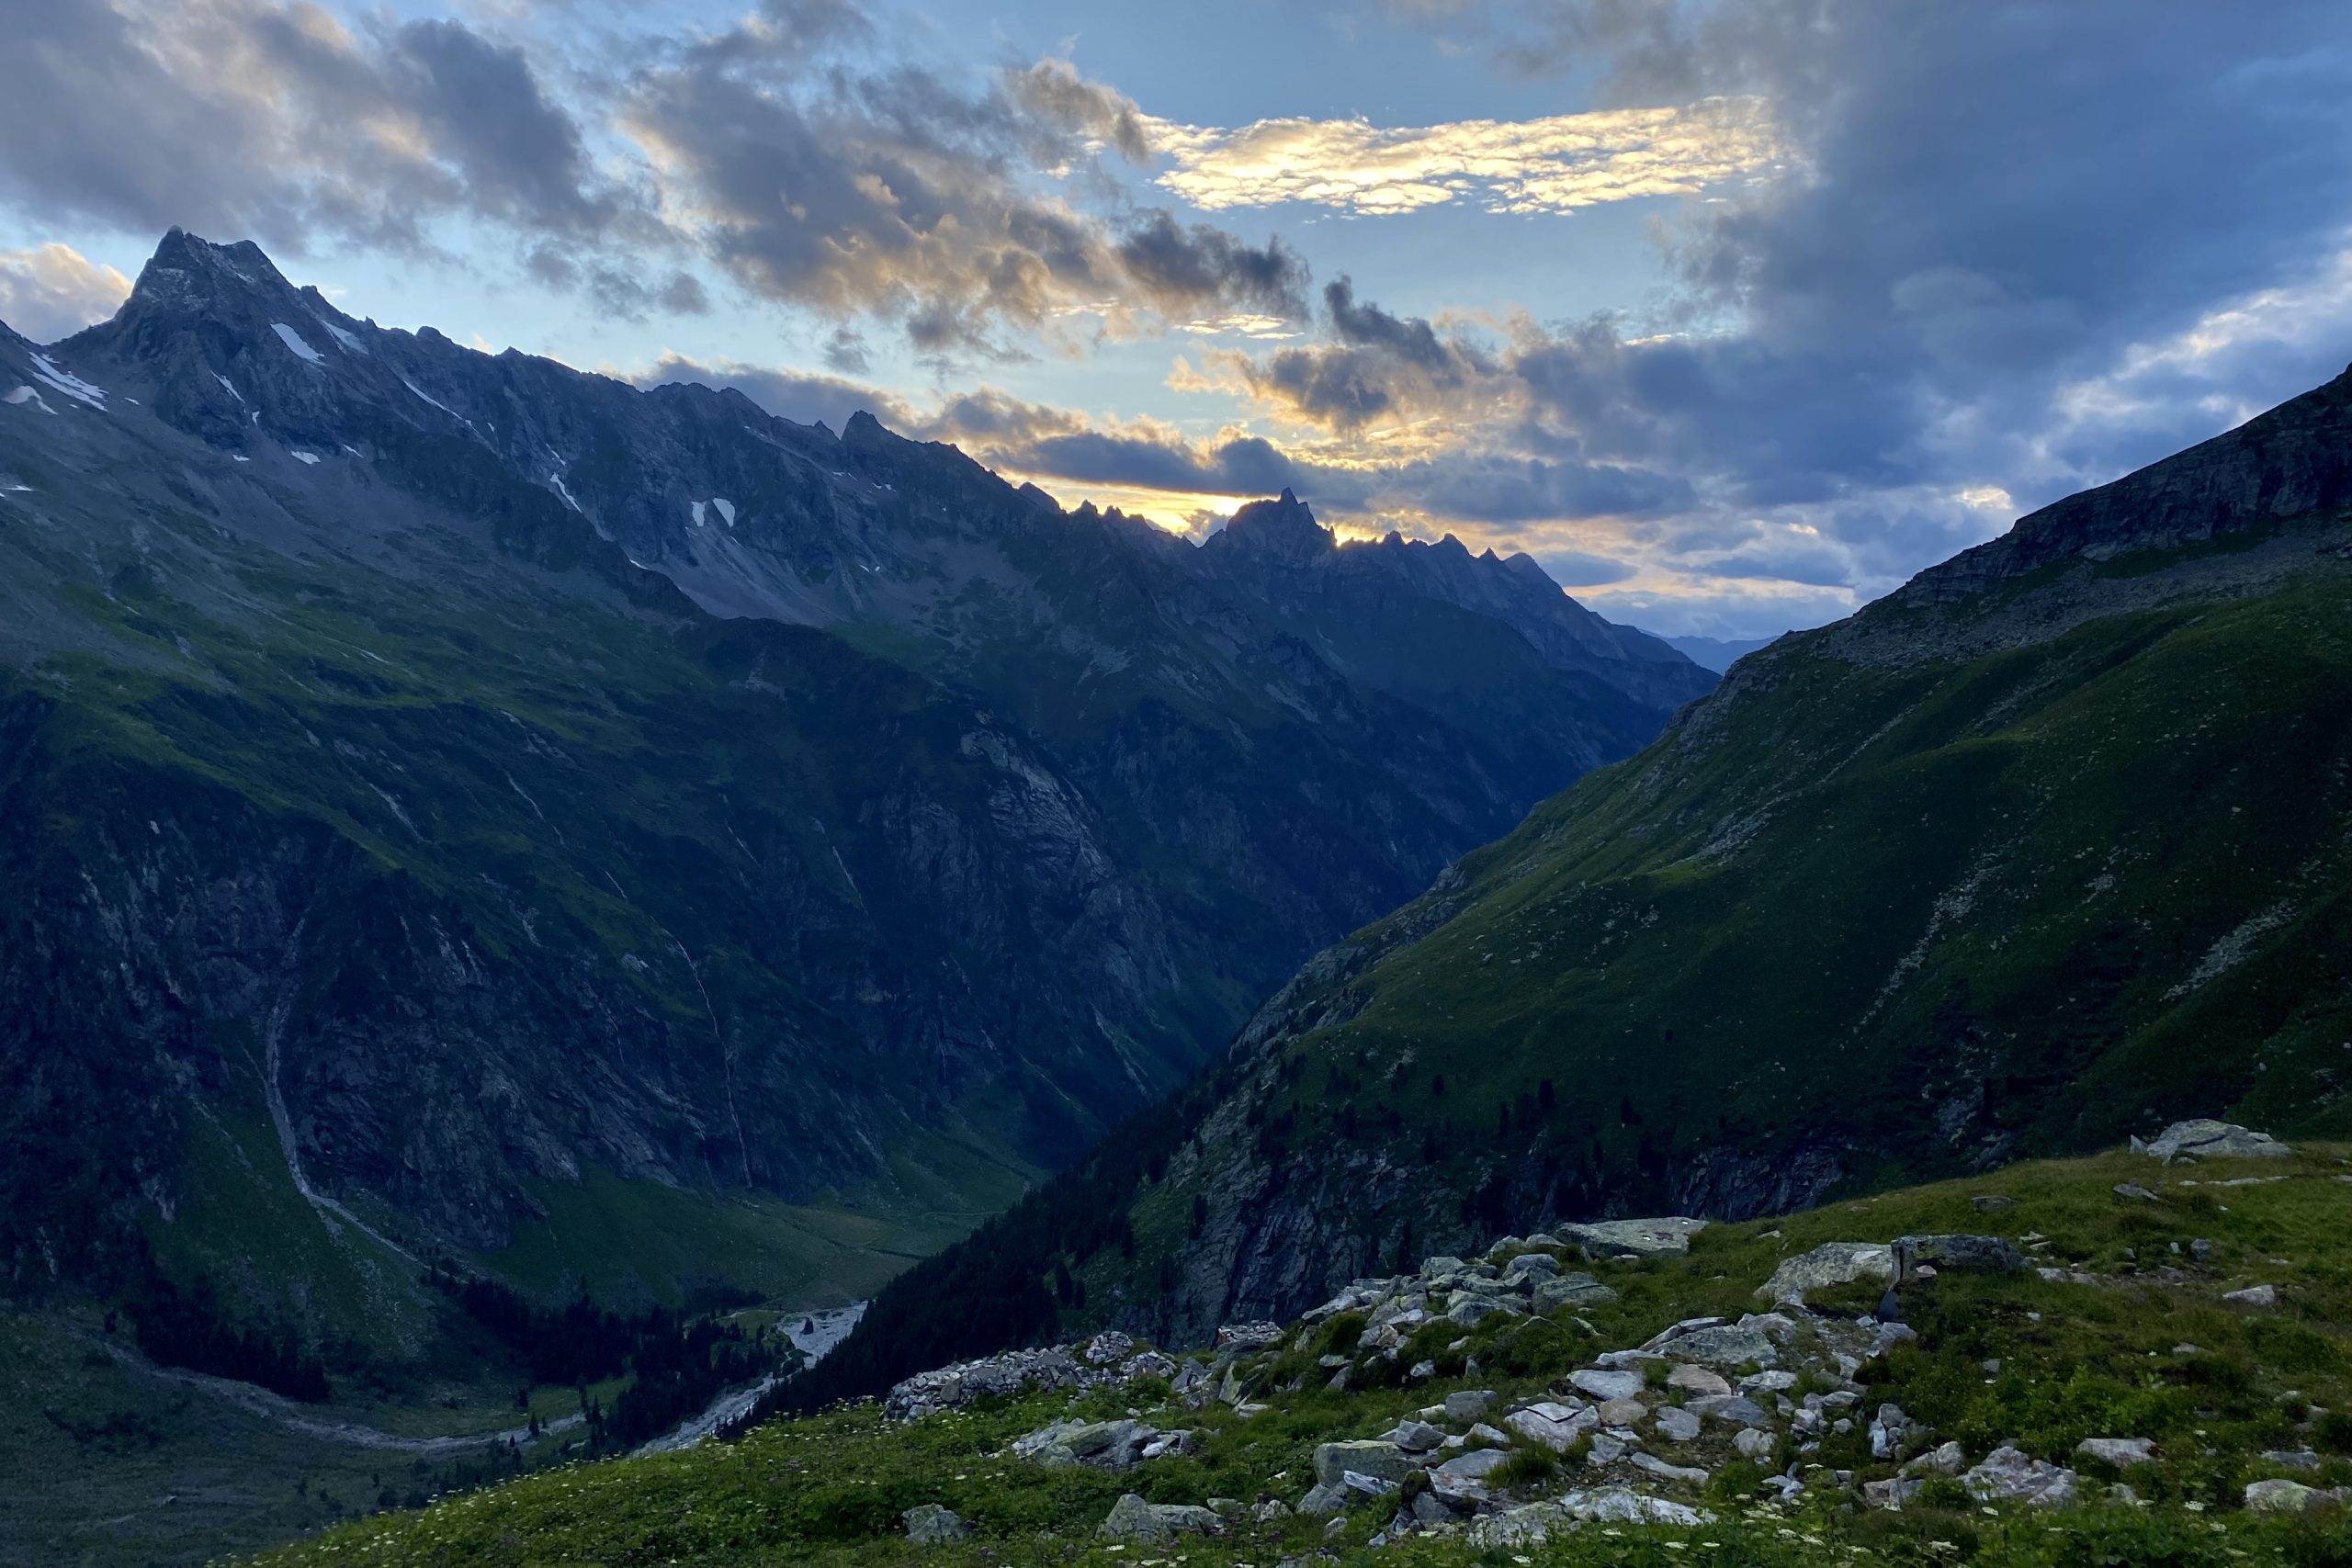
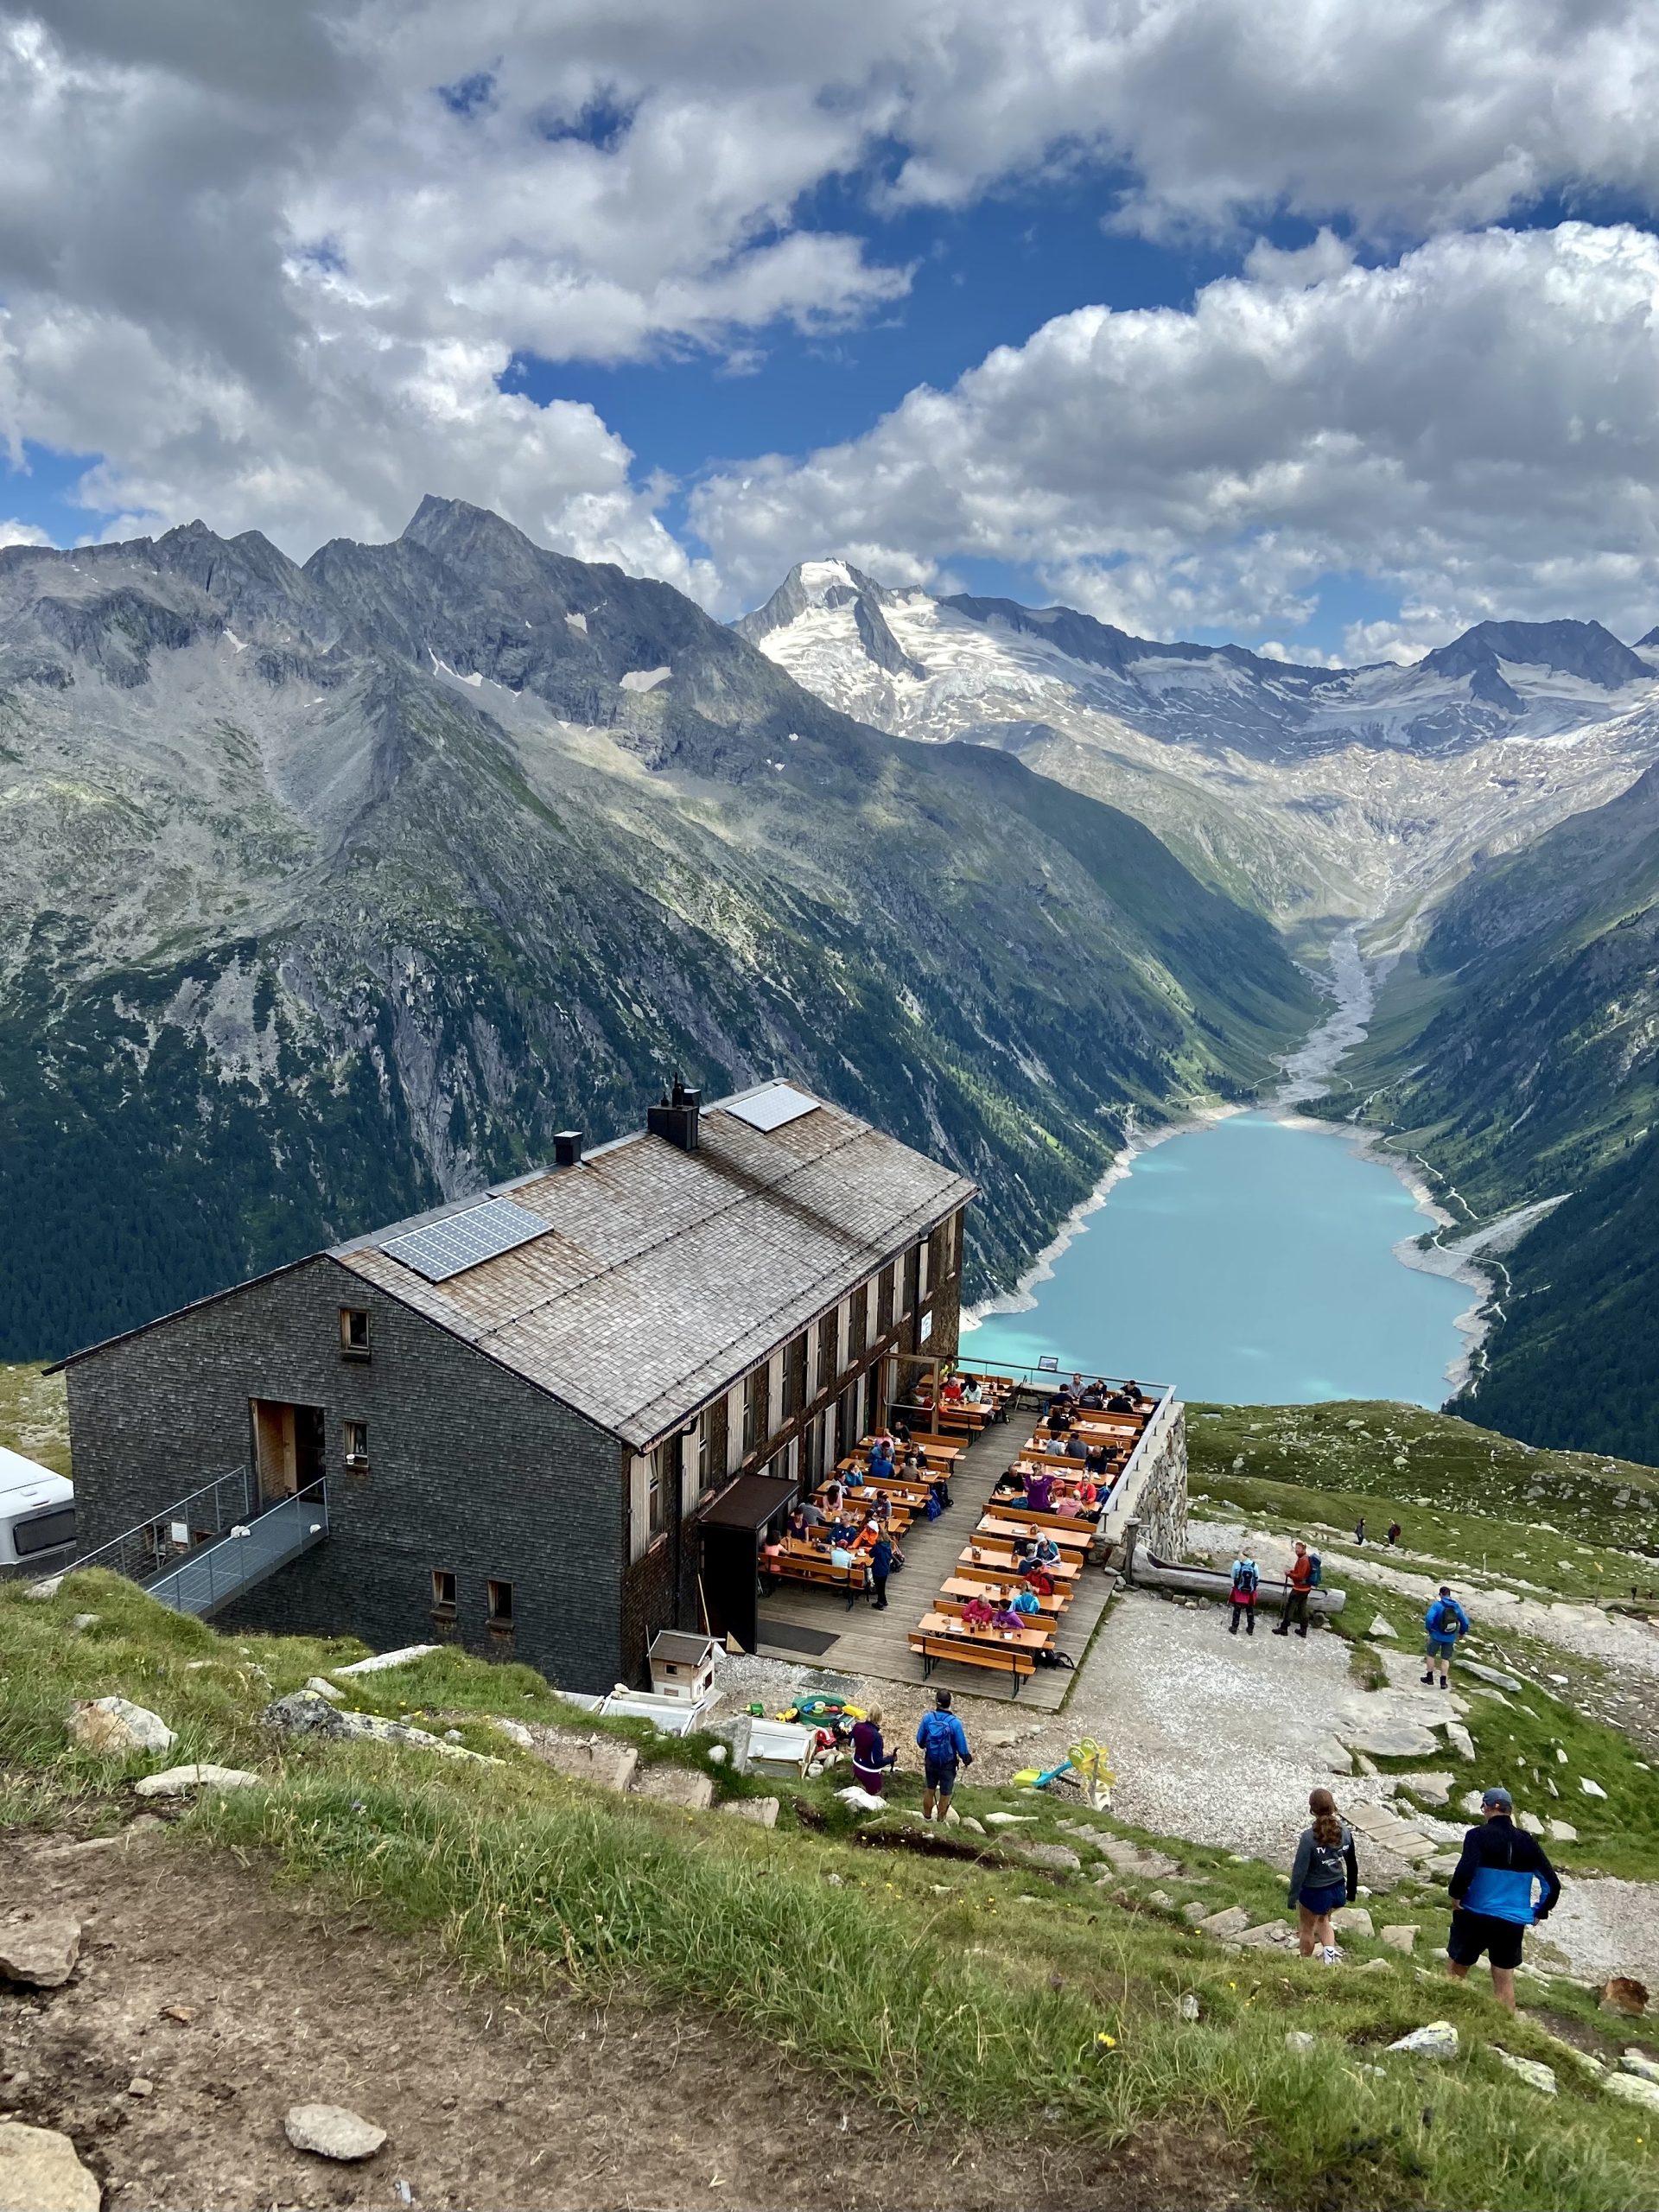
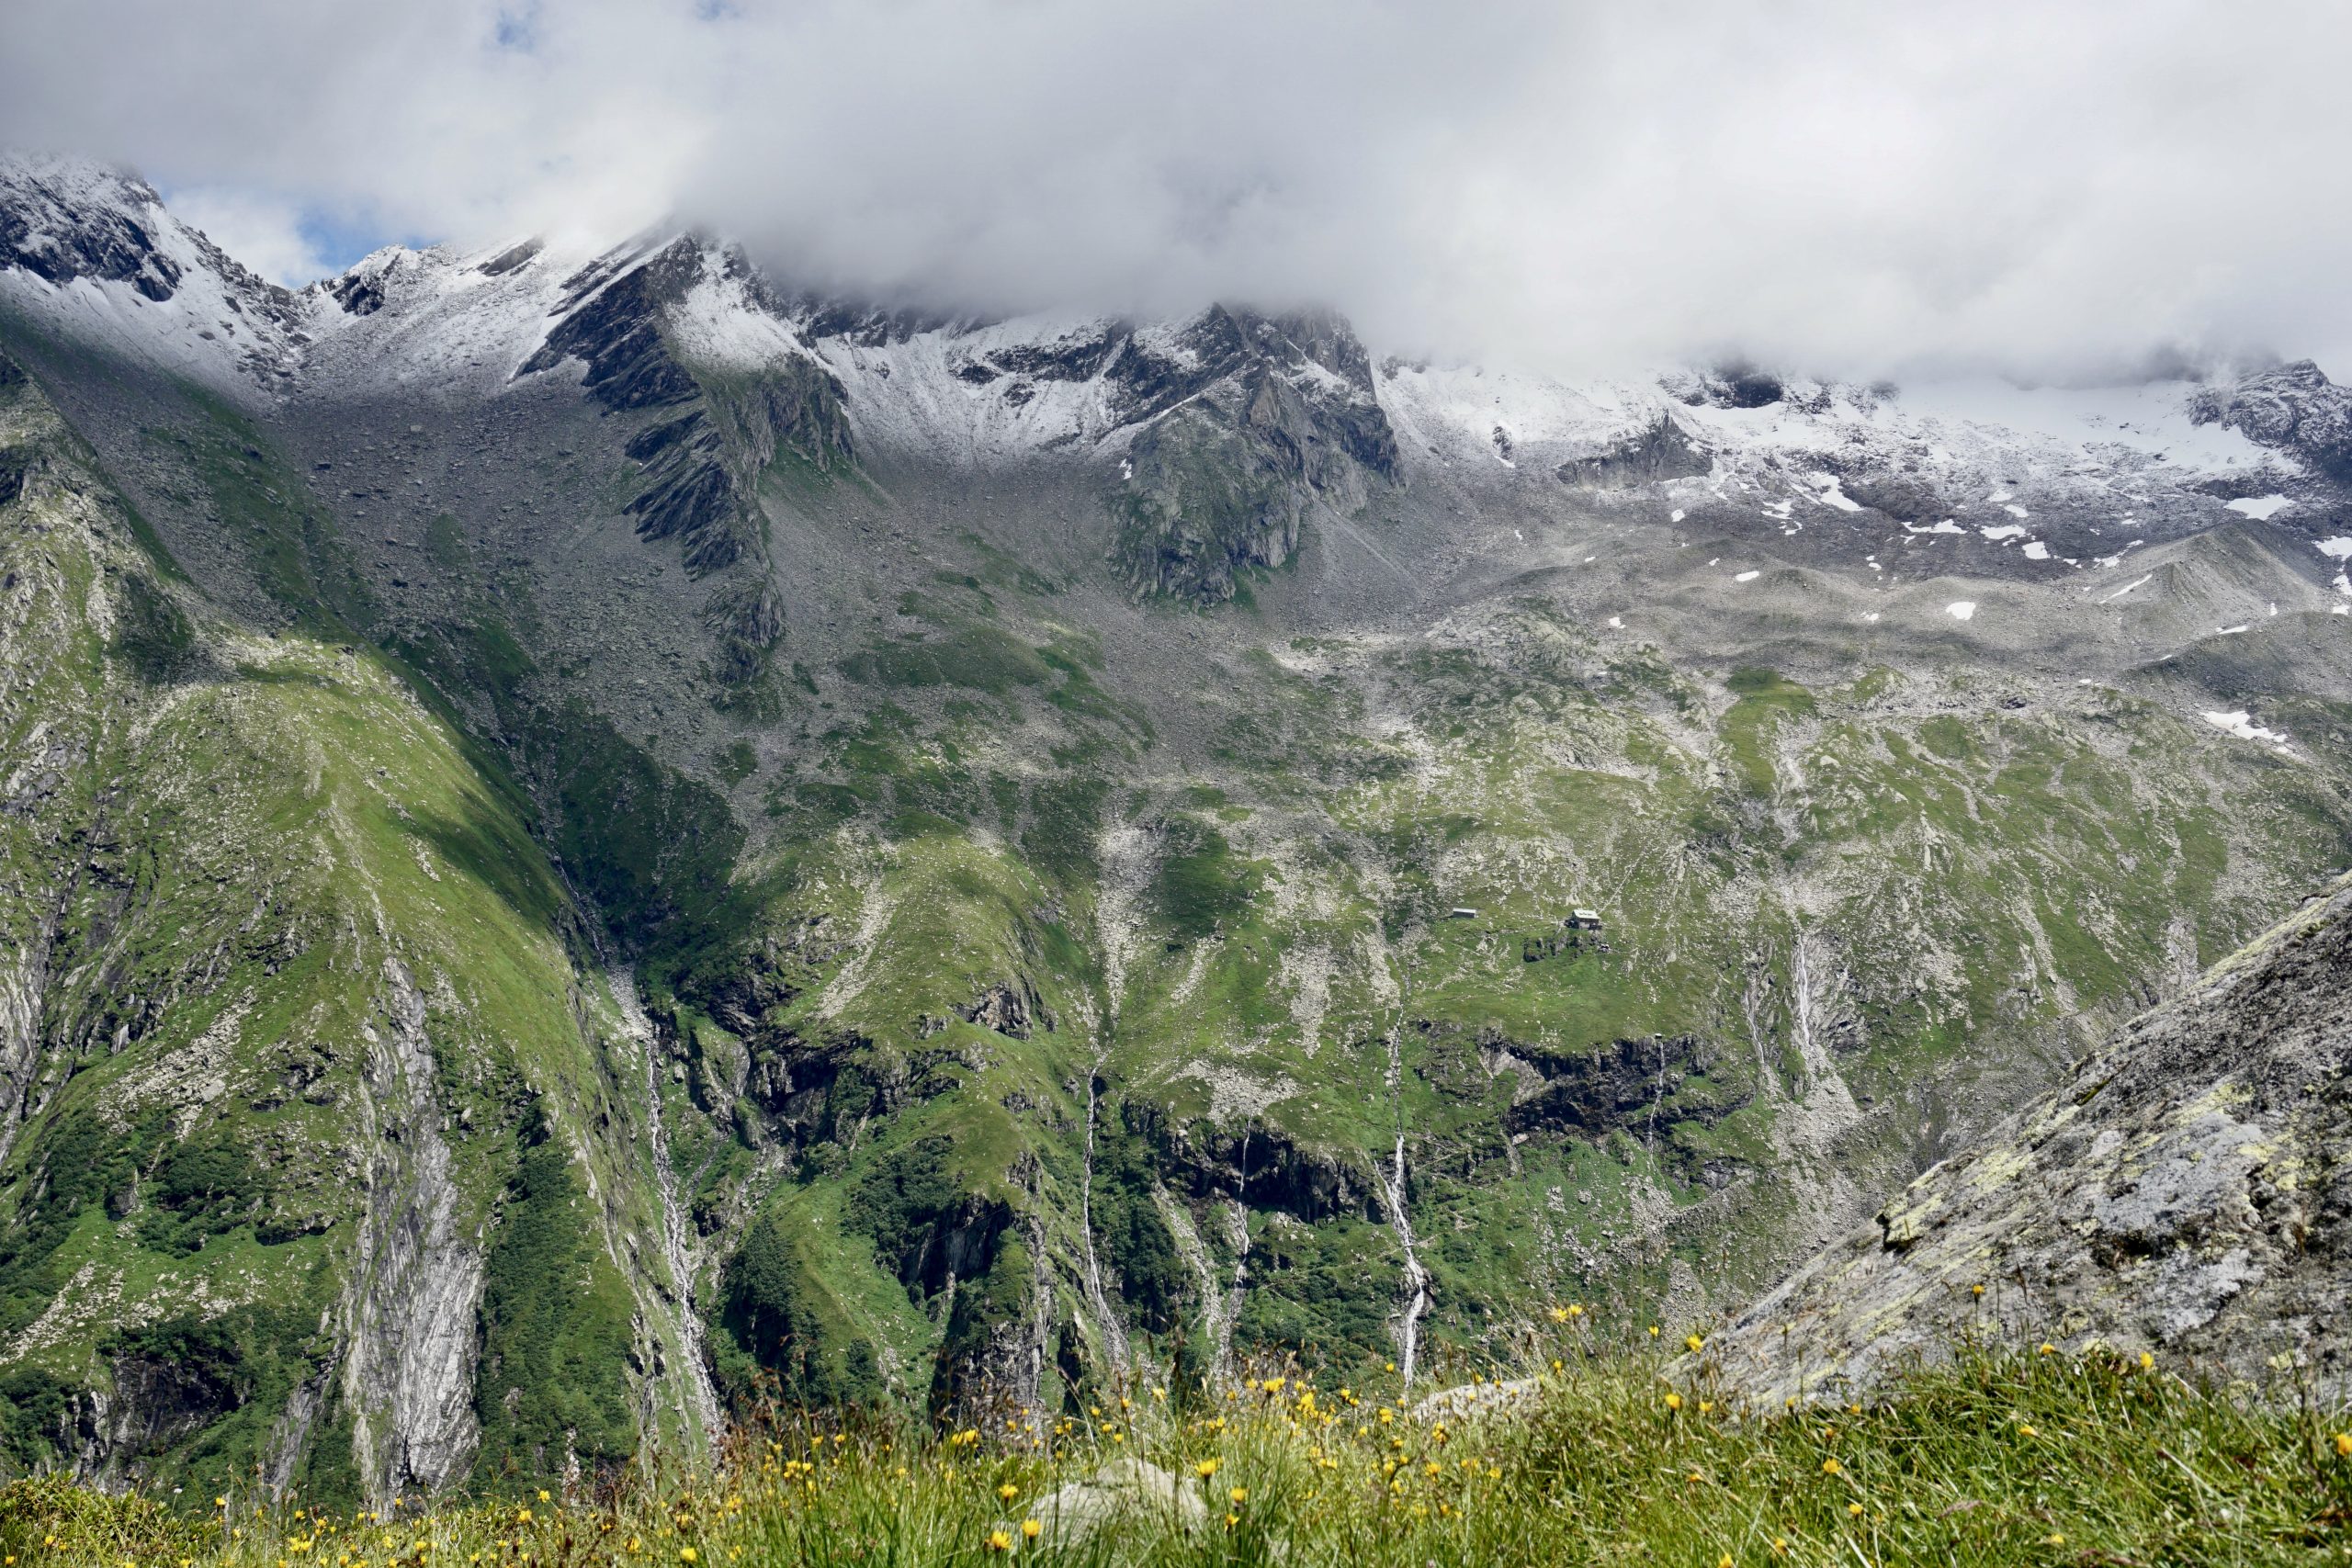
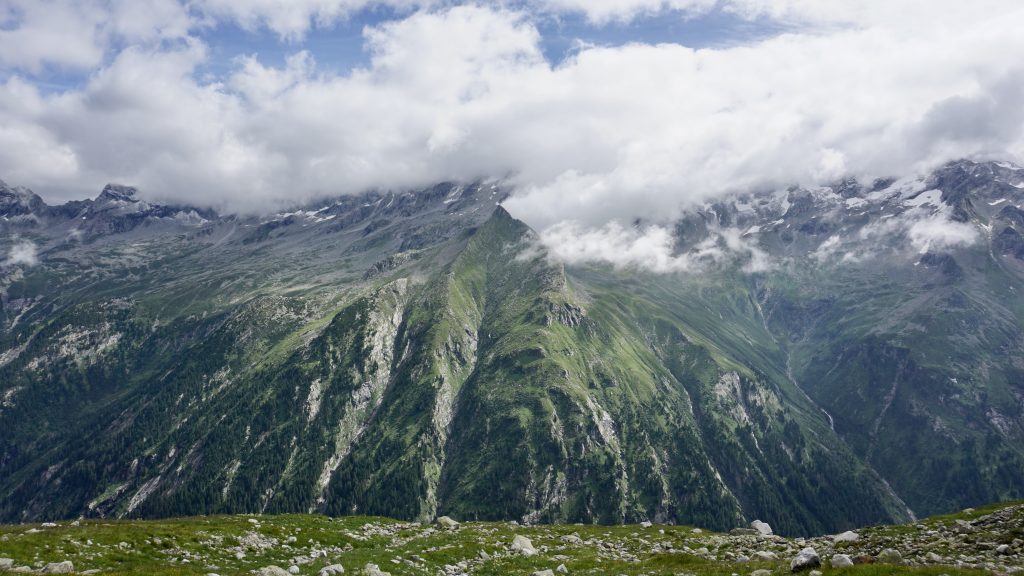
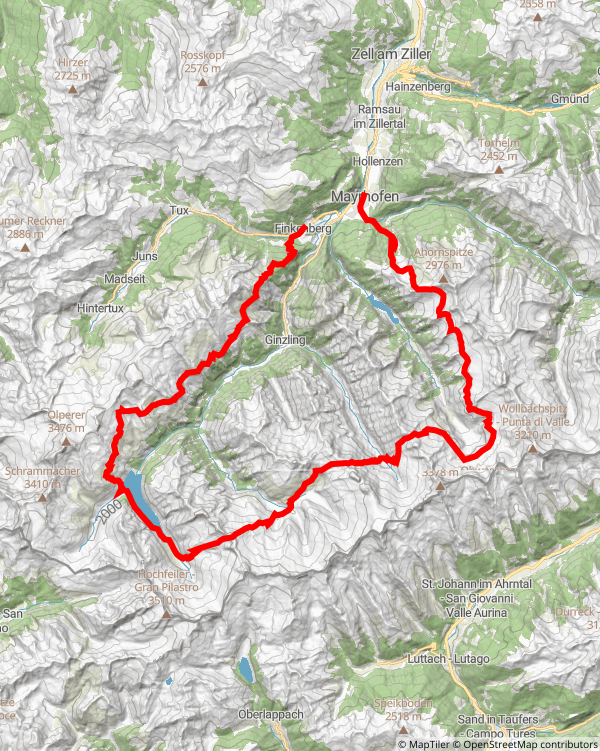
About Berliner Höhenweg trail: This hut-to-hut trail is located in Zillertal Alps Nature Park, Austria. It is almost circular, starting from Finkenberg and finishing in Mayrhofen, amounting to 85km and more than 6500m in elevation gains/losses. This trail is truly spectacular, awarding the hikers a chance to admire the Alpine views throughout the whole hike.

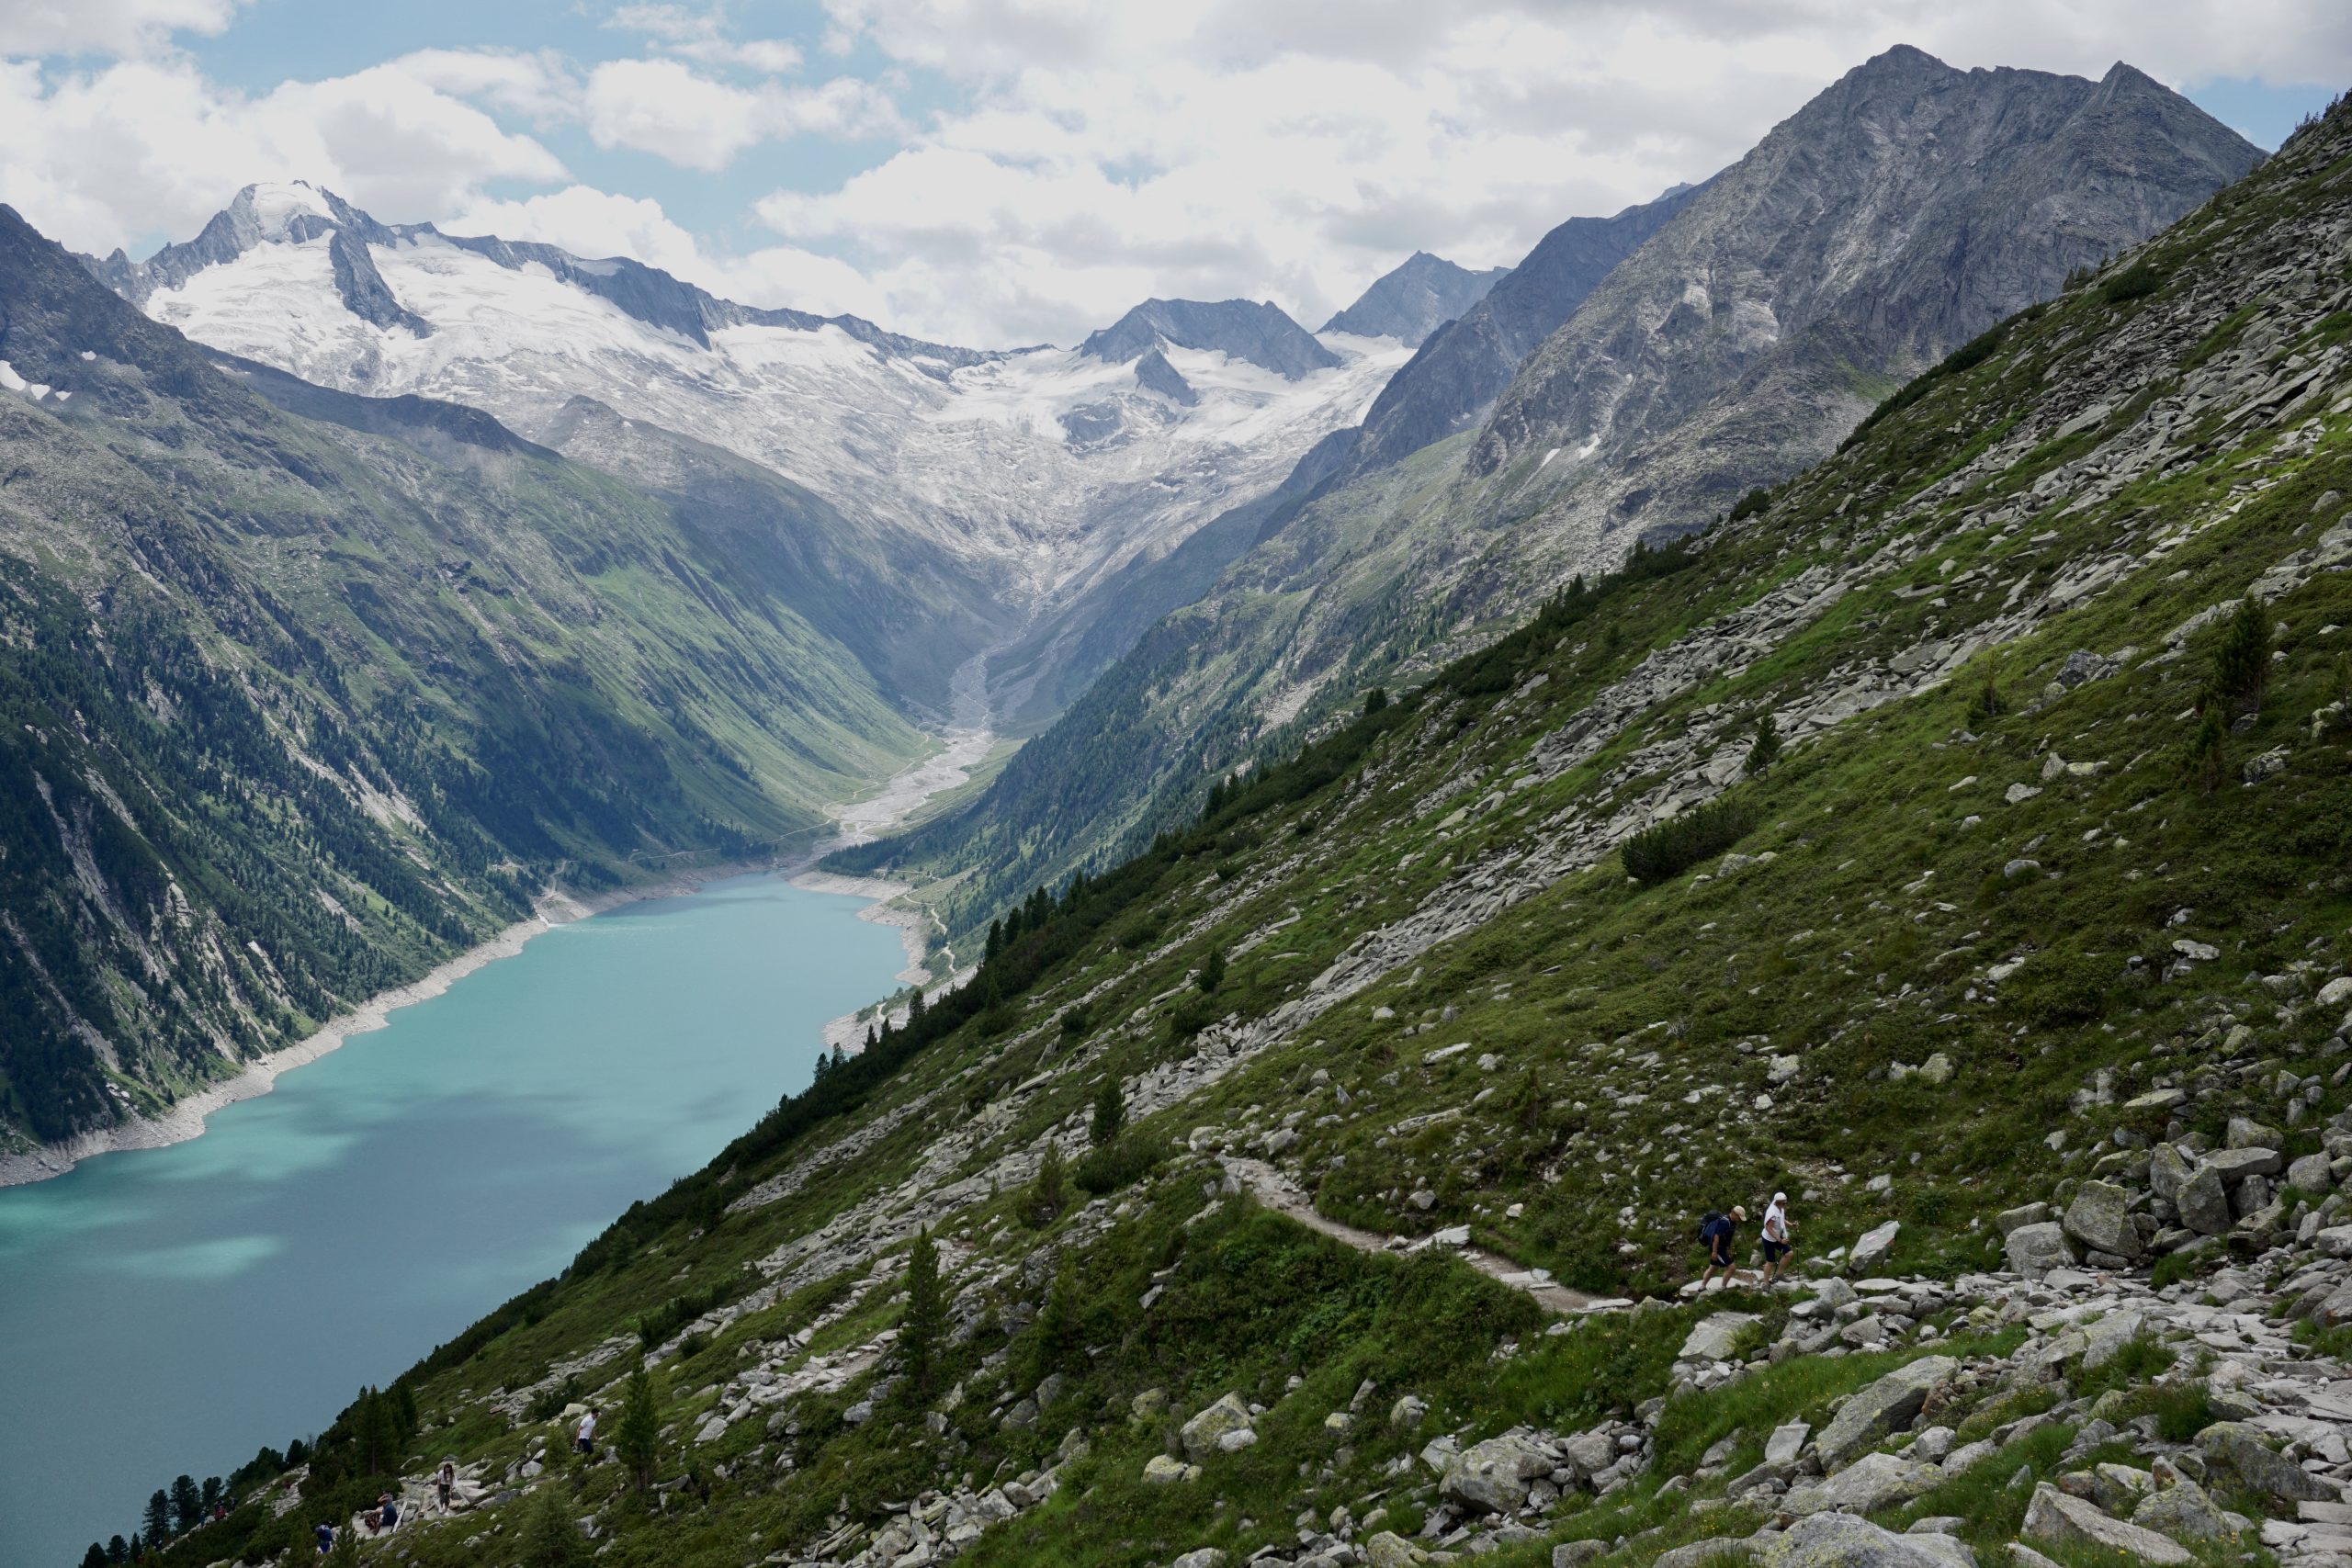
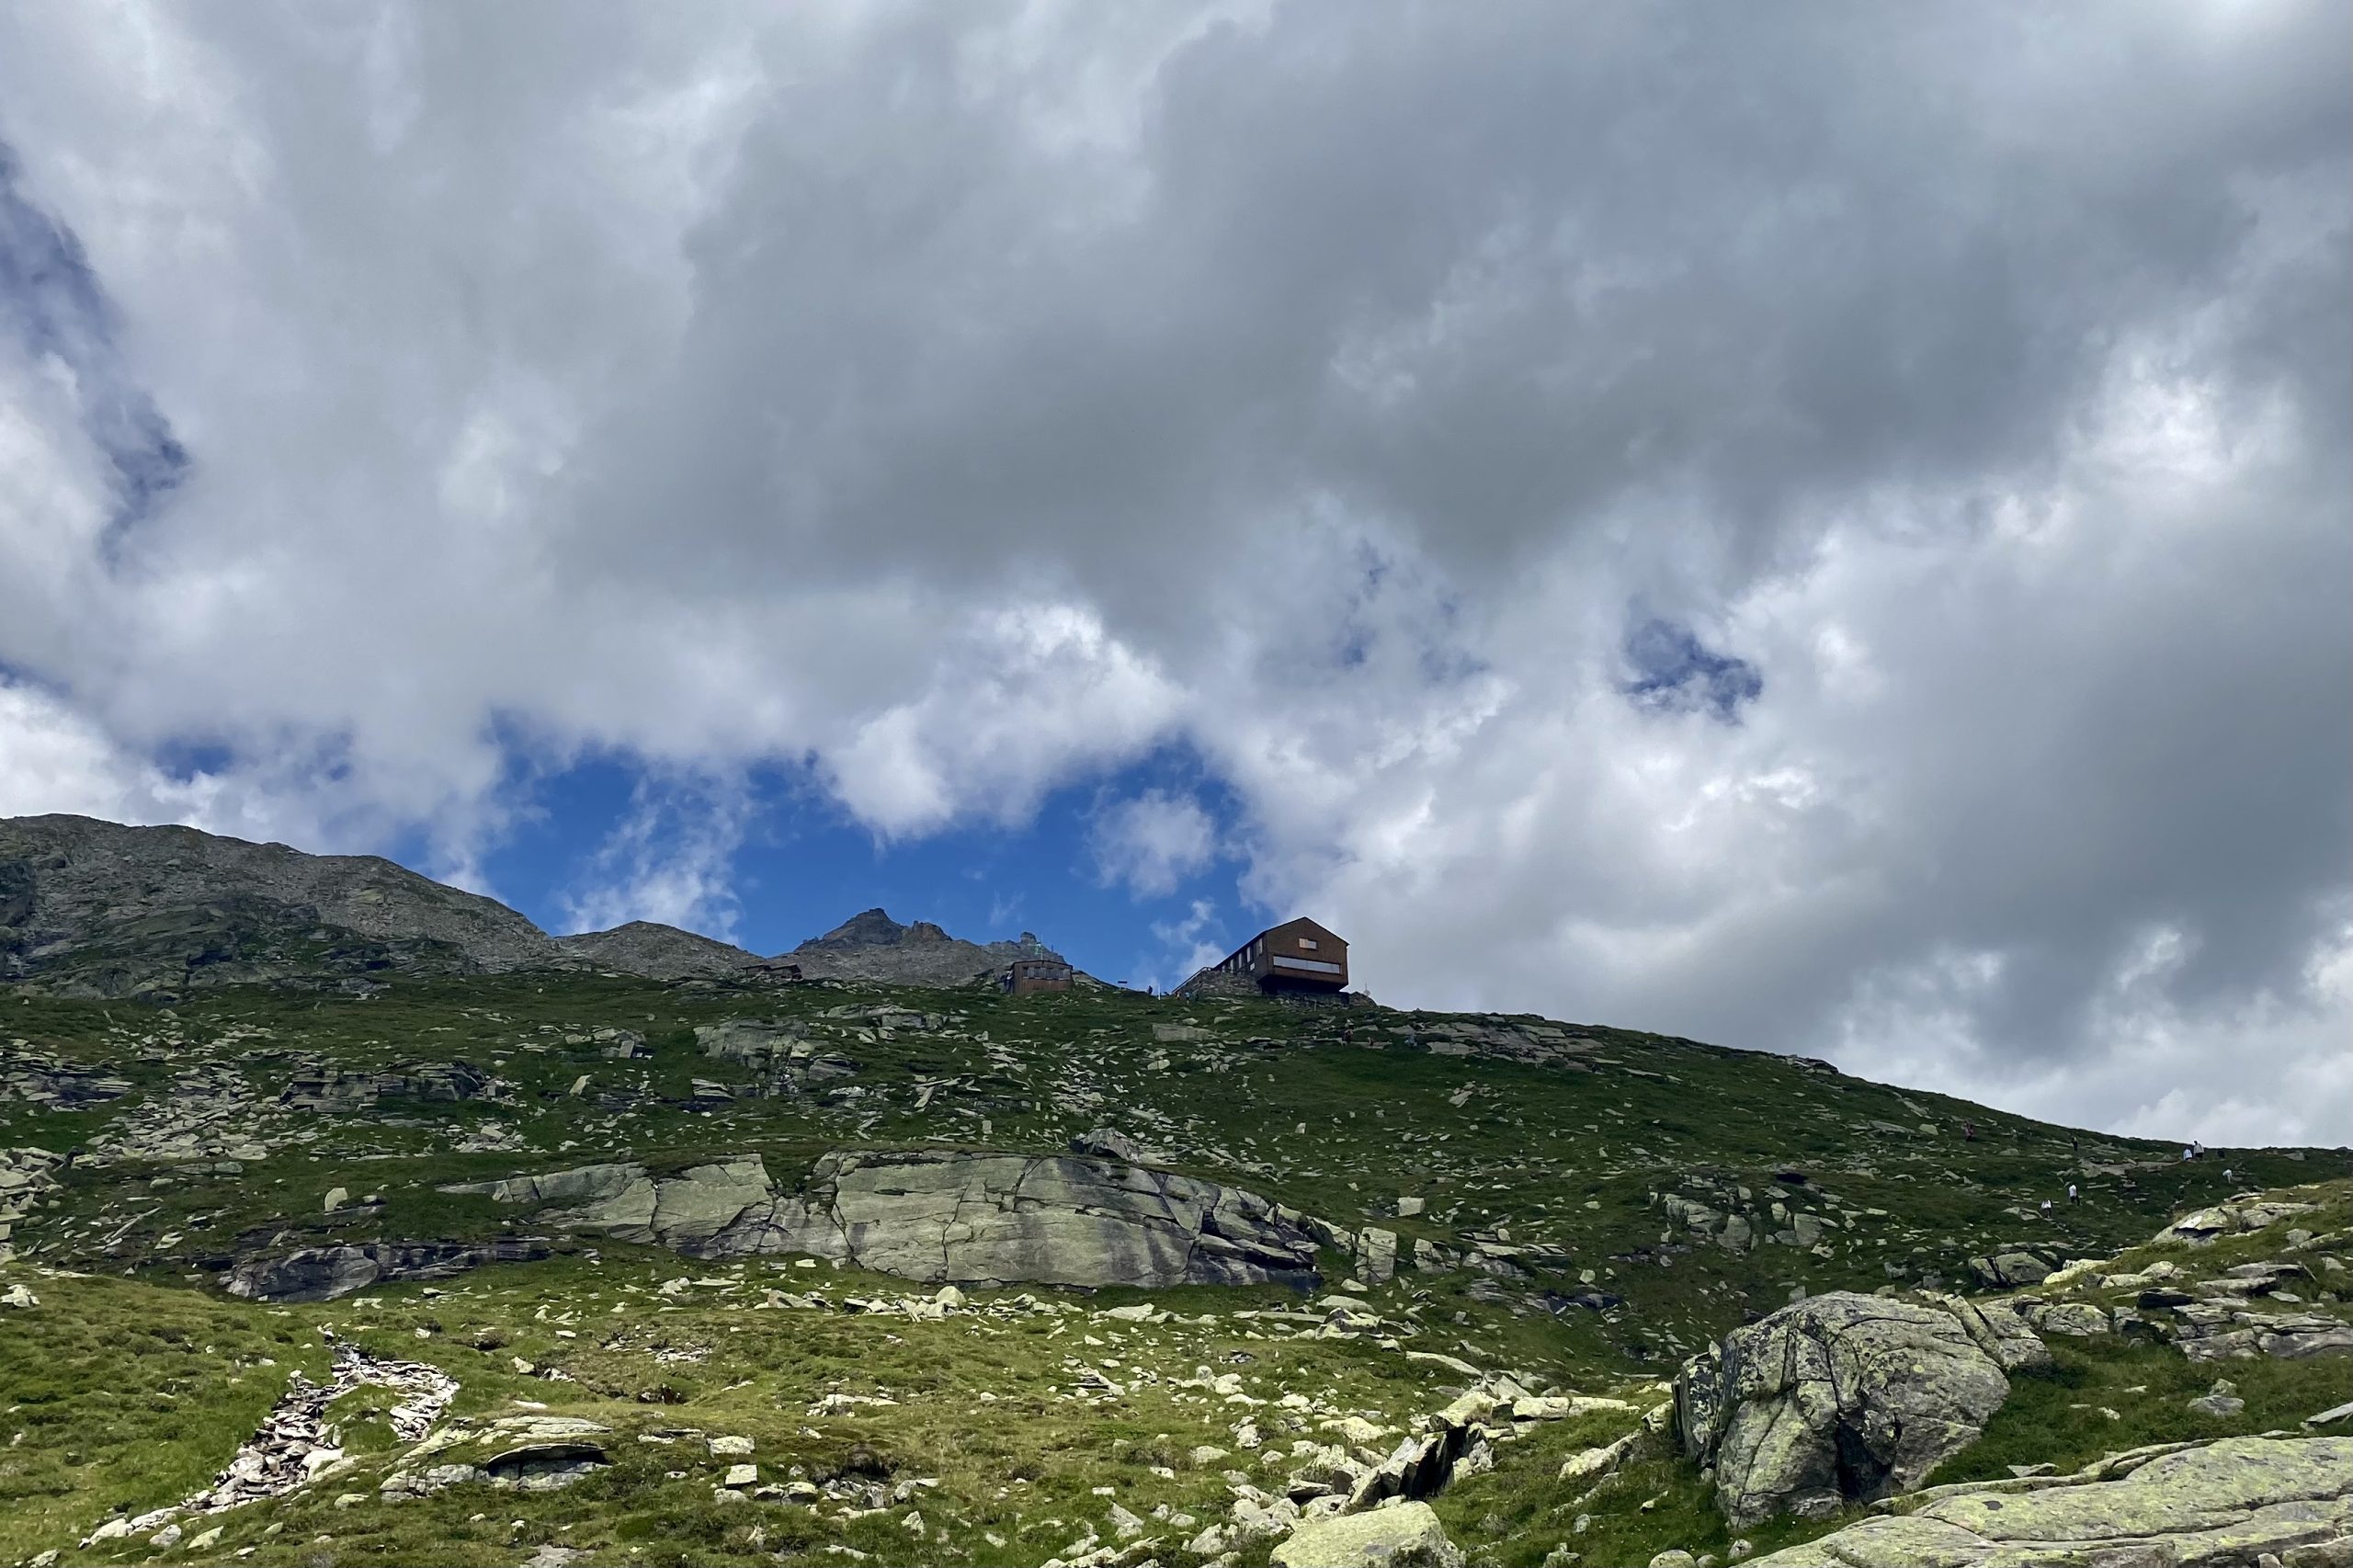
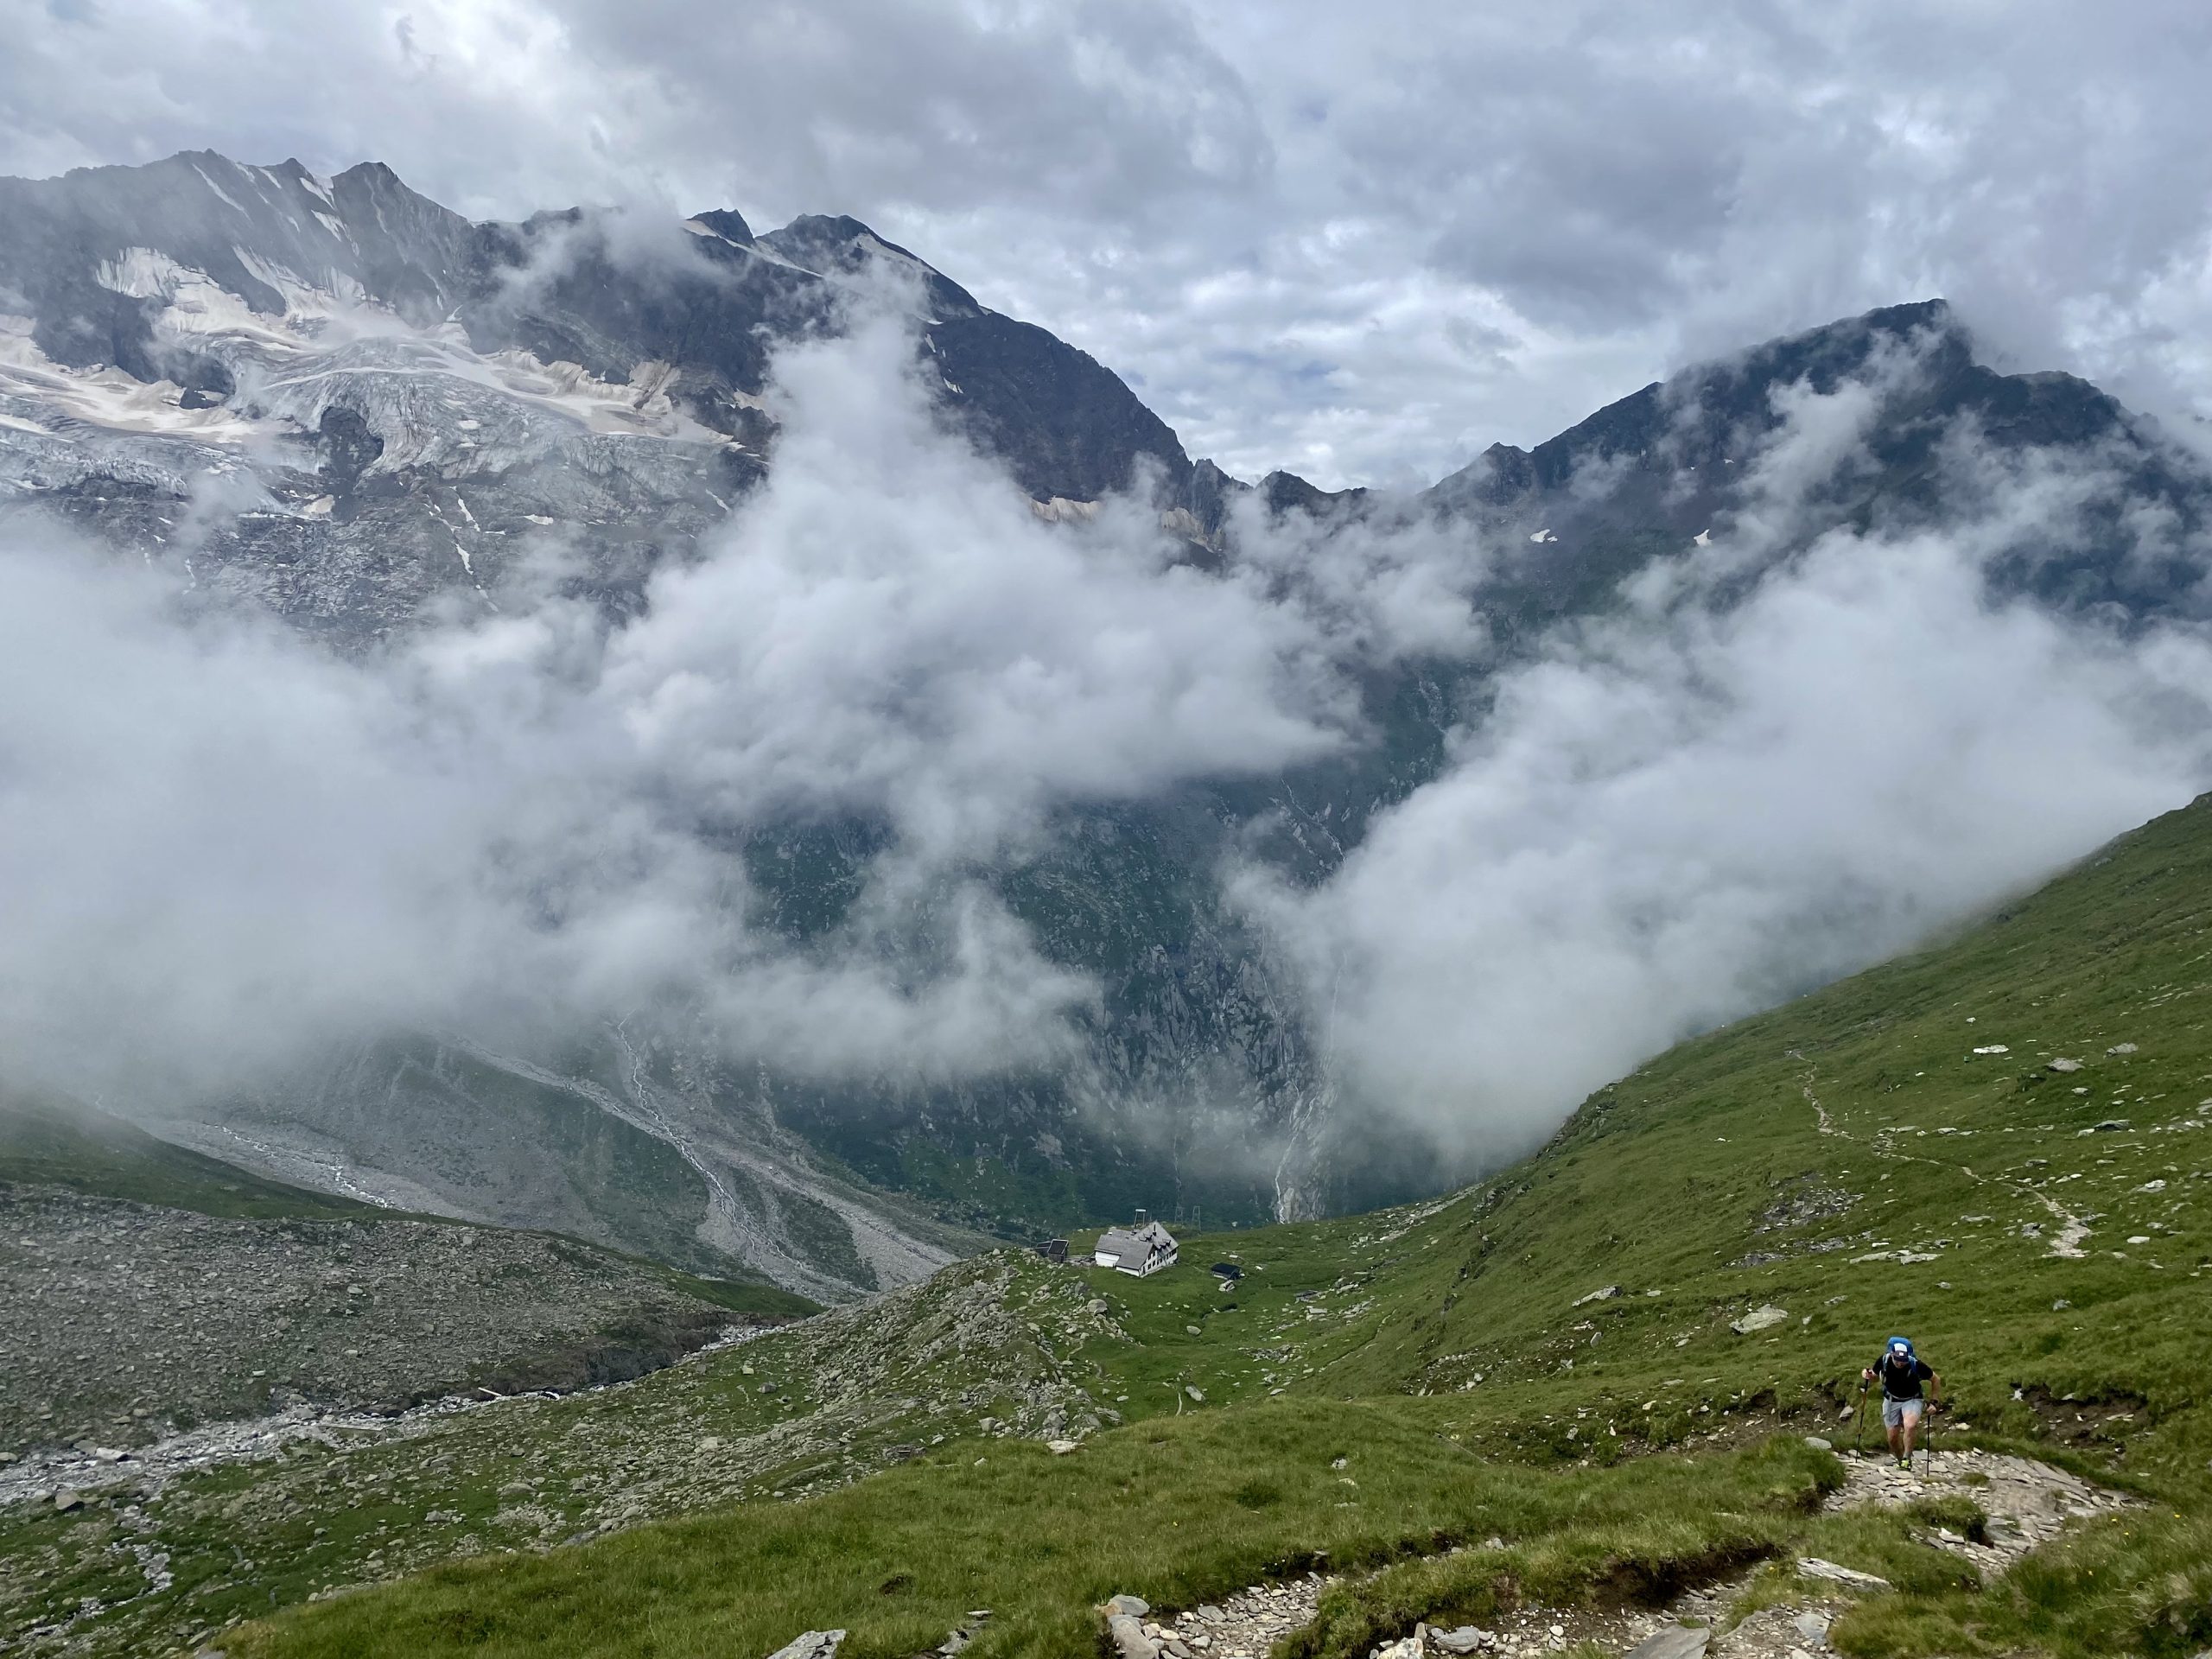
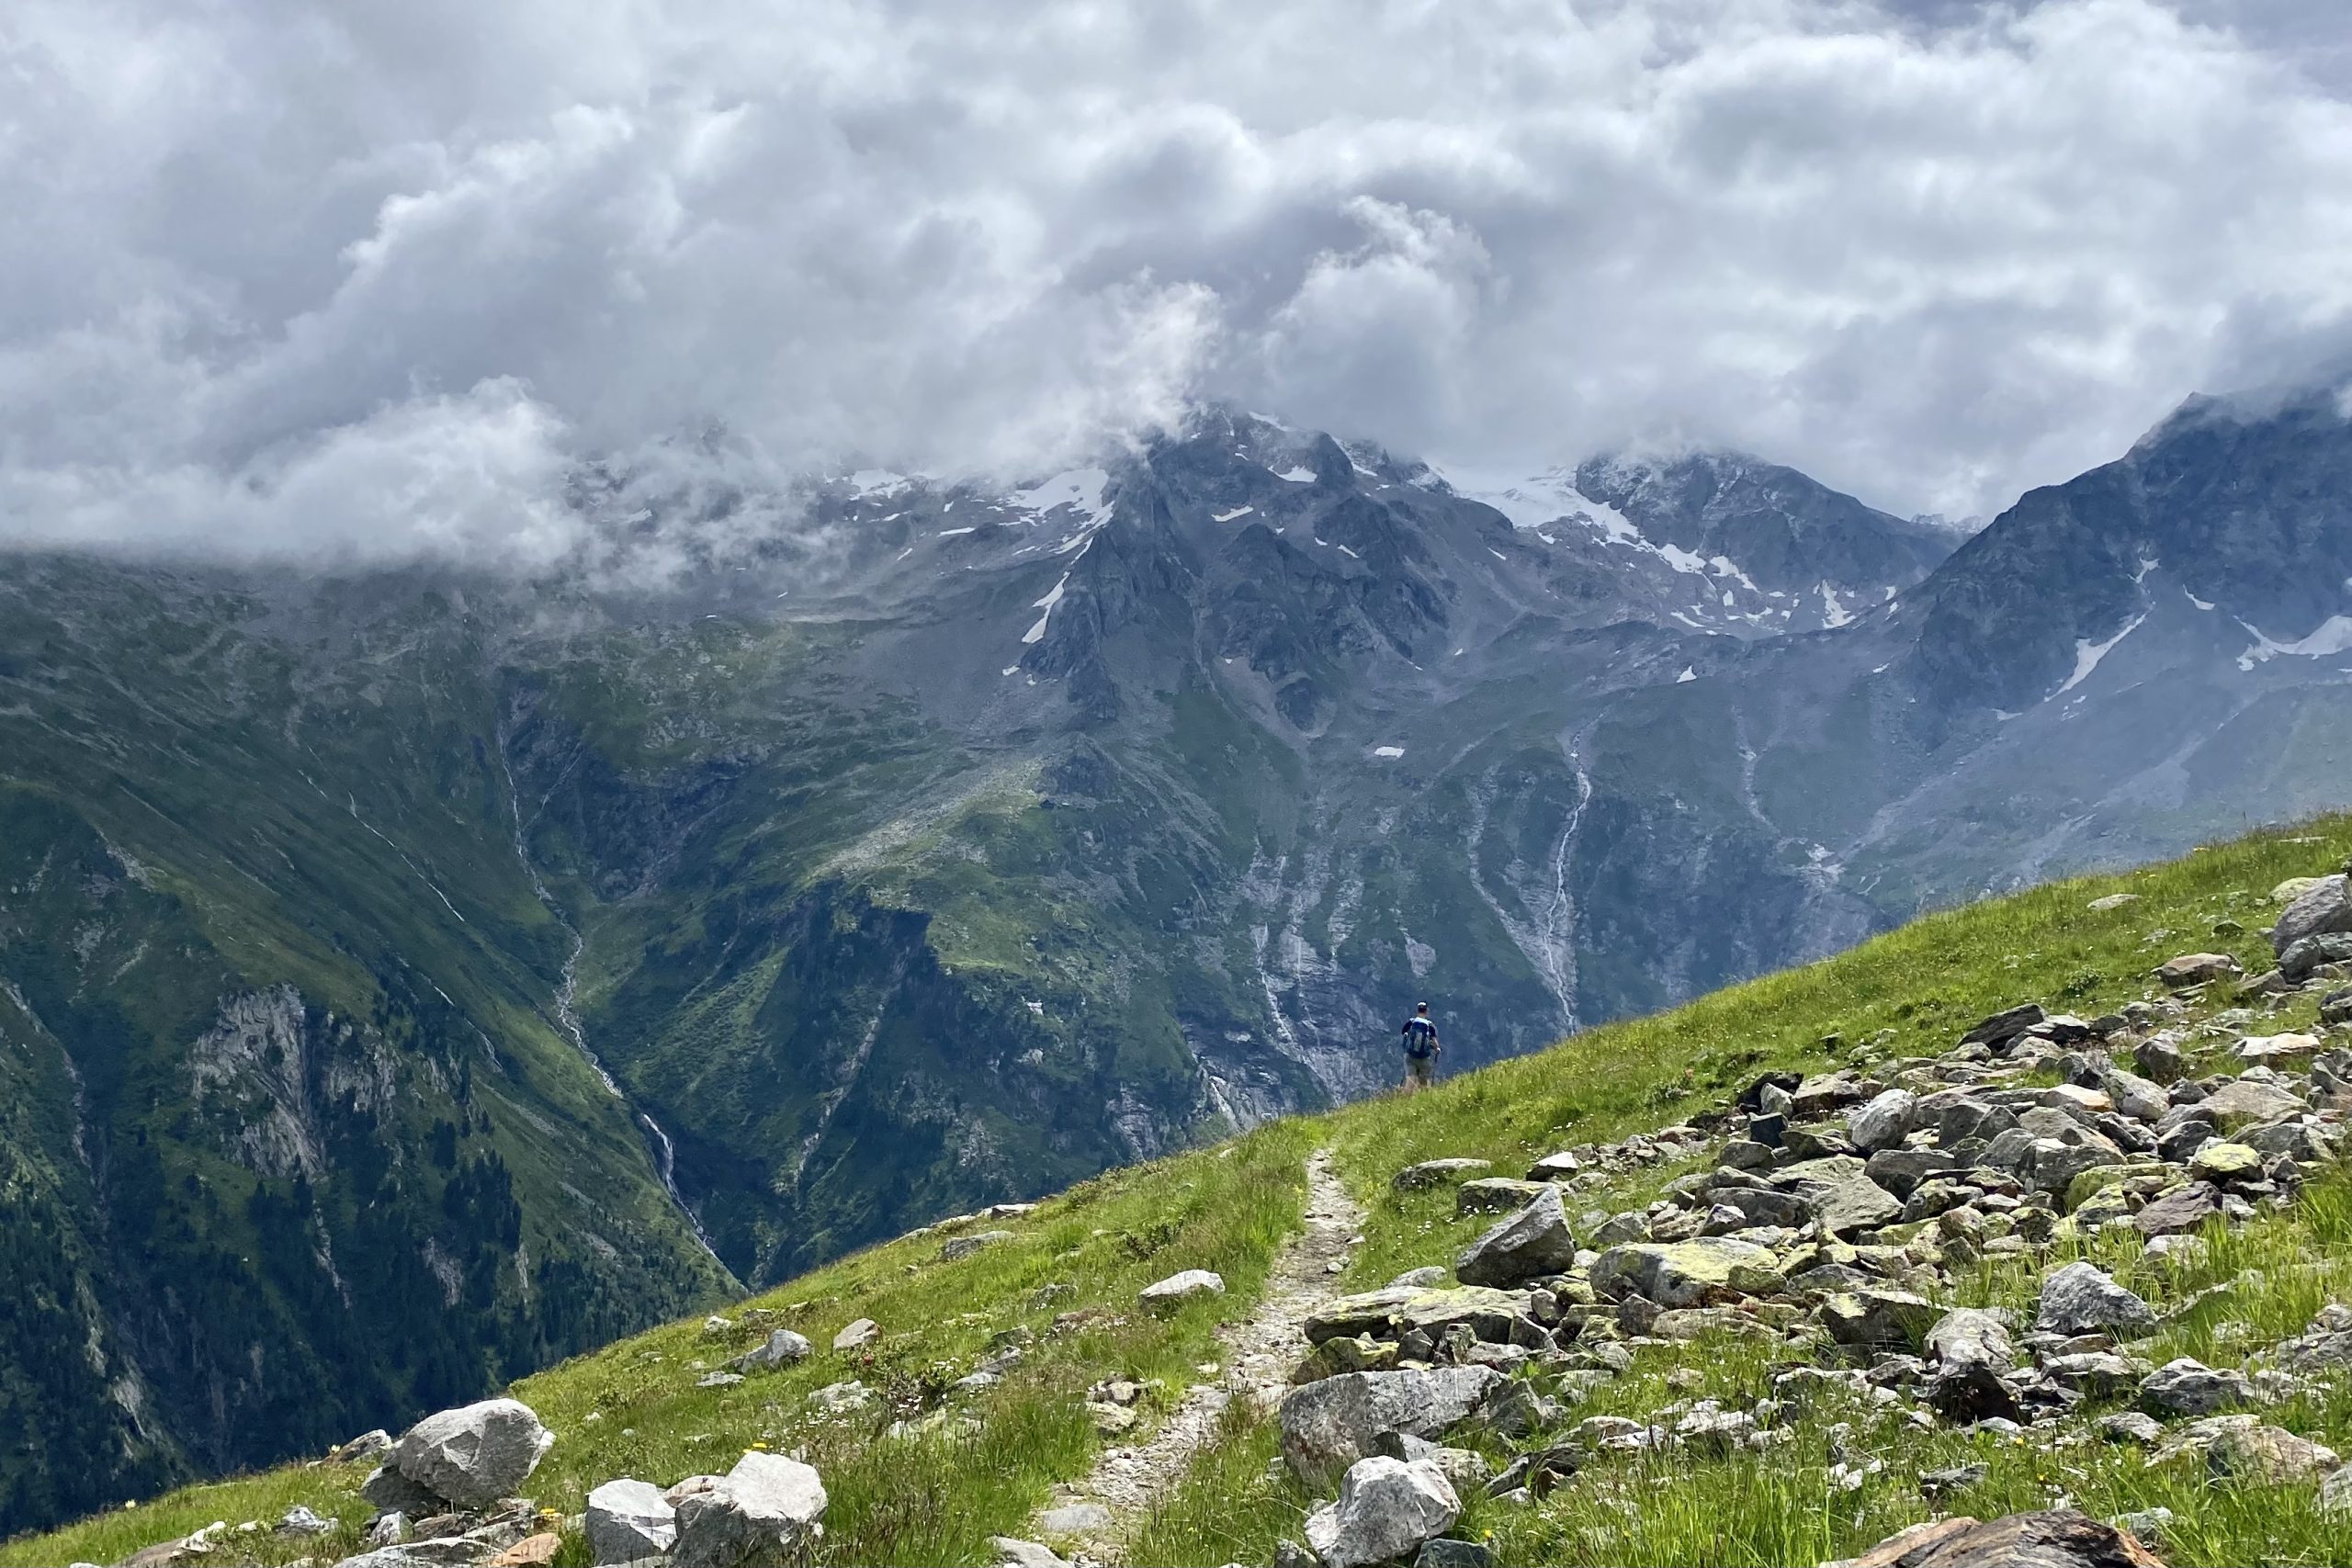
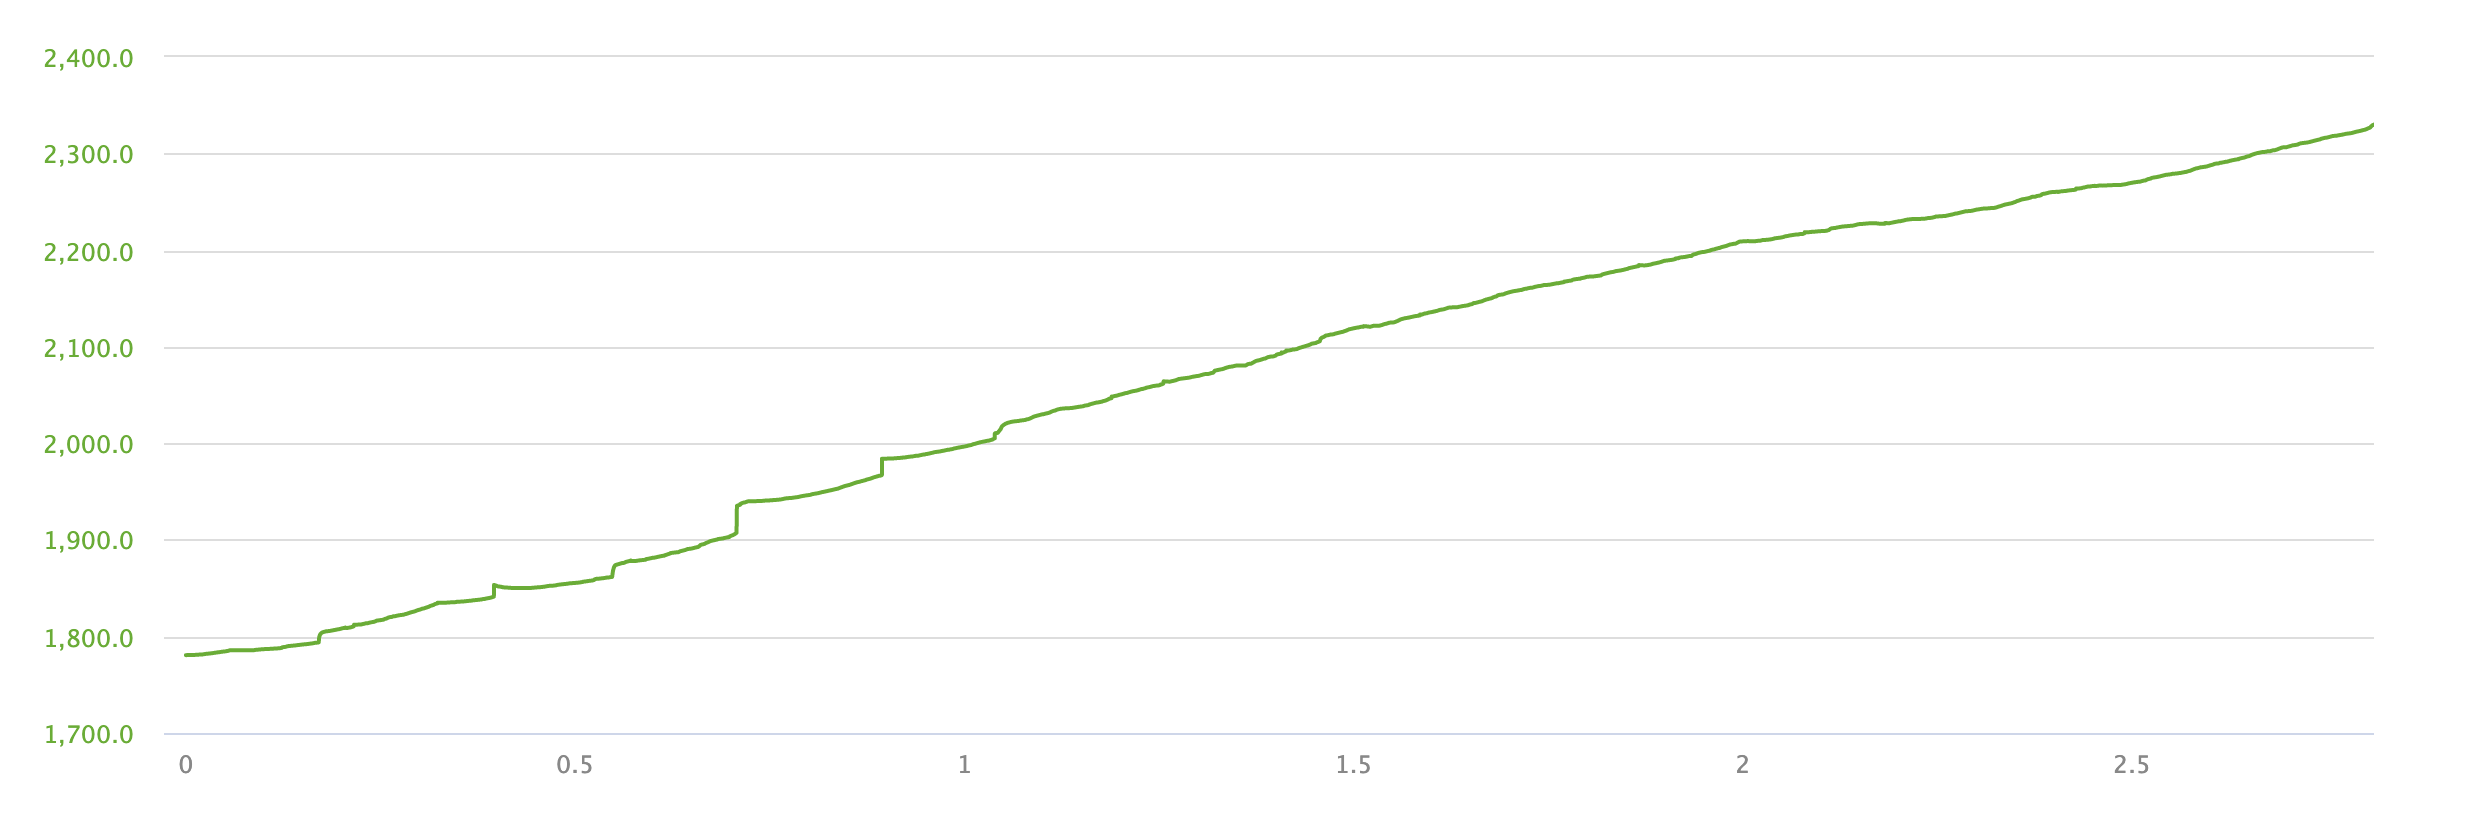
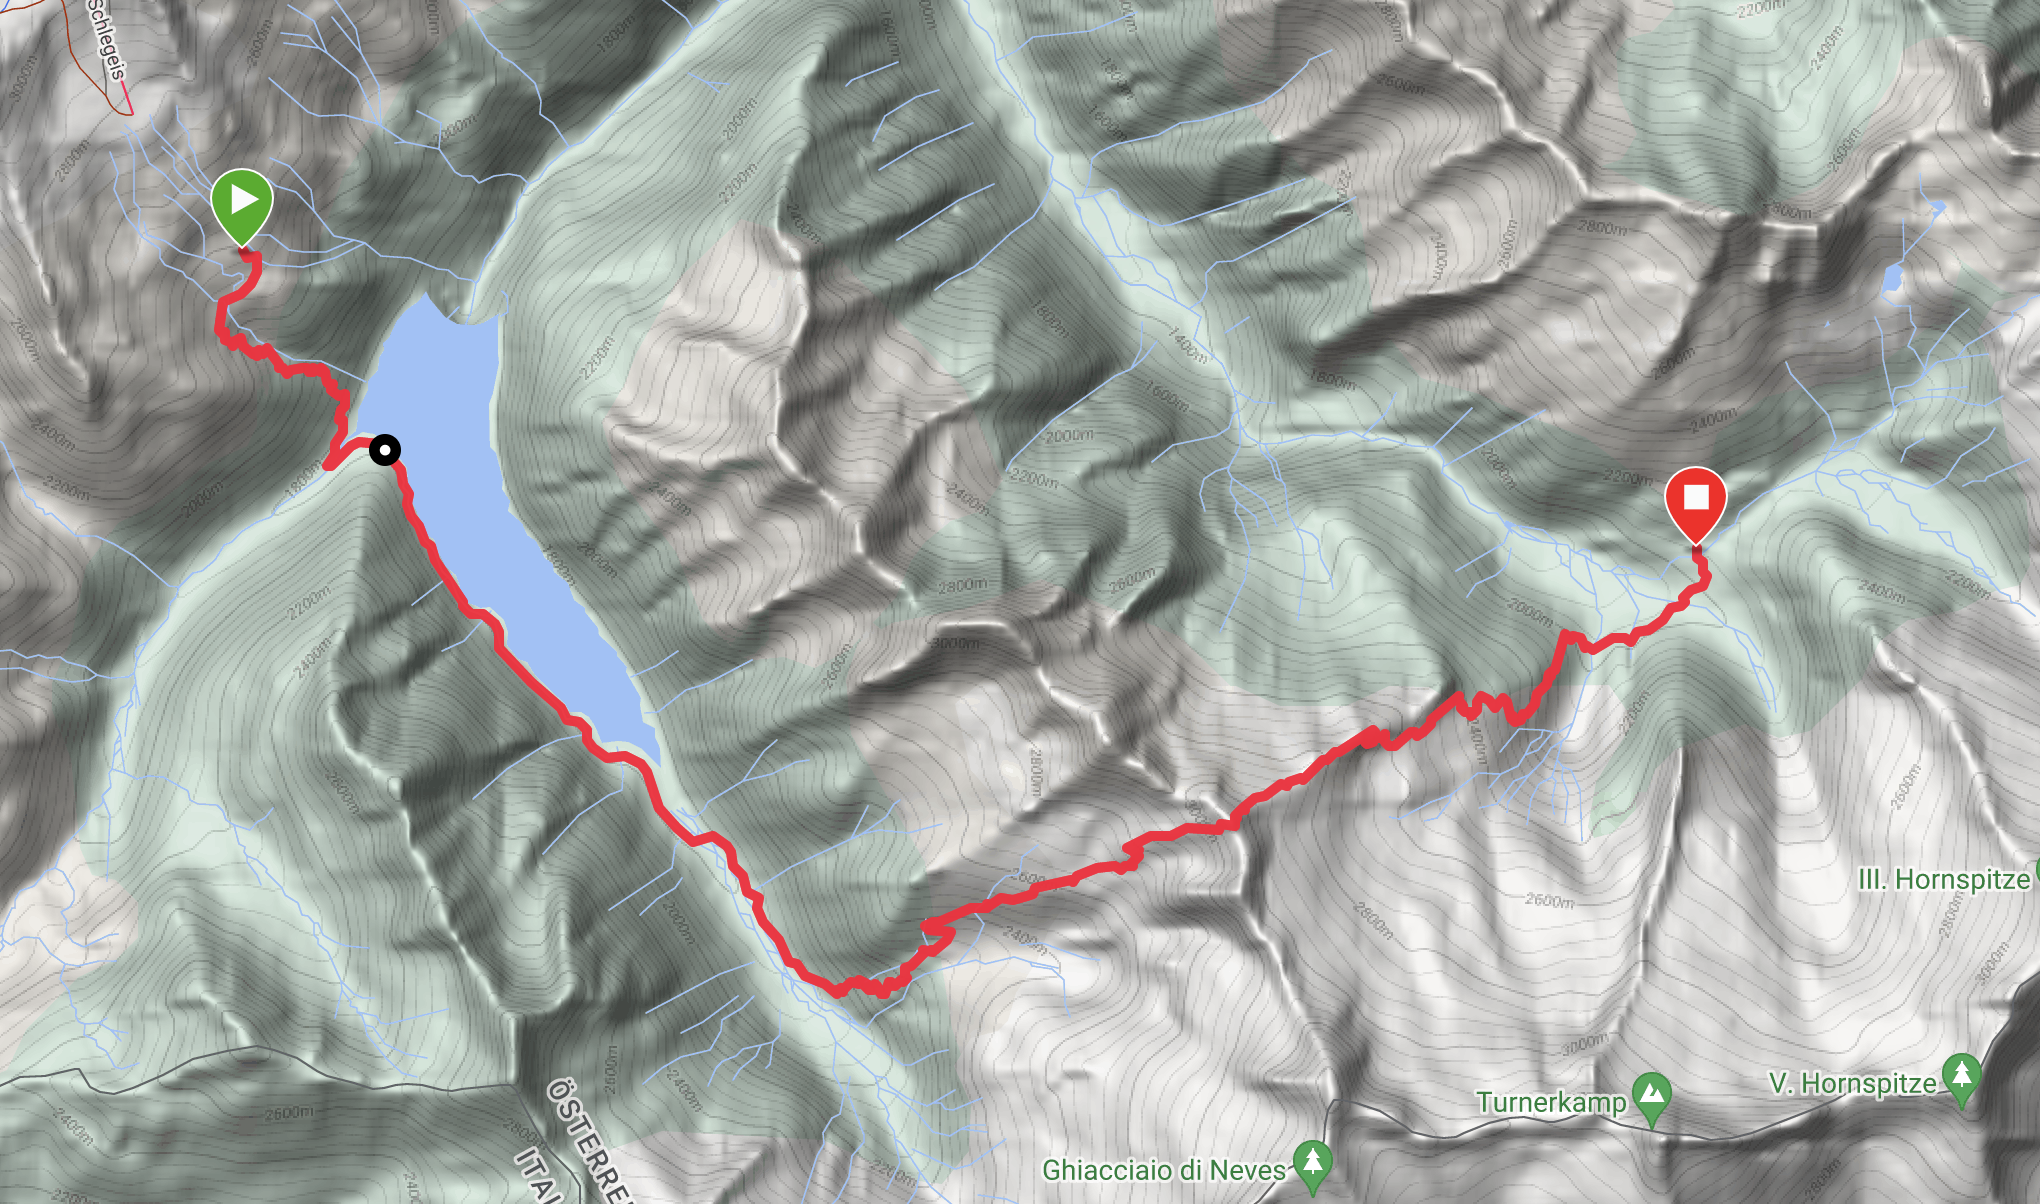
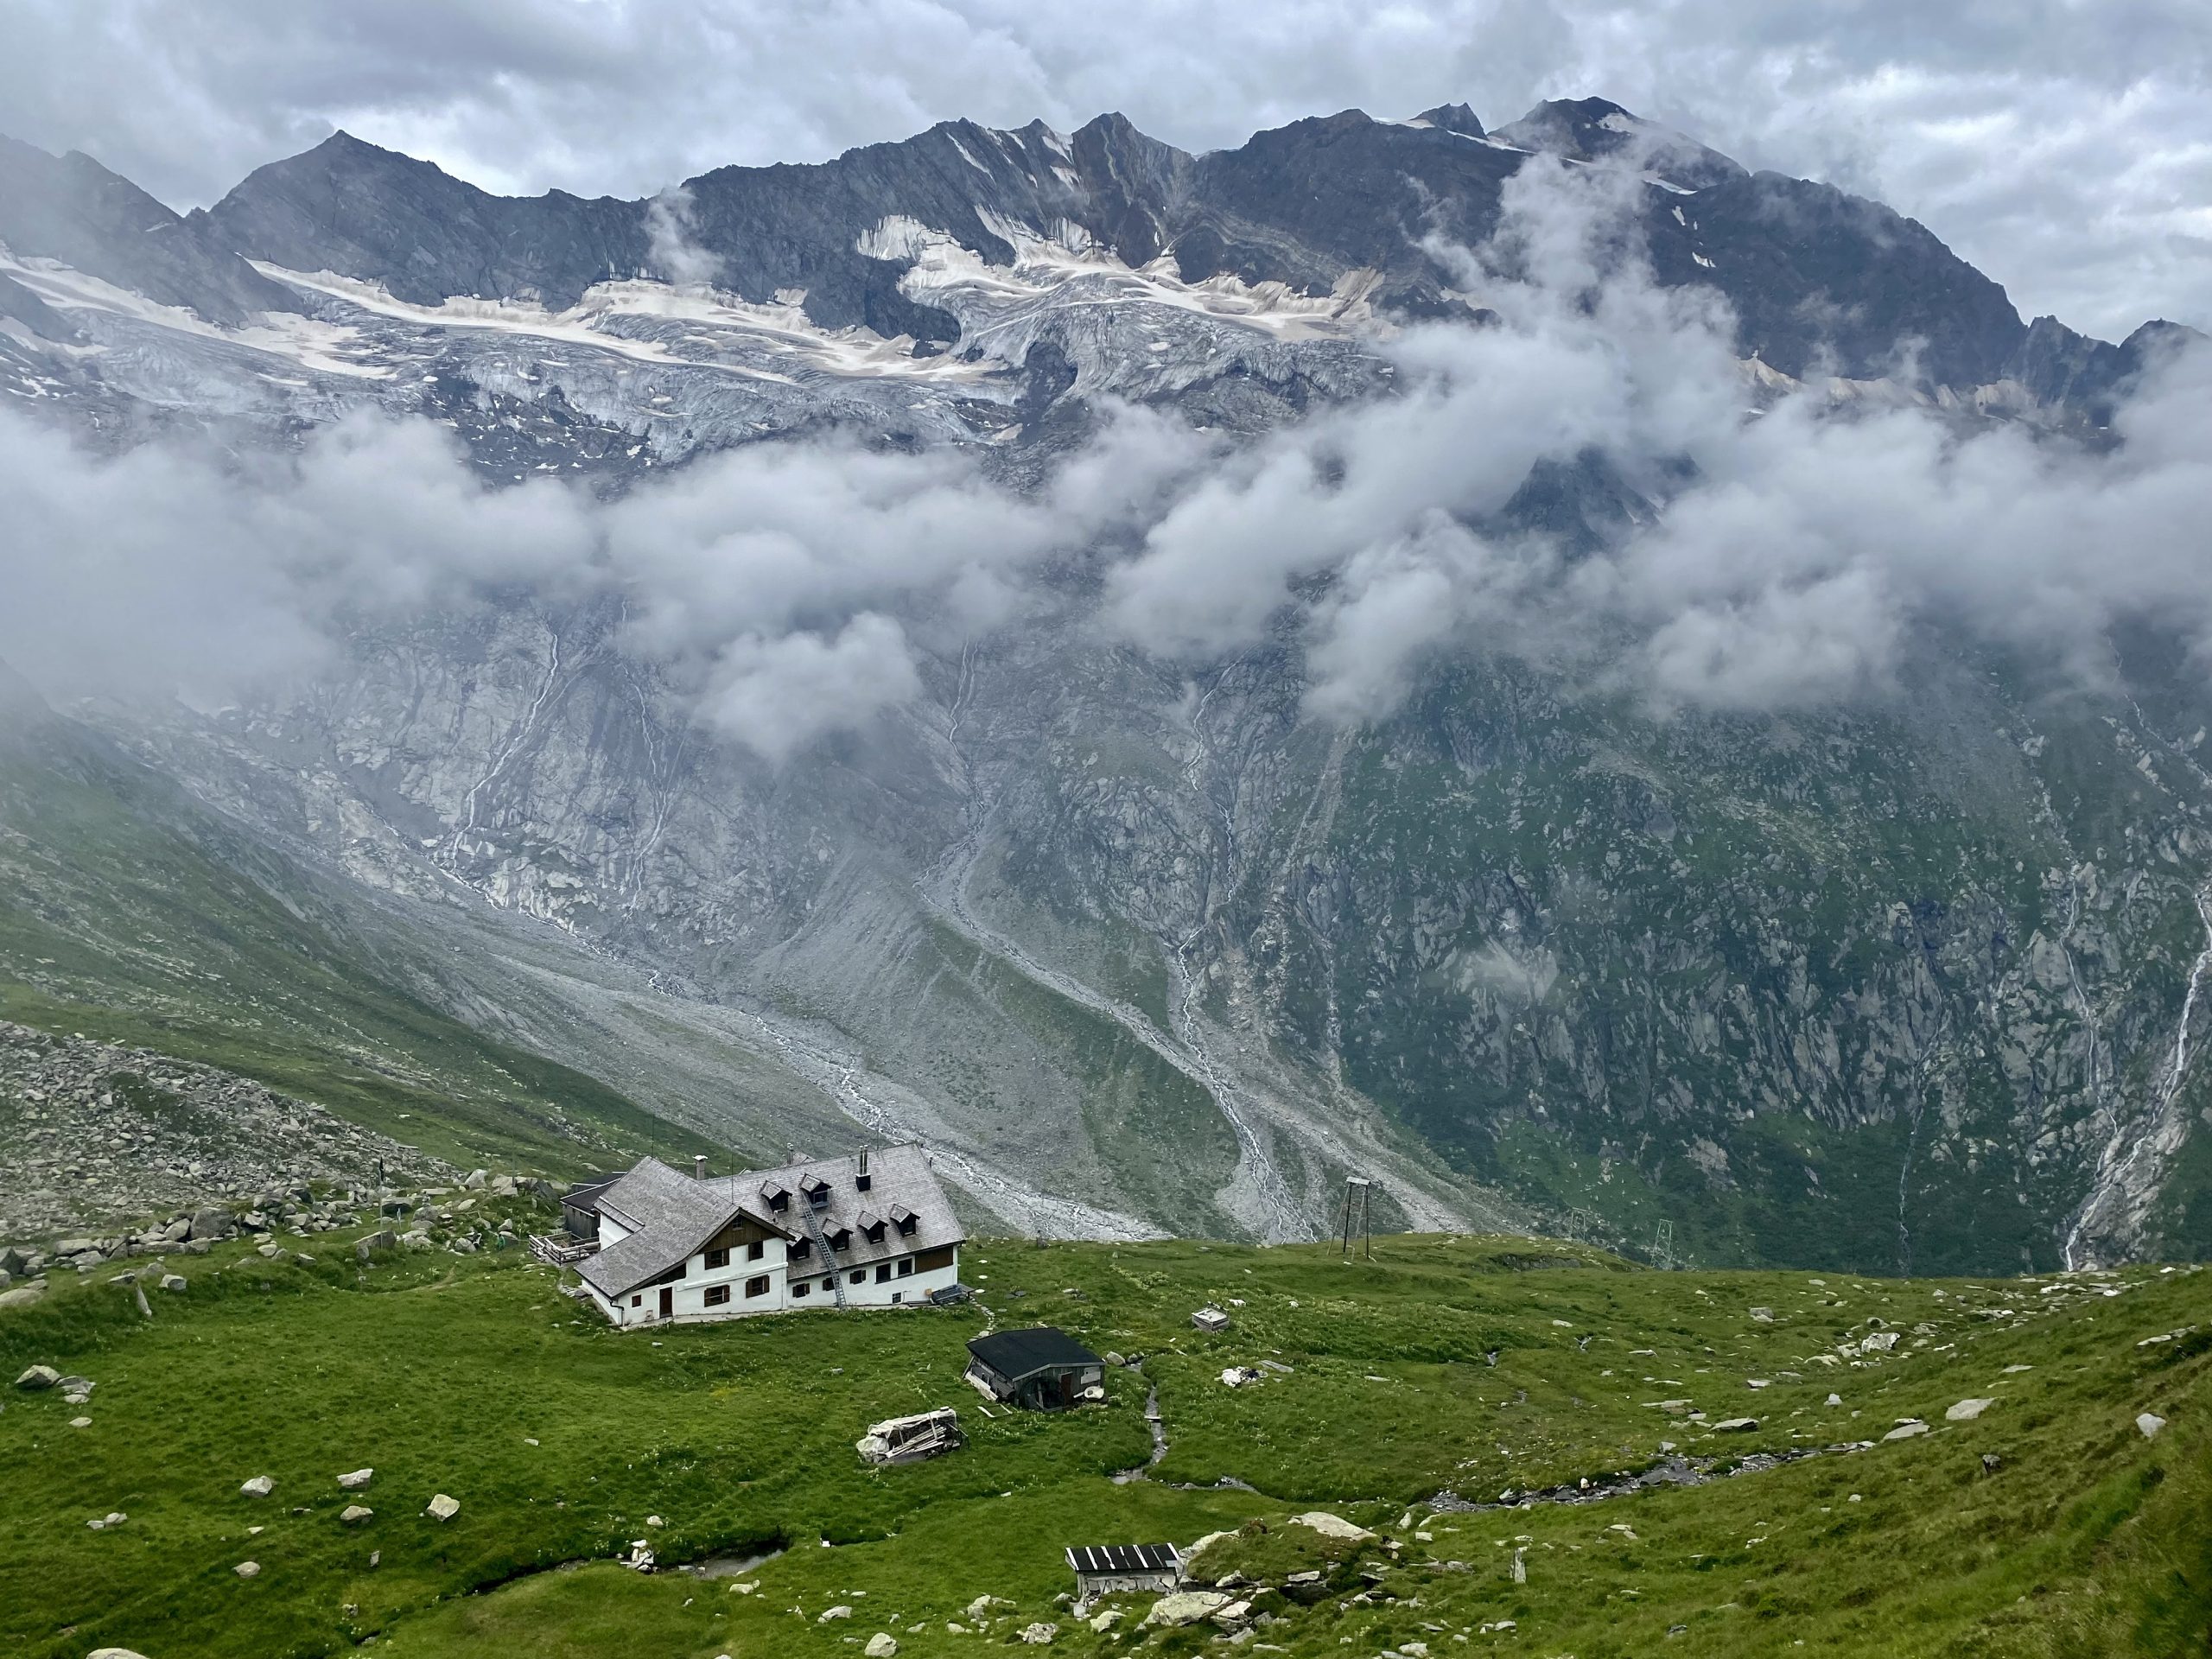
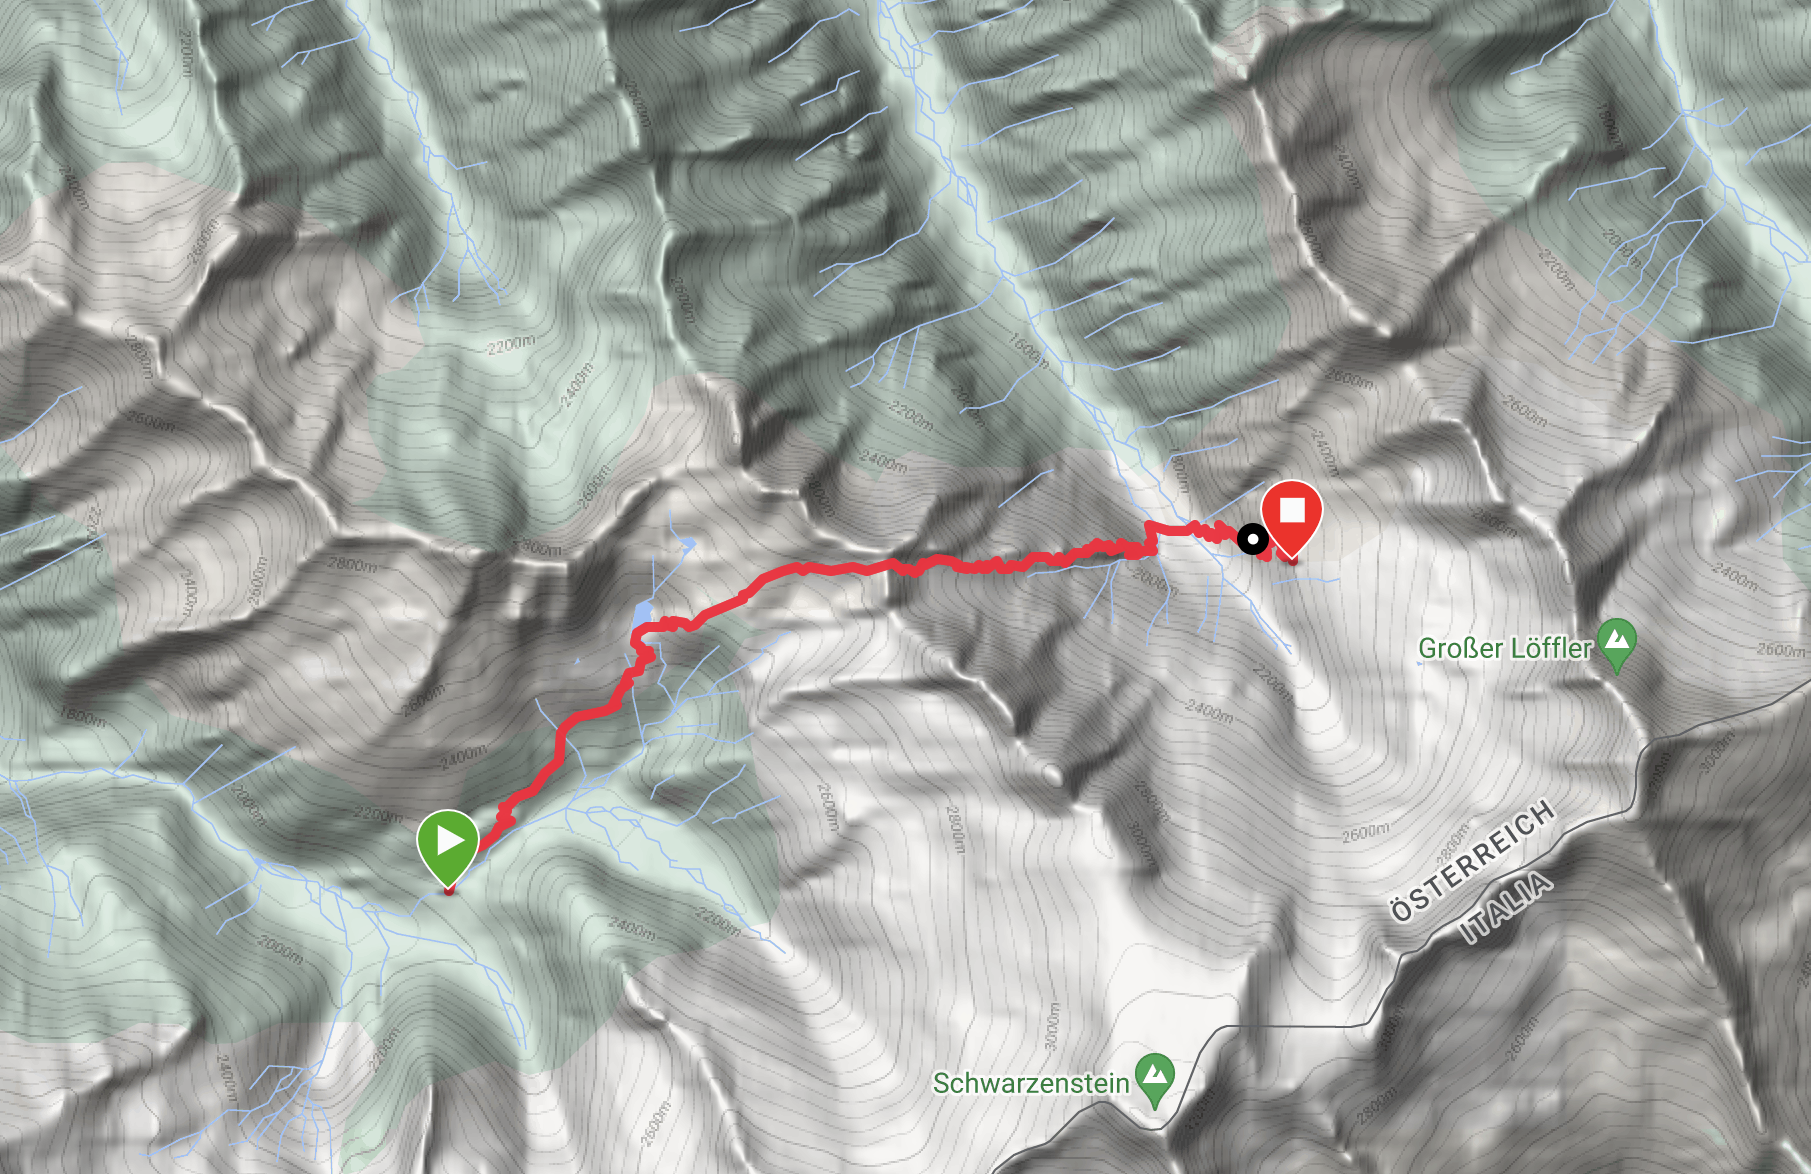
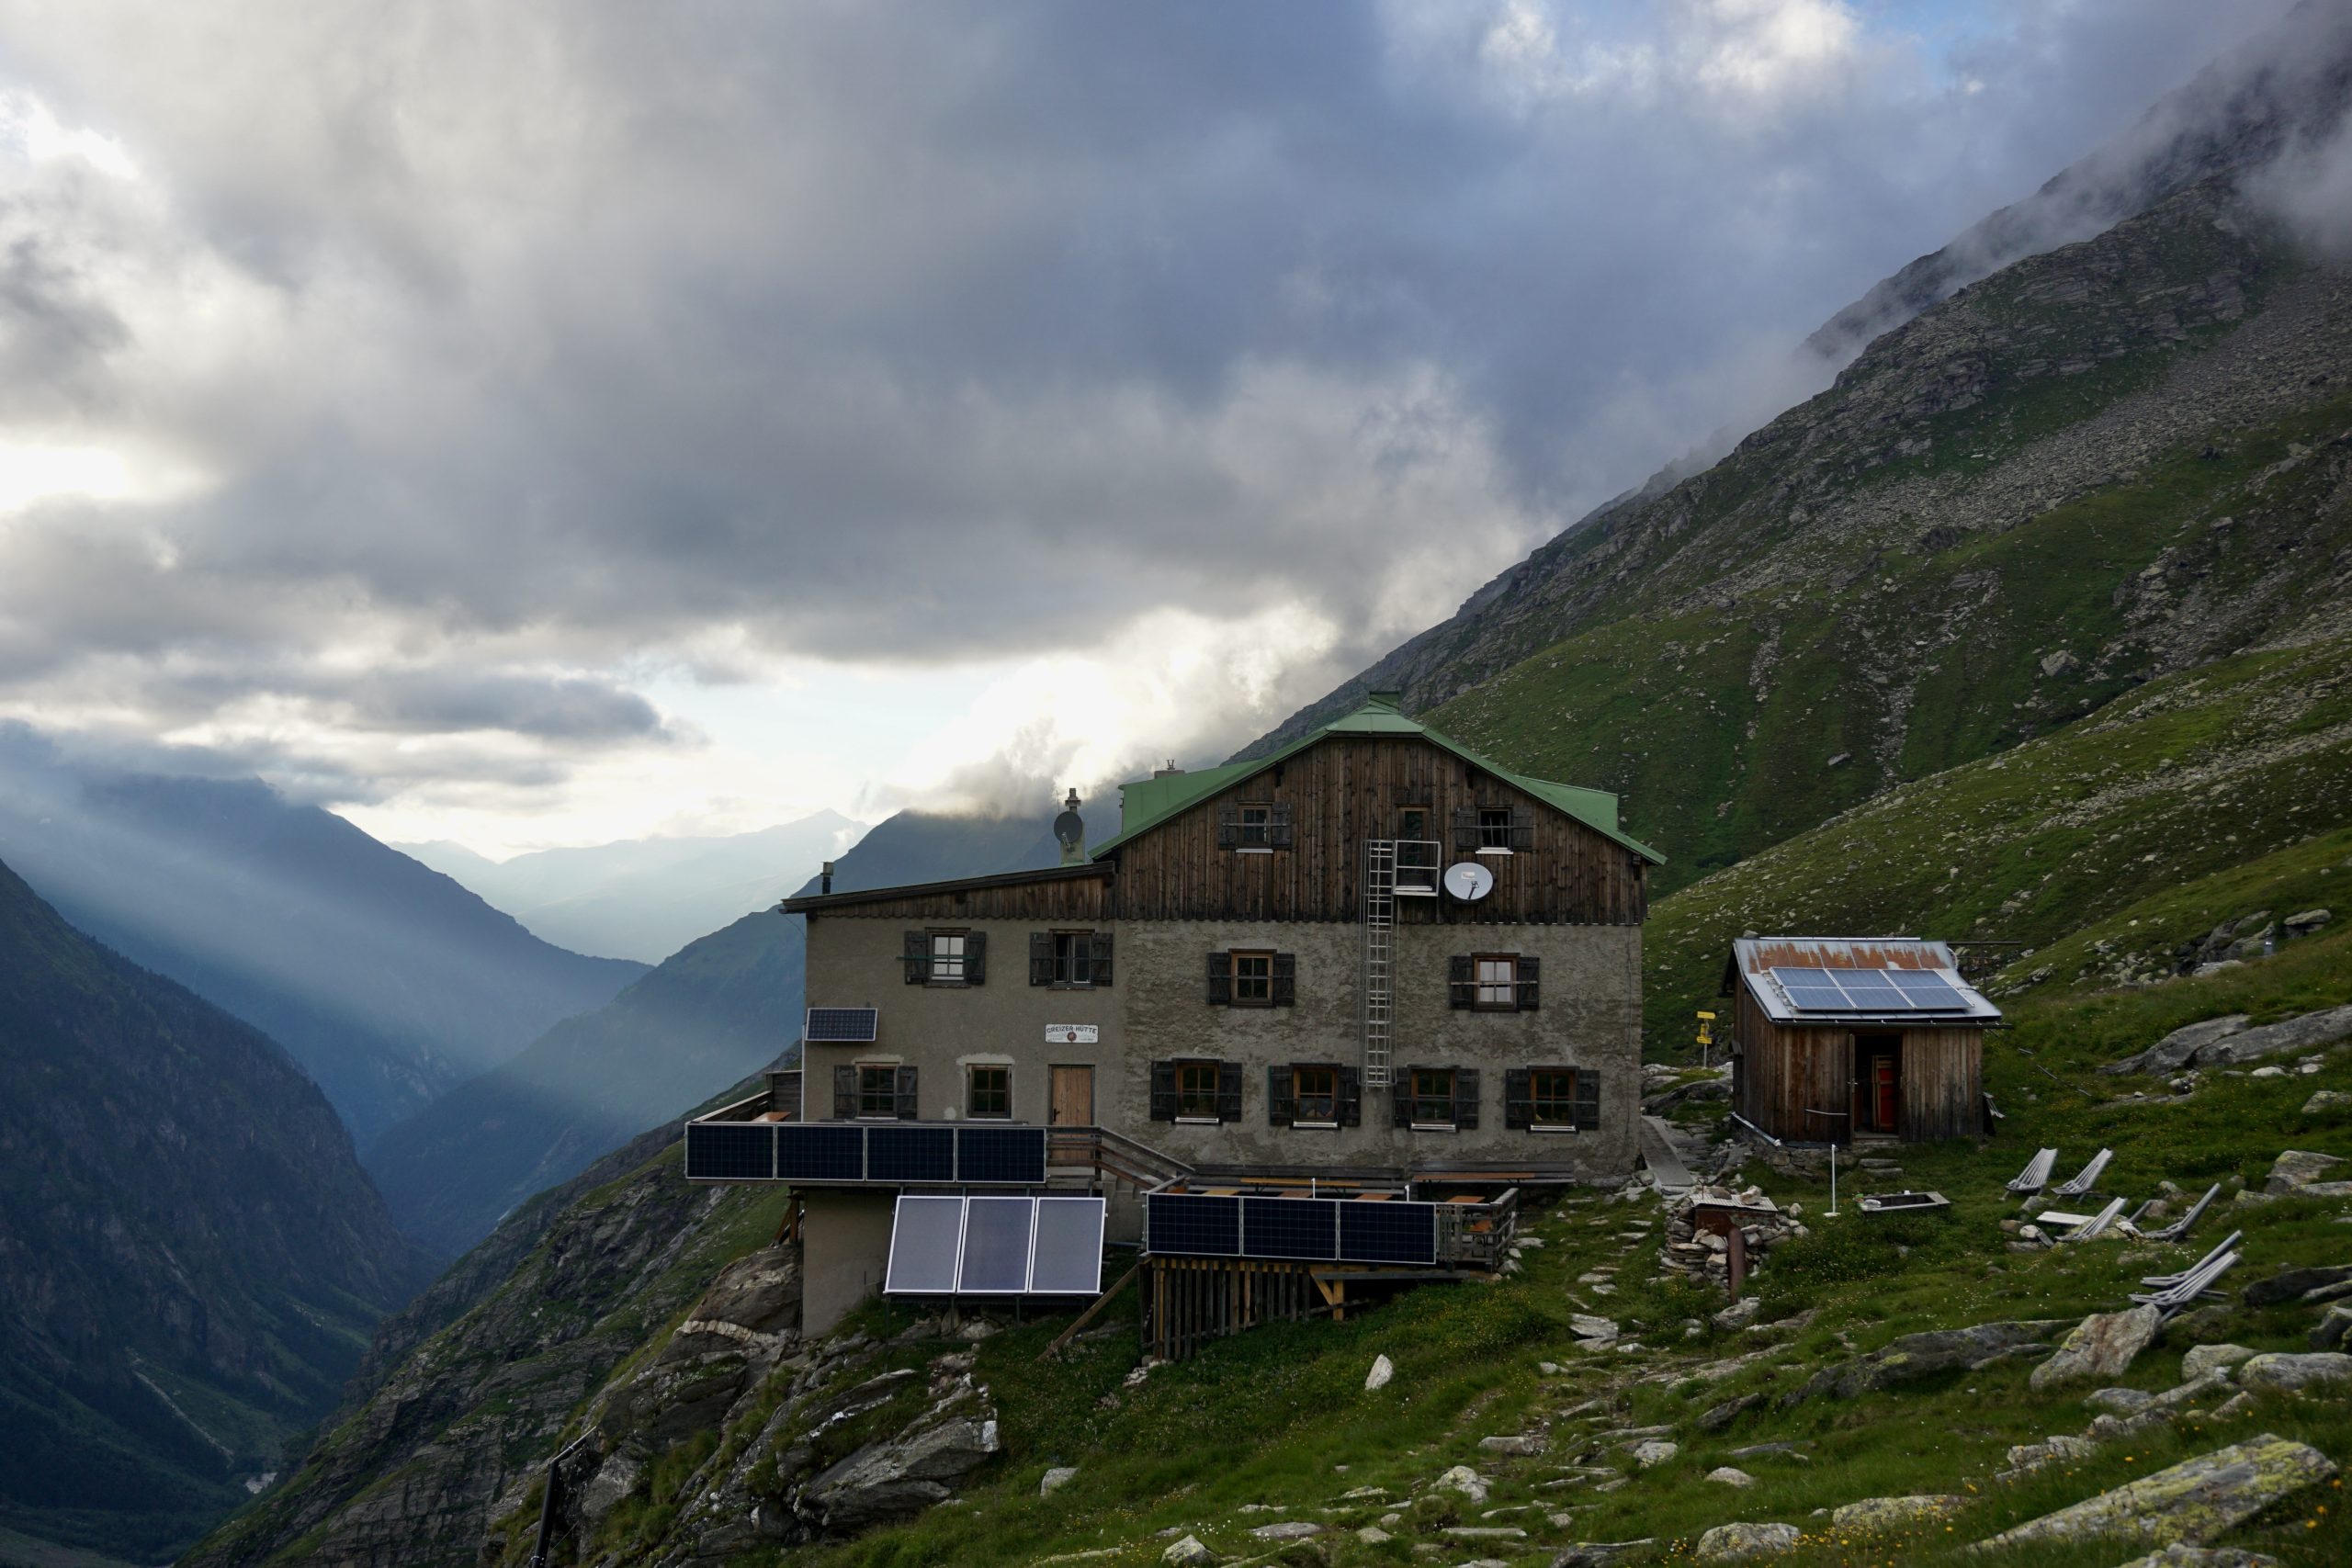
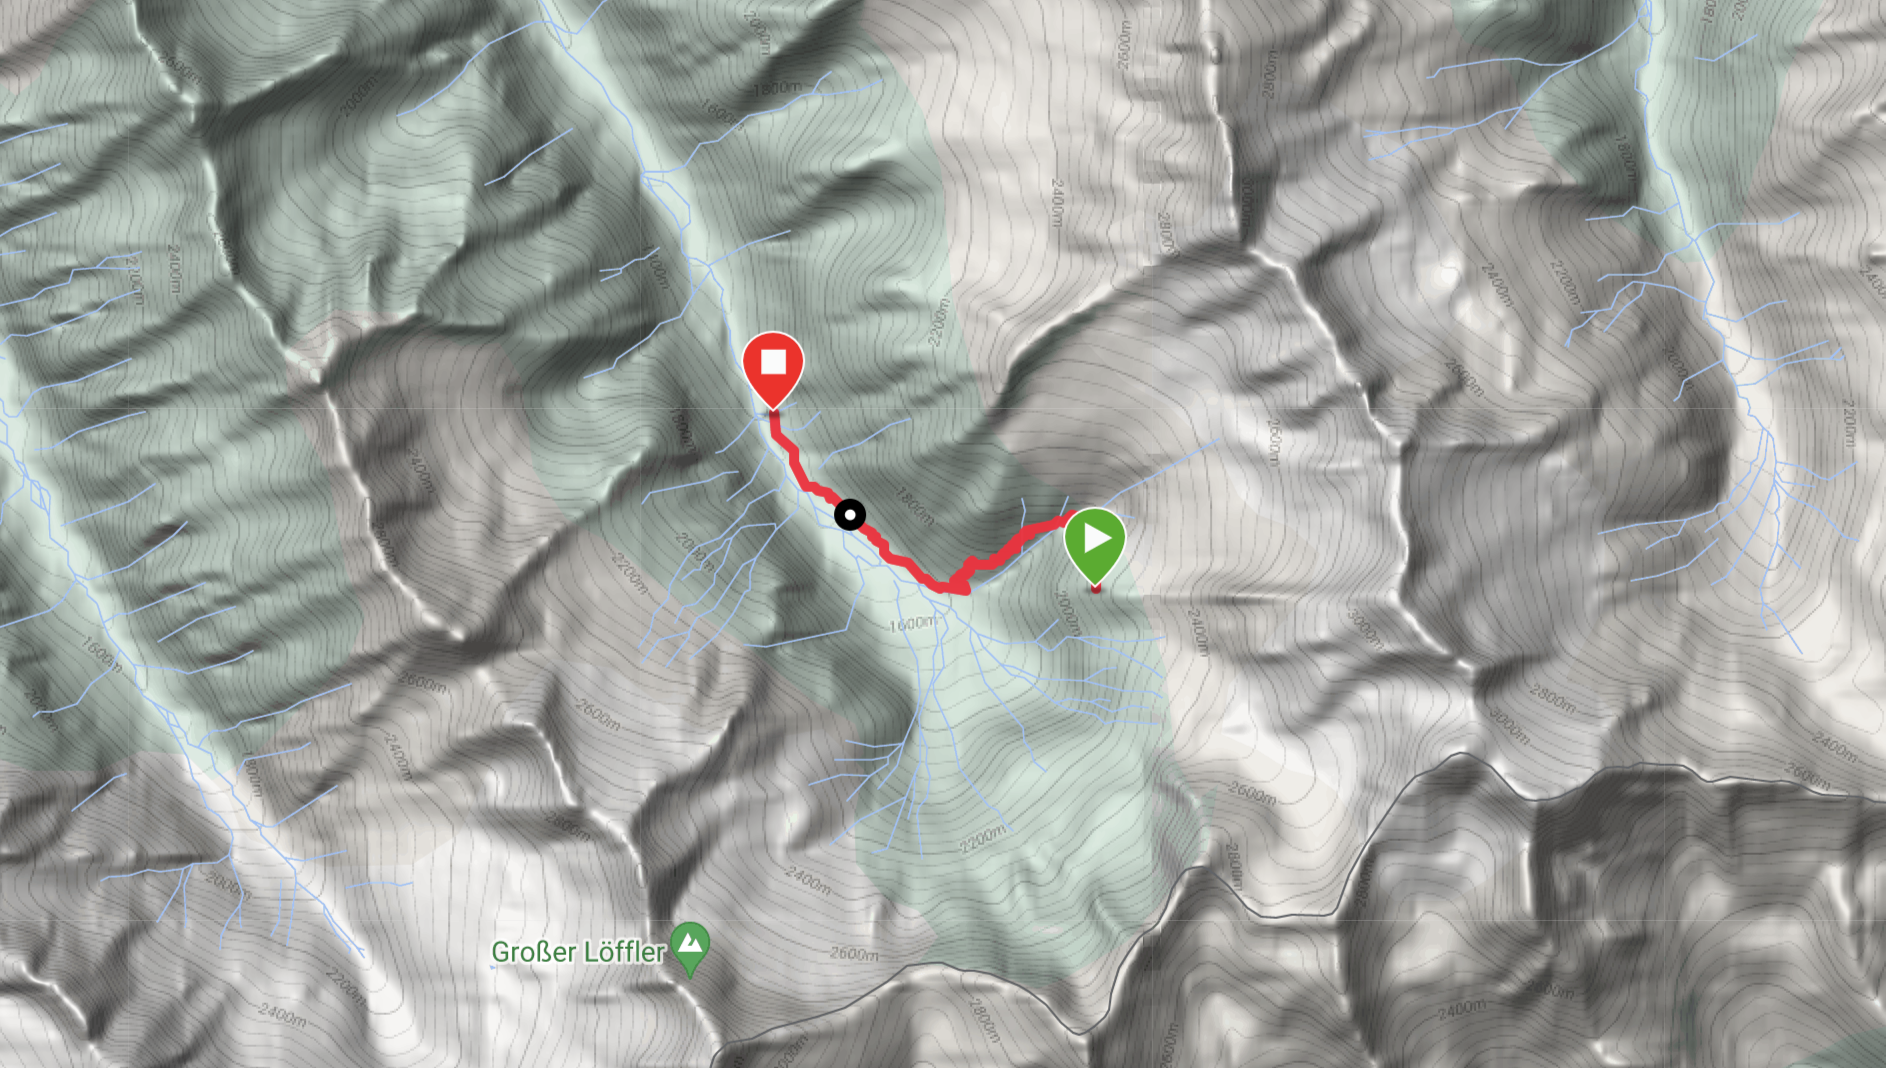
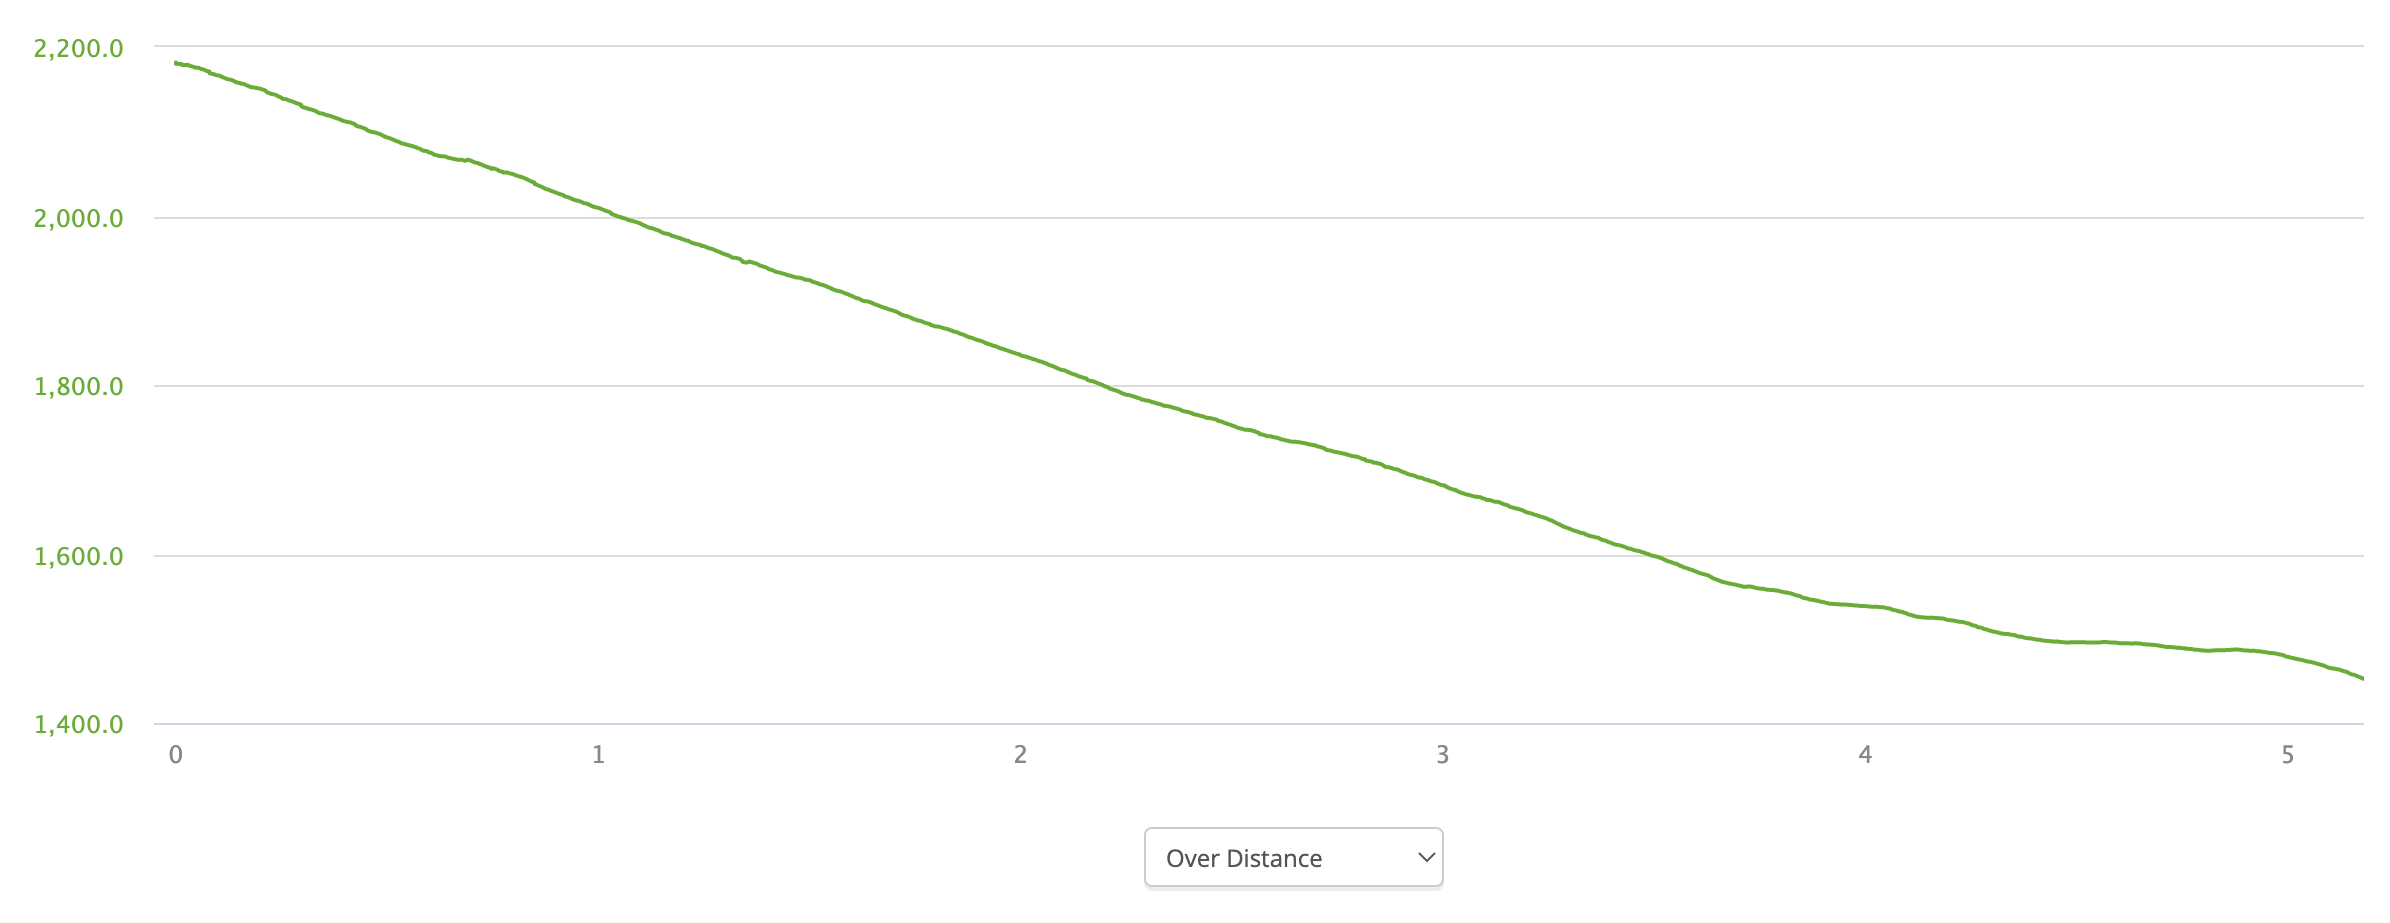
Why we chose it: I had this trail on my hiking bucket list for a while. So when there was an opportunity to spend some time in Austria, I could not resist squeezing this hike into our plans. Given the limited time we had, we hiked a section of the trail, starting from Olpererhütte until Grüne Wand Hütte. 

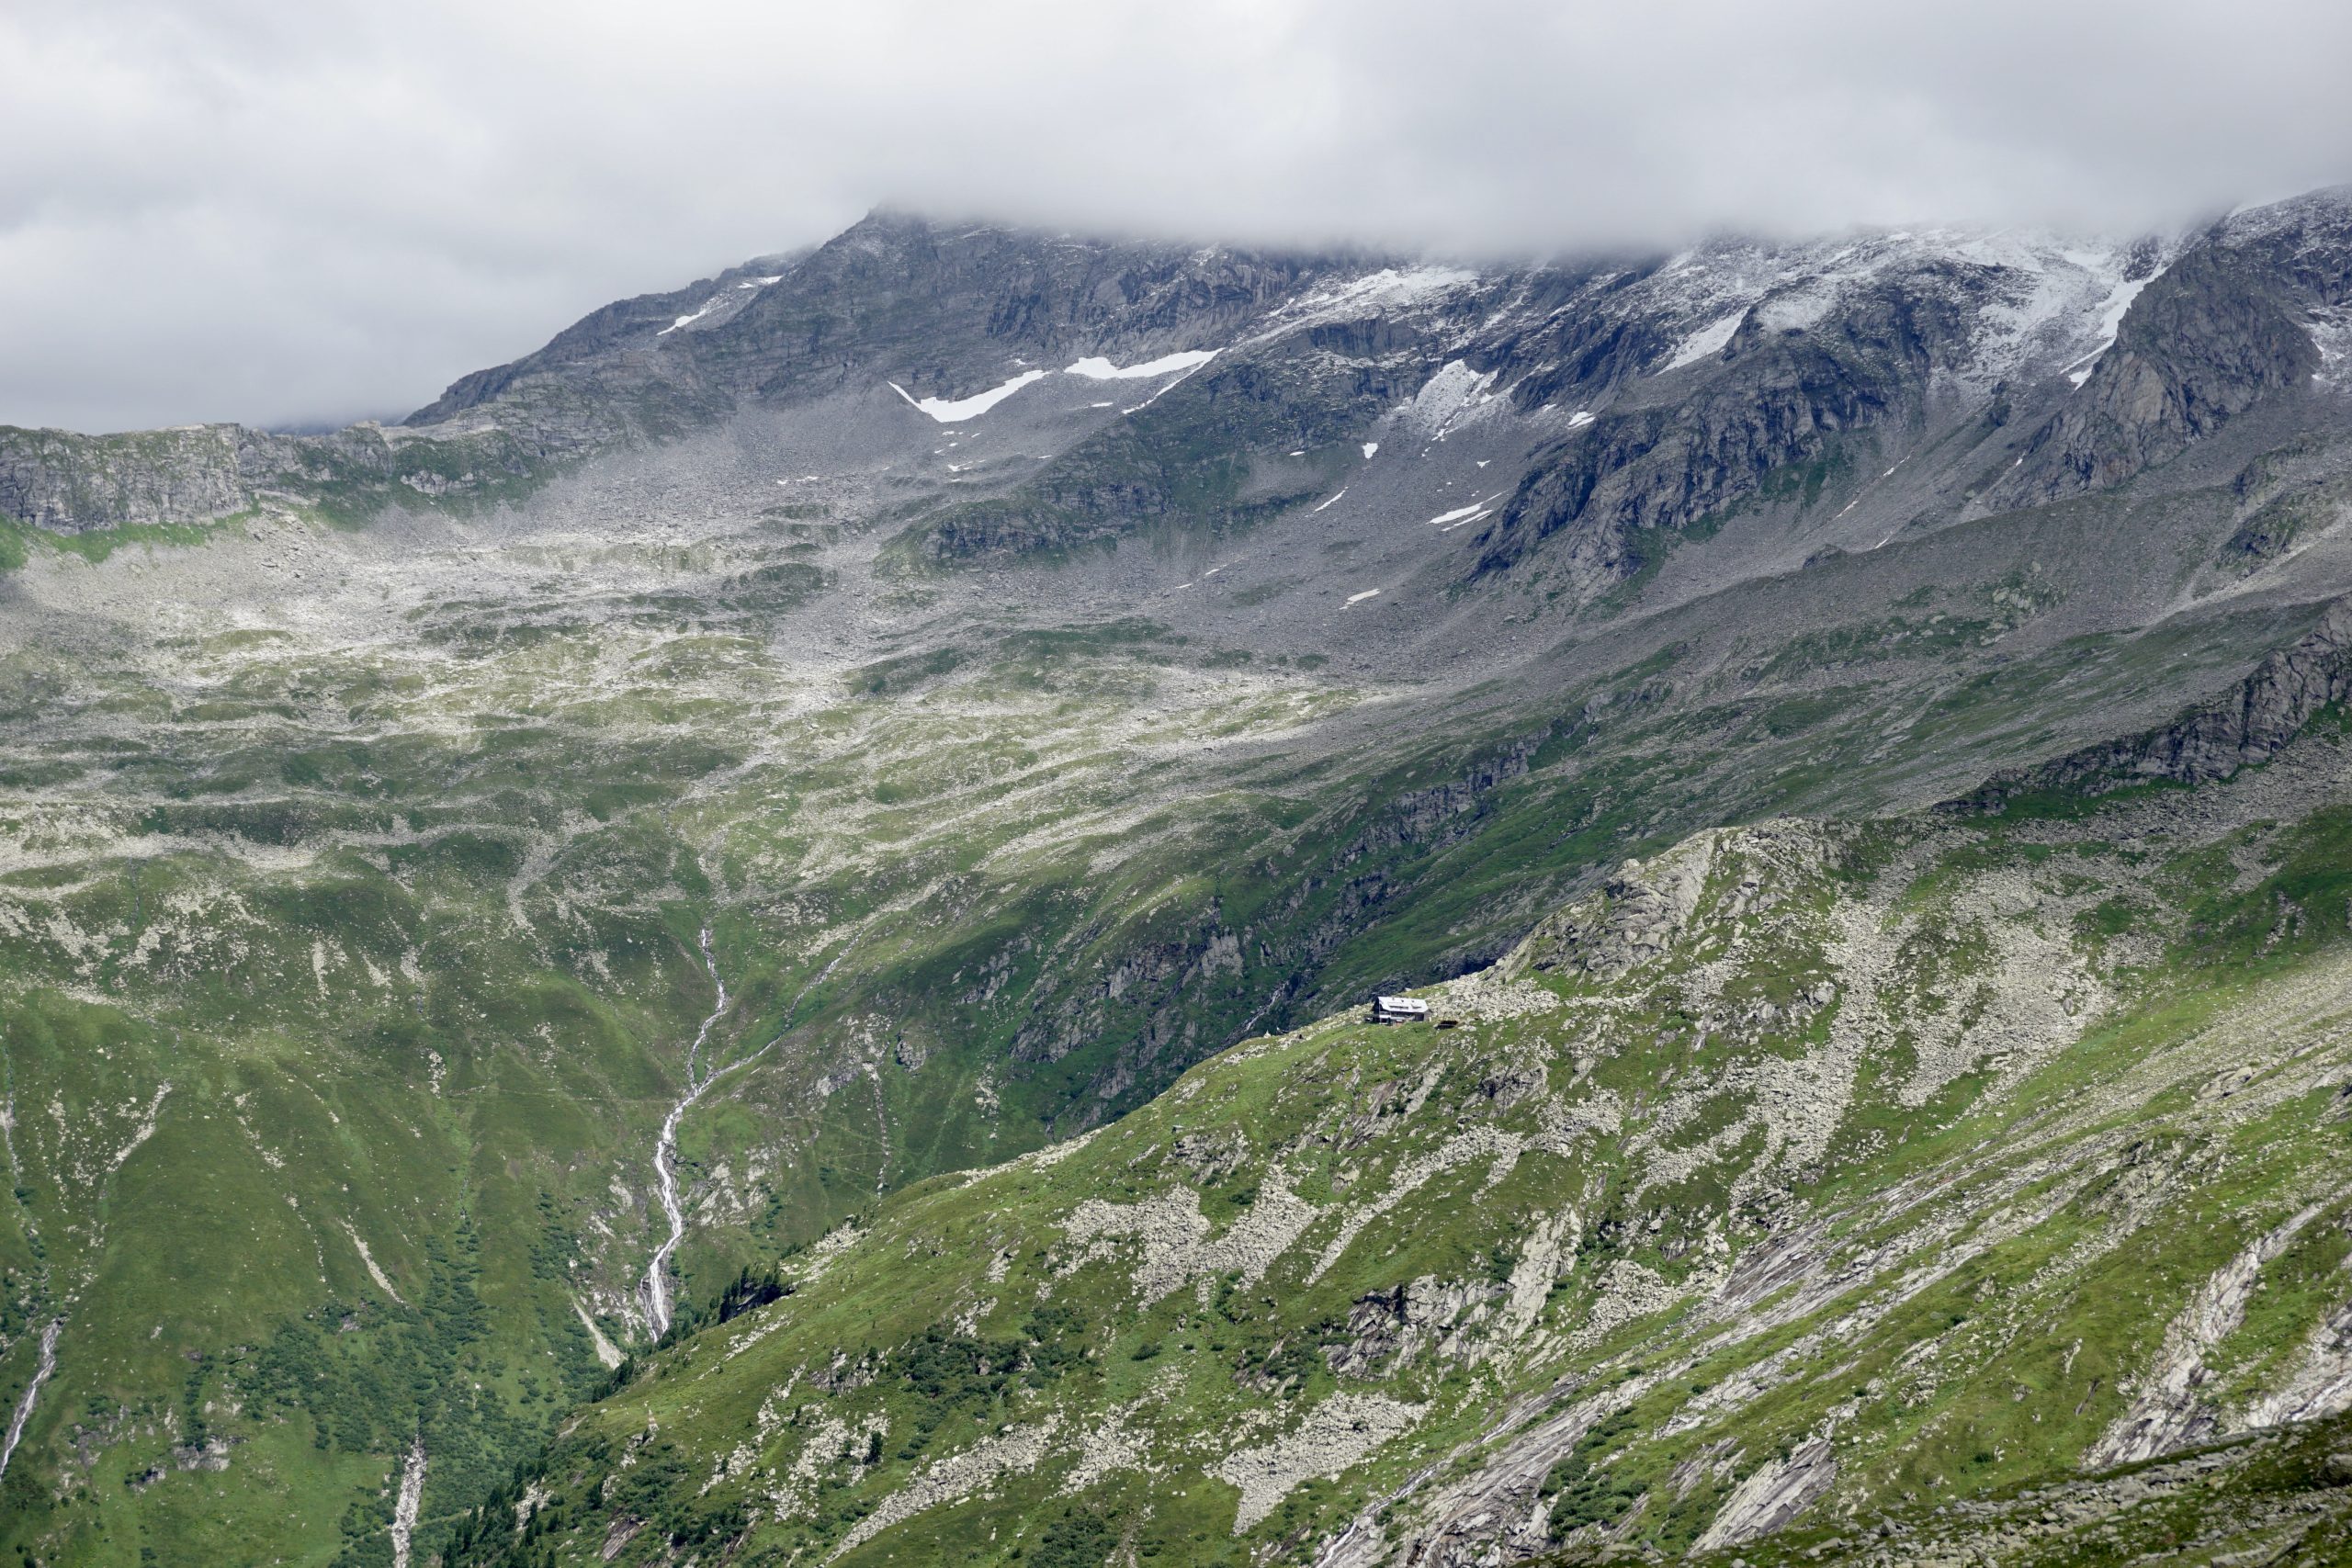
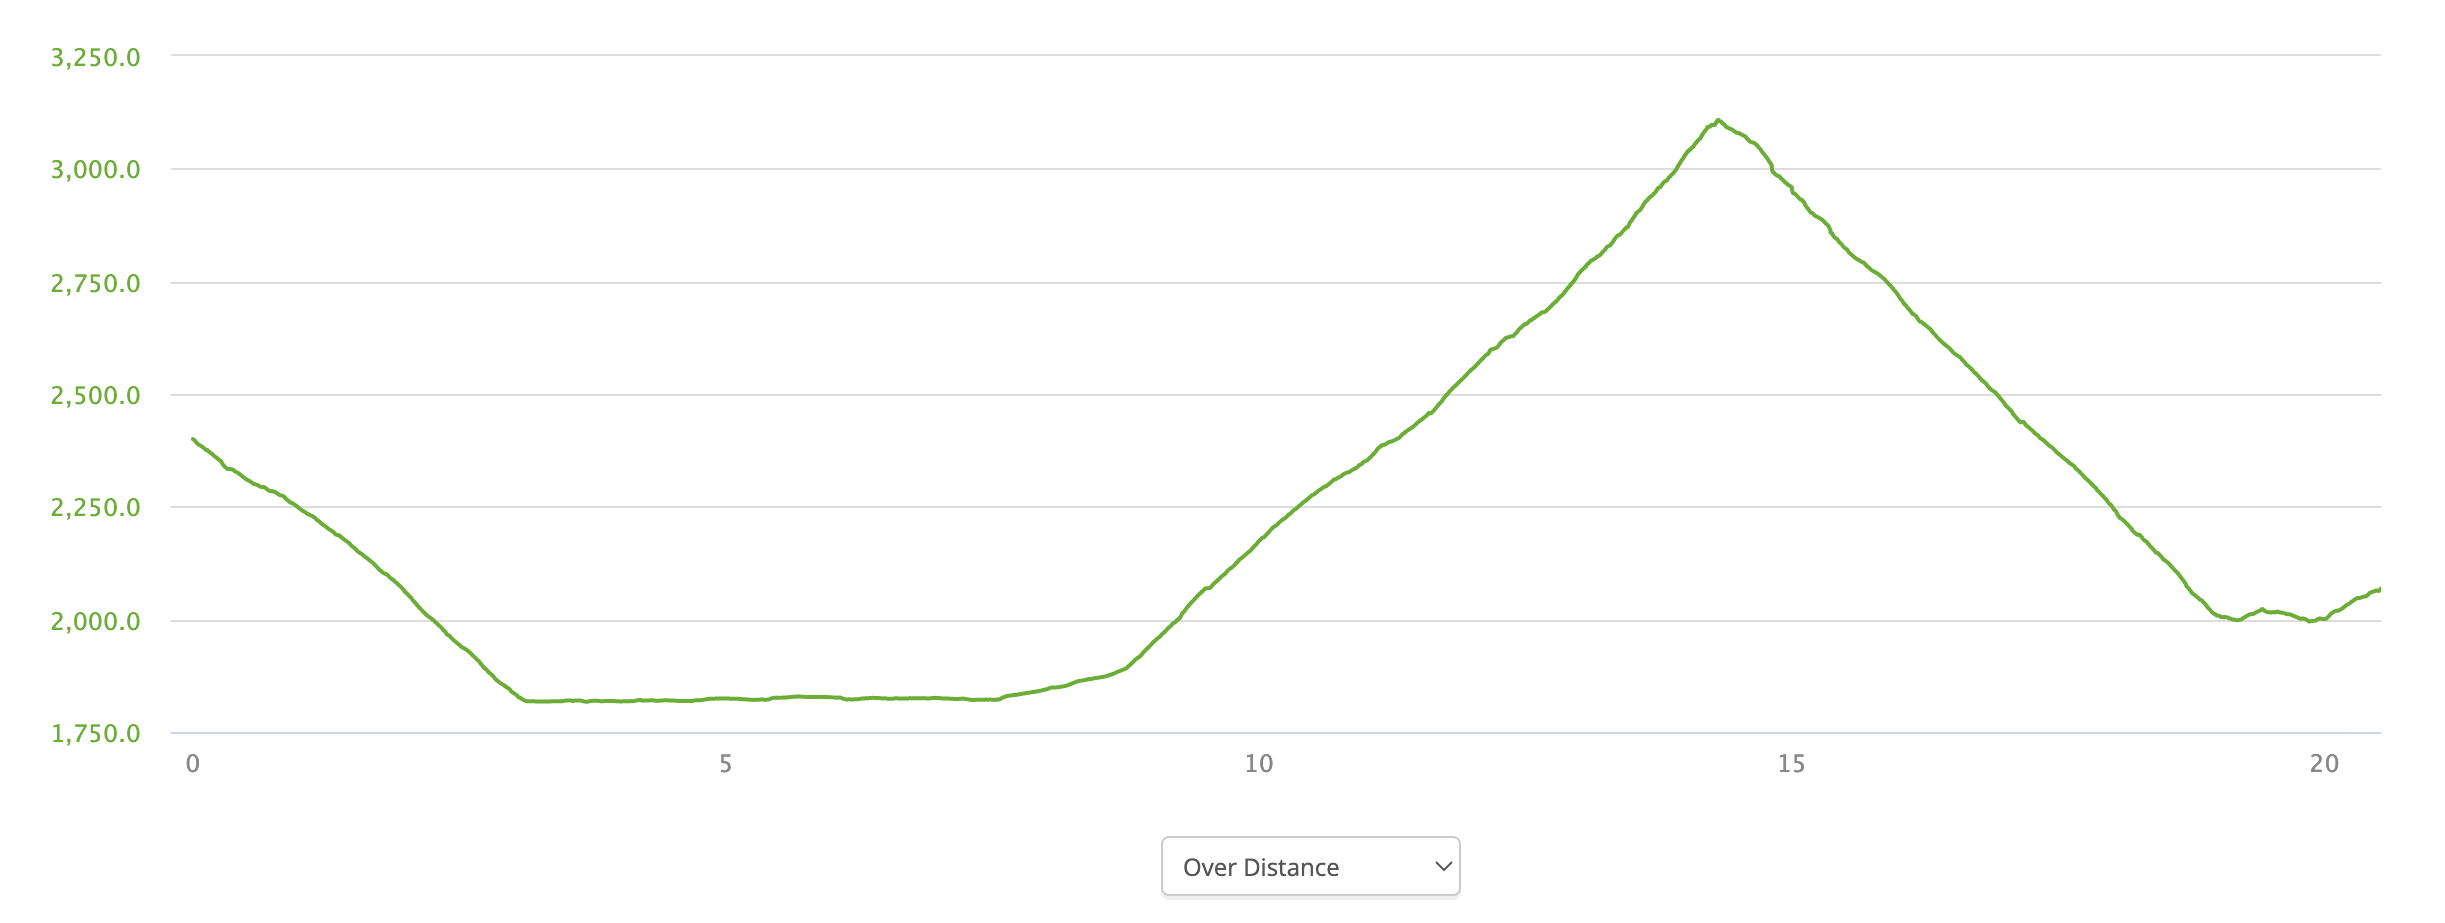
How long does it take: The whole trail takes roughly a week to hike. Since it’s not allowed to wild camp (and the terrain is not tent-friendly anyway), there is little flexibility in terms of shortening duration since you’ll be bounded by the huts. You can combine some stages, which will lead to long and challenging days. However, after hiking the majority of the trail, I’d say, you really need the time given the difficulty of the trail. It is possible to hike a section of the trail and descend to the valley from almost all the huts along the trail.  

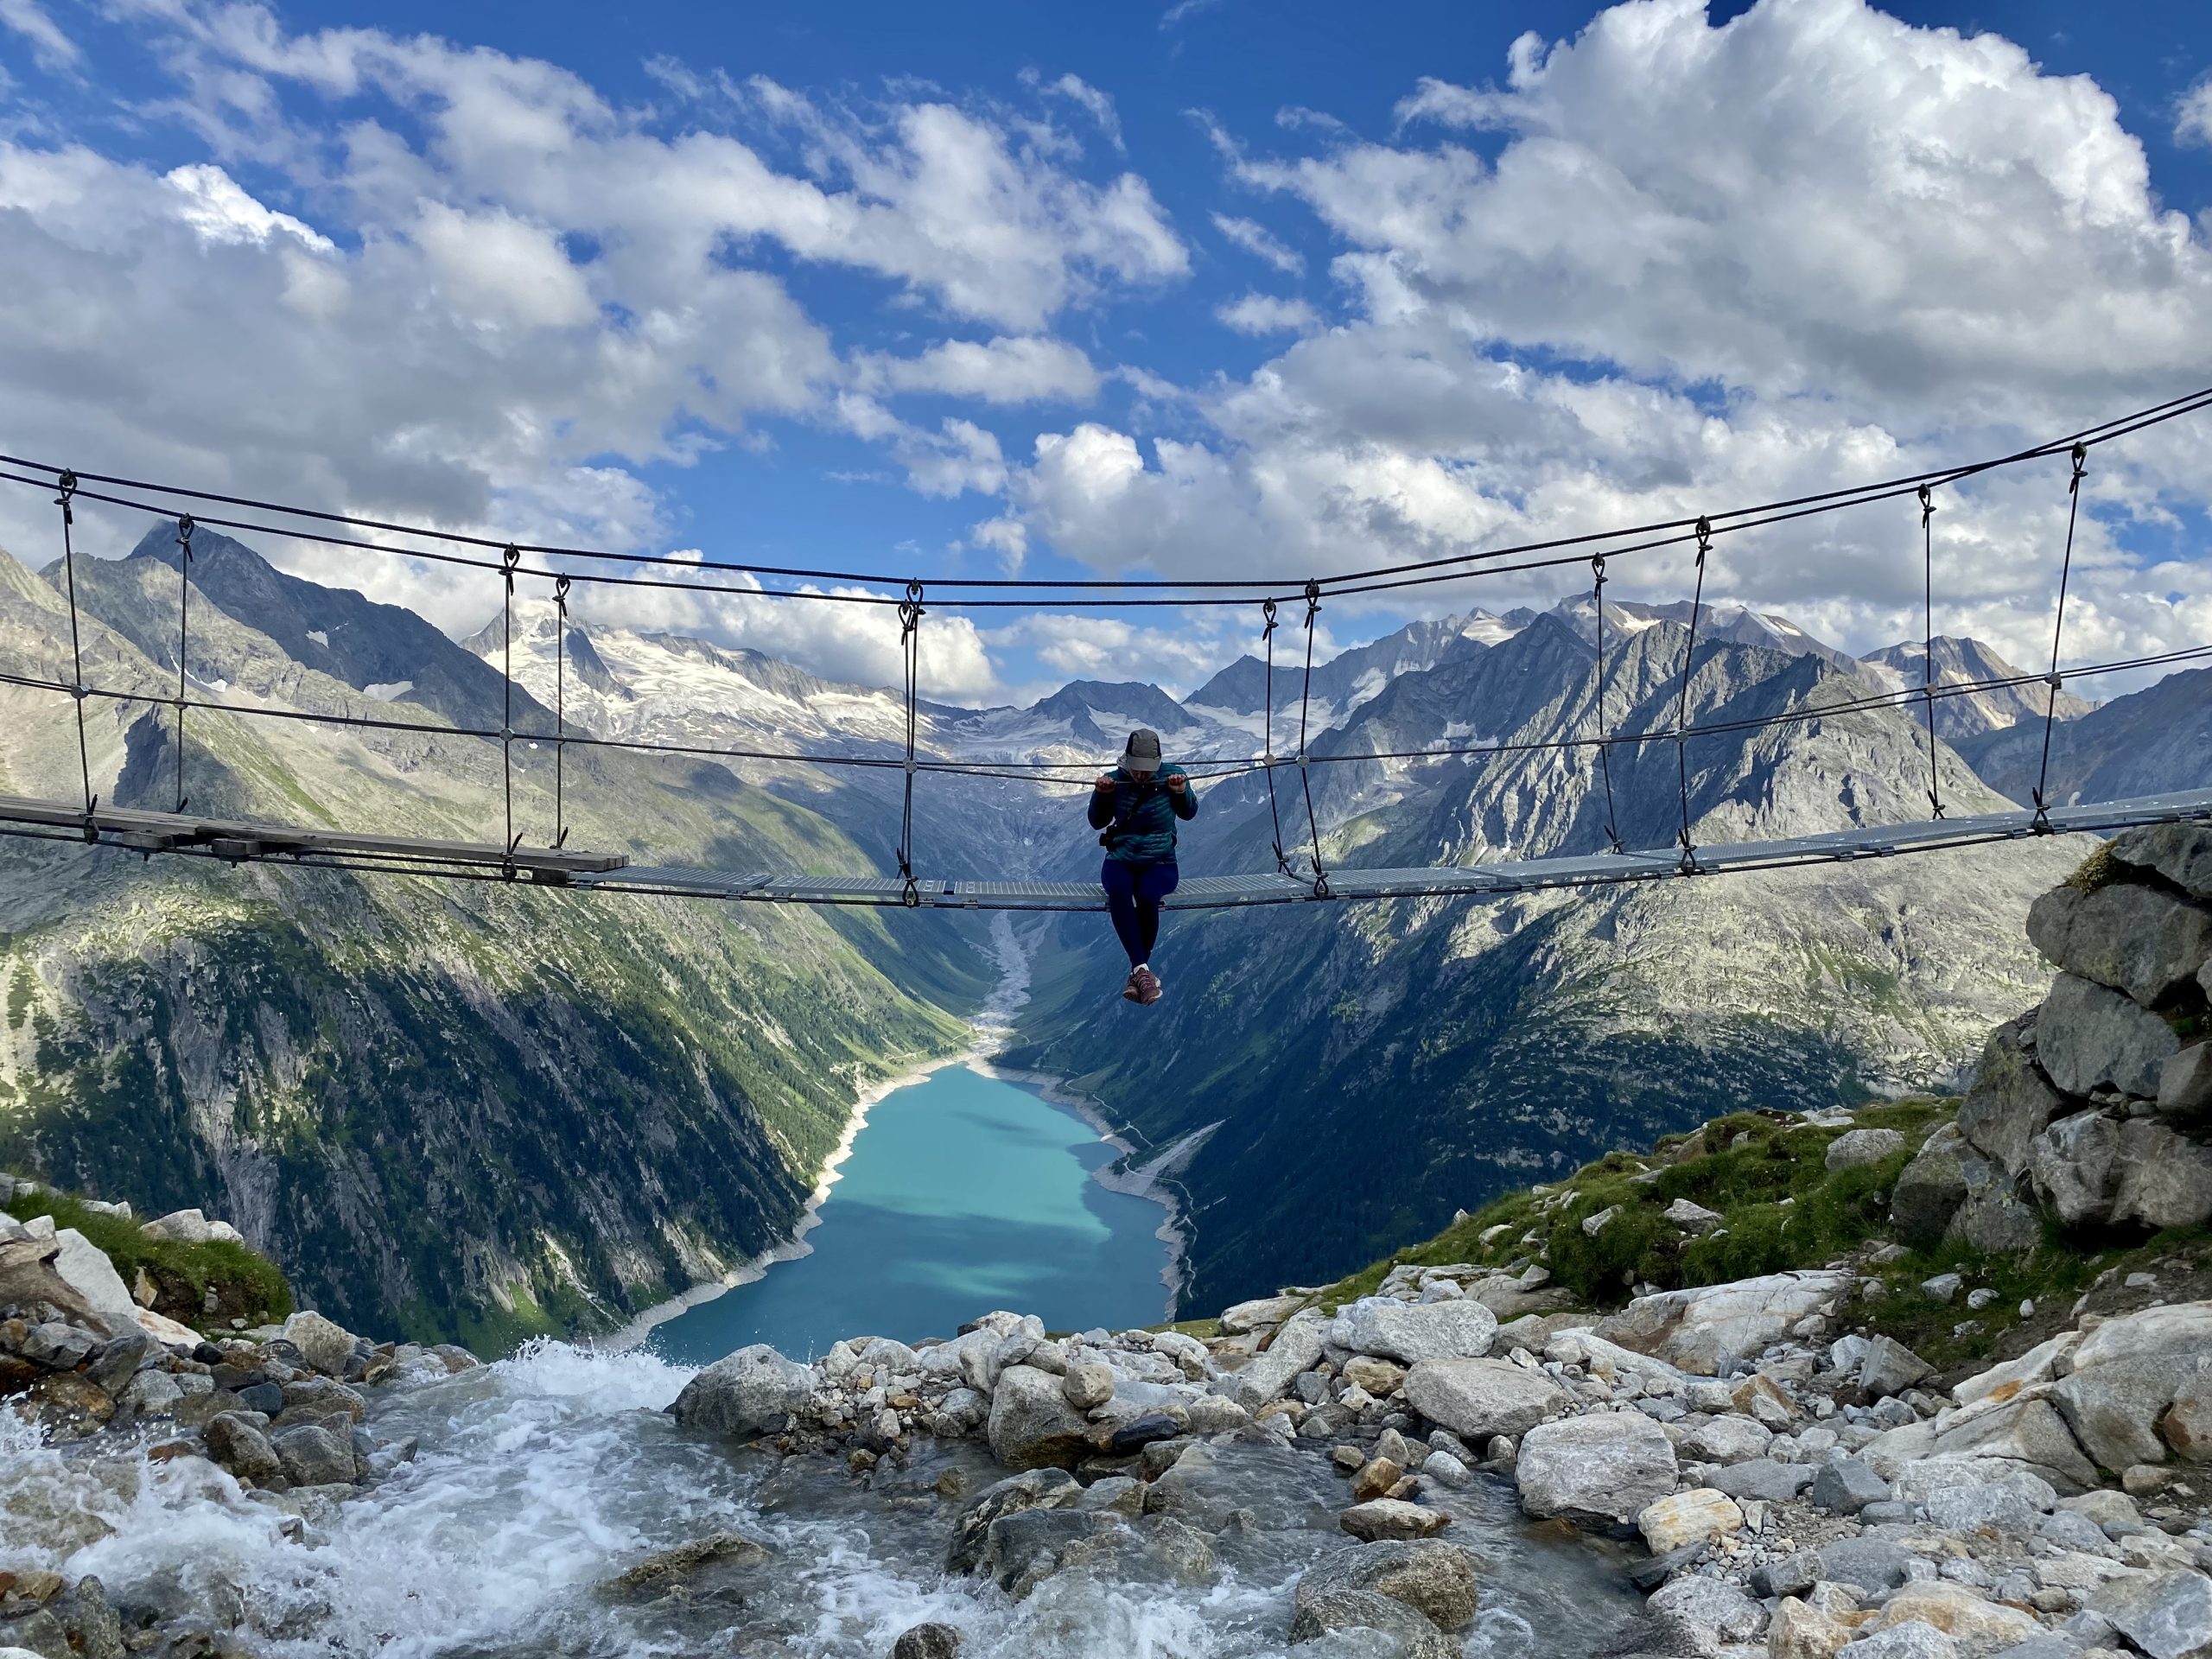
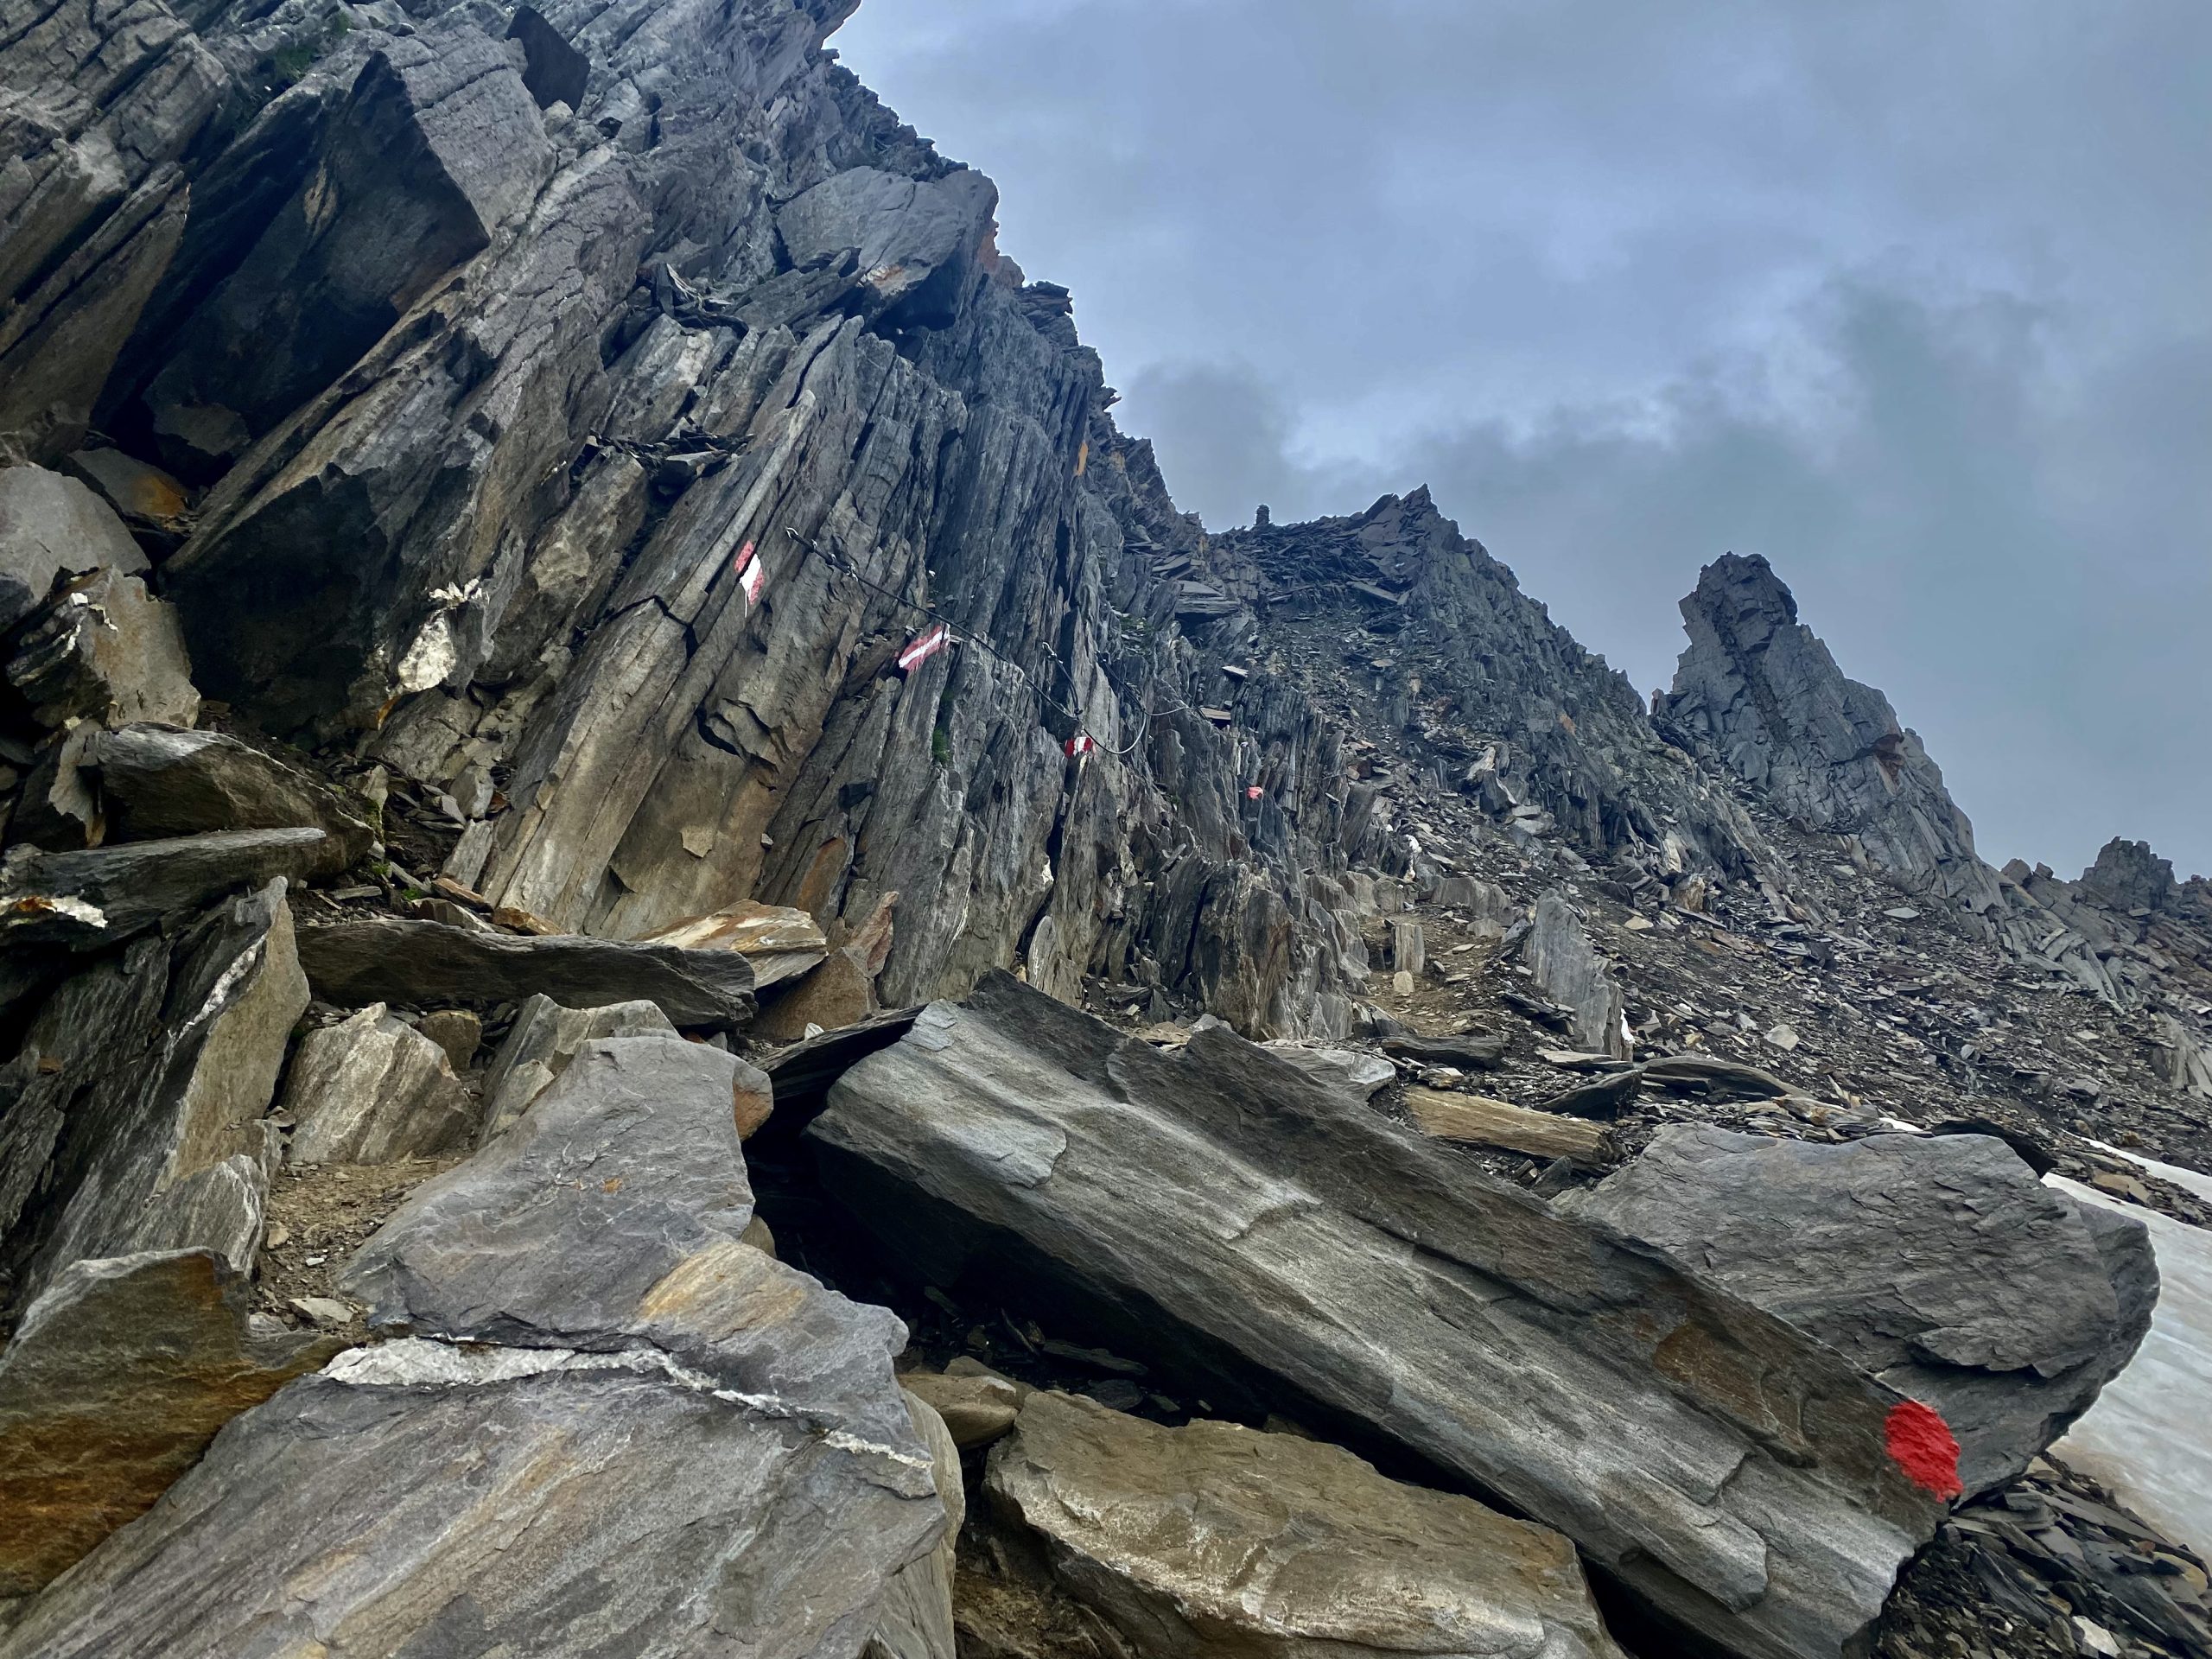
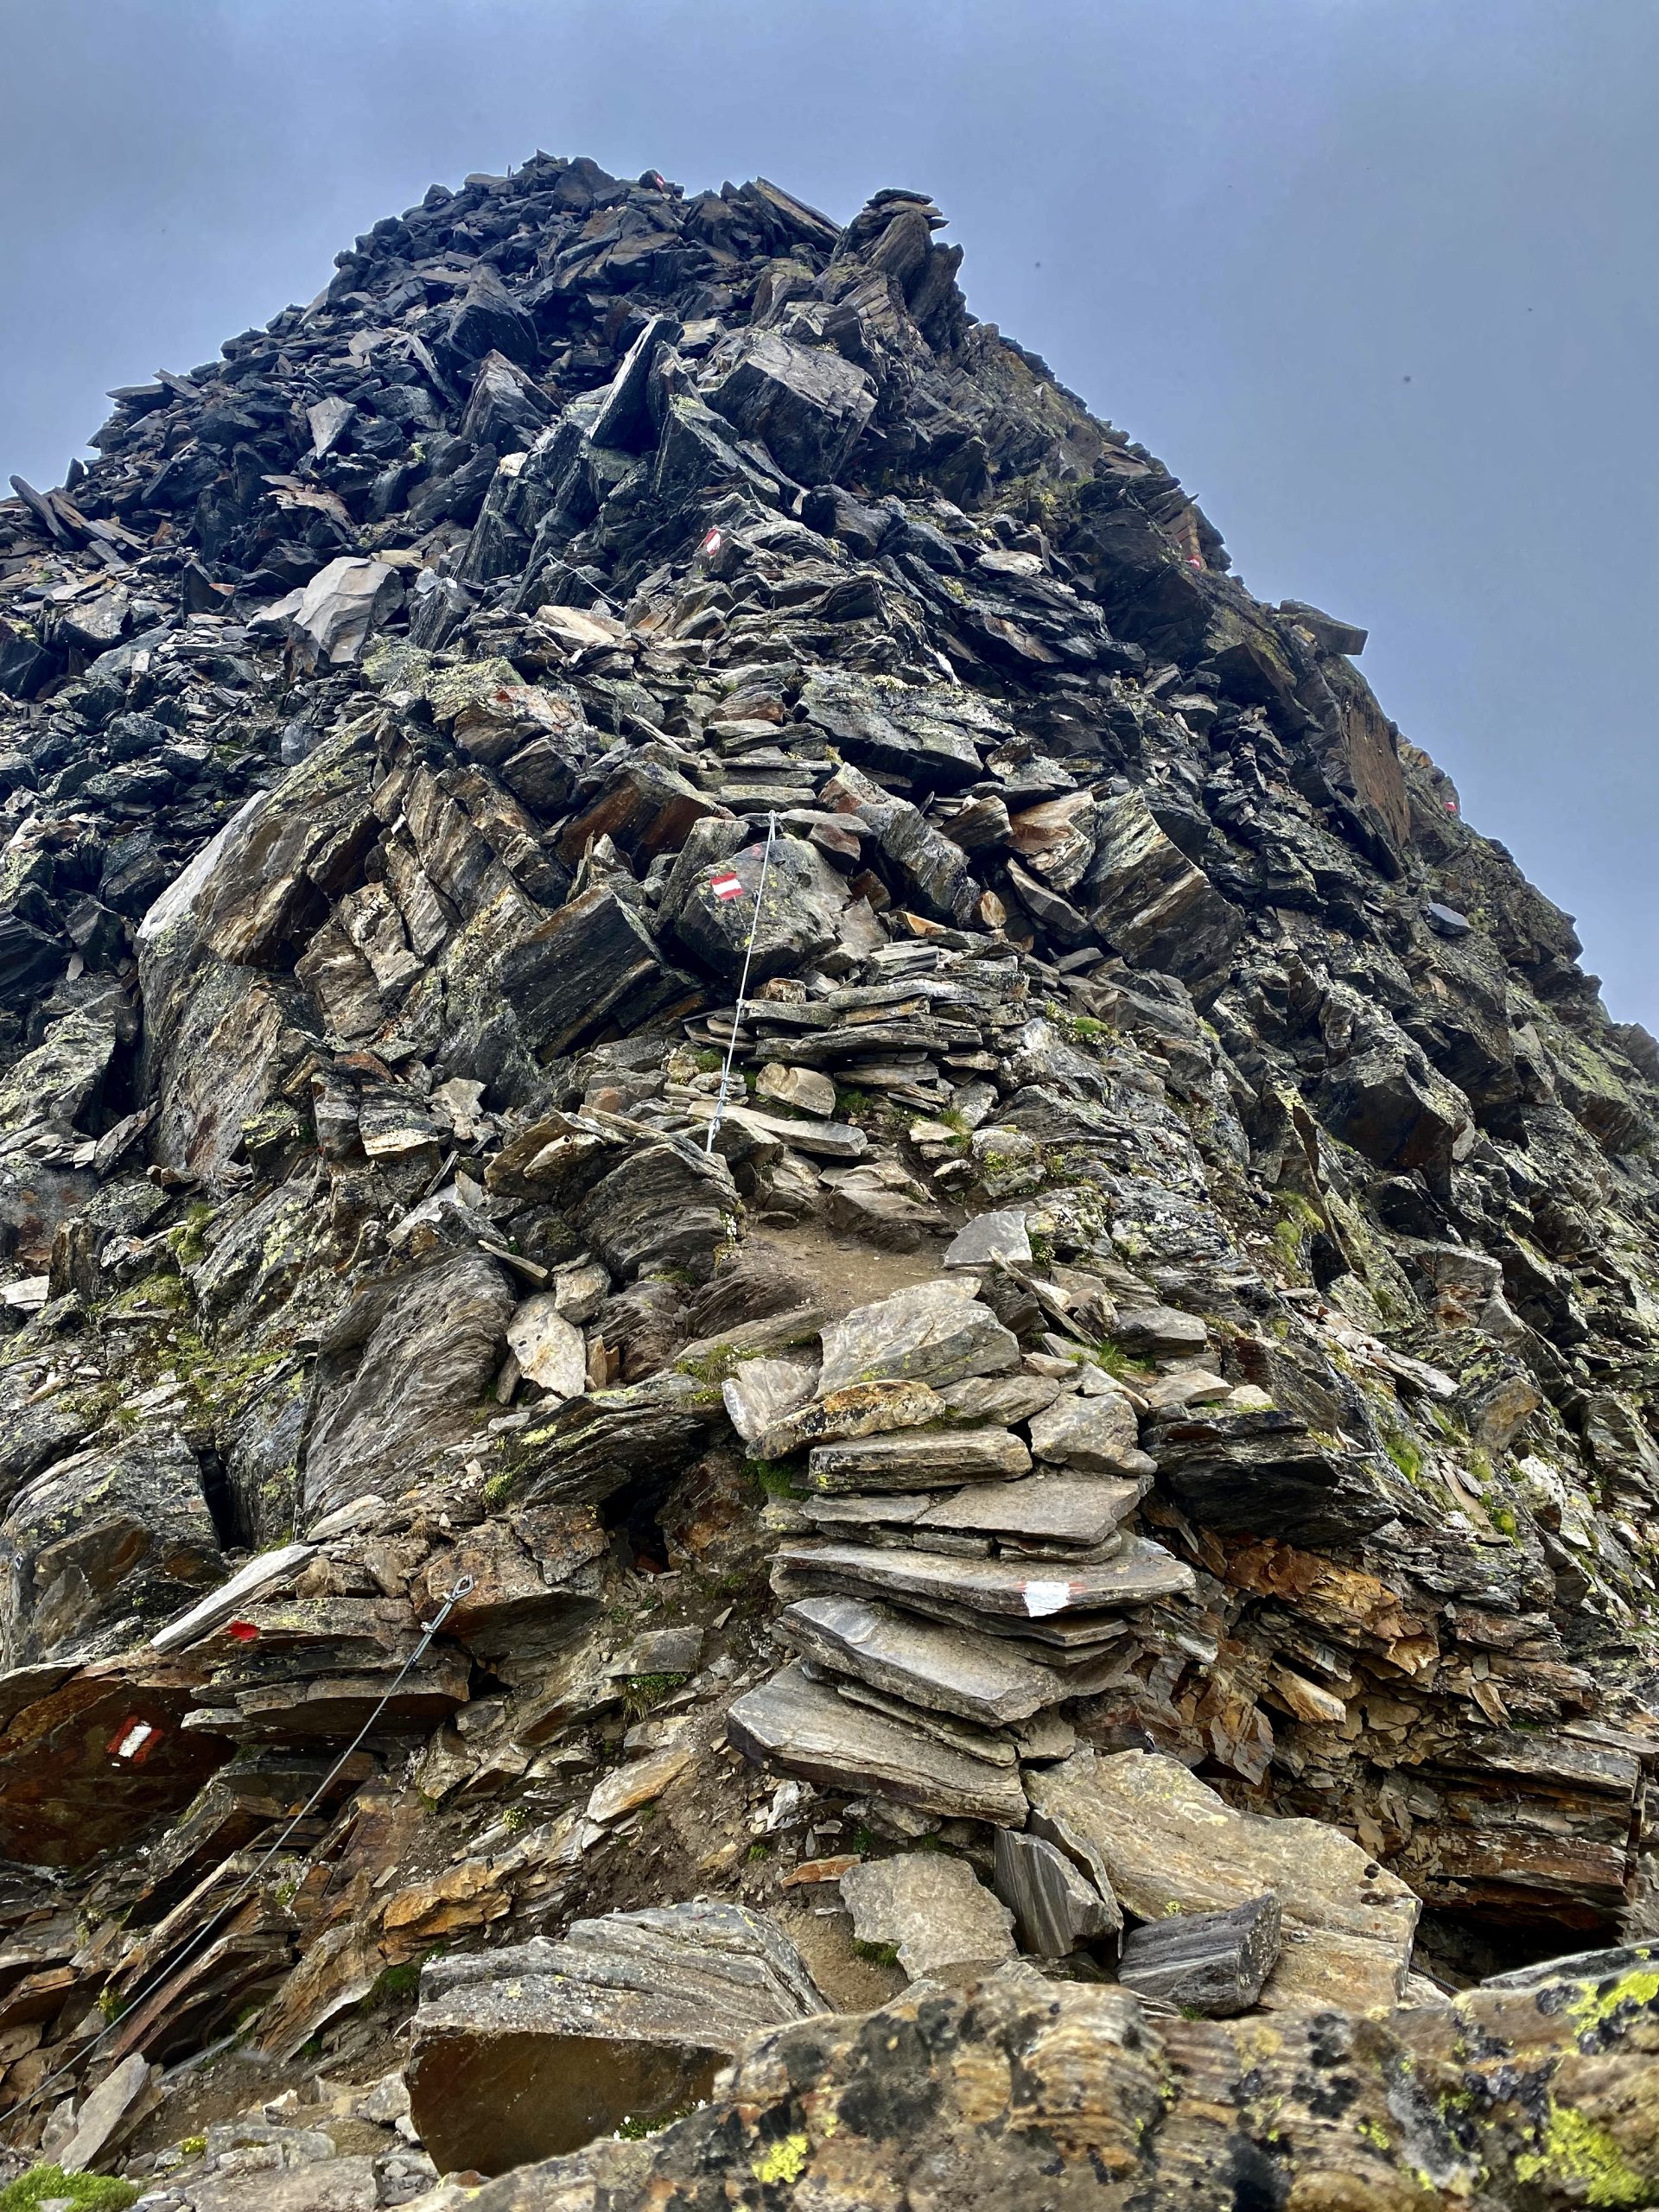
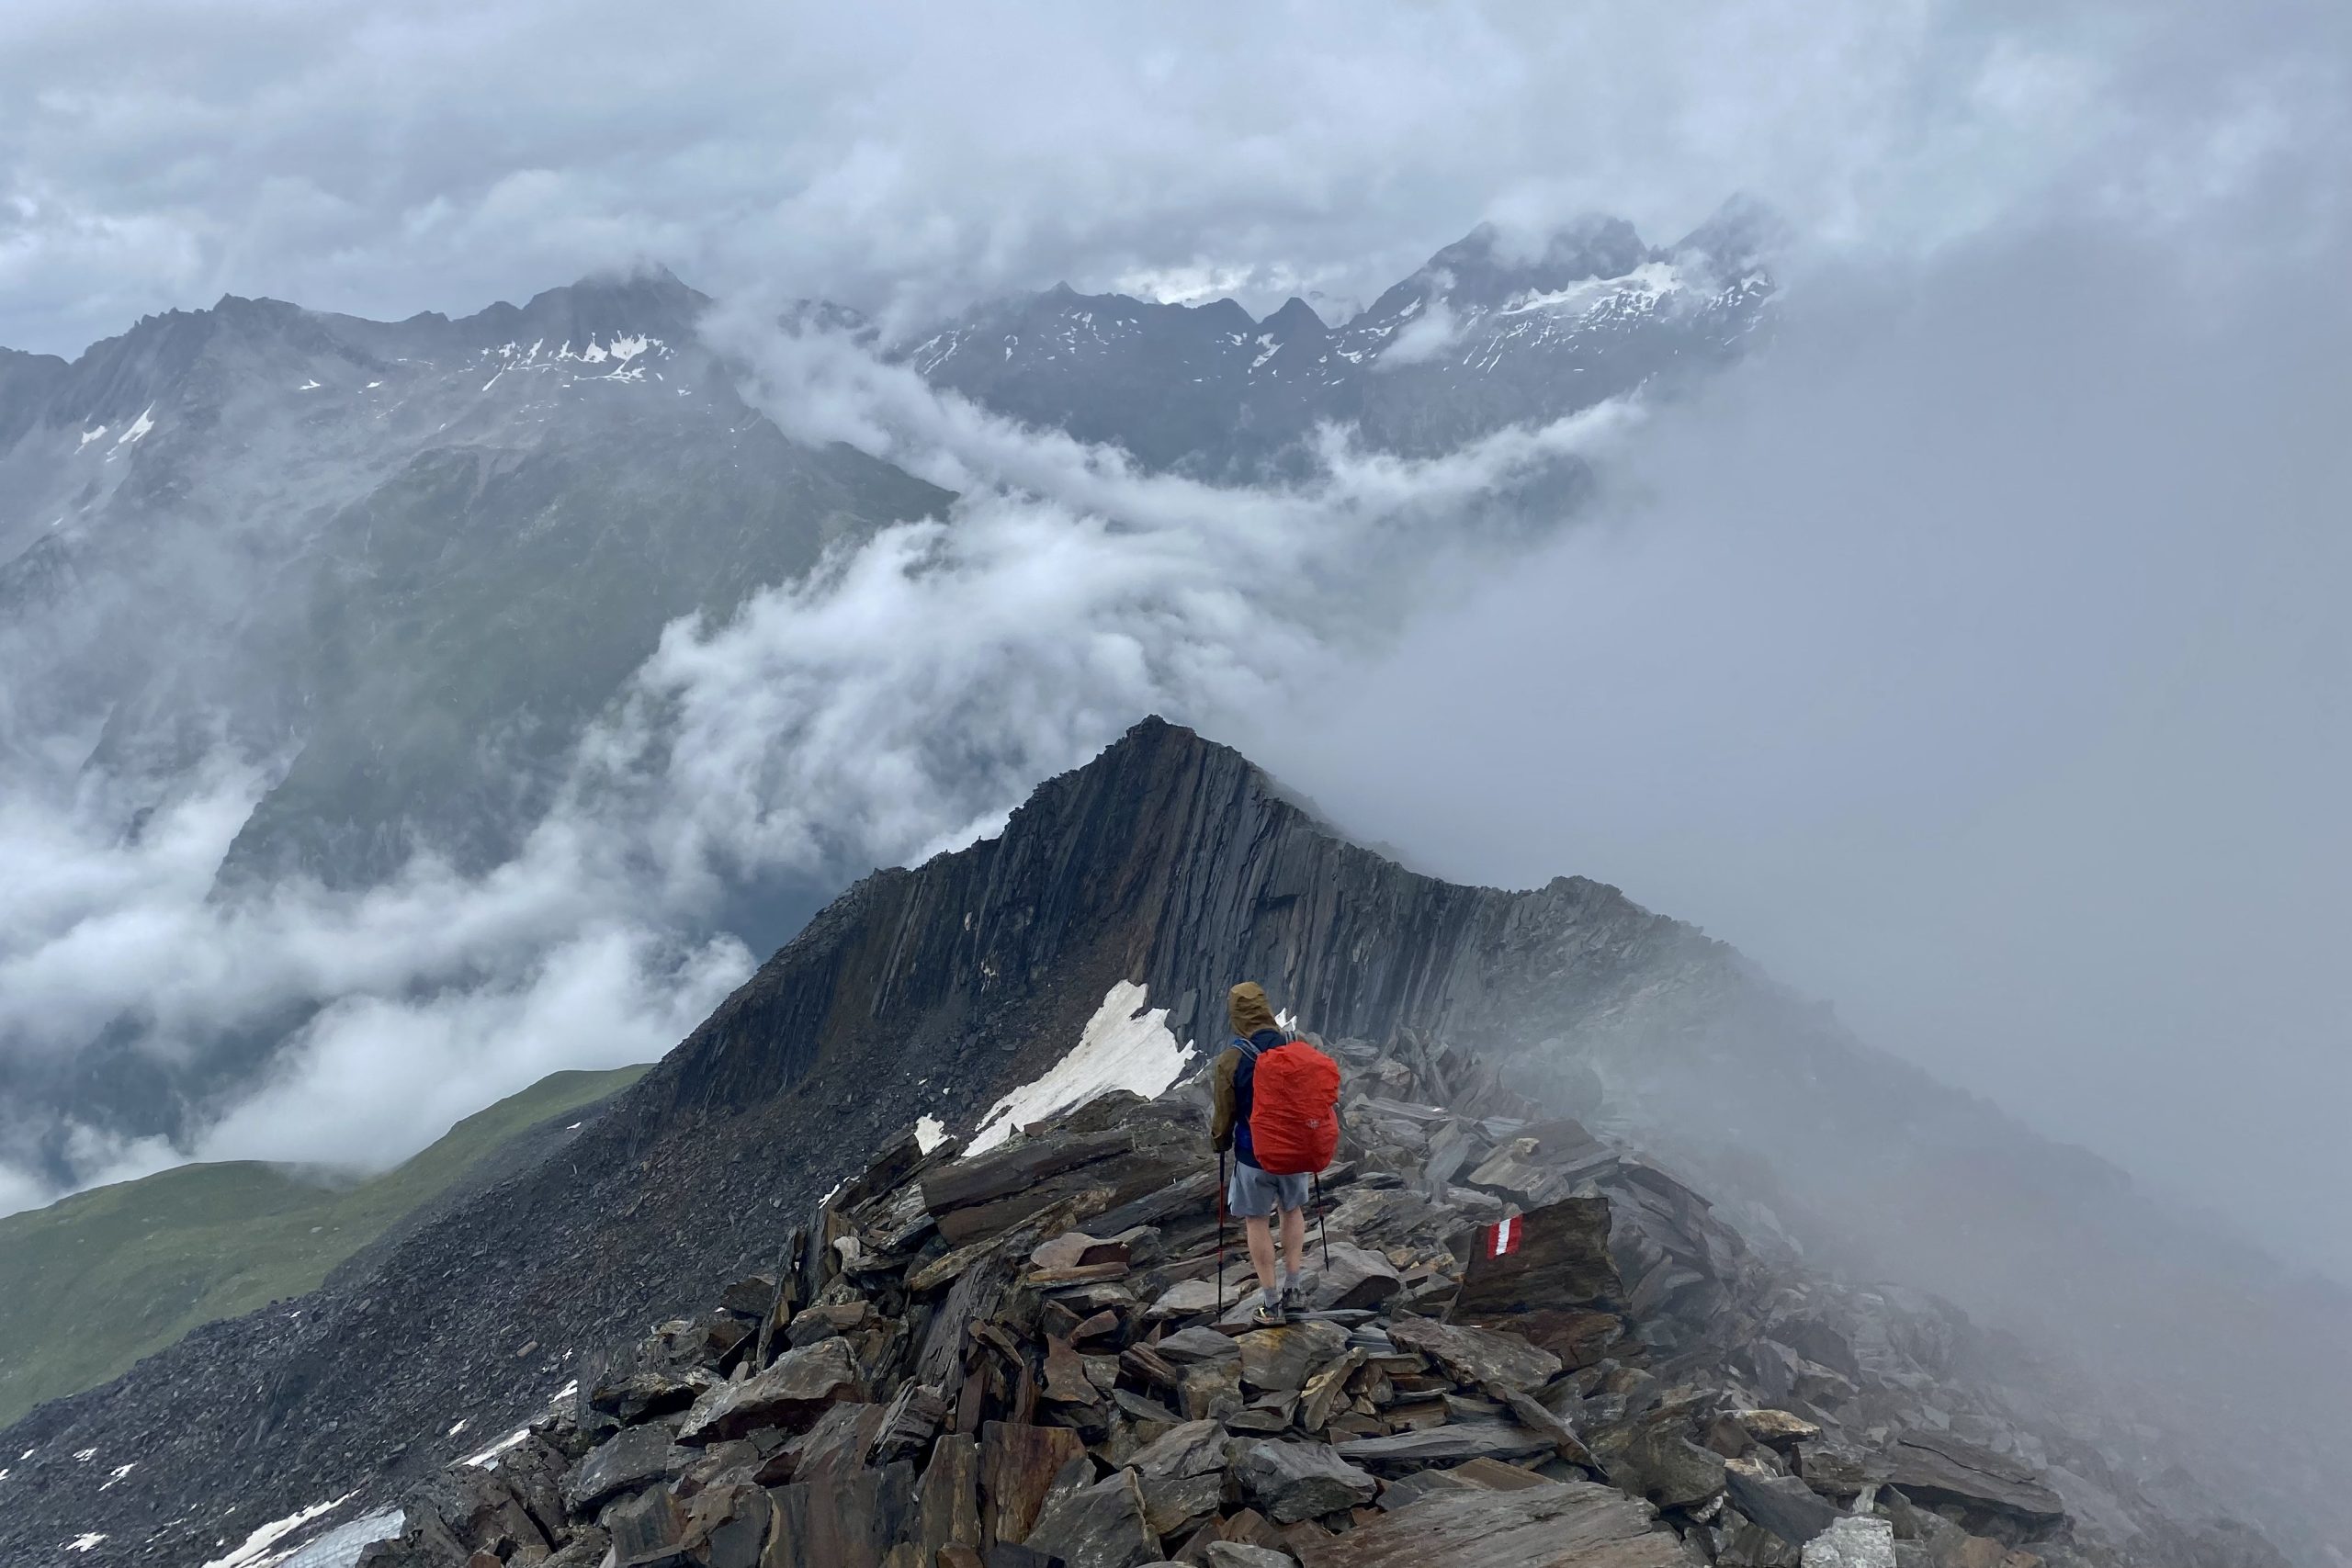
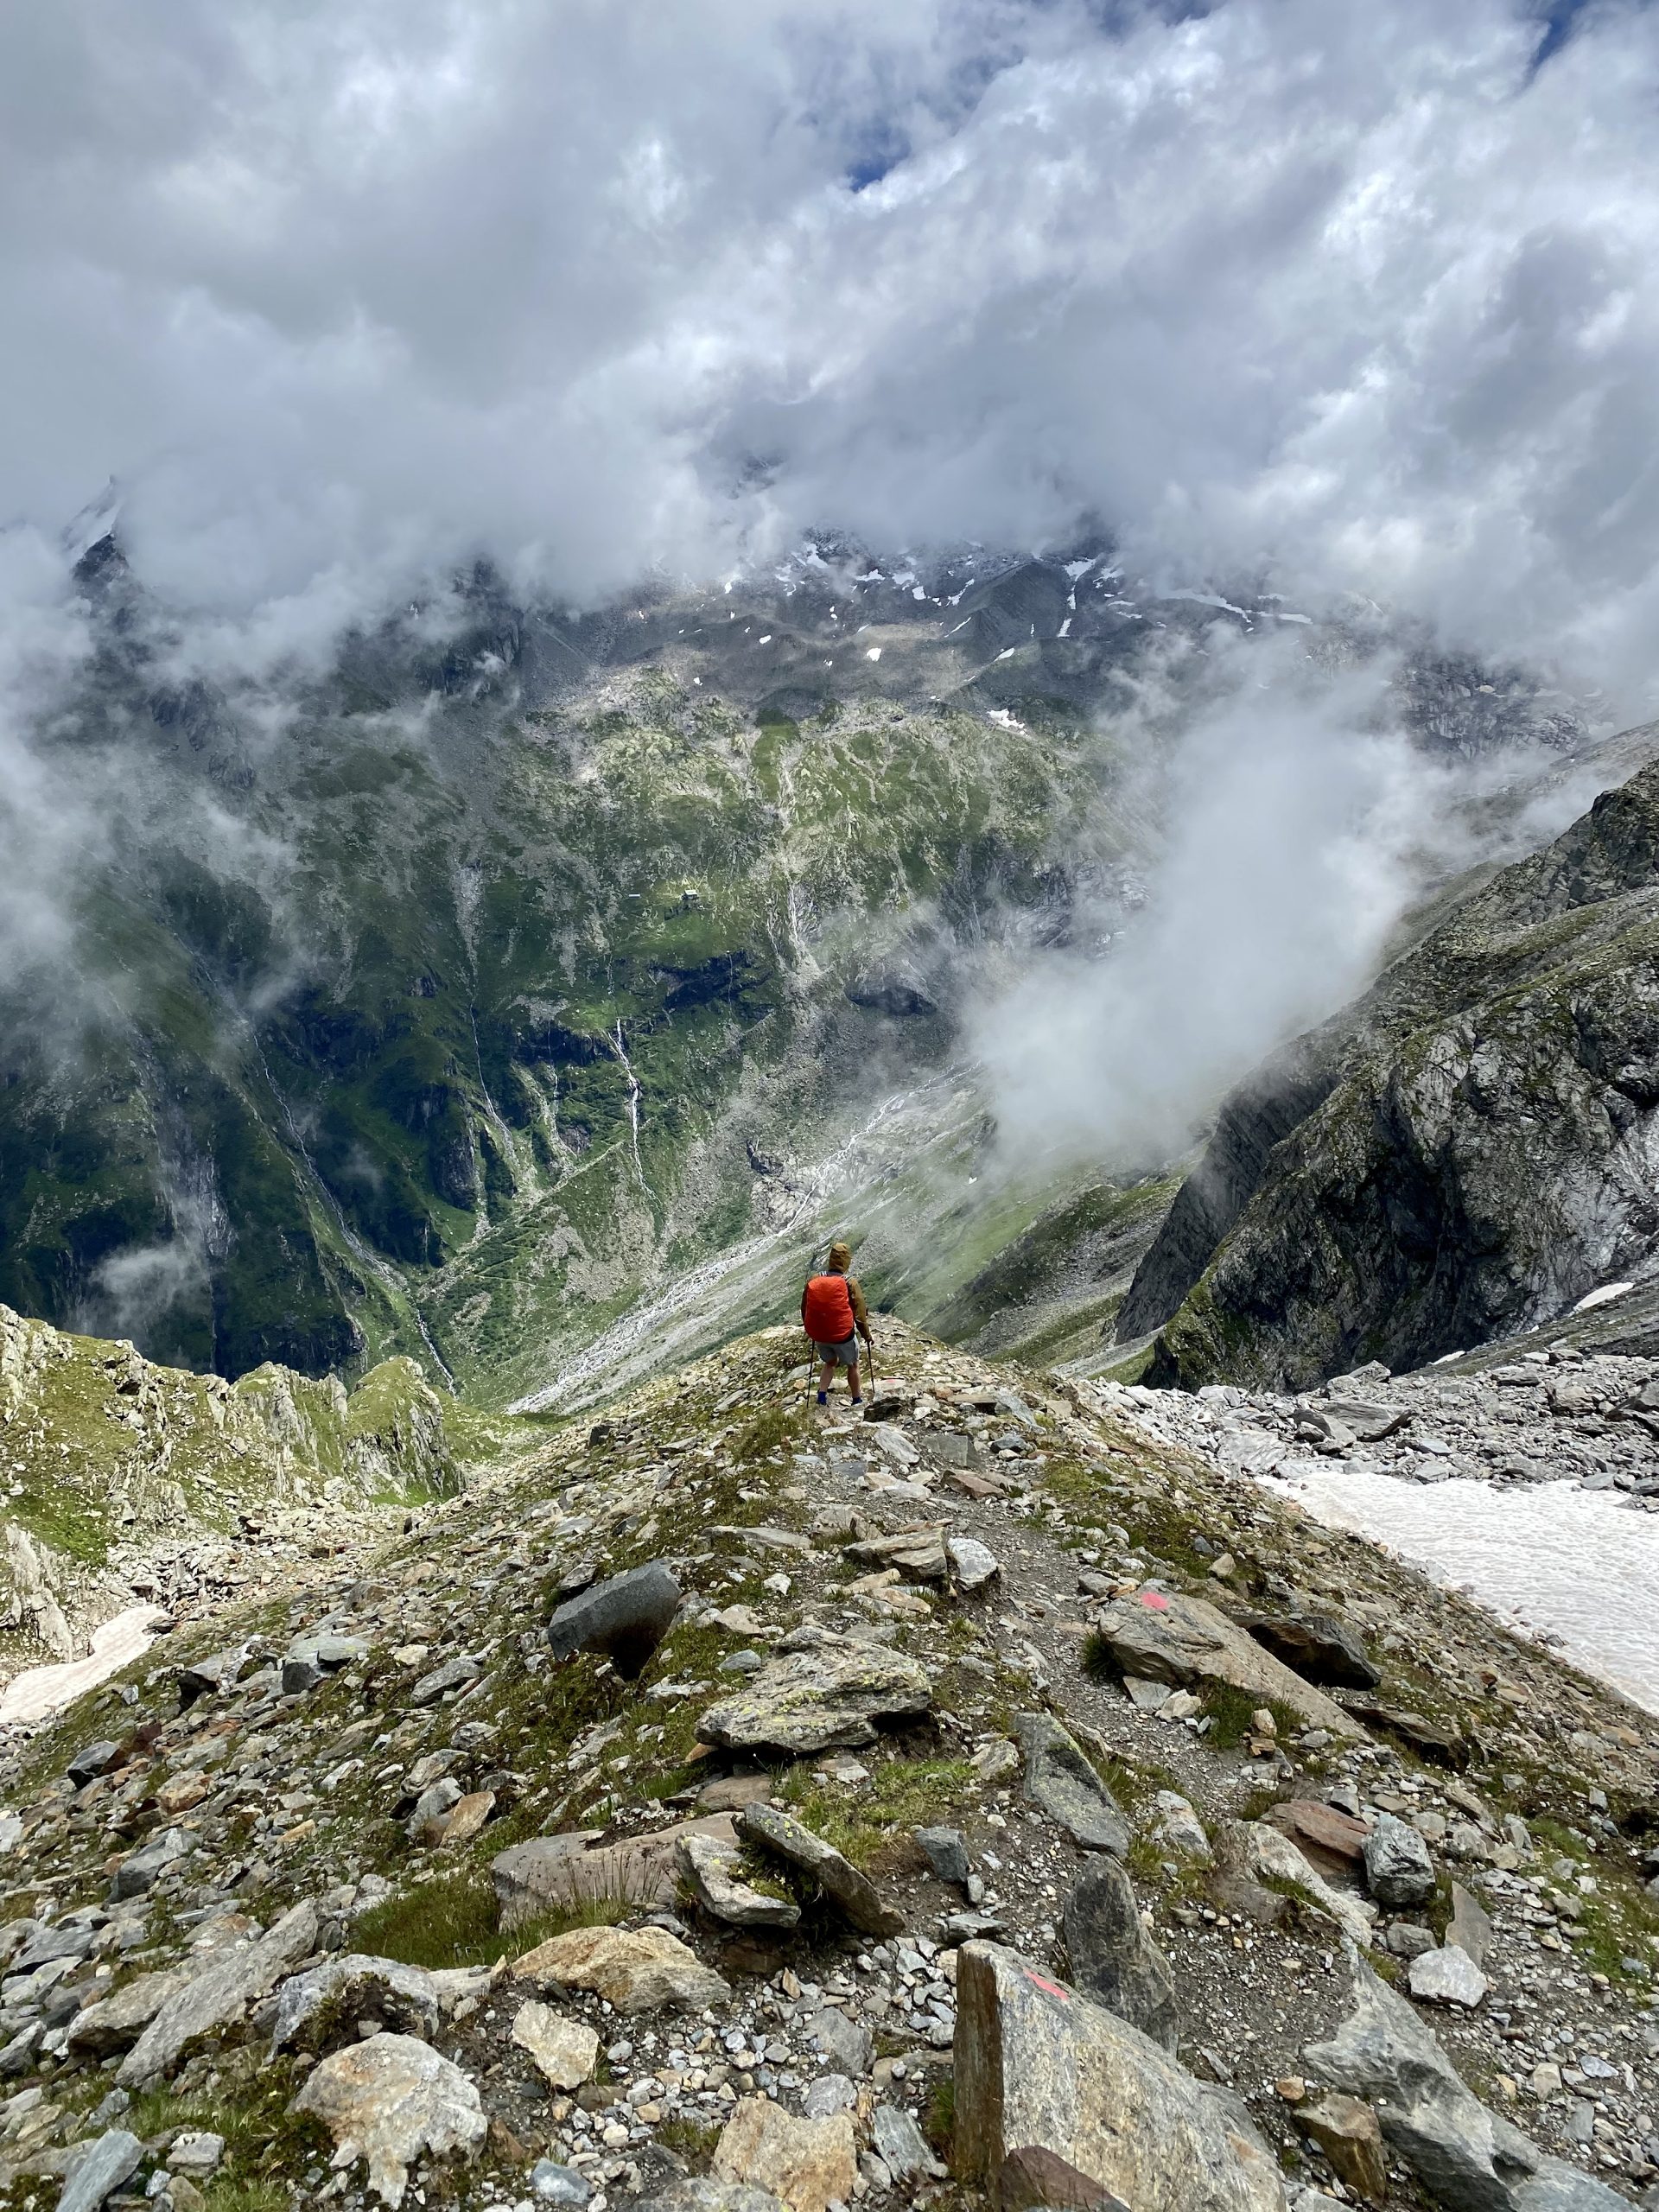
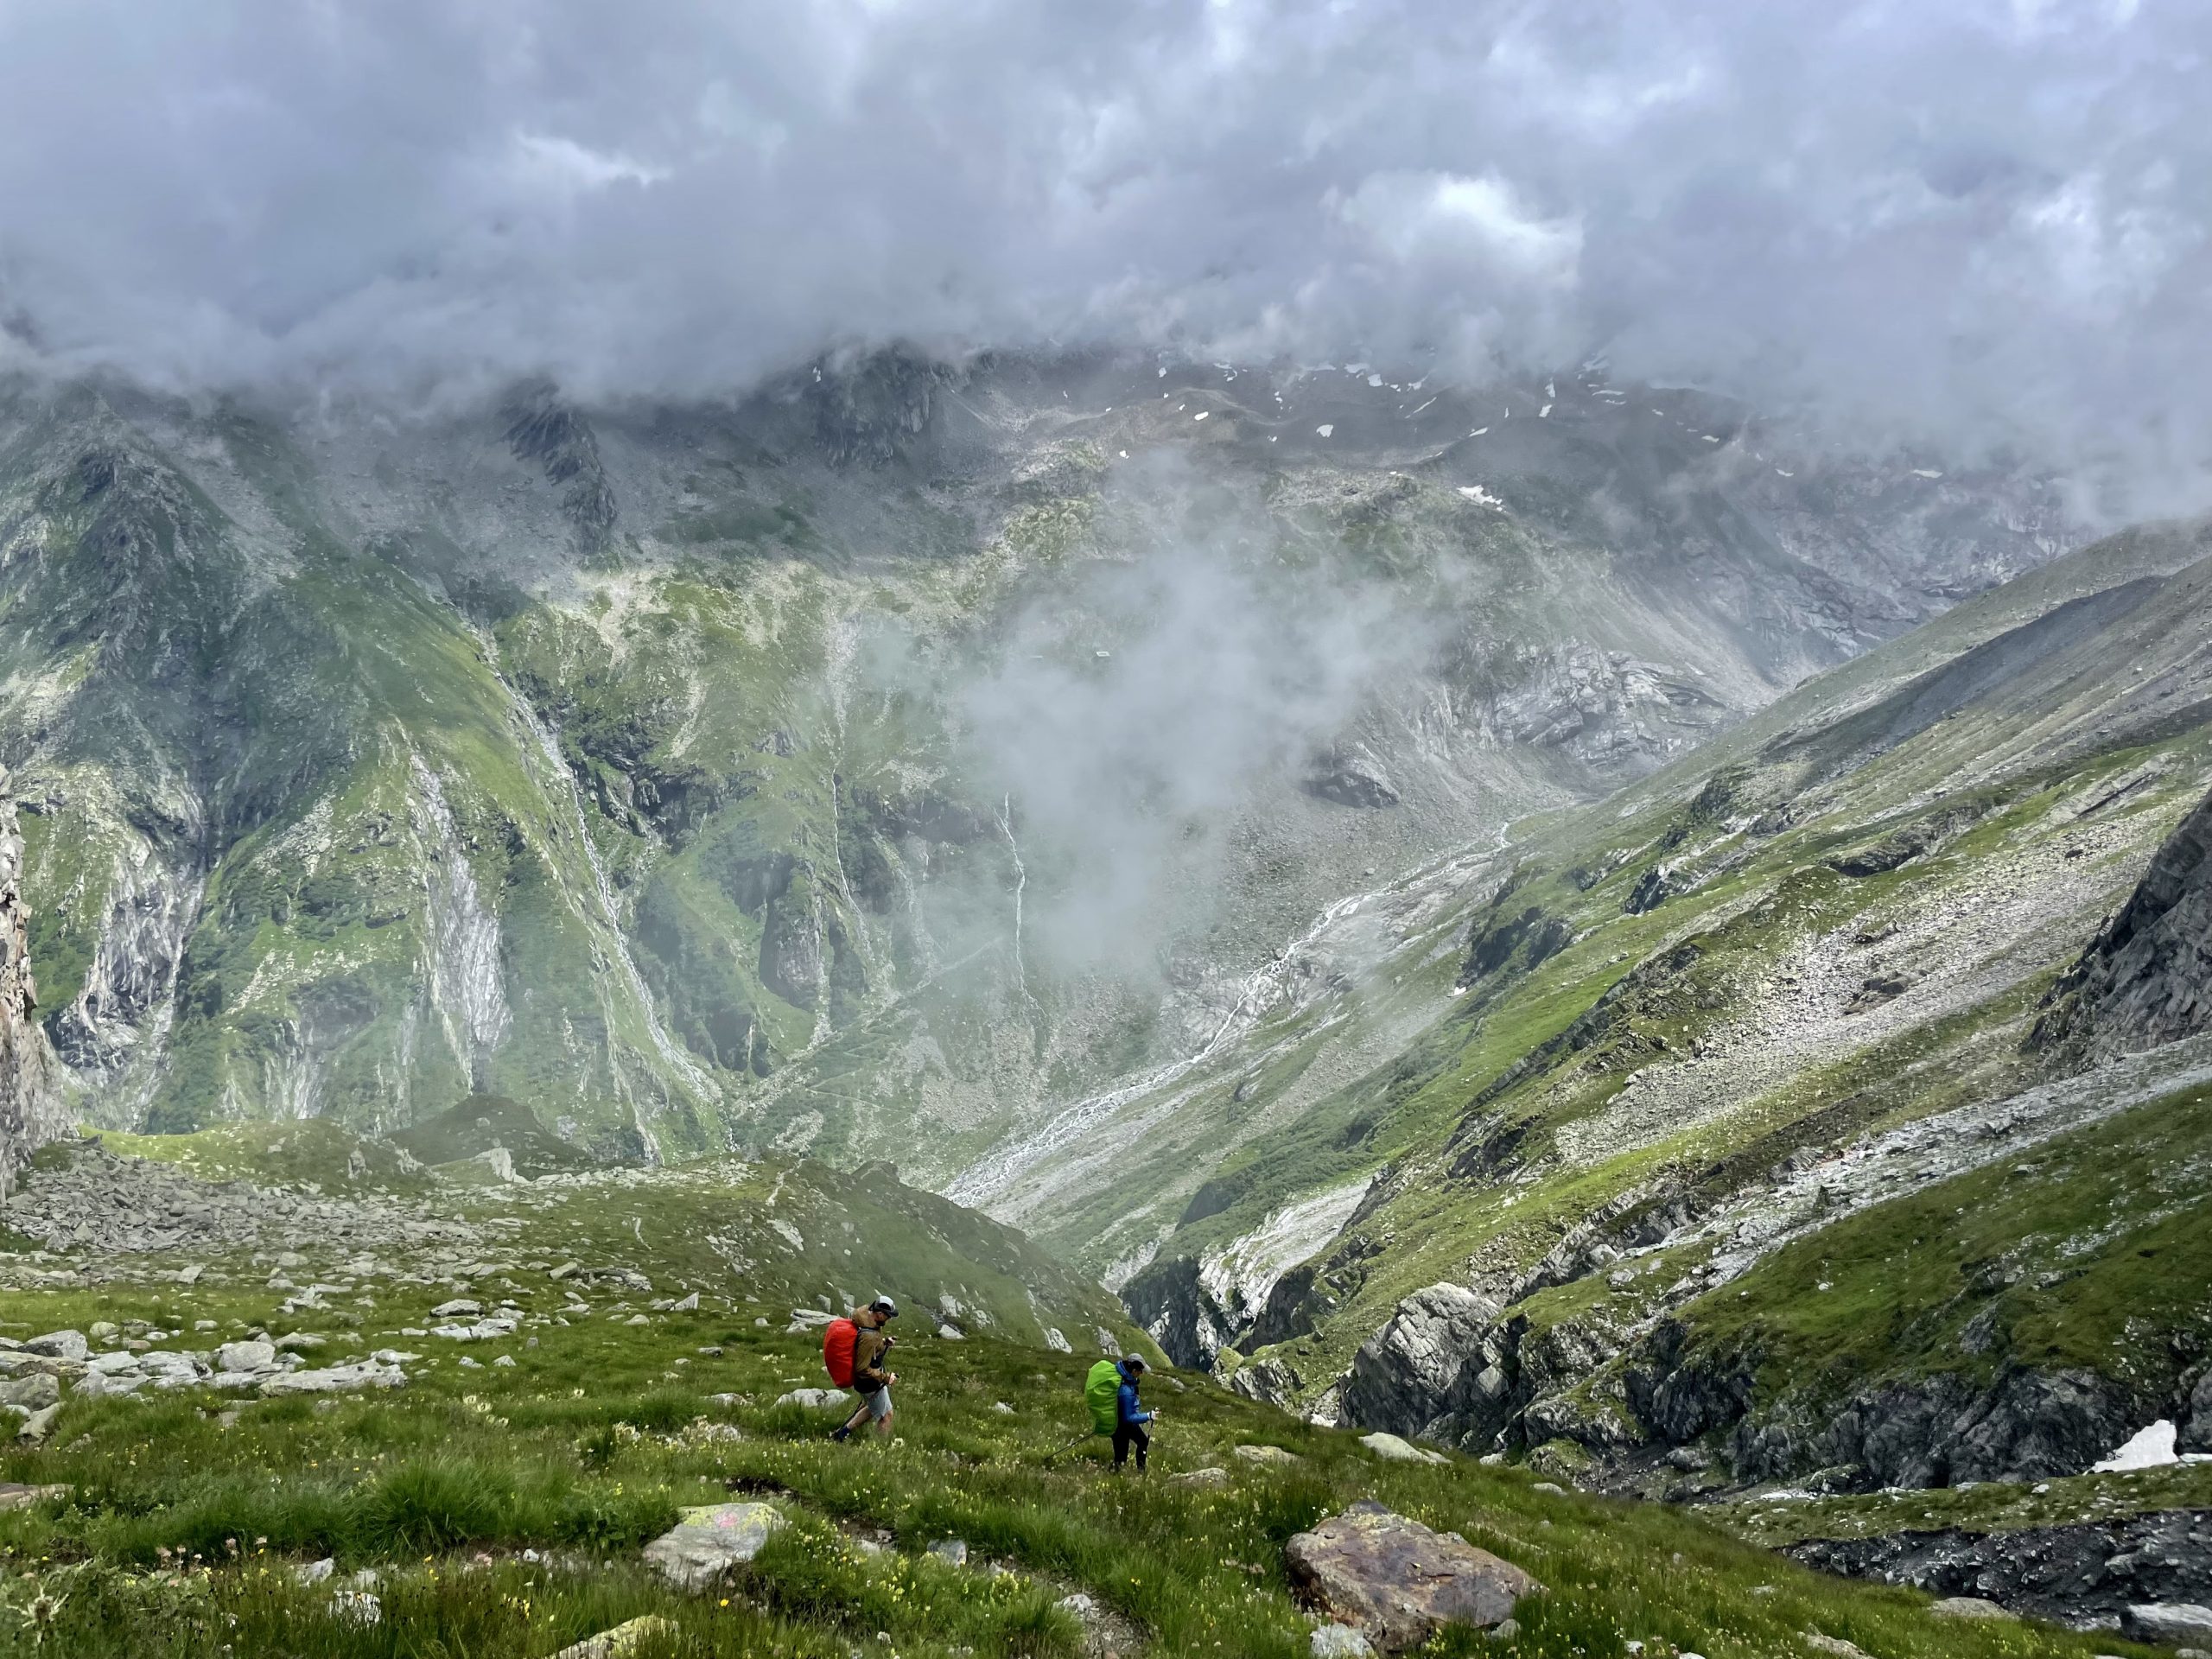
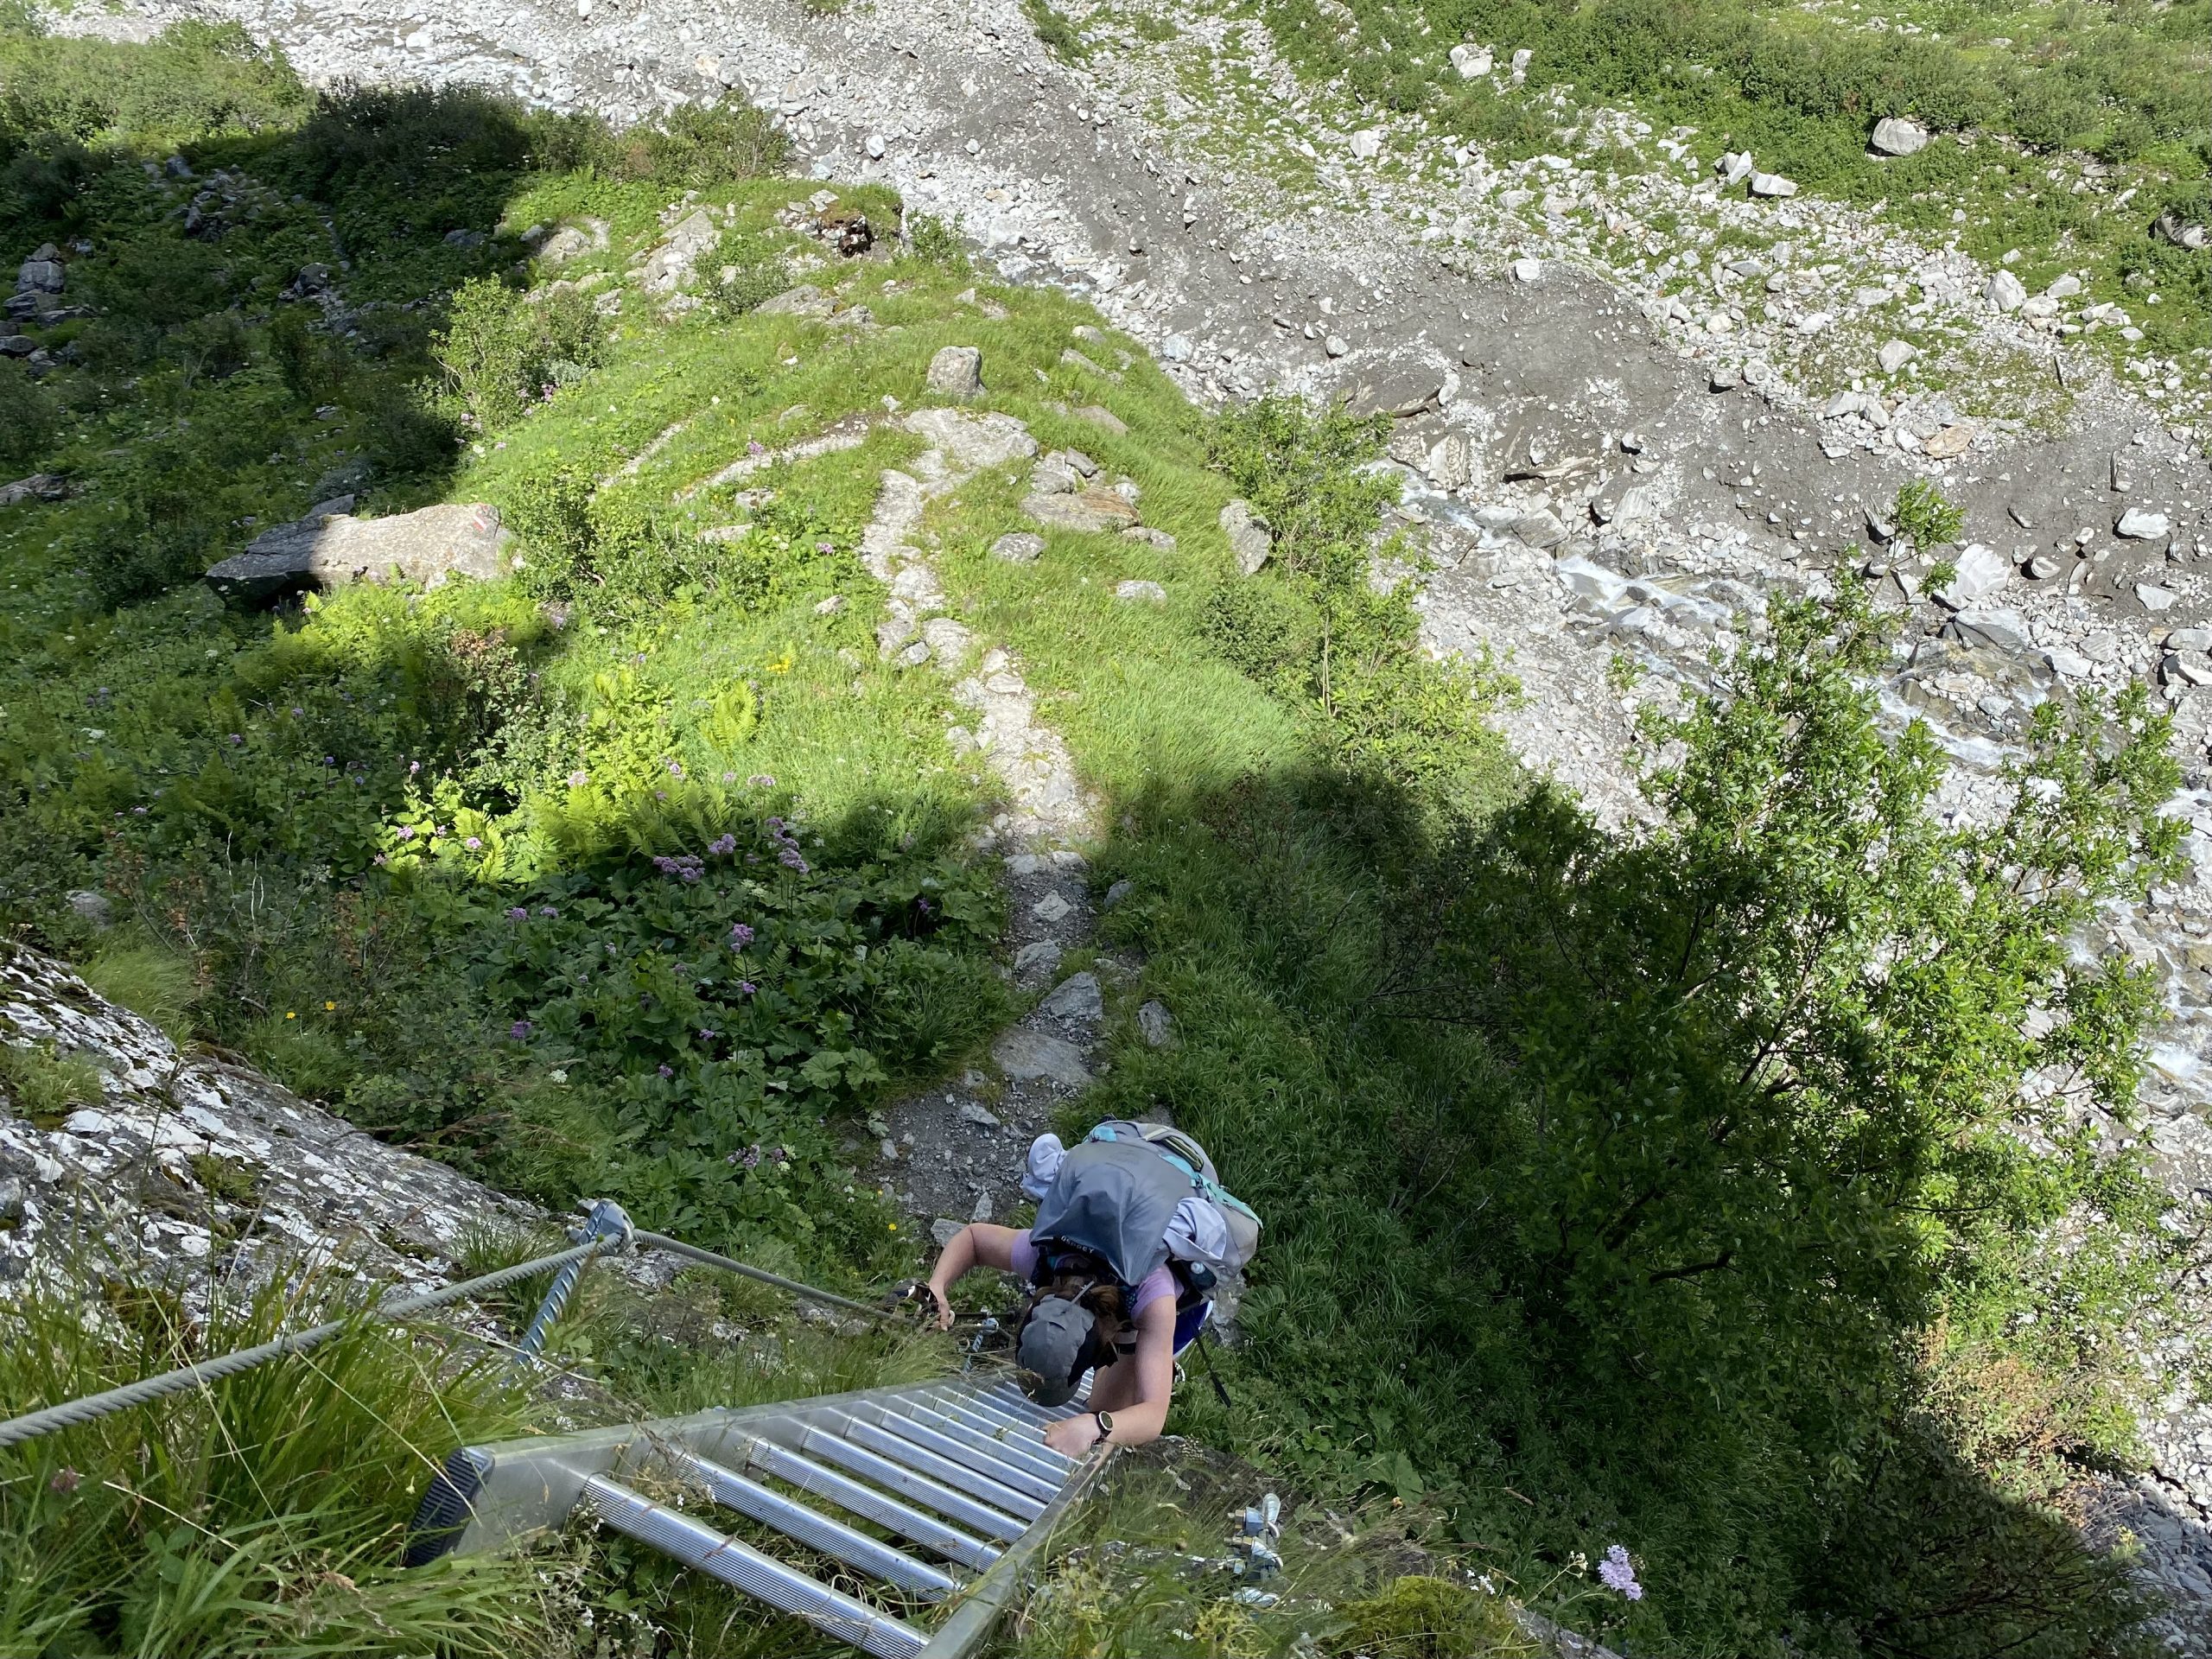
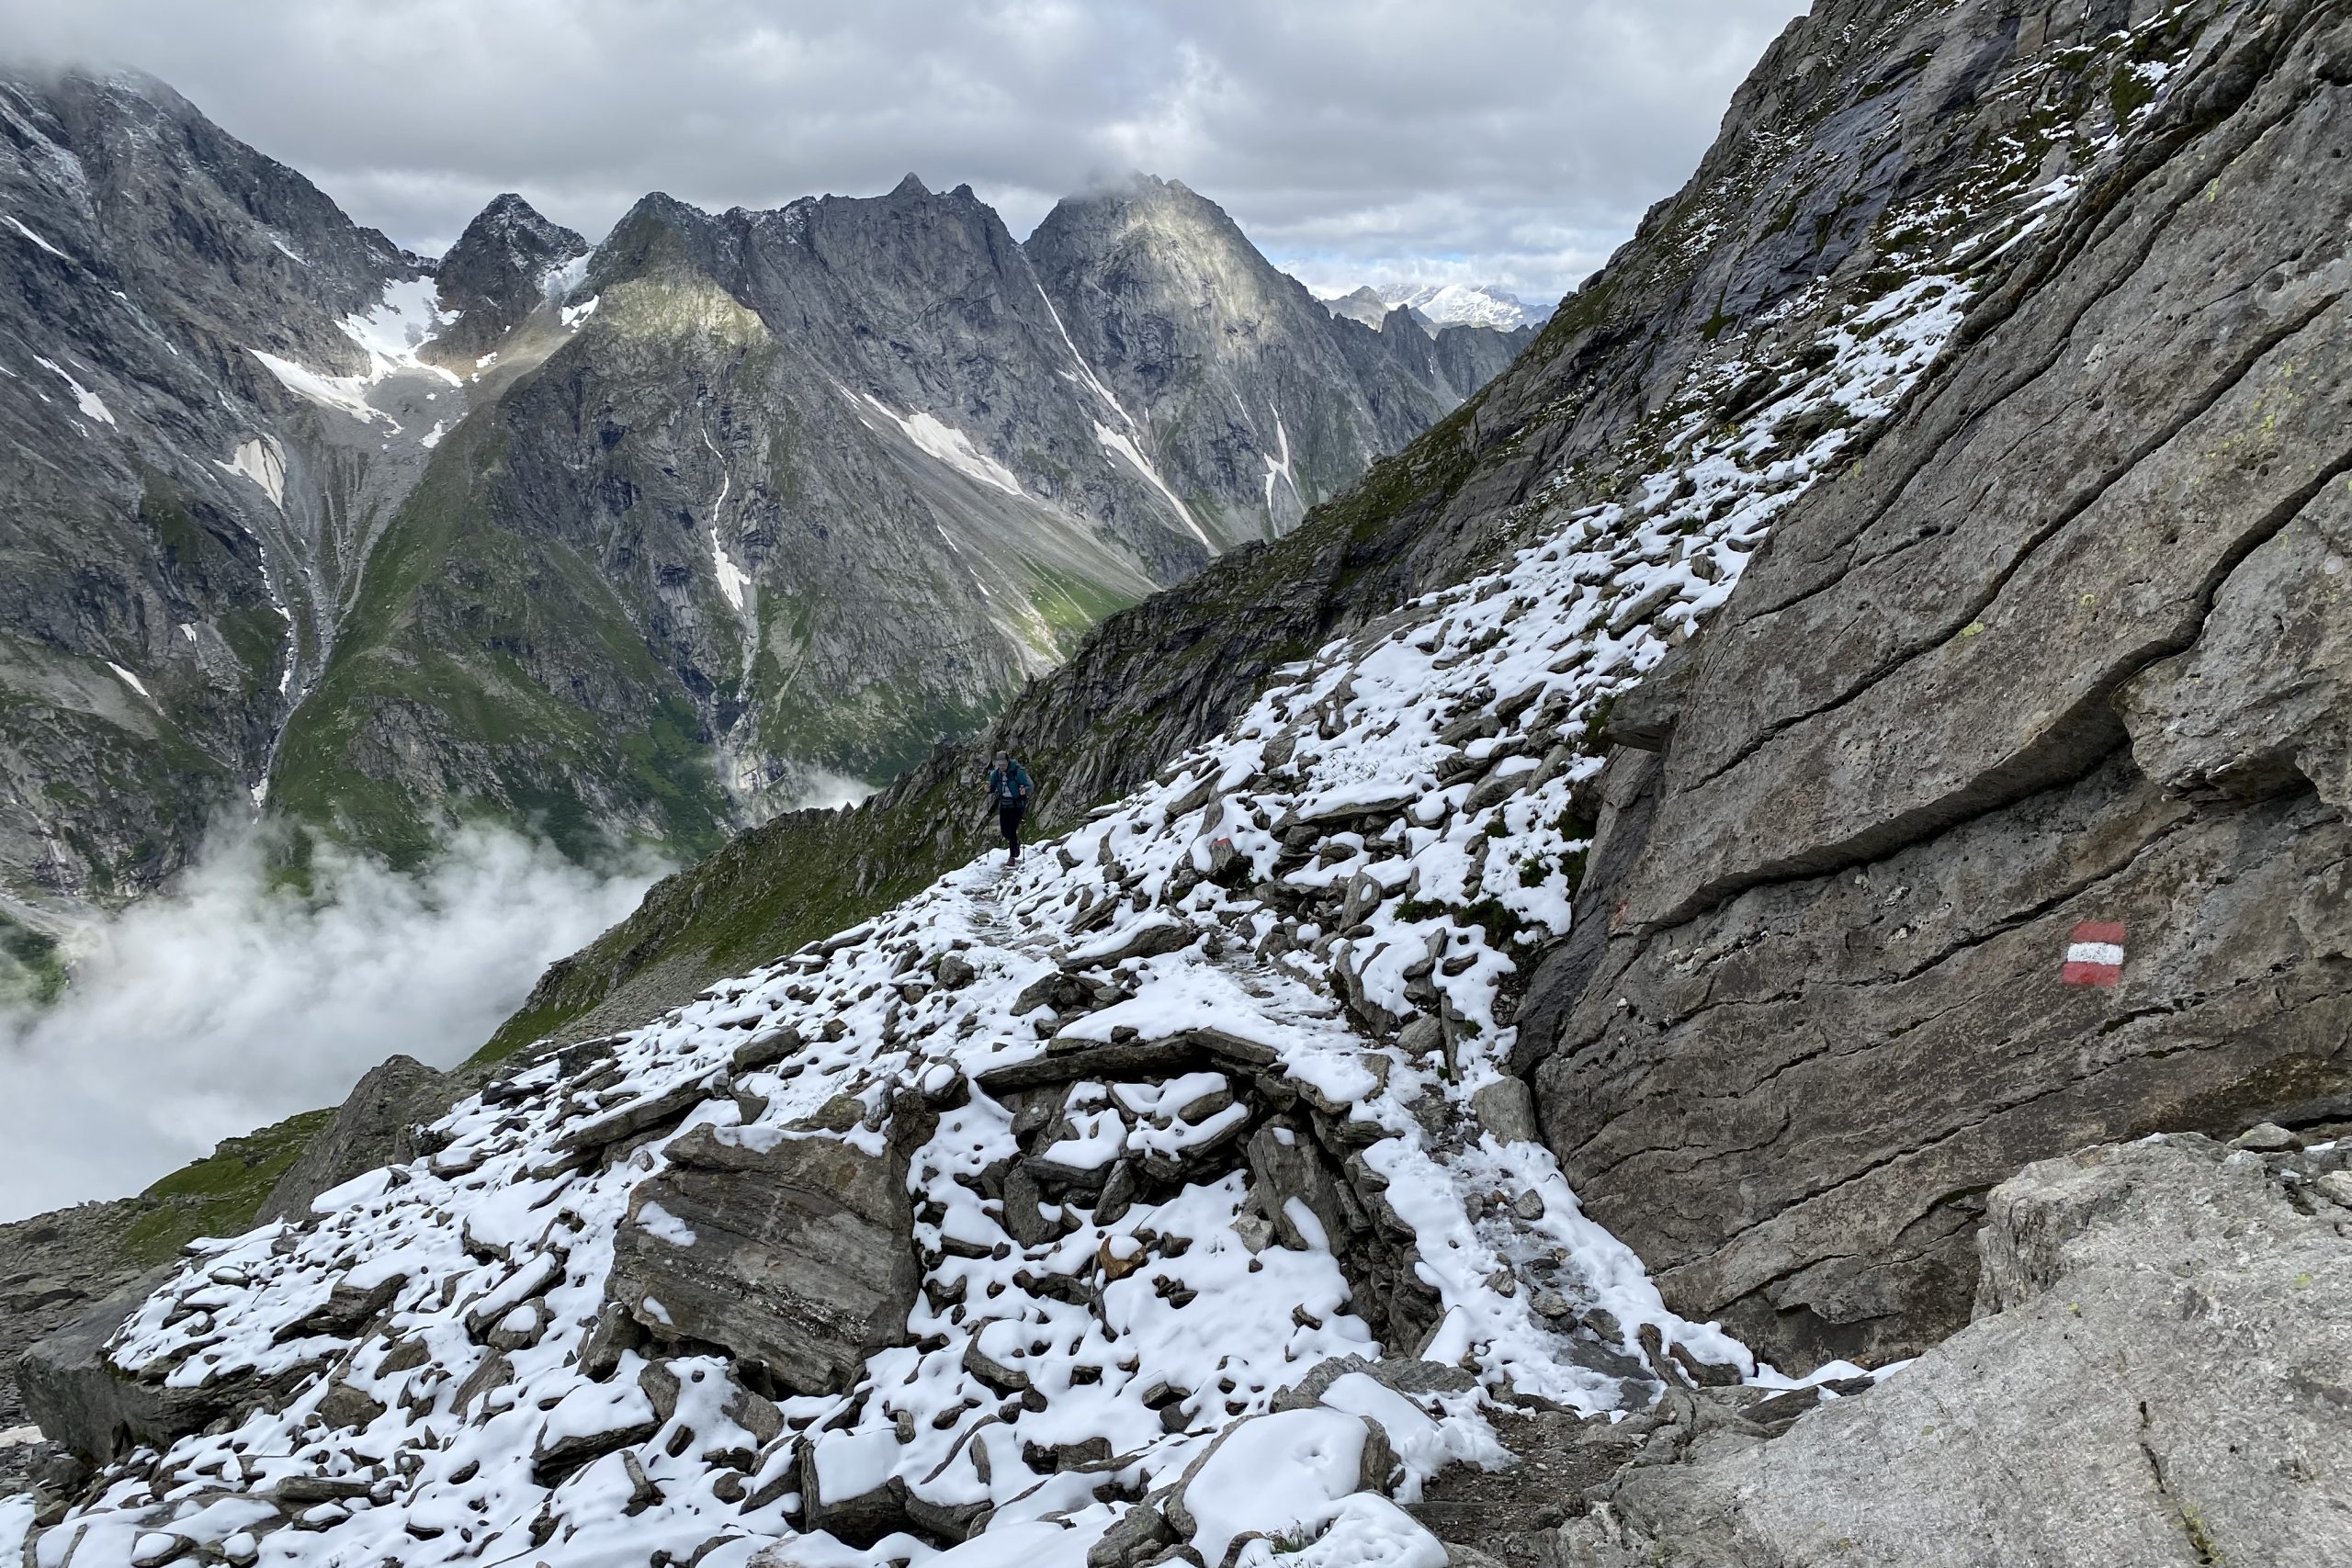
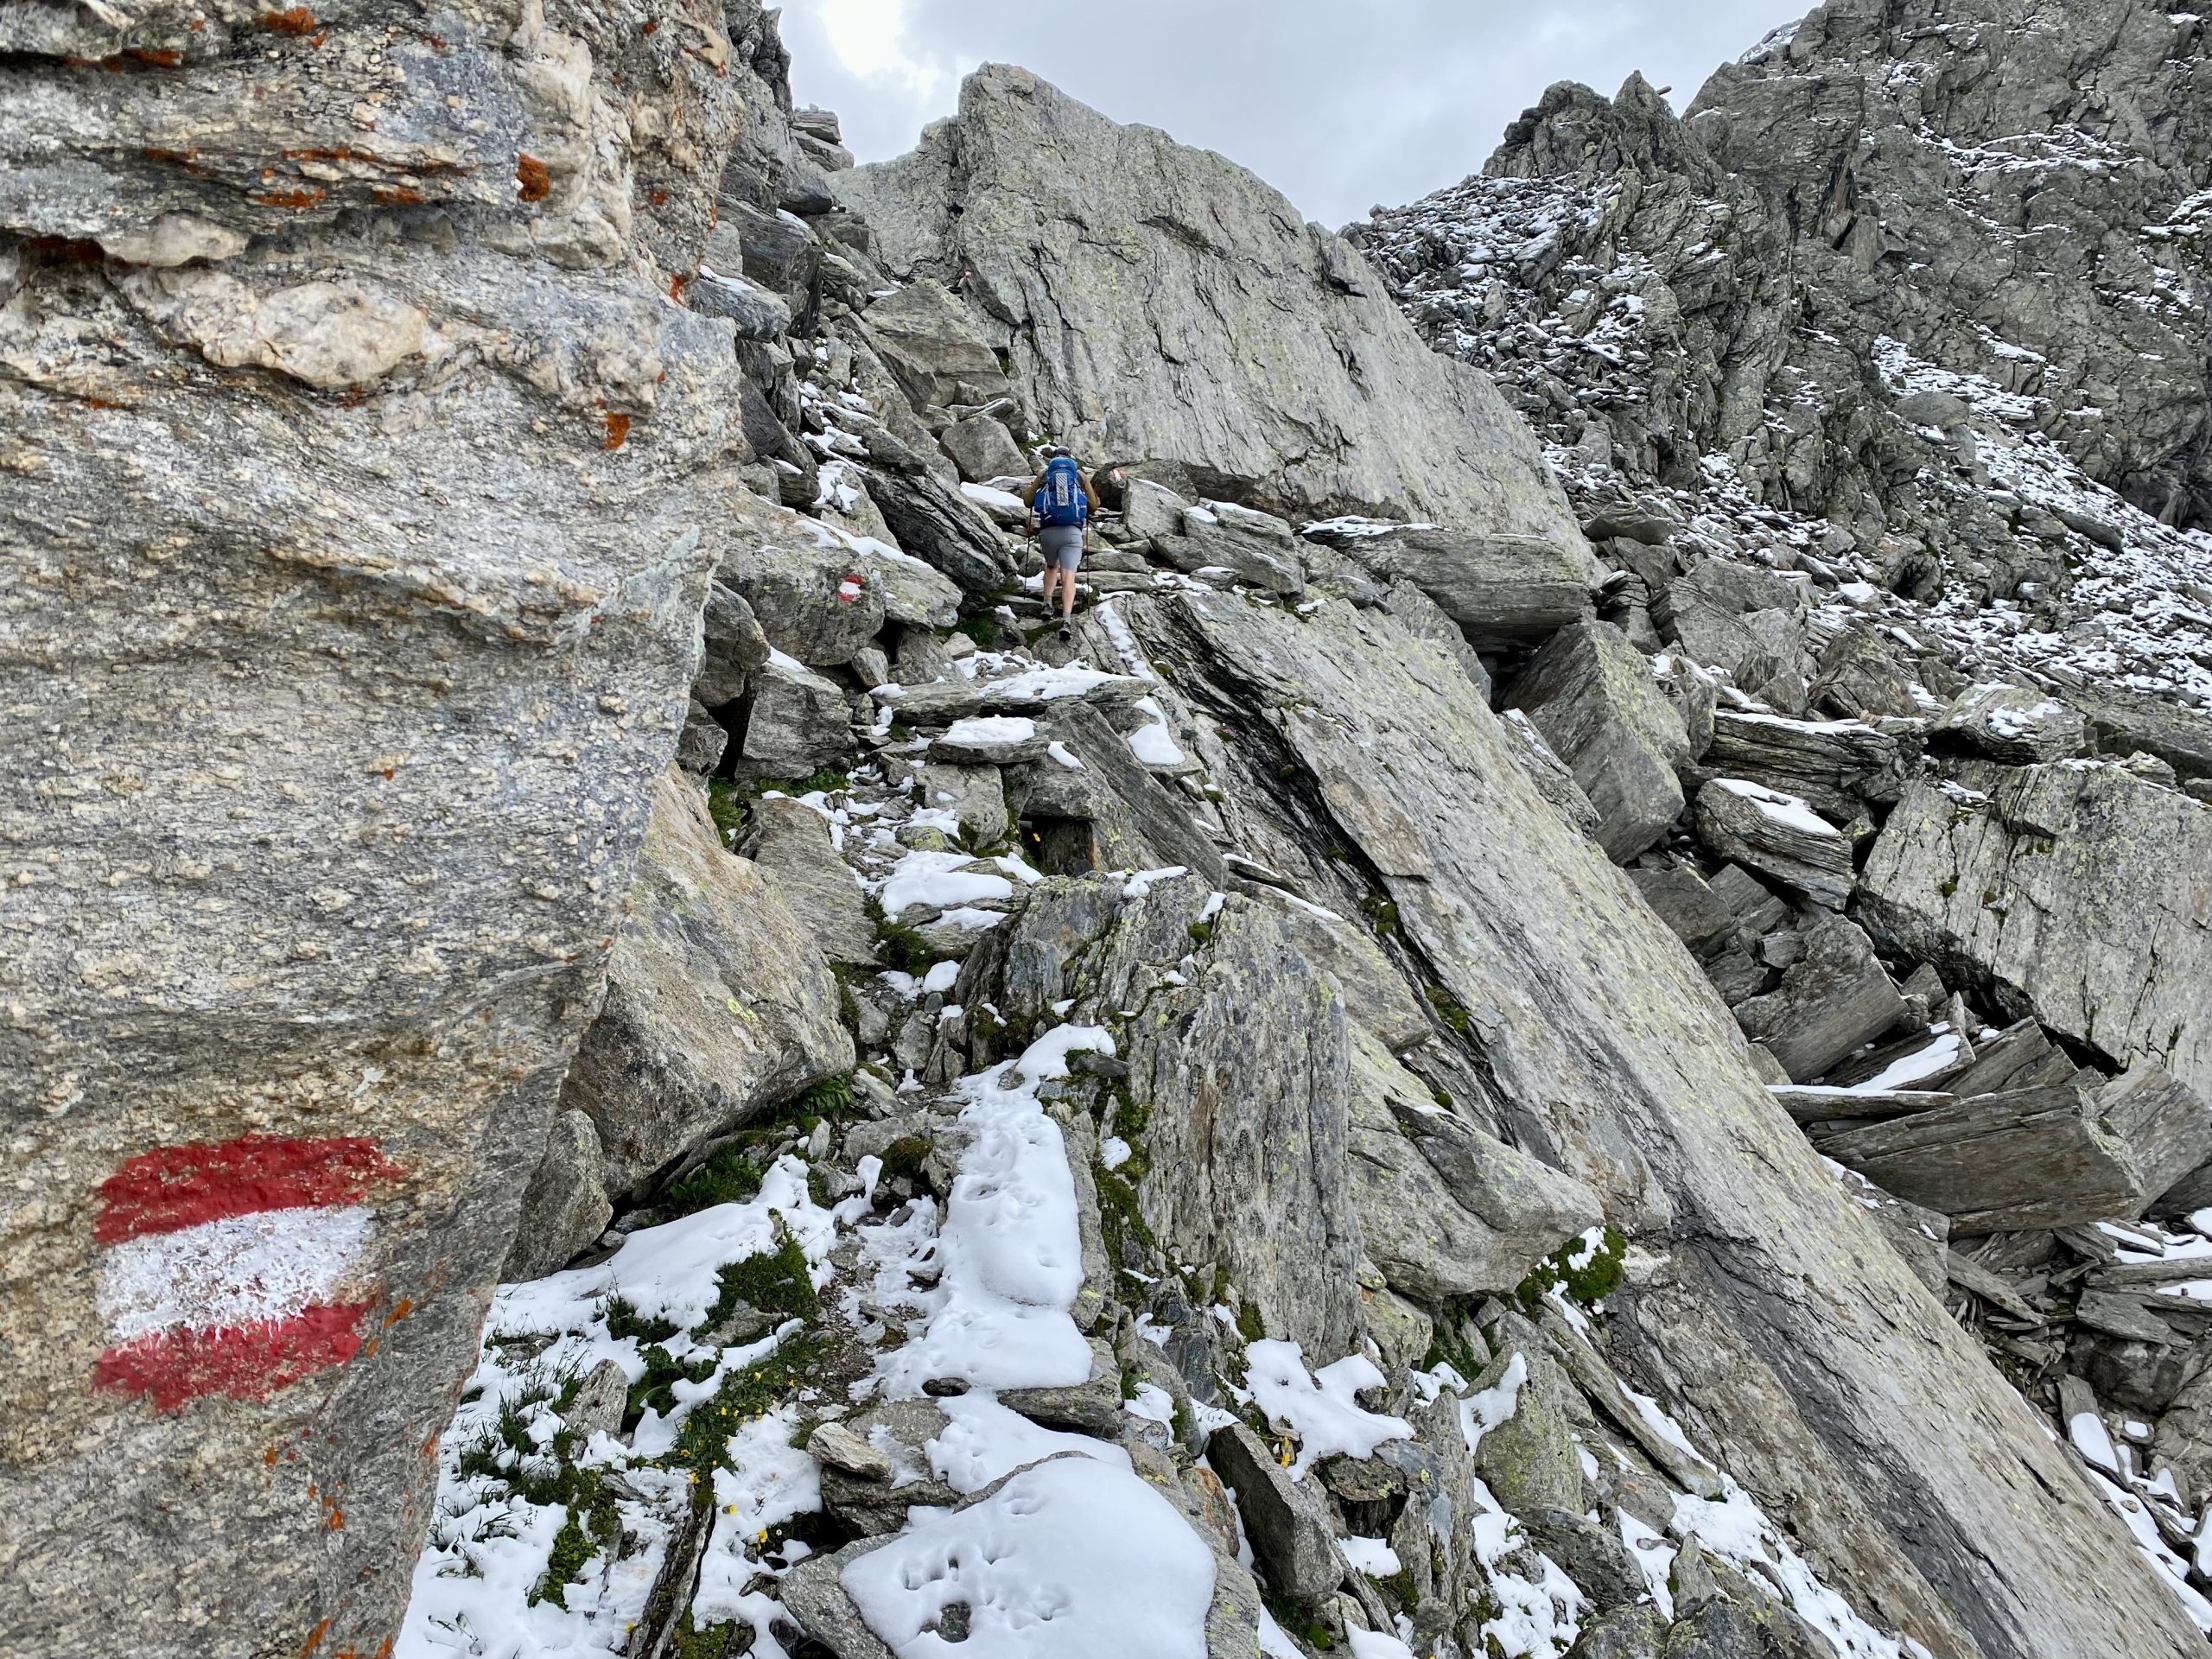
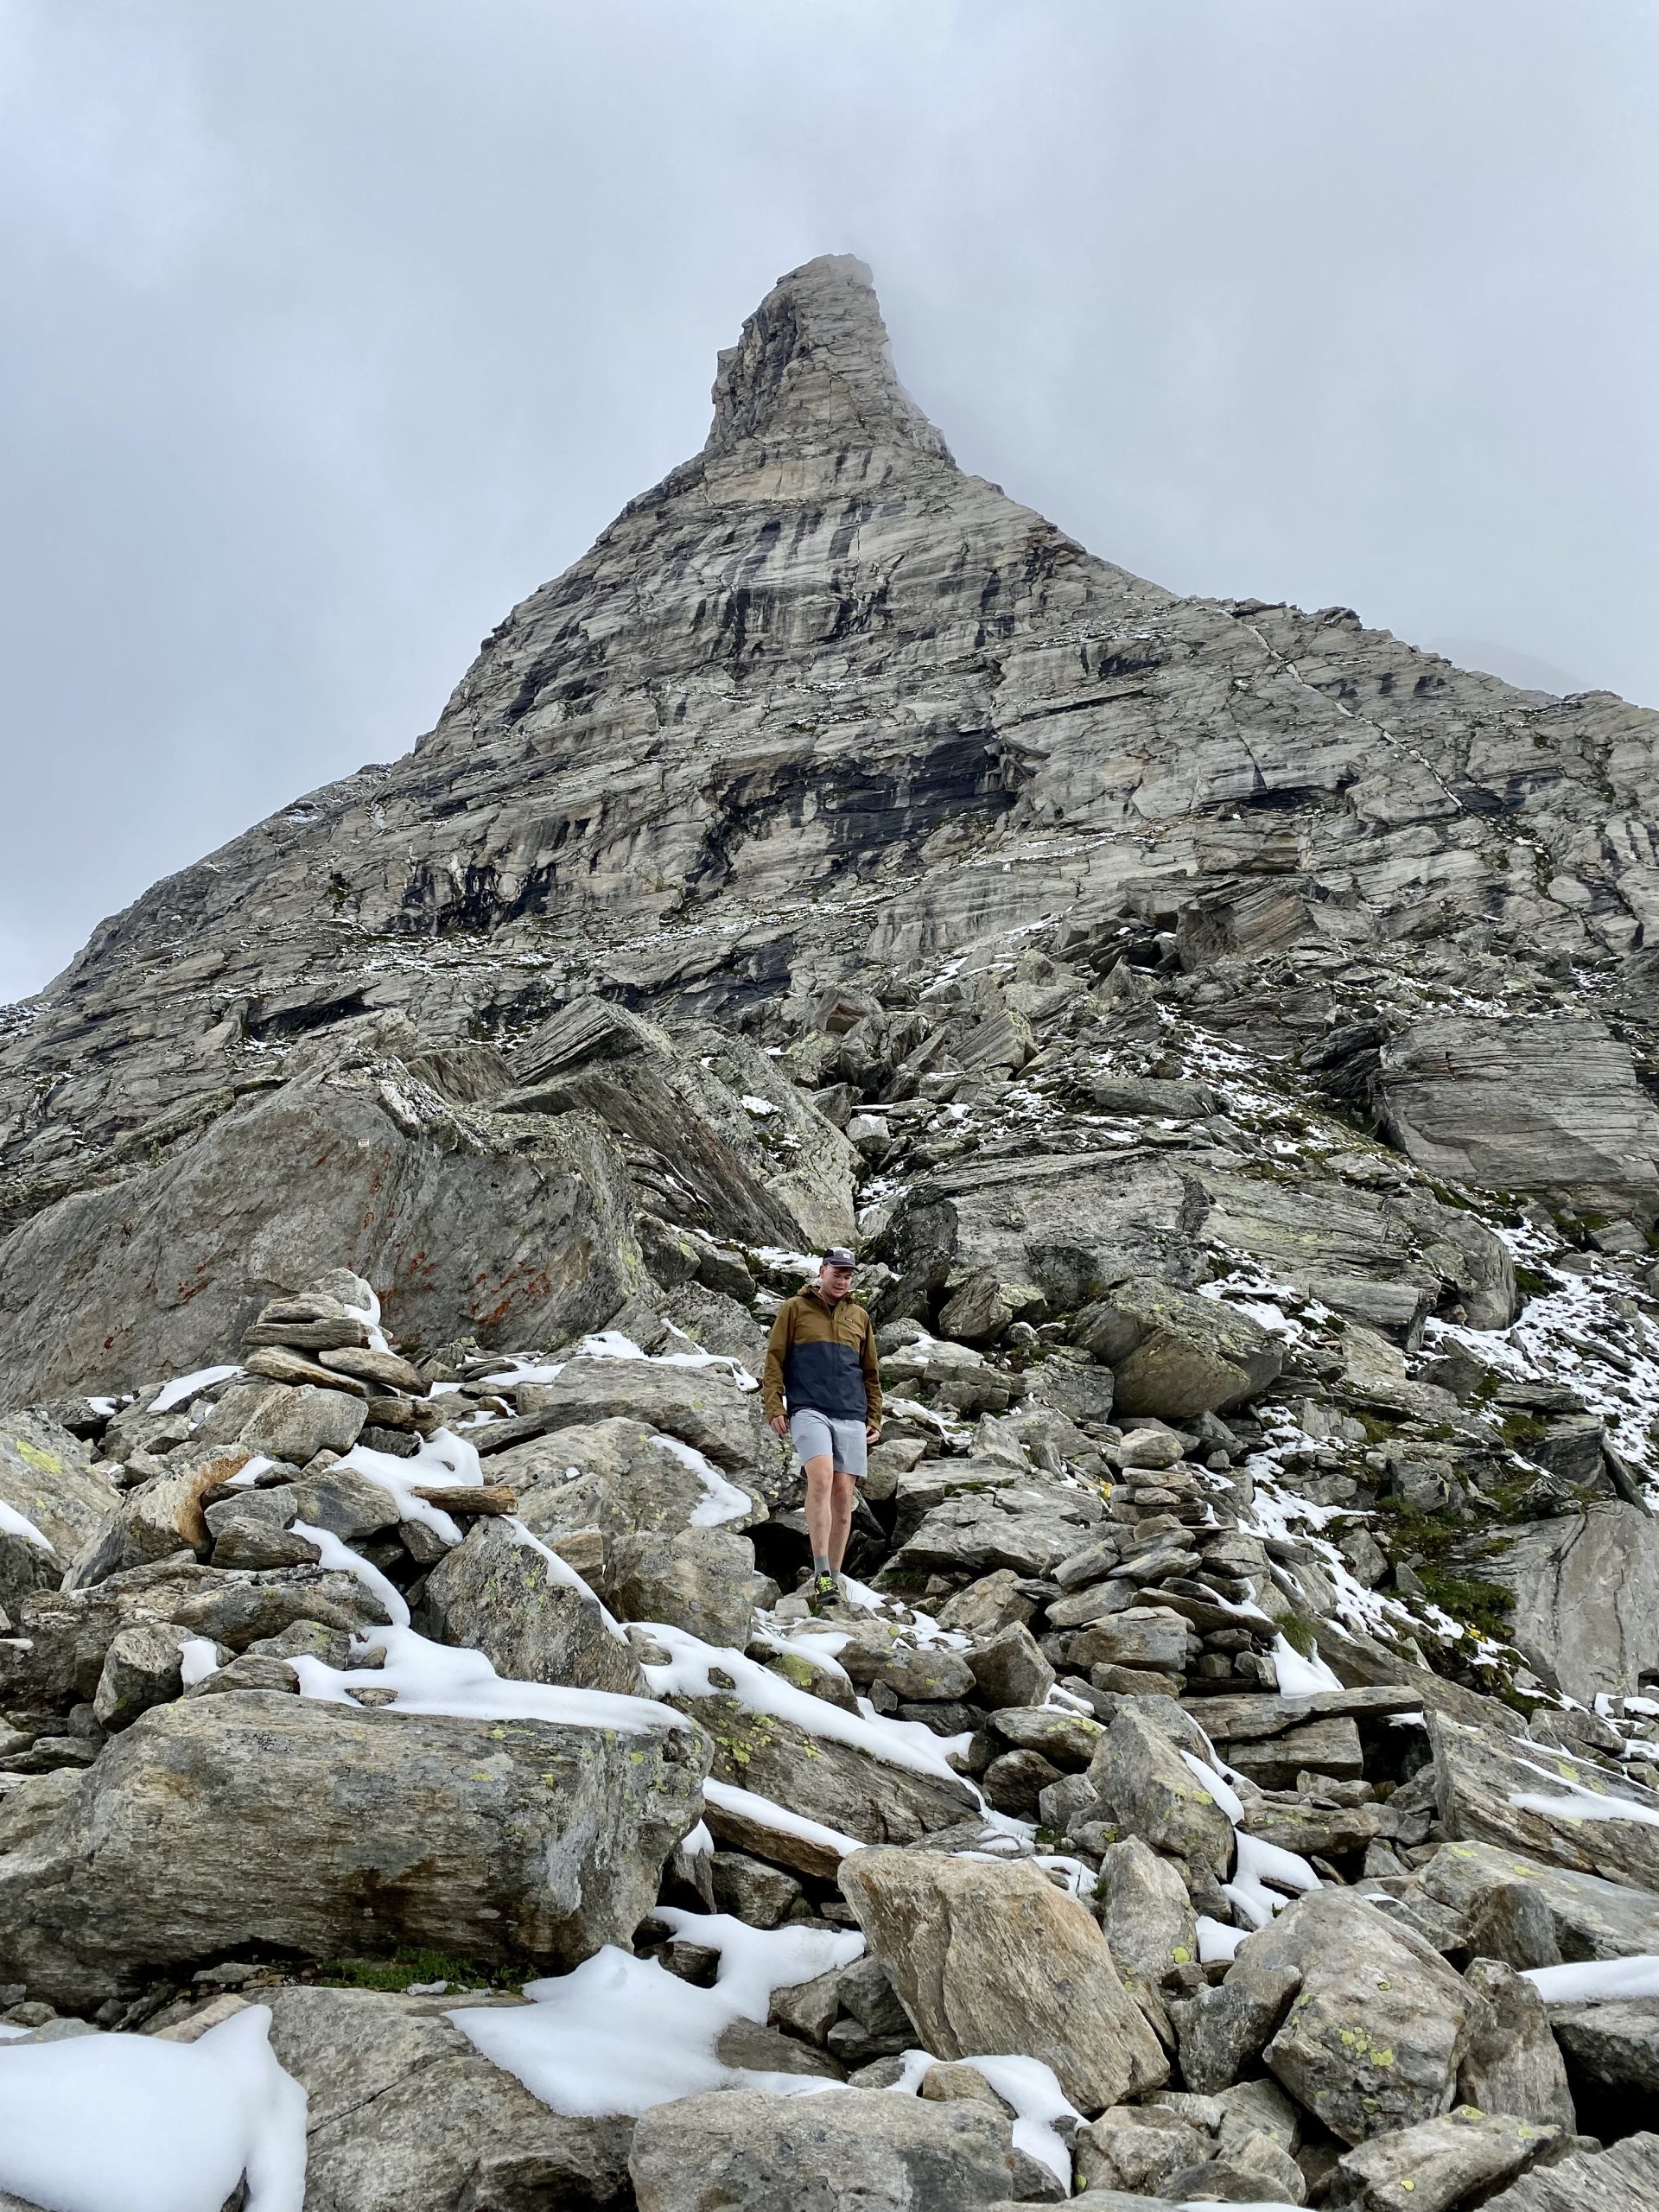
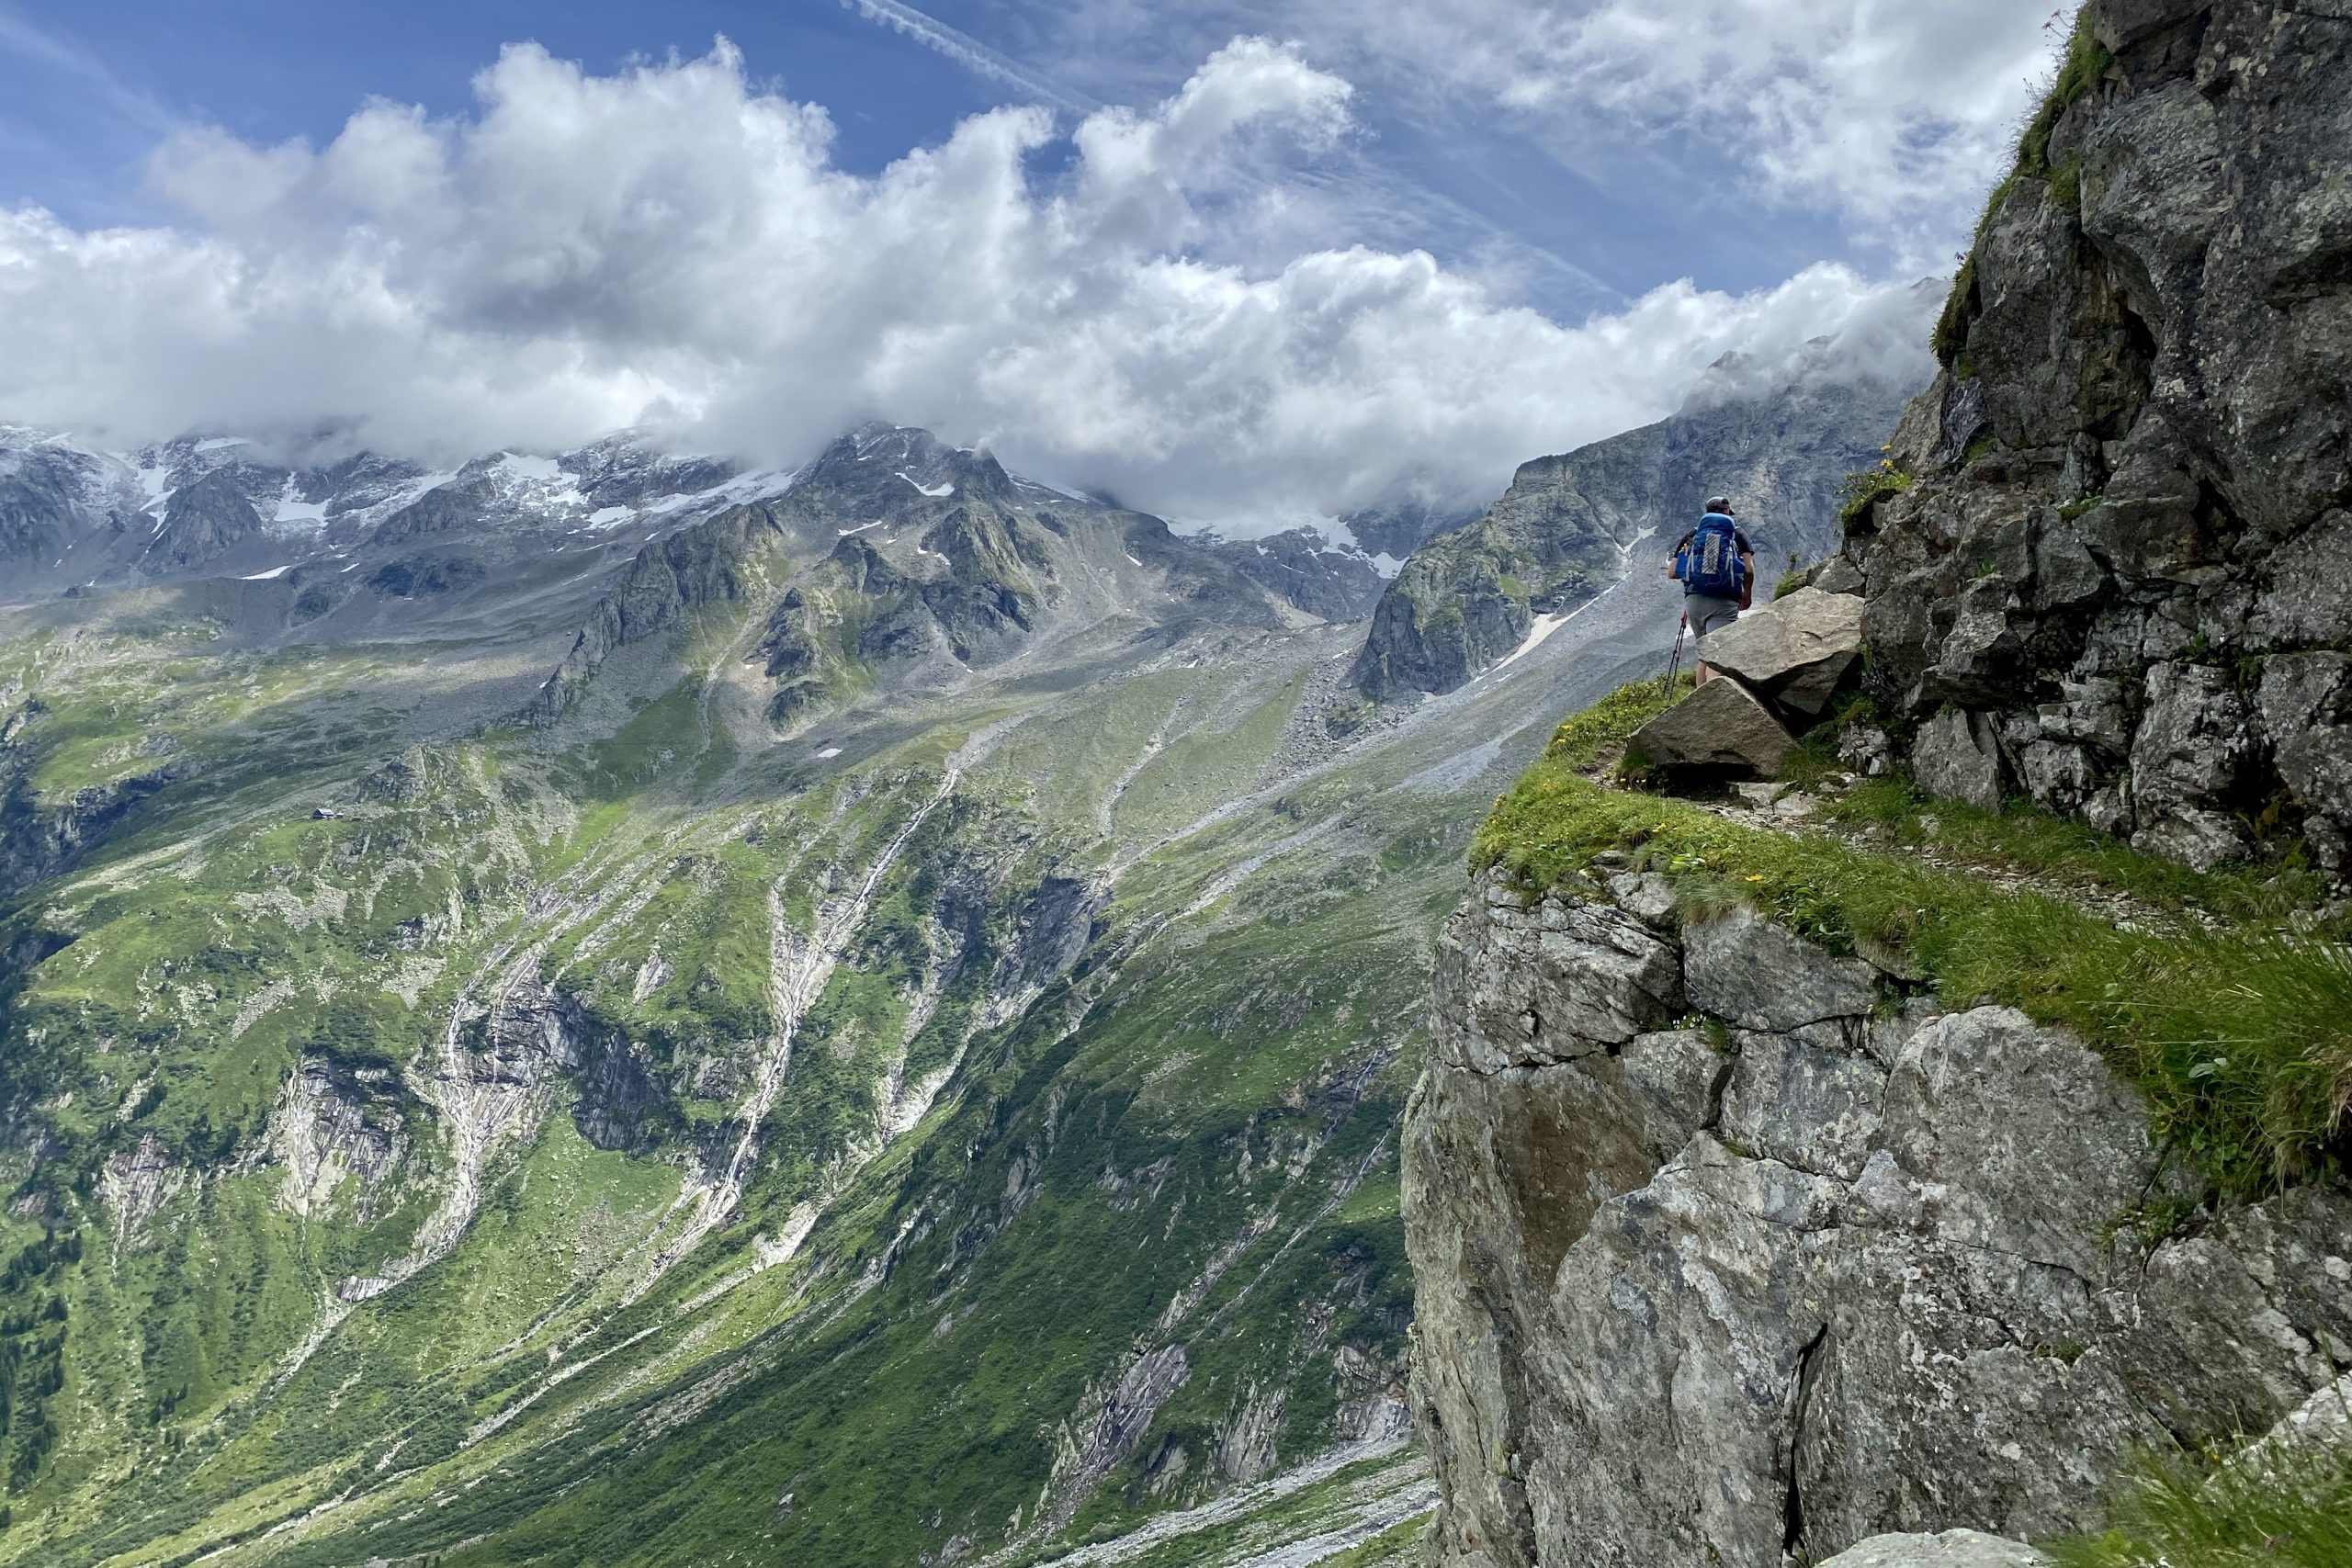
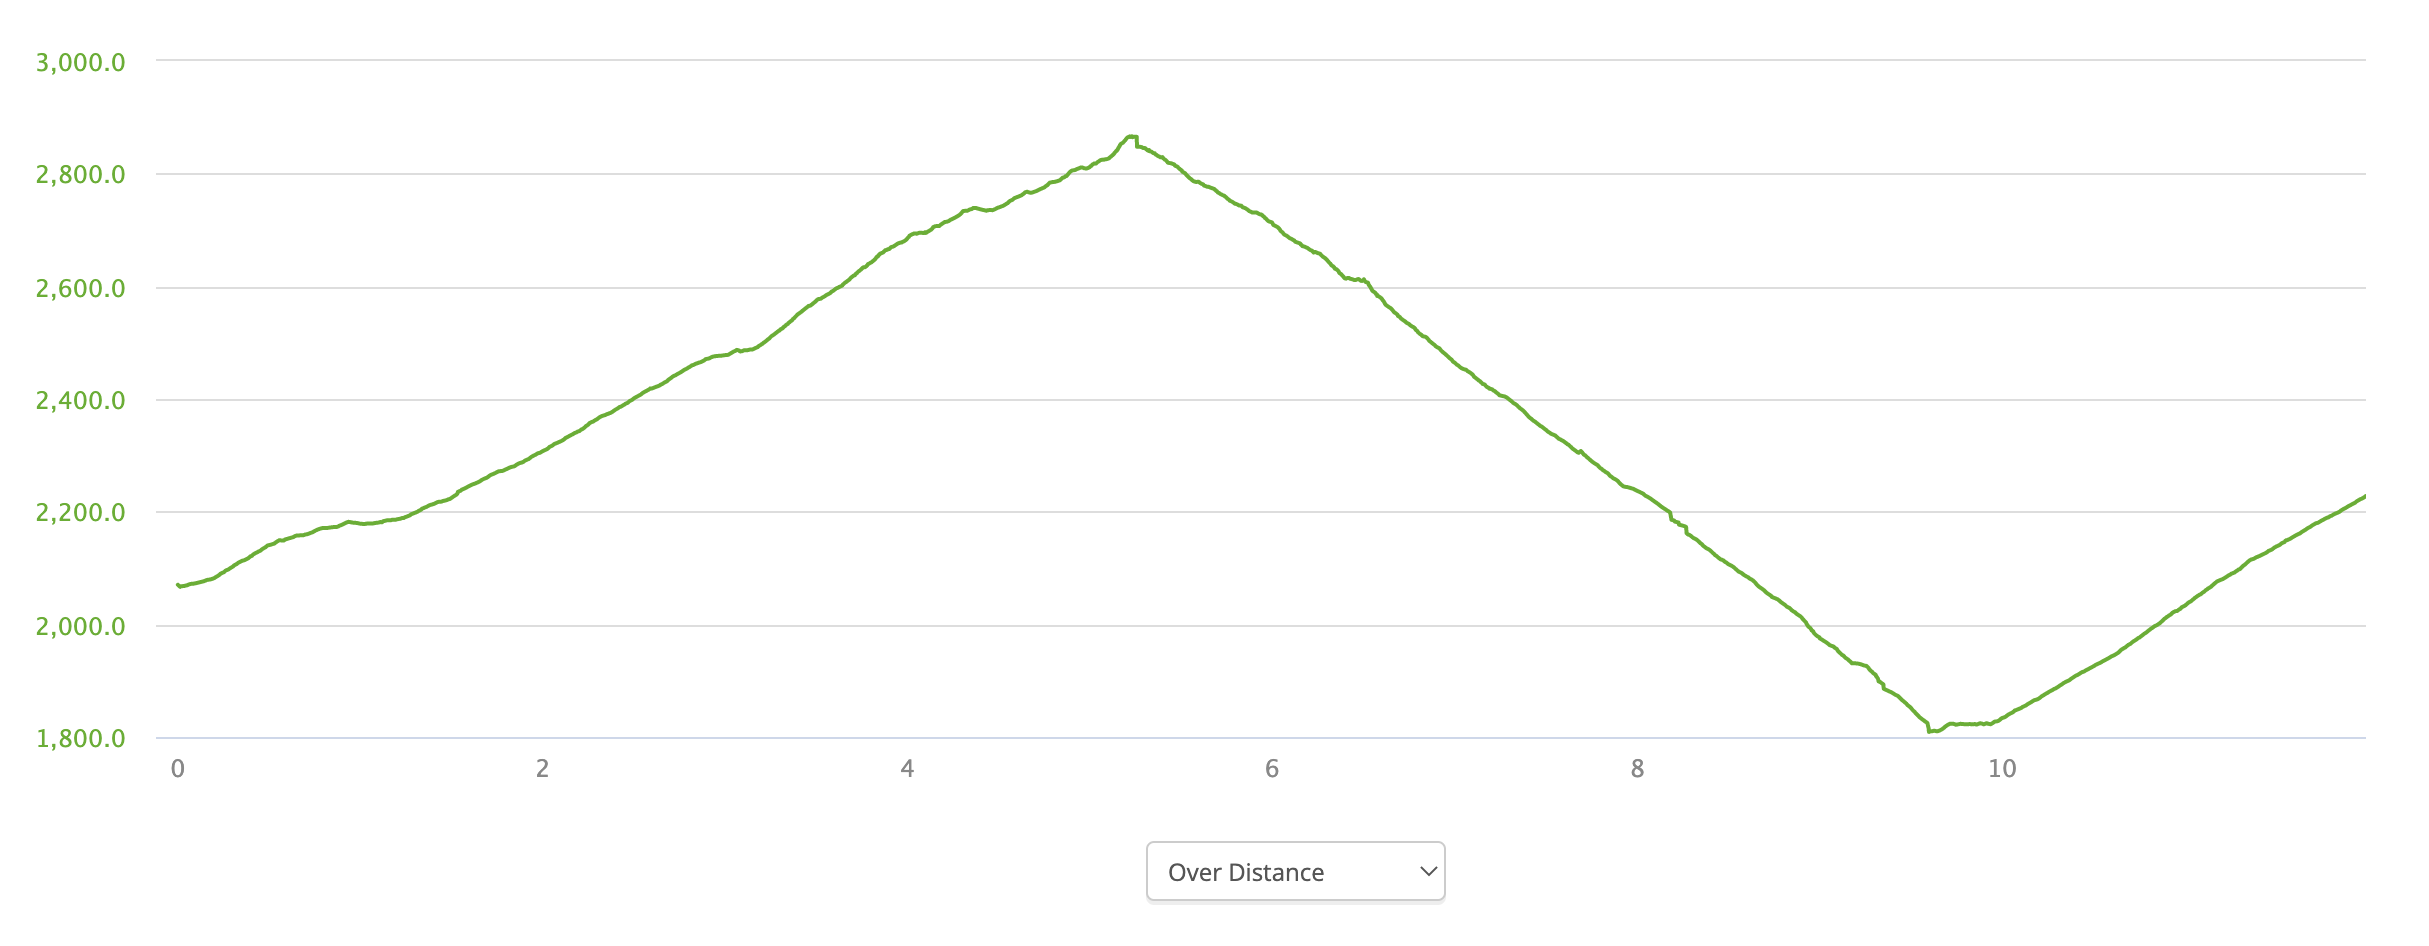
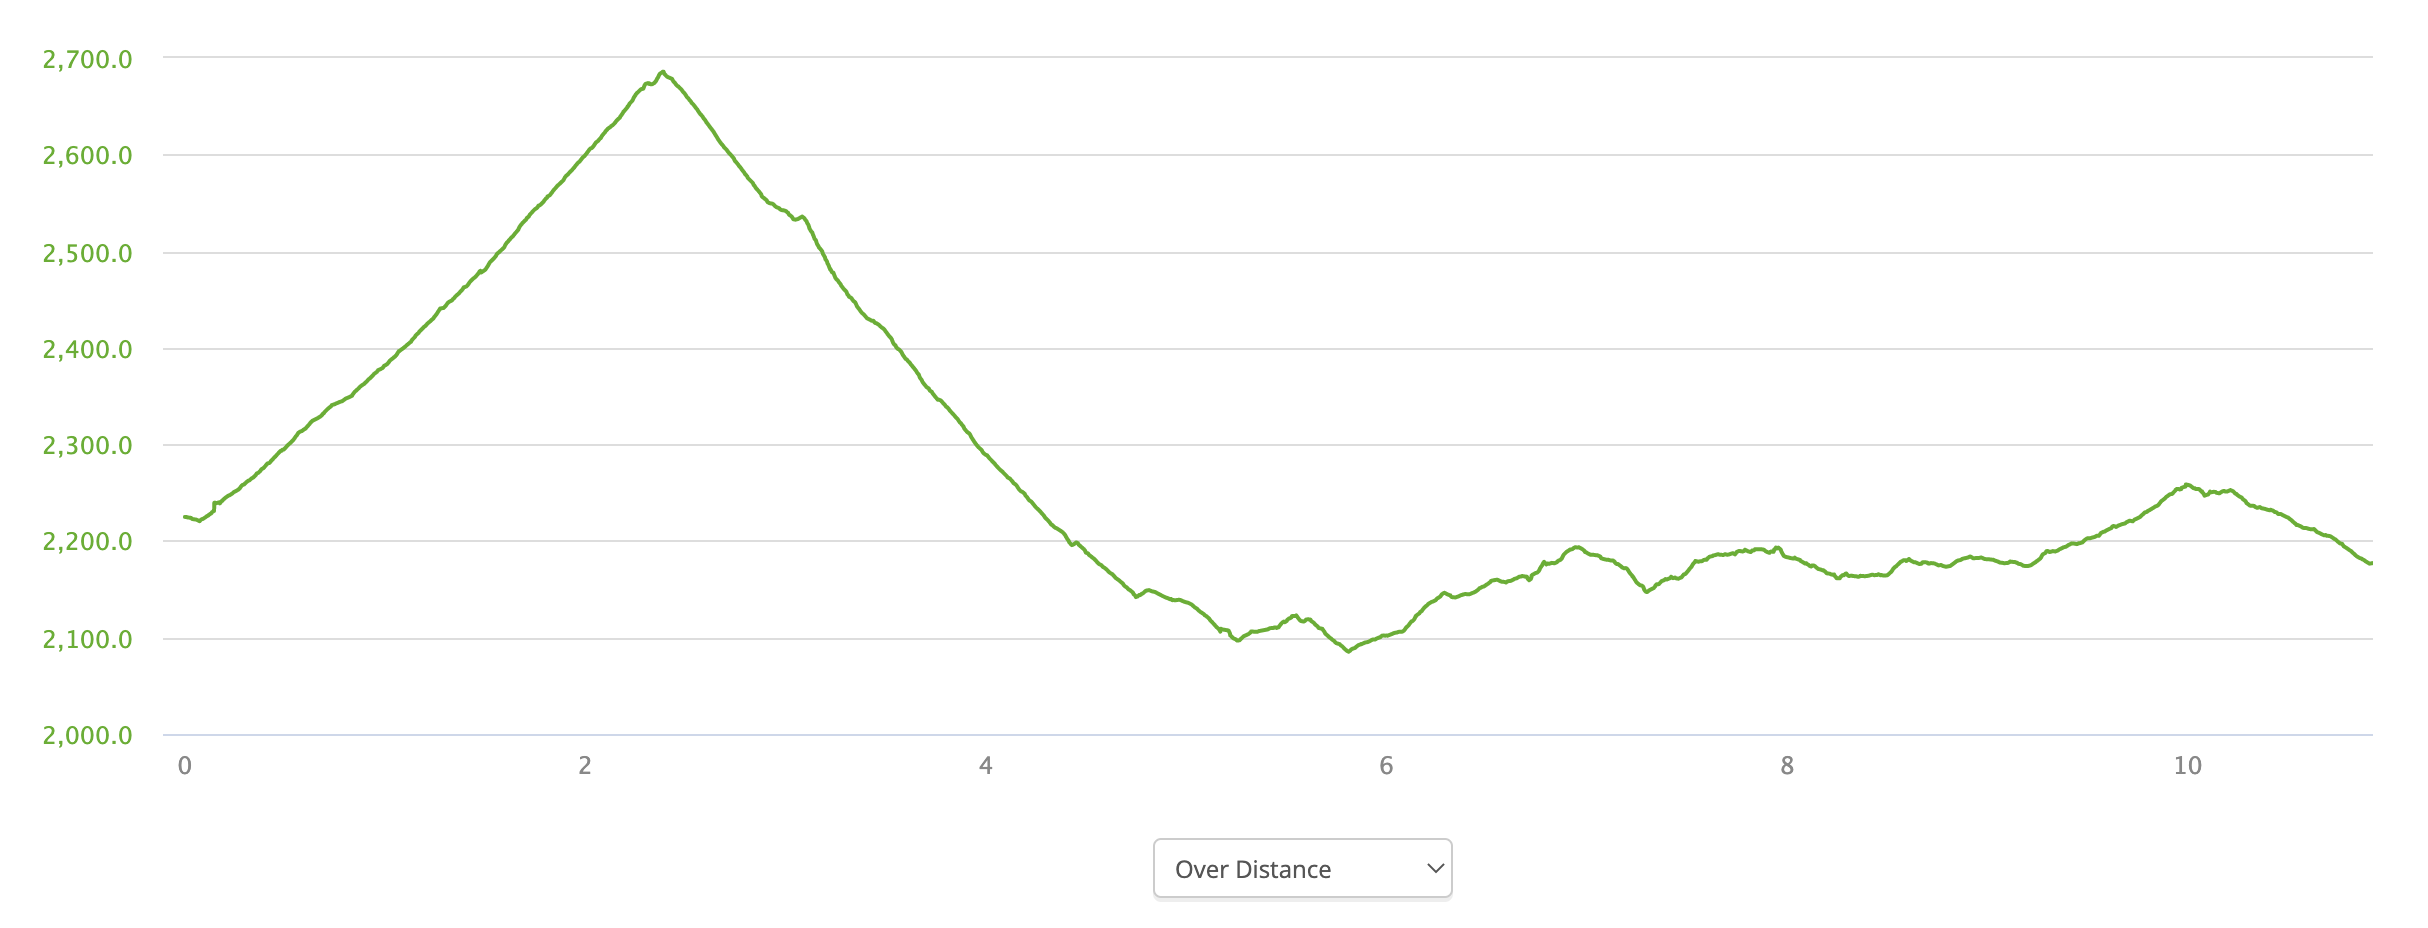
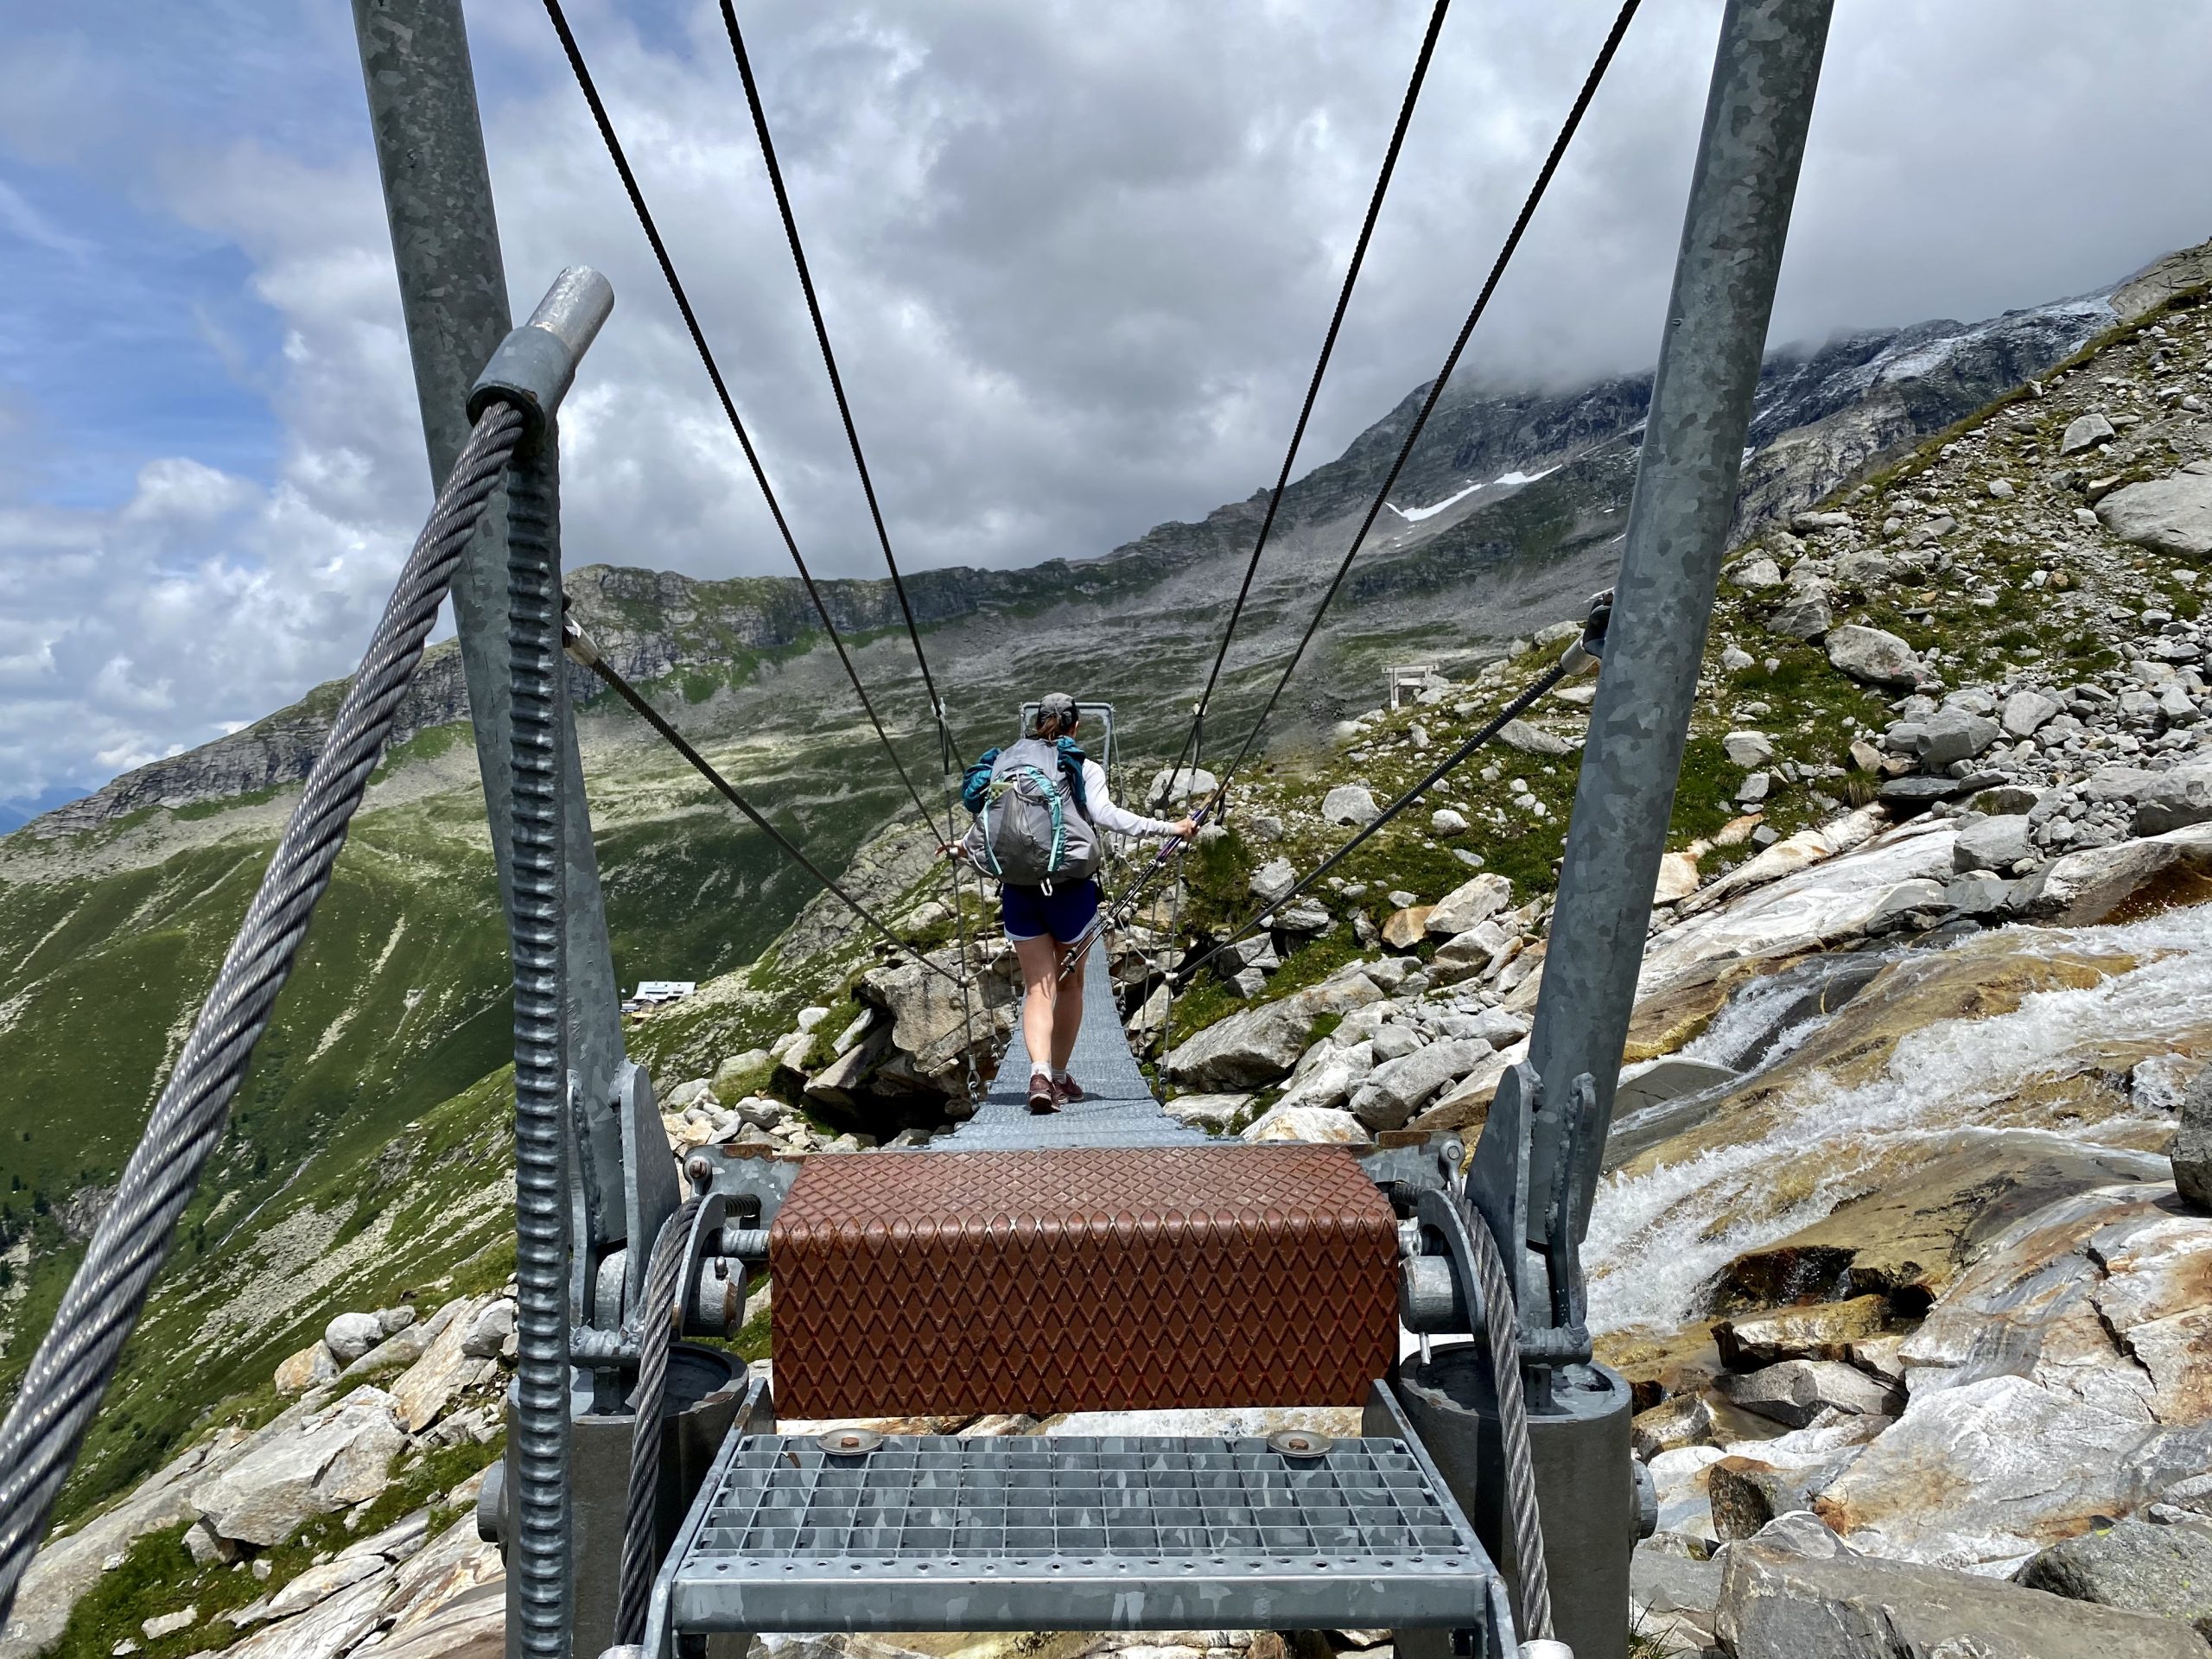
Difficulty: While the difficulty is somewhat subjective and relative, I consider Berliner Höhenweg as a difficult trail. There are several rather technical sections where you need to use ropes or ladders to ascent/descent. The elevation gains and losses are also impressive and challenging. Of all the hikes I’ve done so far (e.g. TMB, Walker’s Haute route, GR5), this was by far the scariest. Some of the rope sections were very steep and a few hikers even used harnesses. We didn’t have any equipment and relied on our past climbing/bouldering experience. This trail is meant for experienced hikers and I definitely understood why!

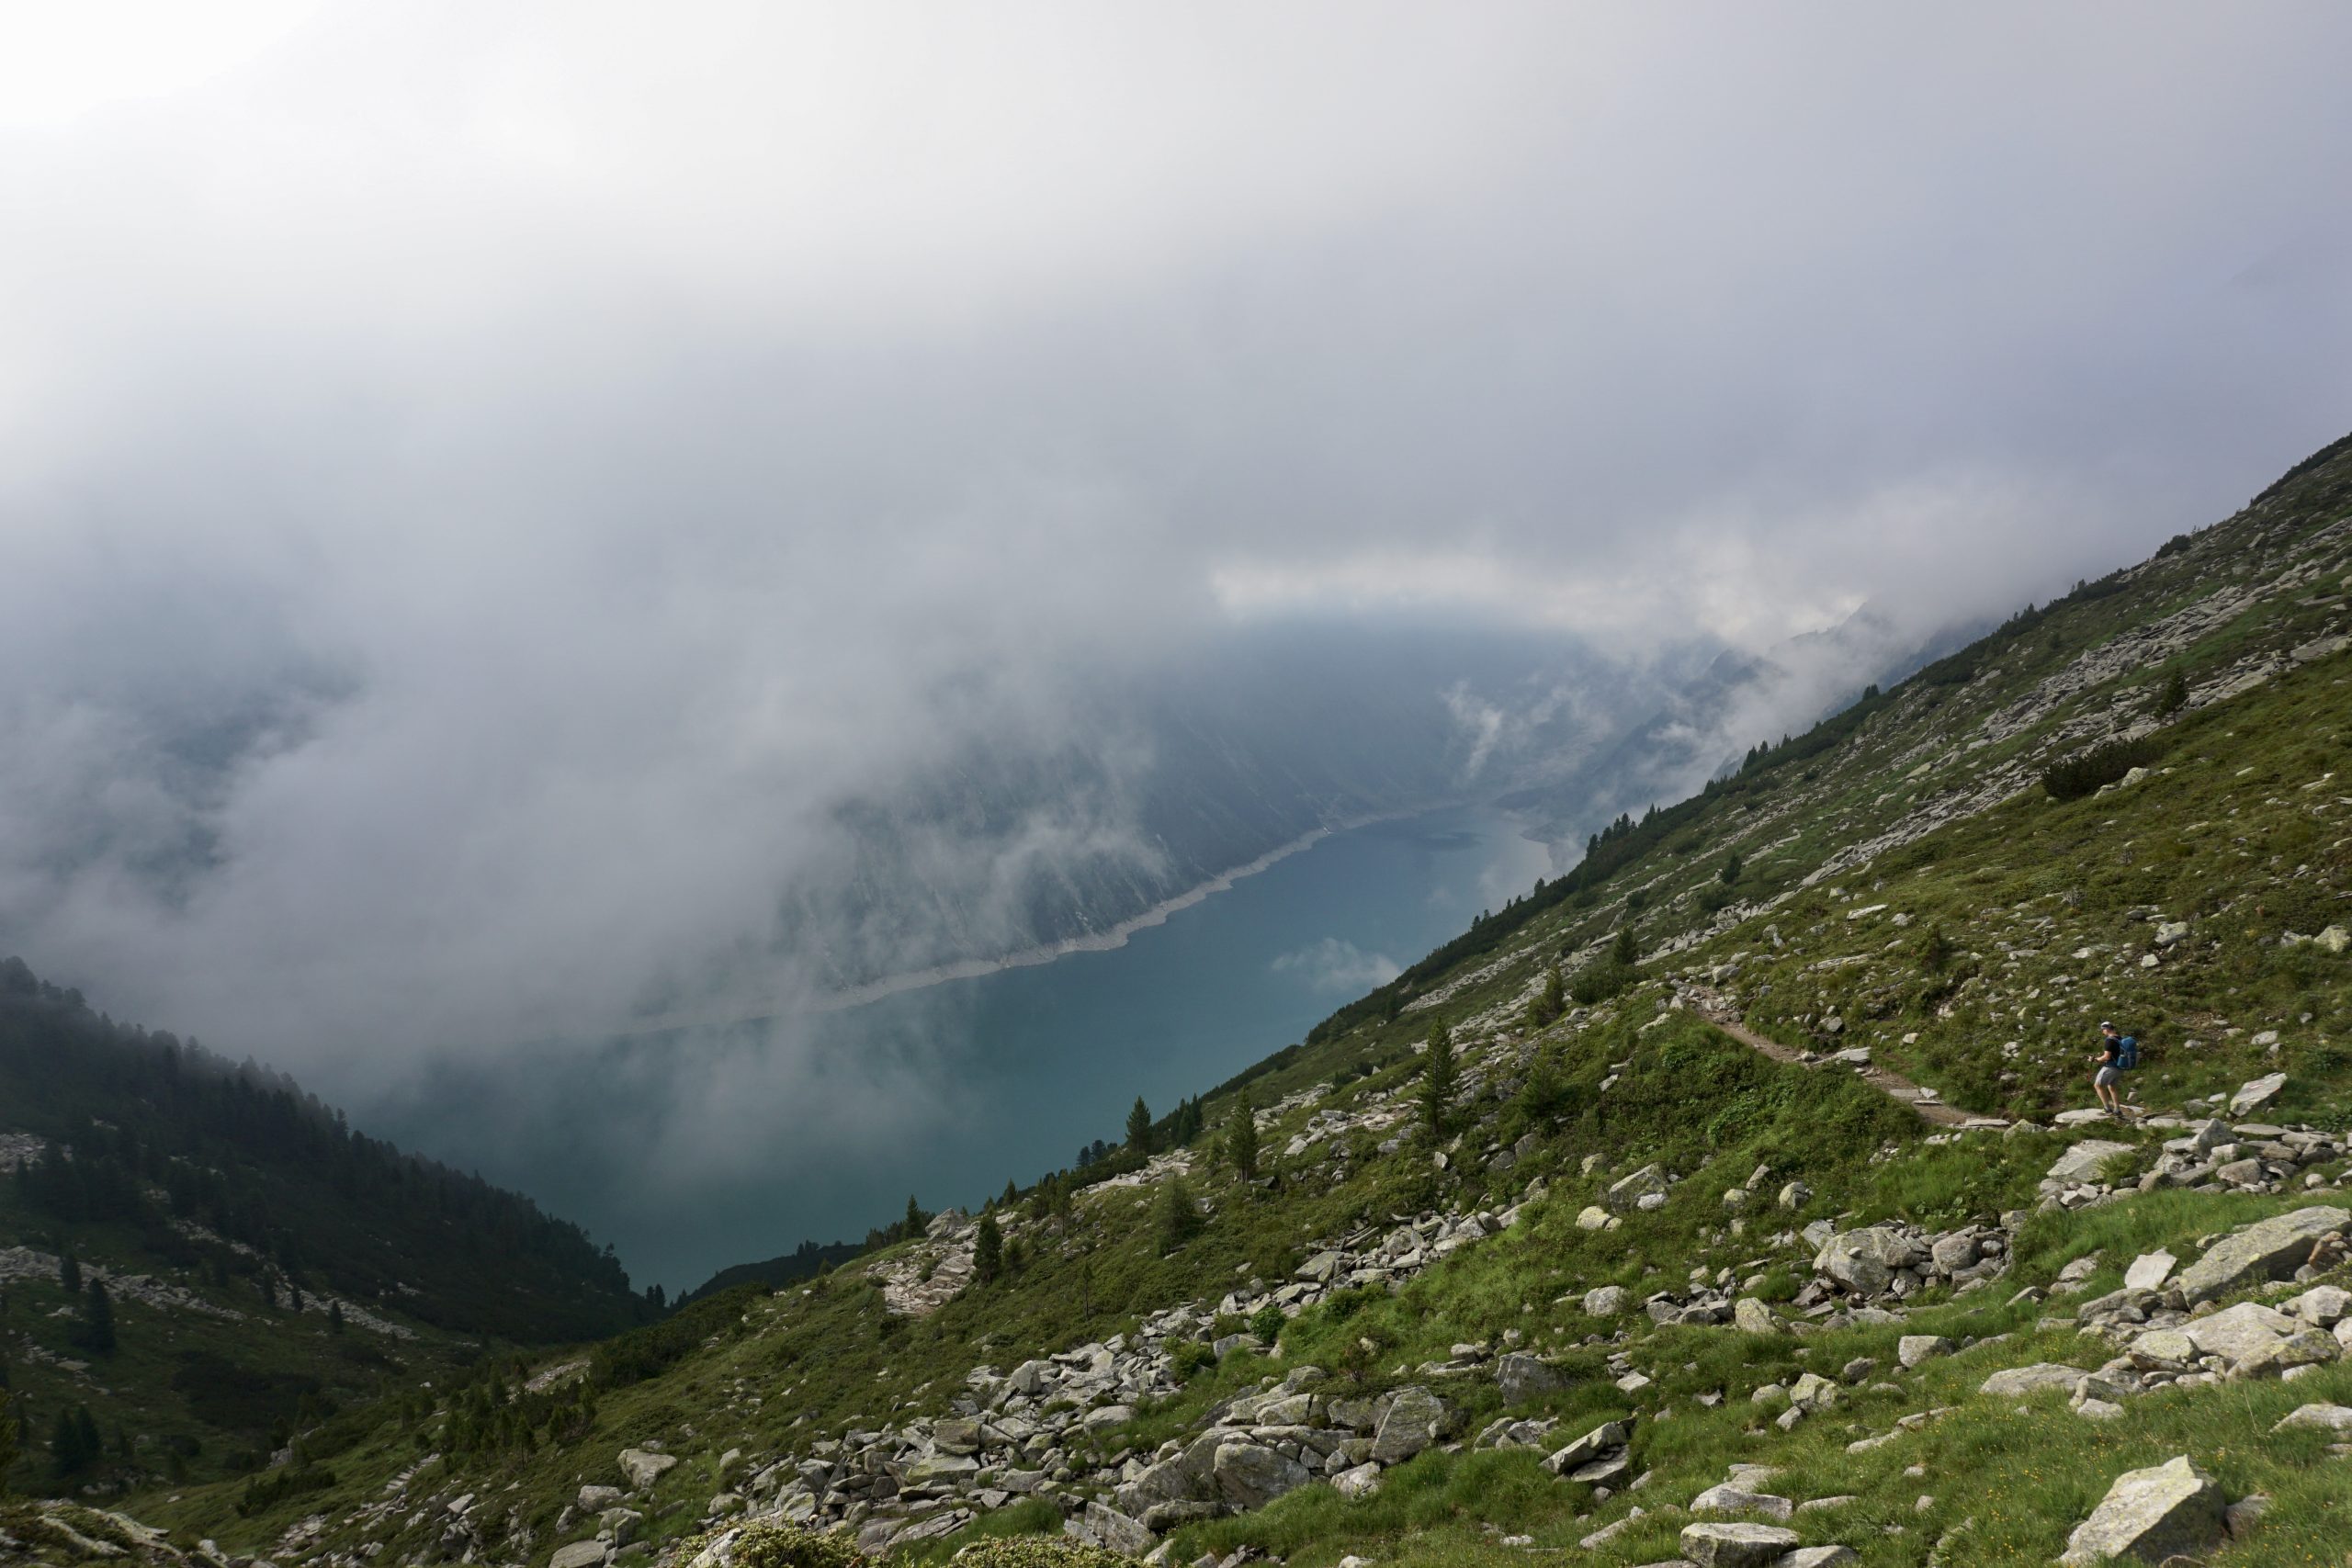
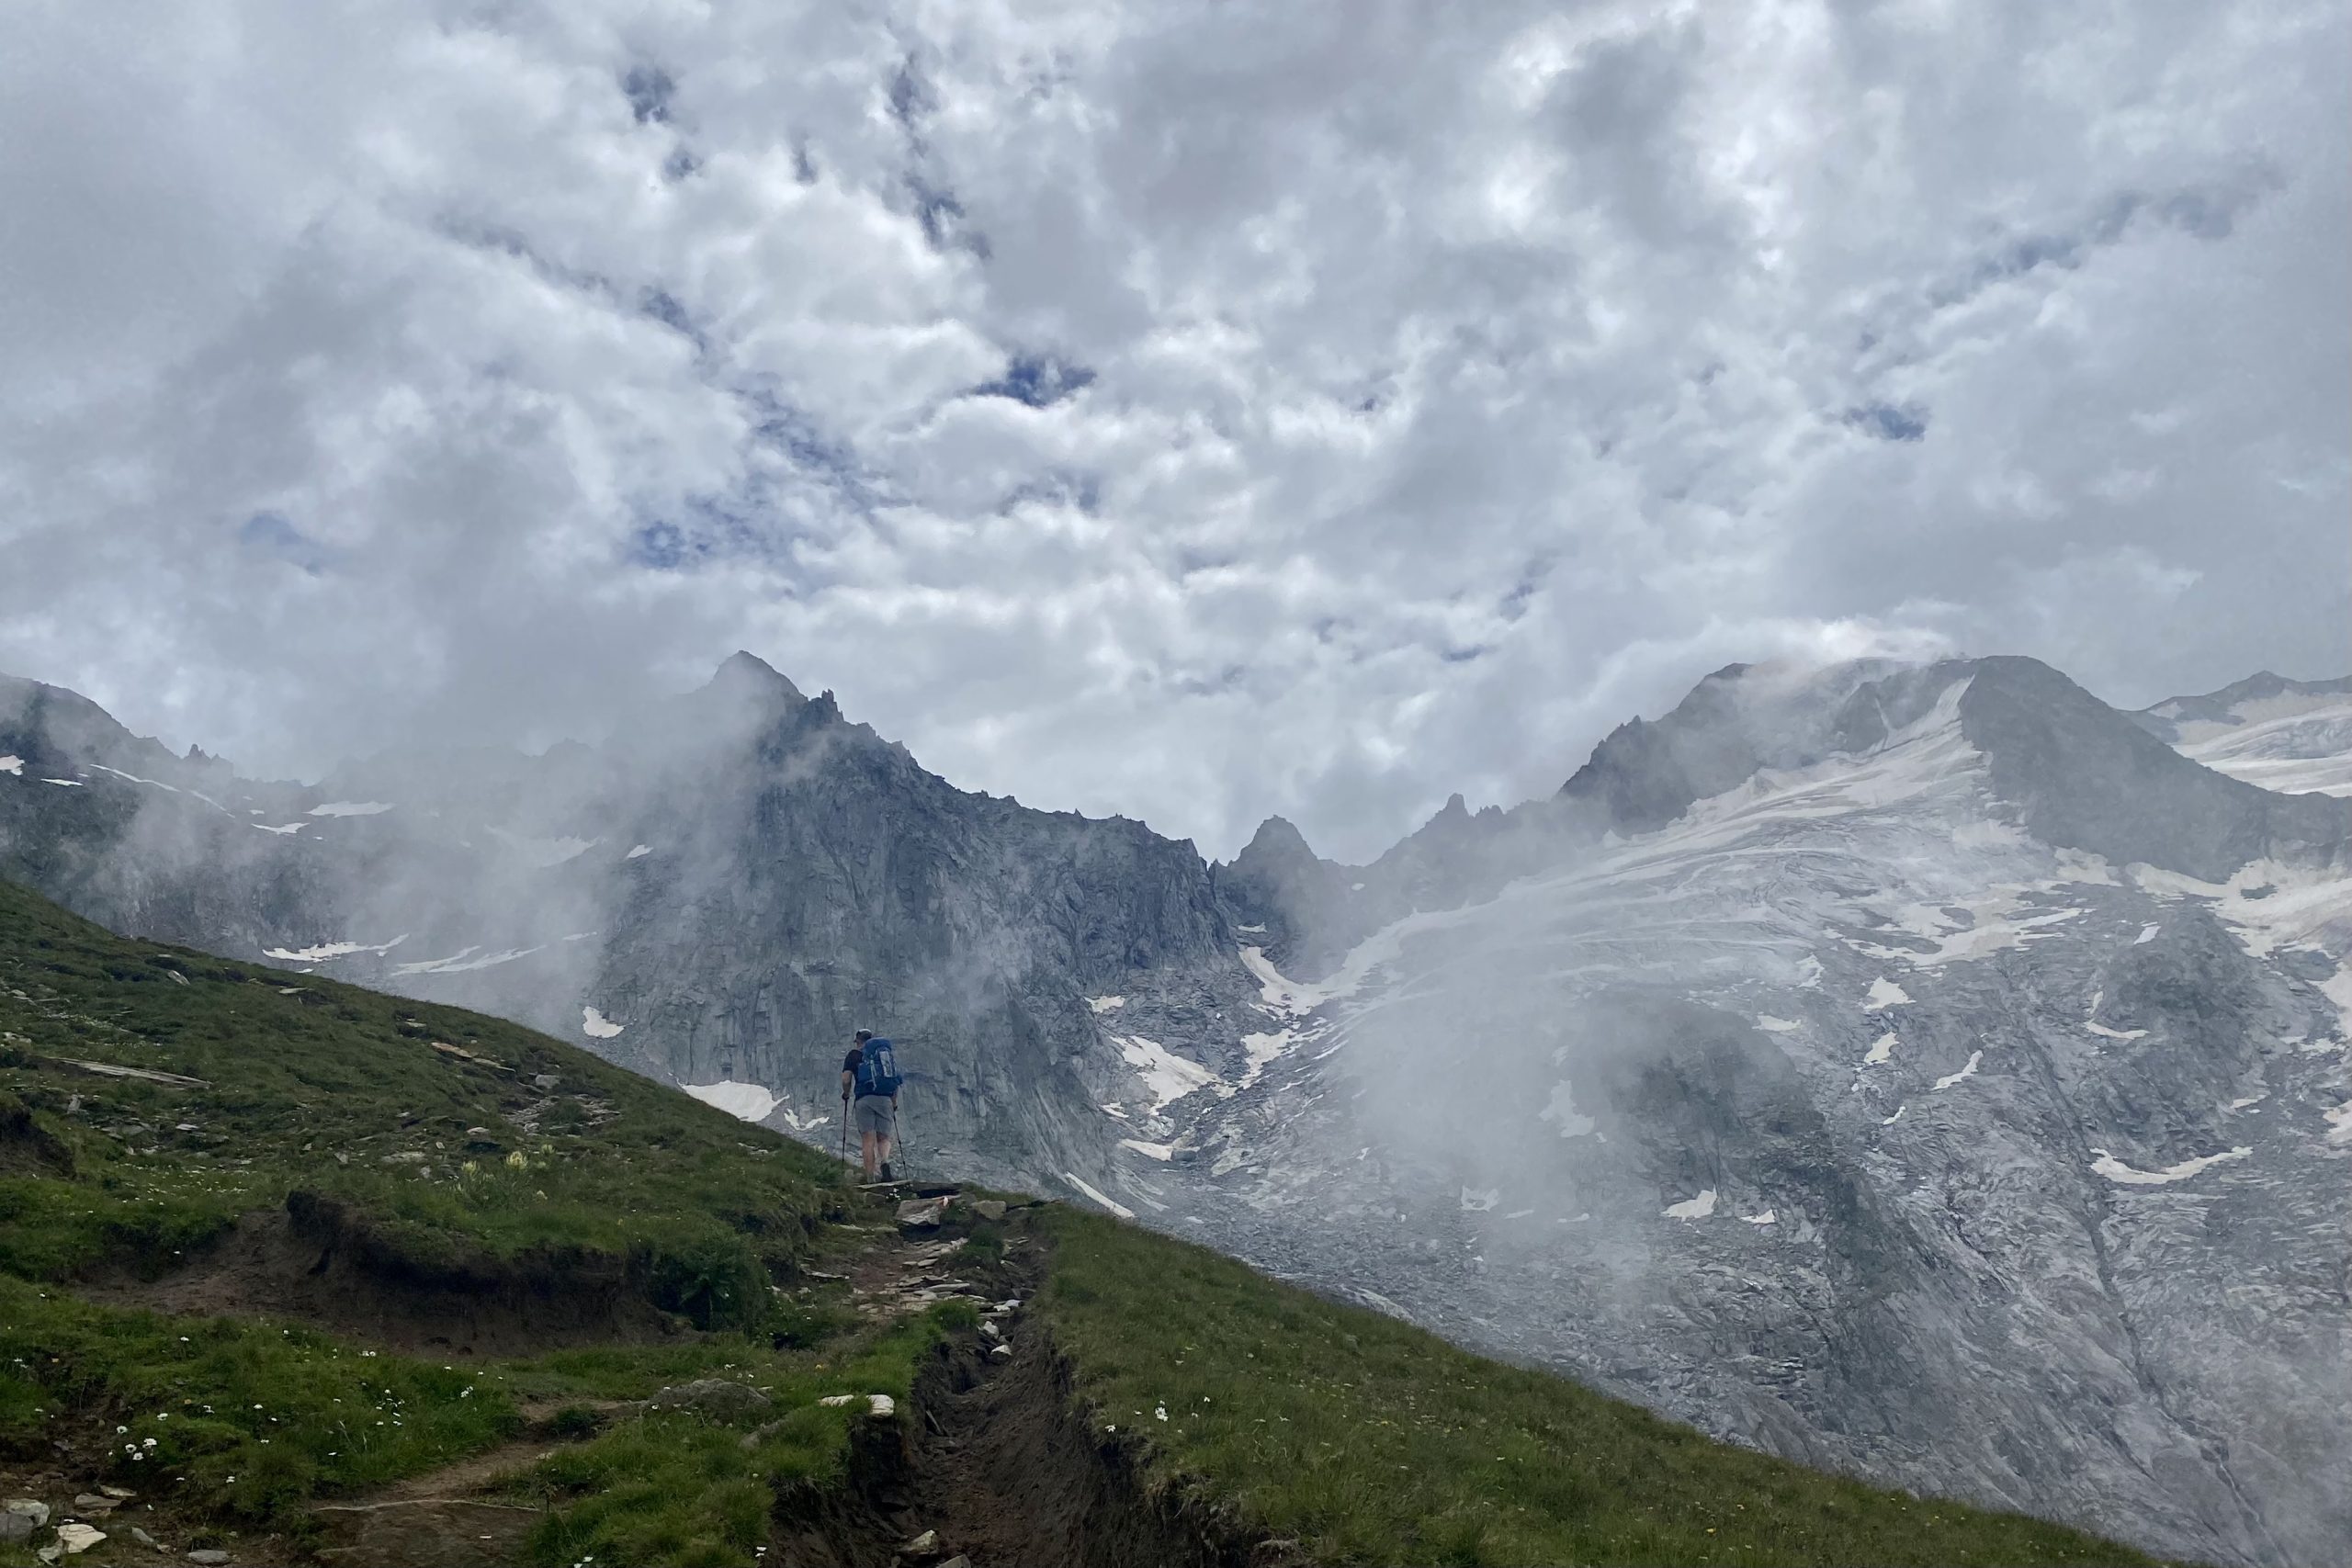
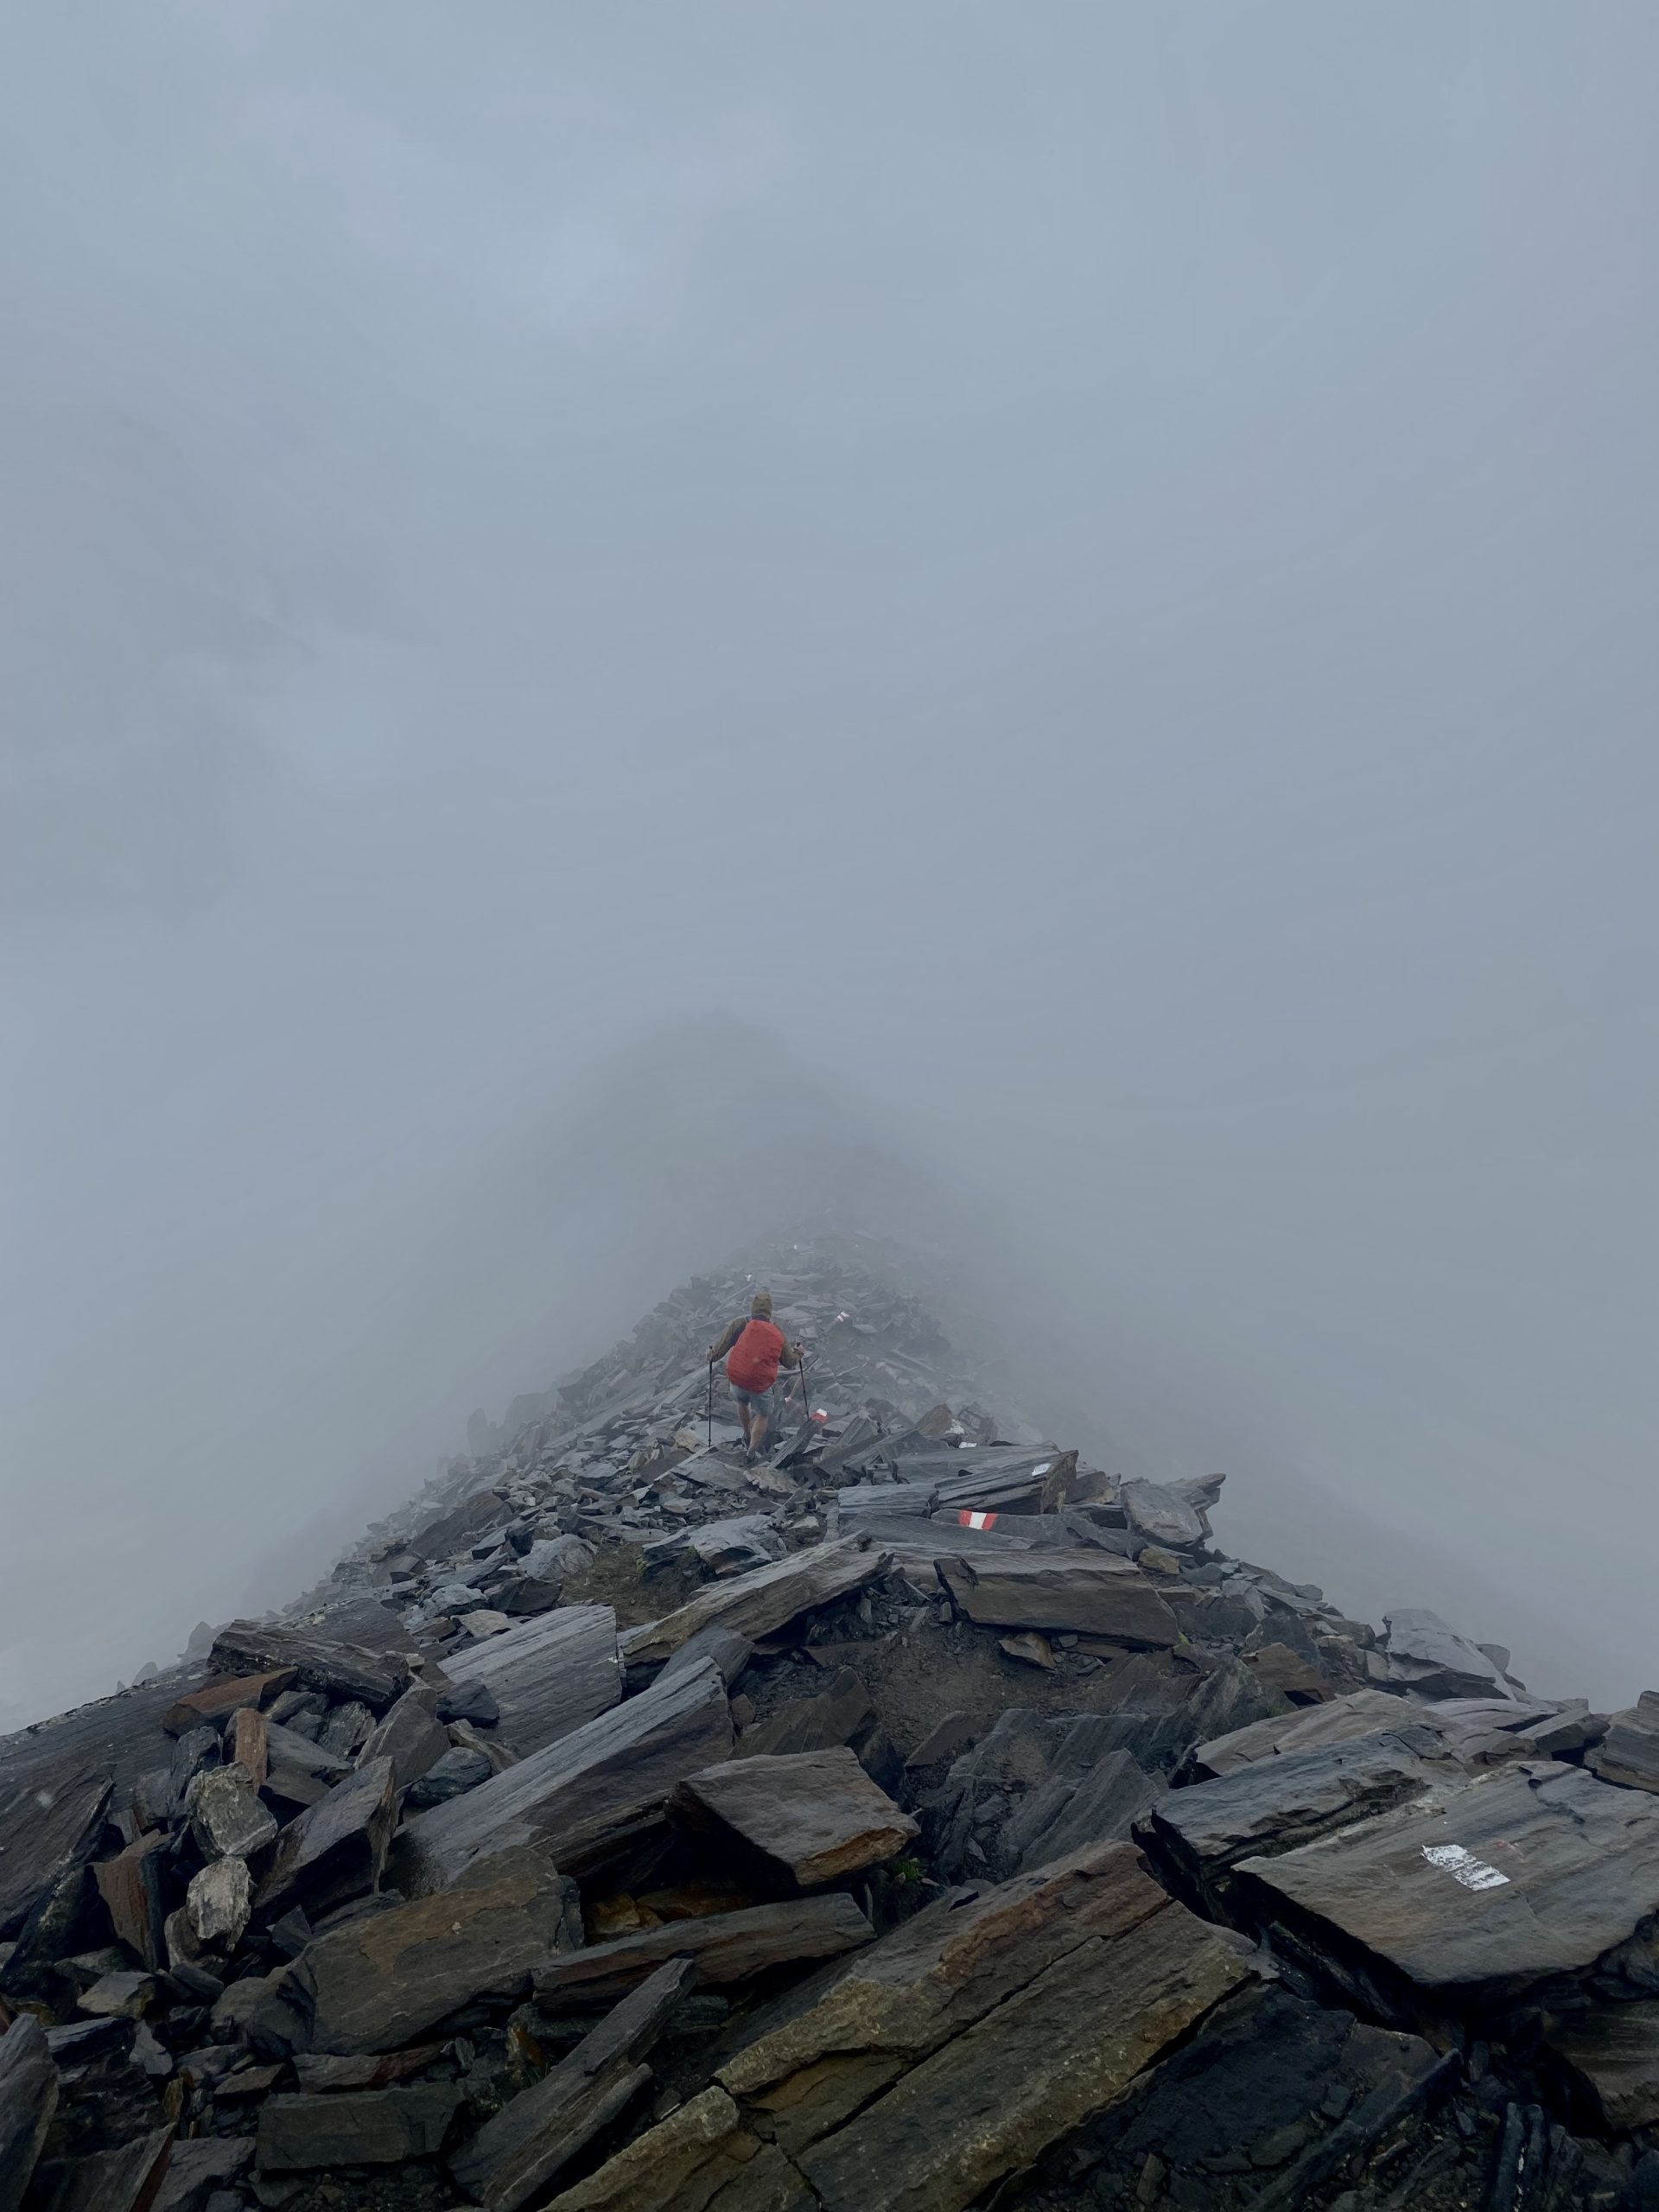
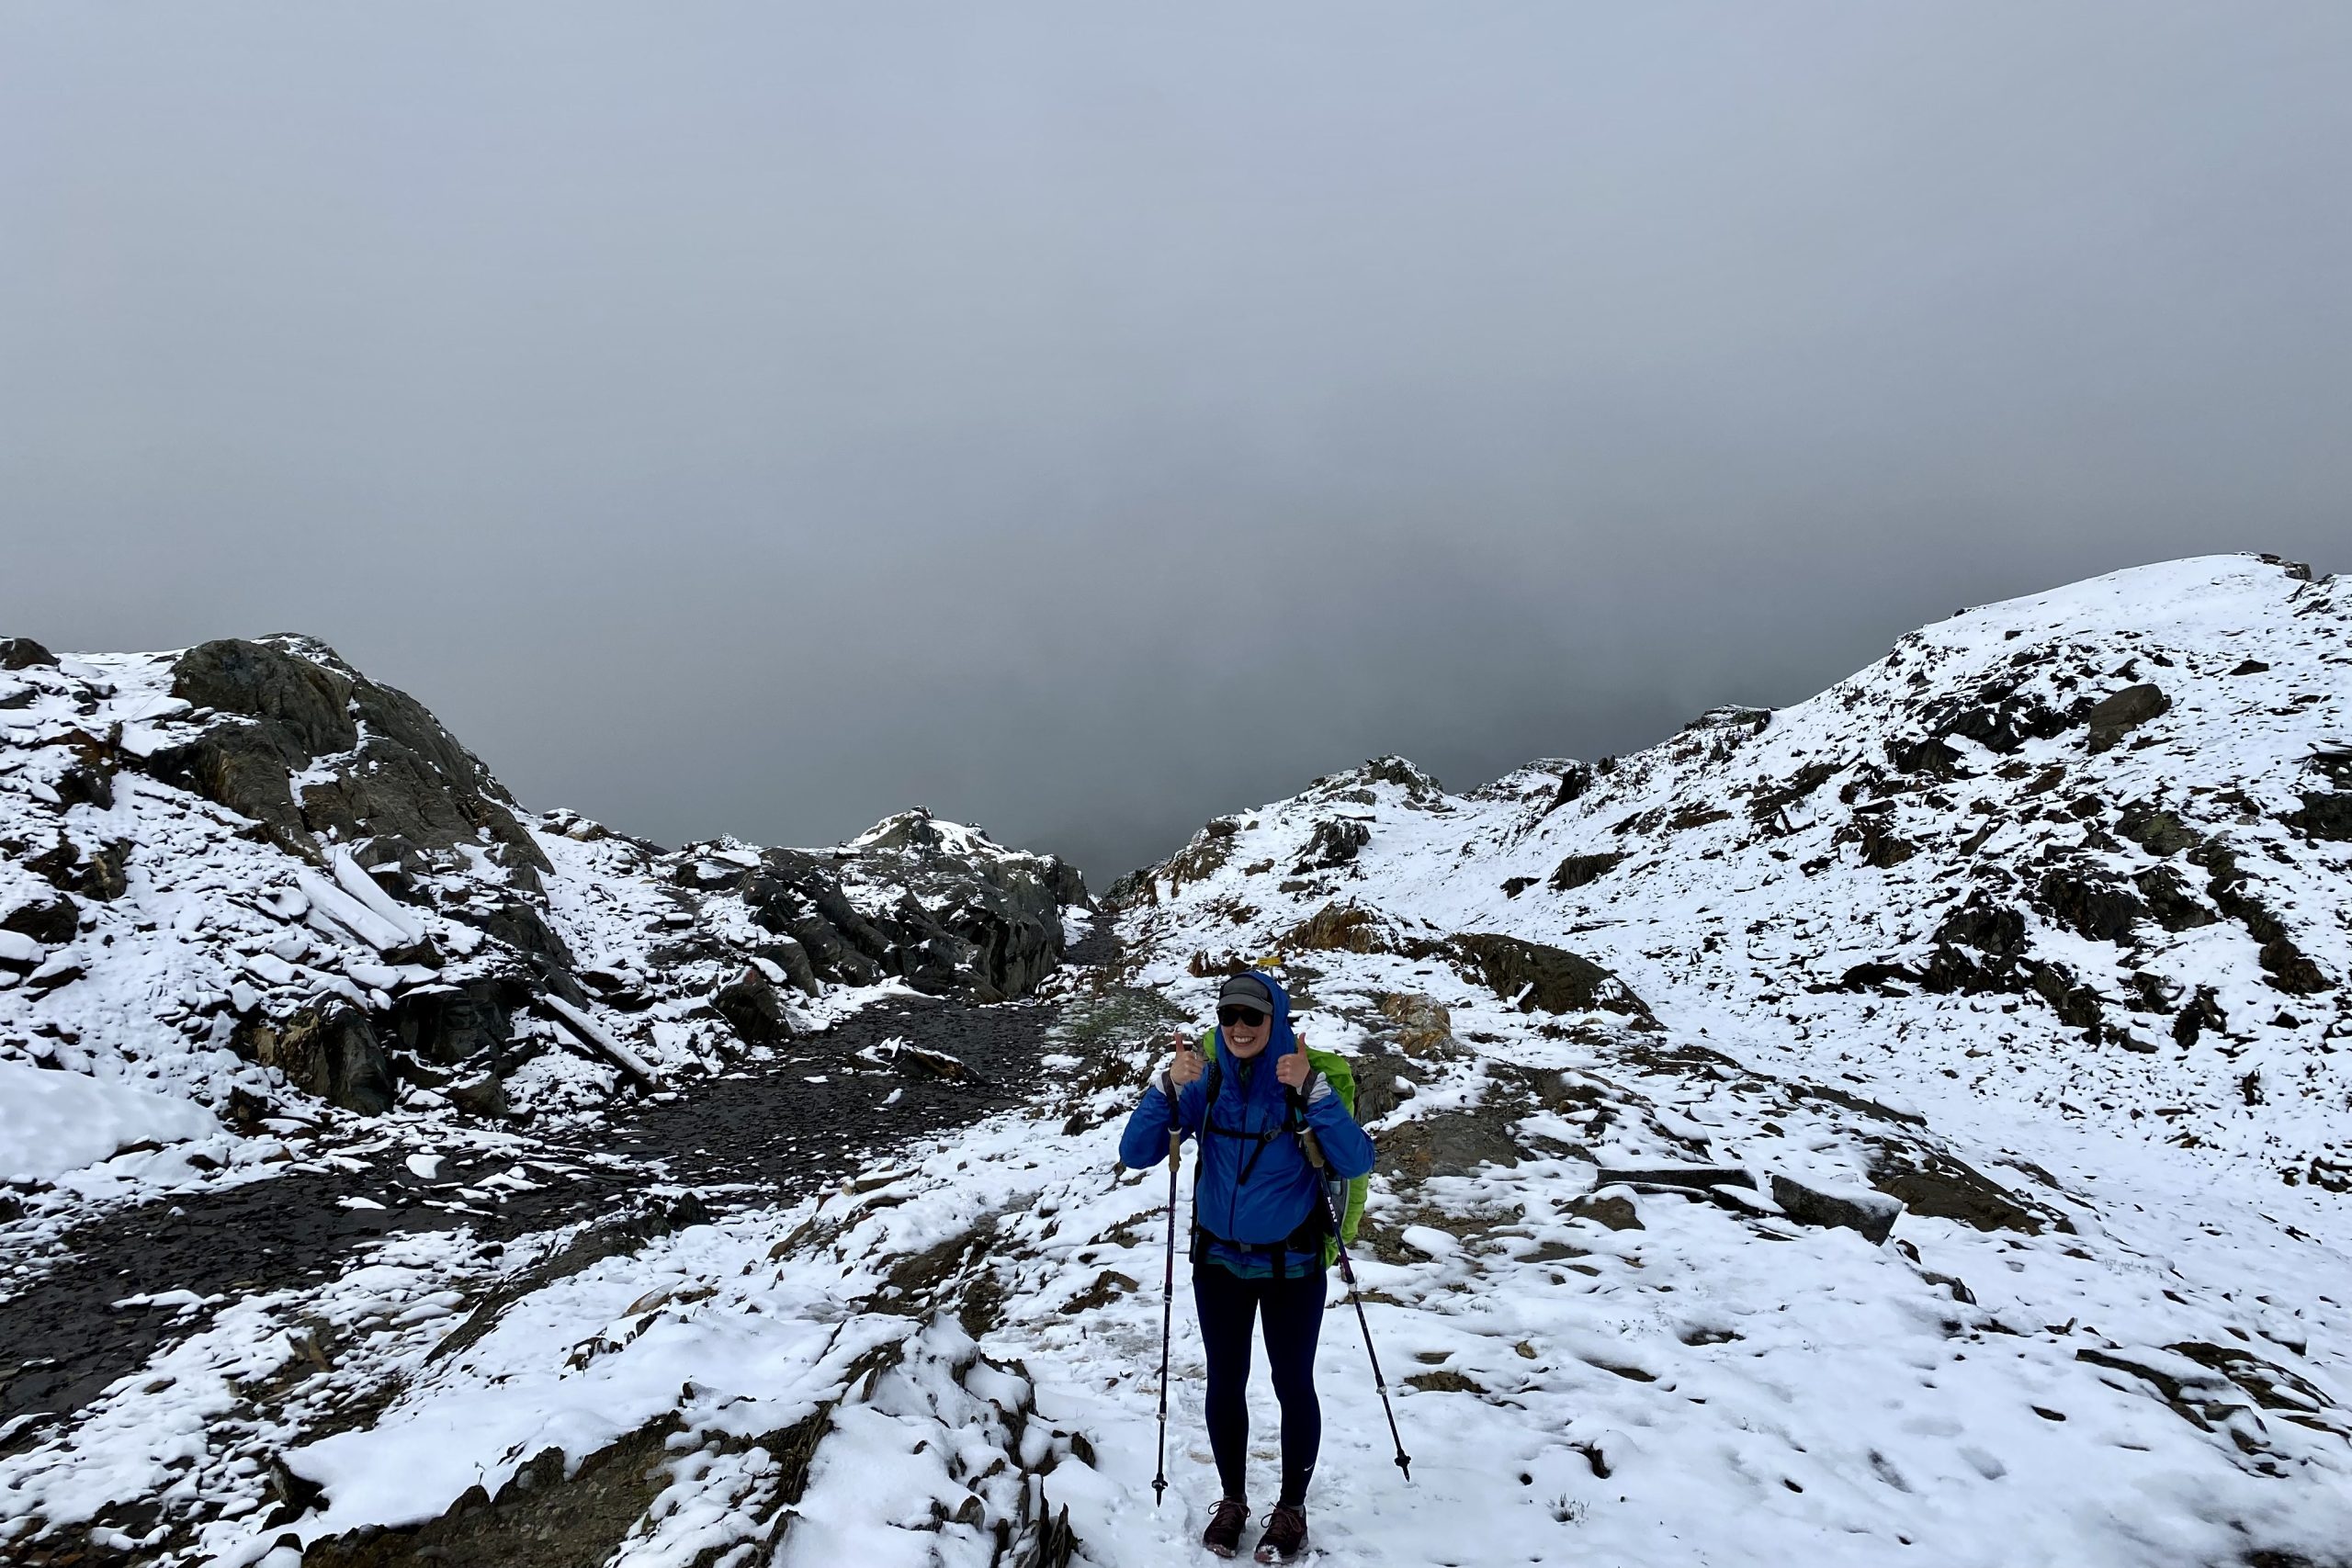
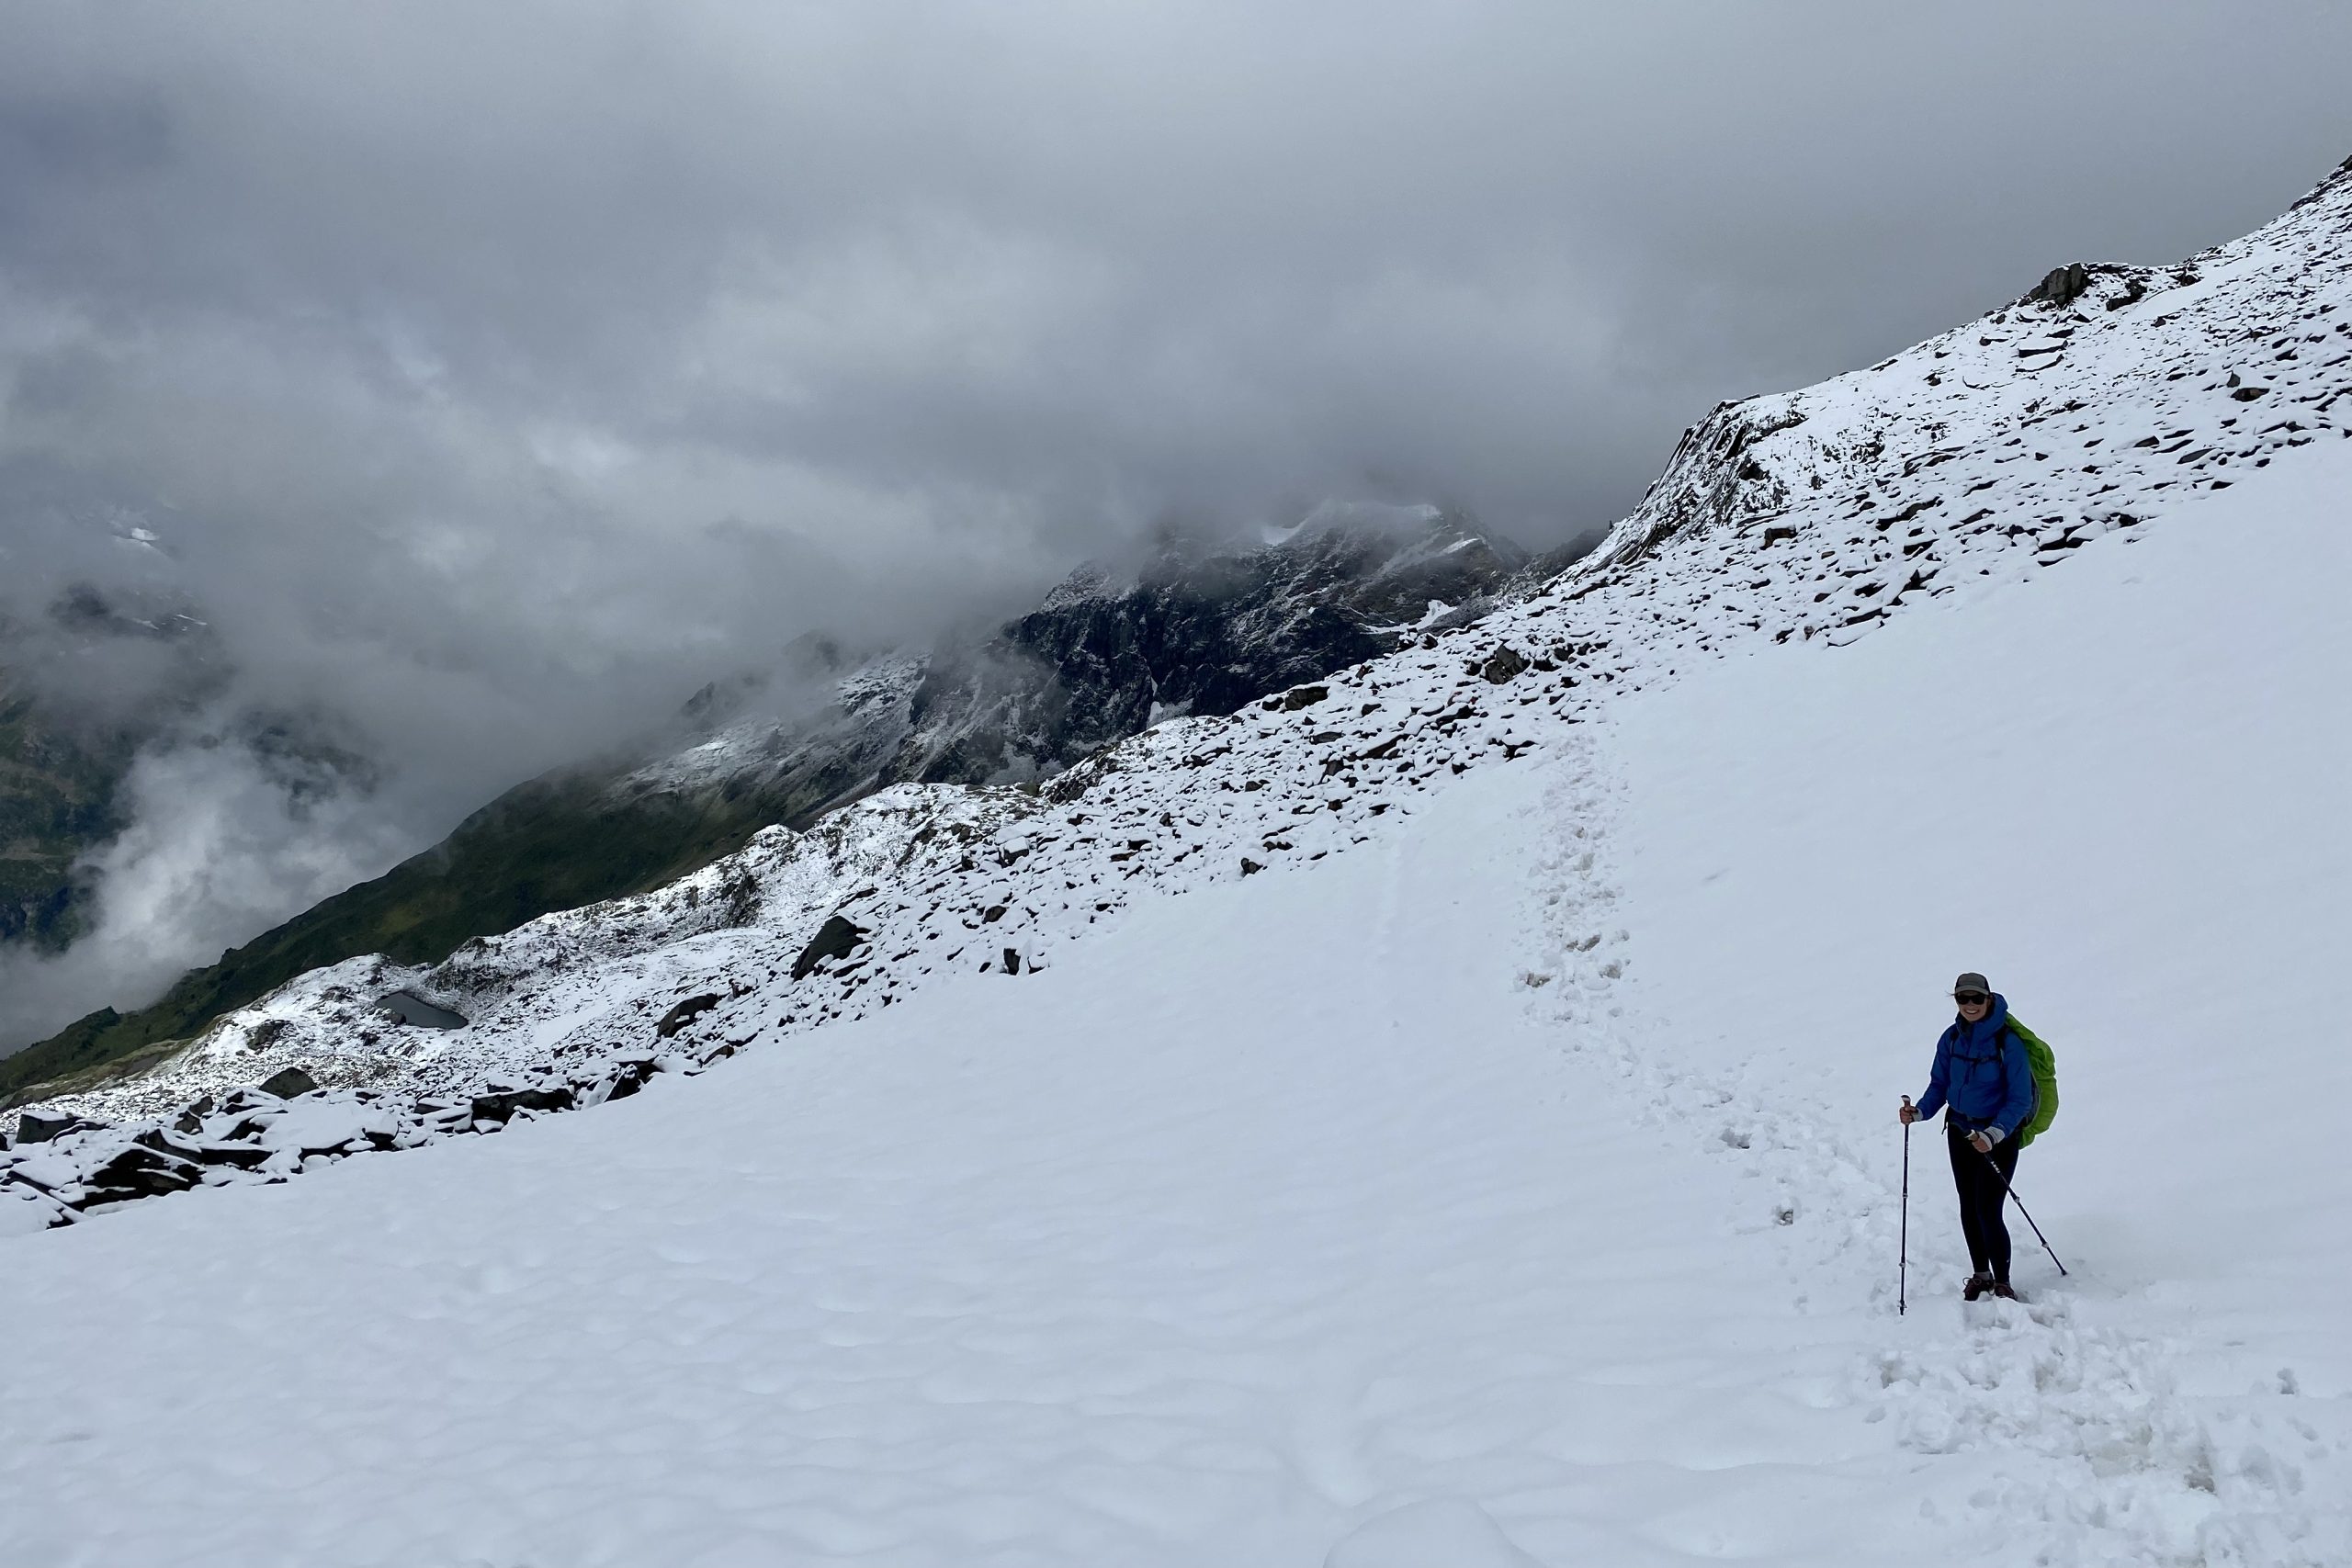
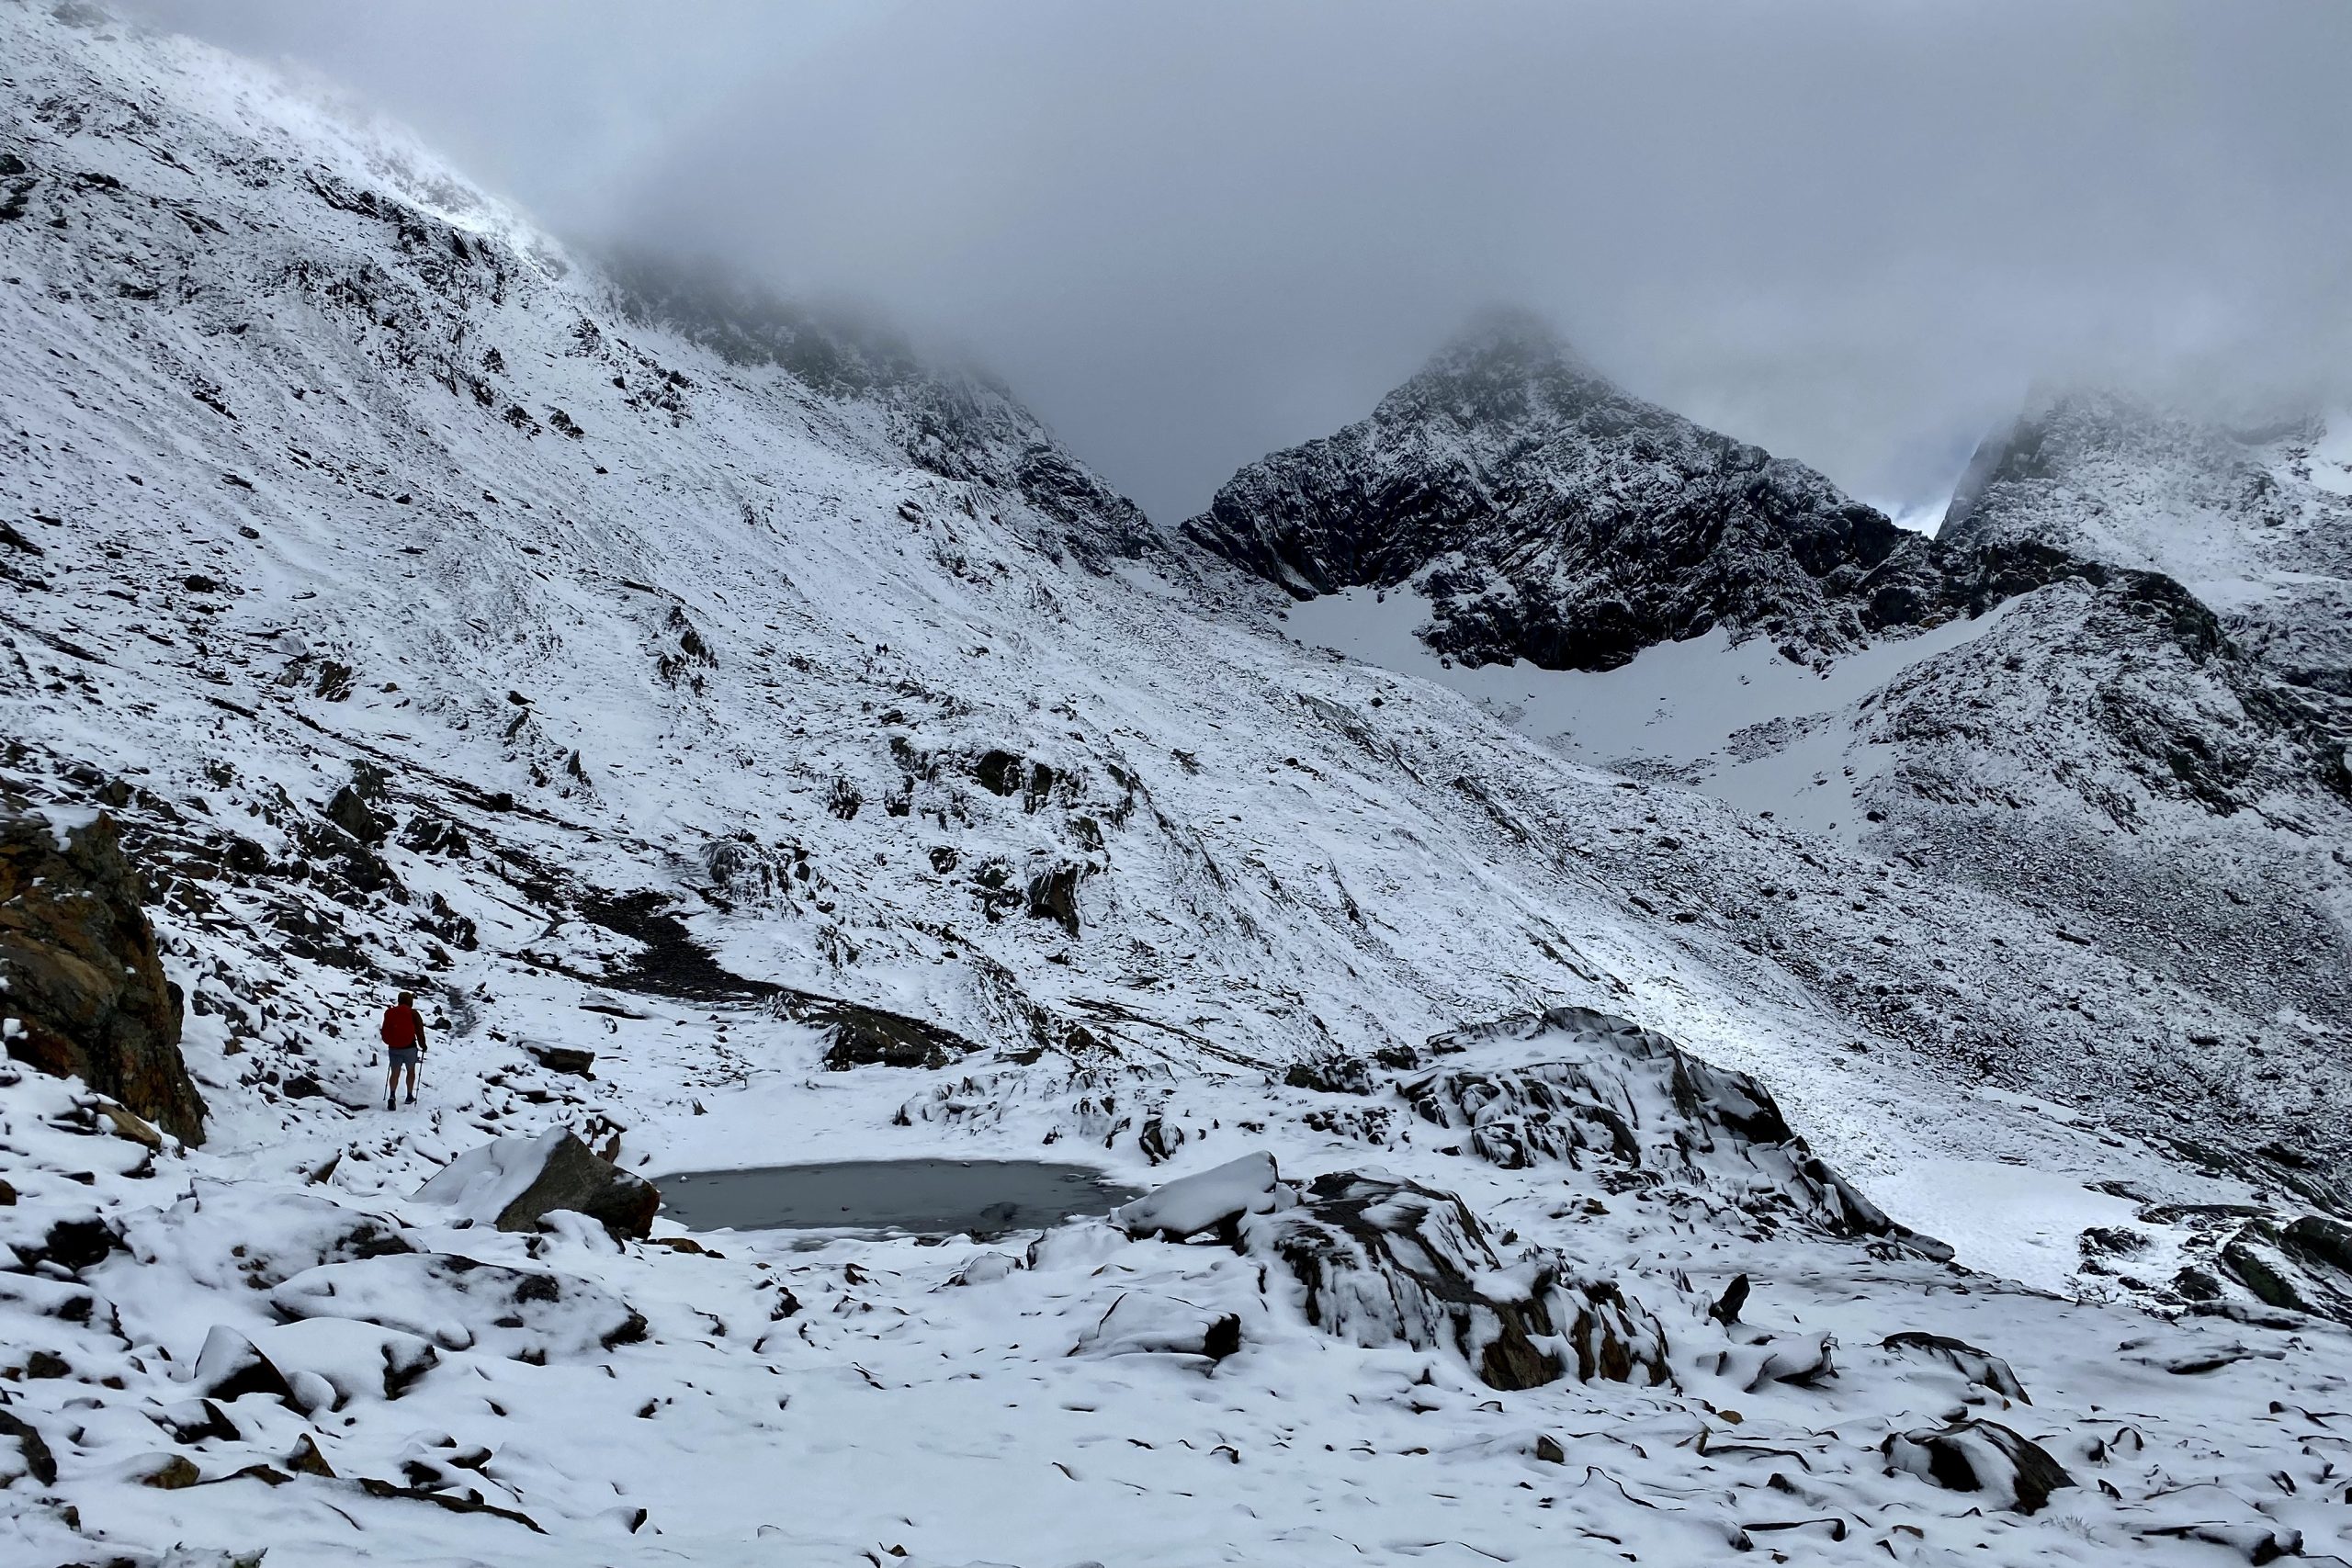
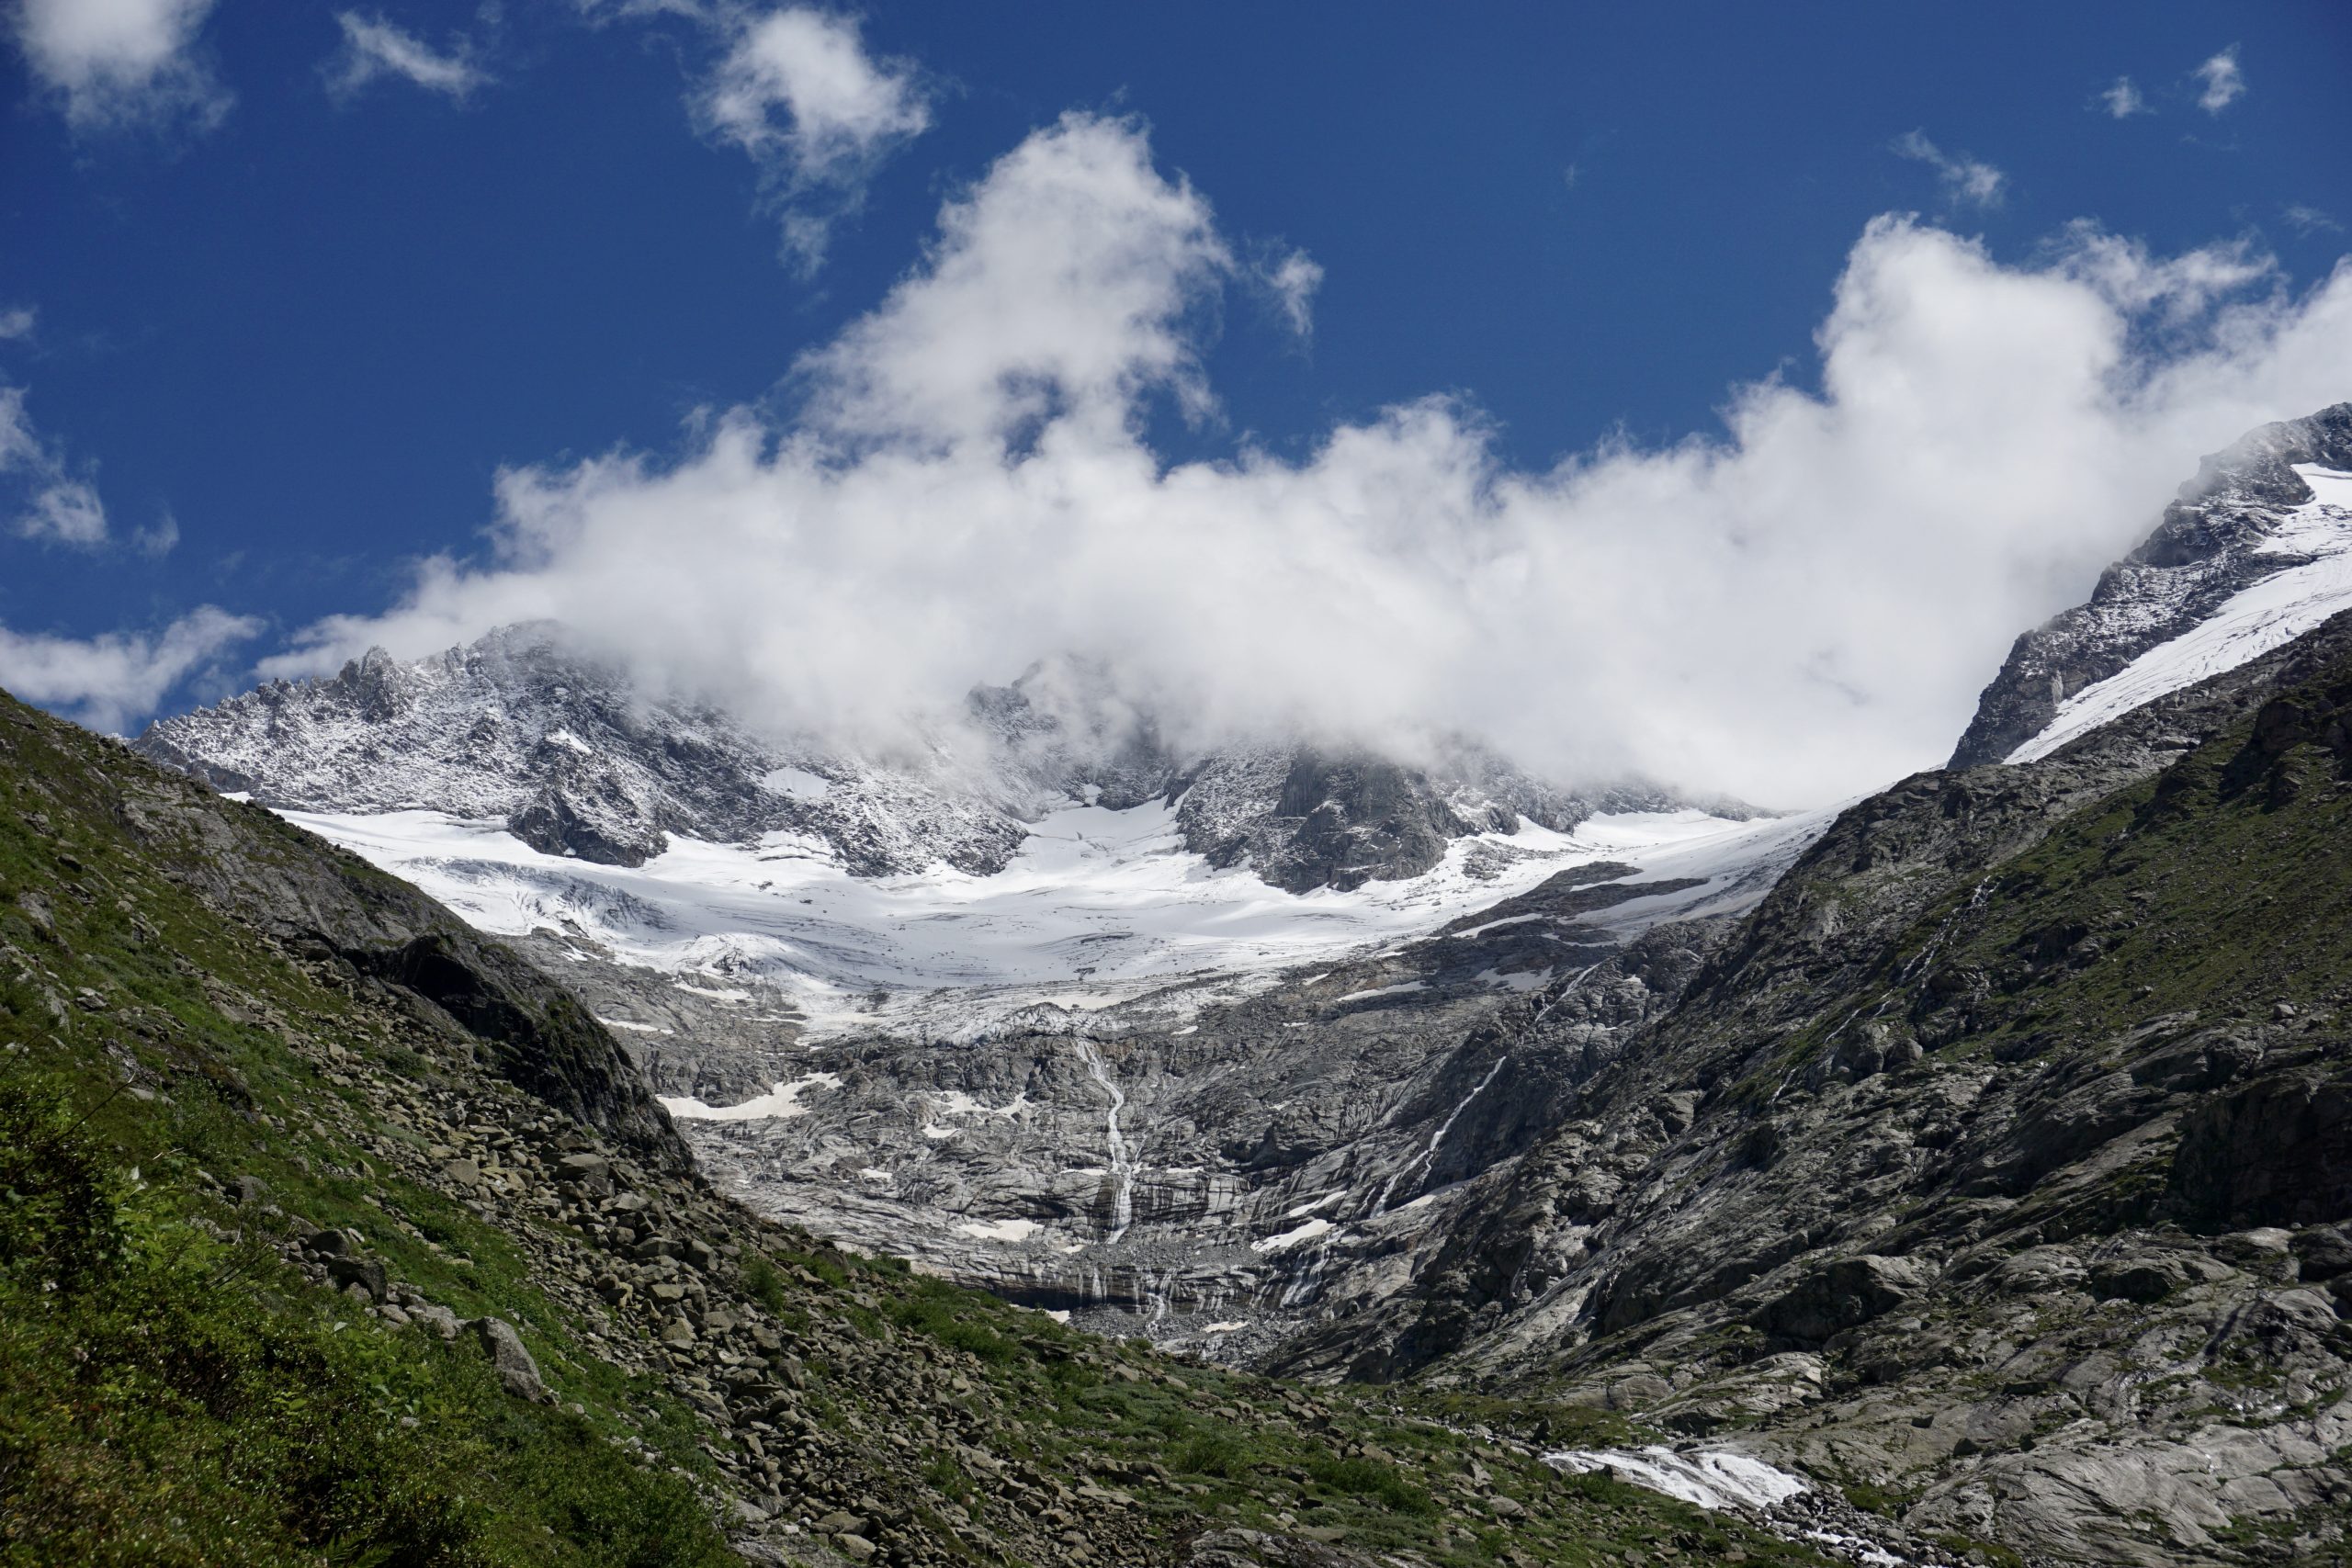
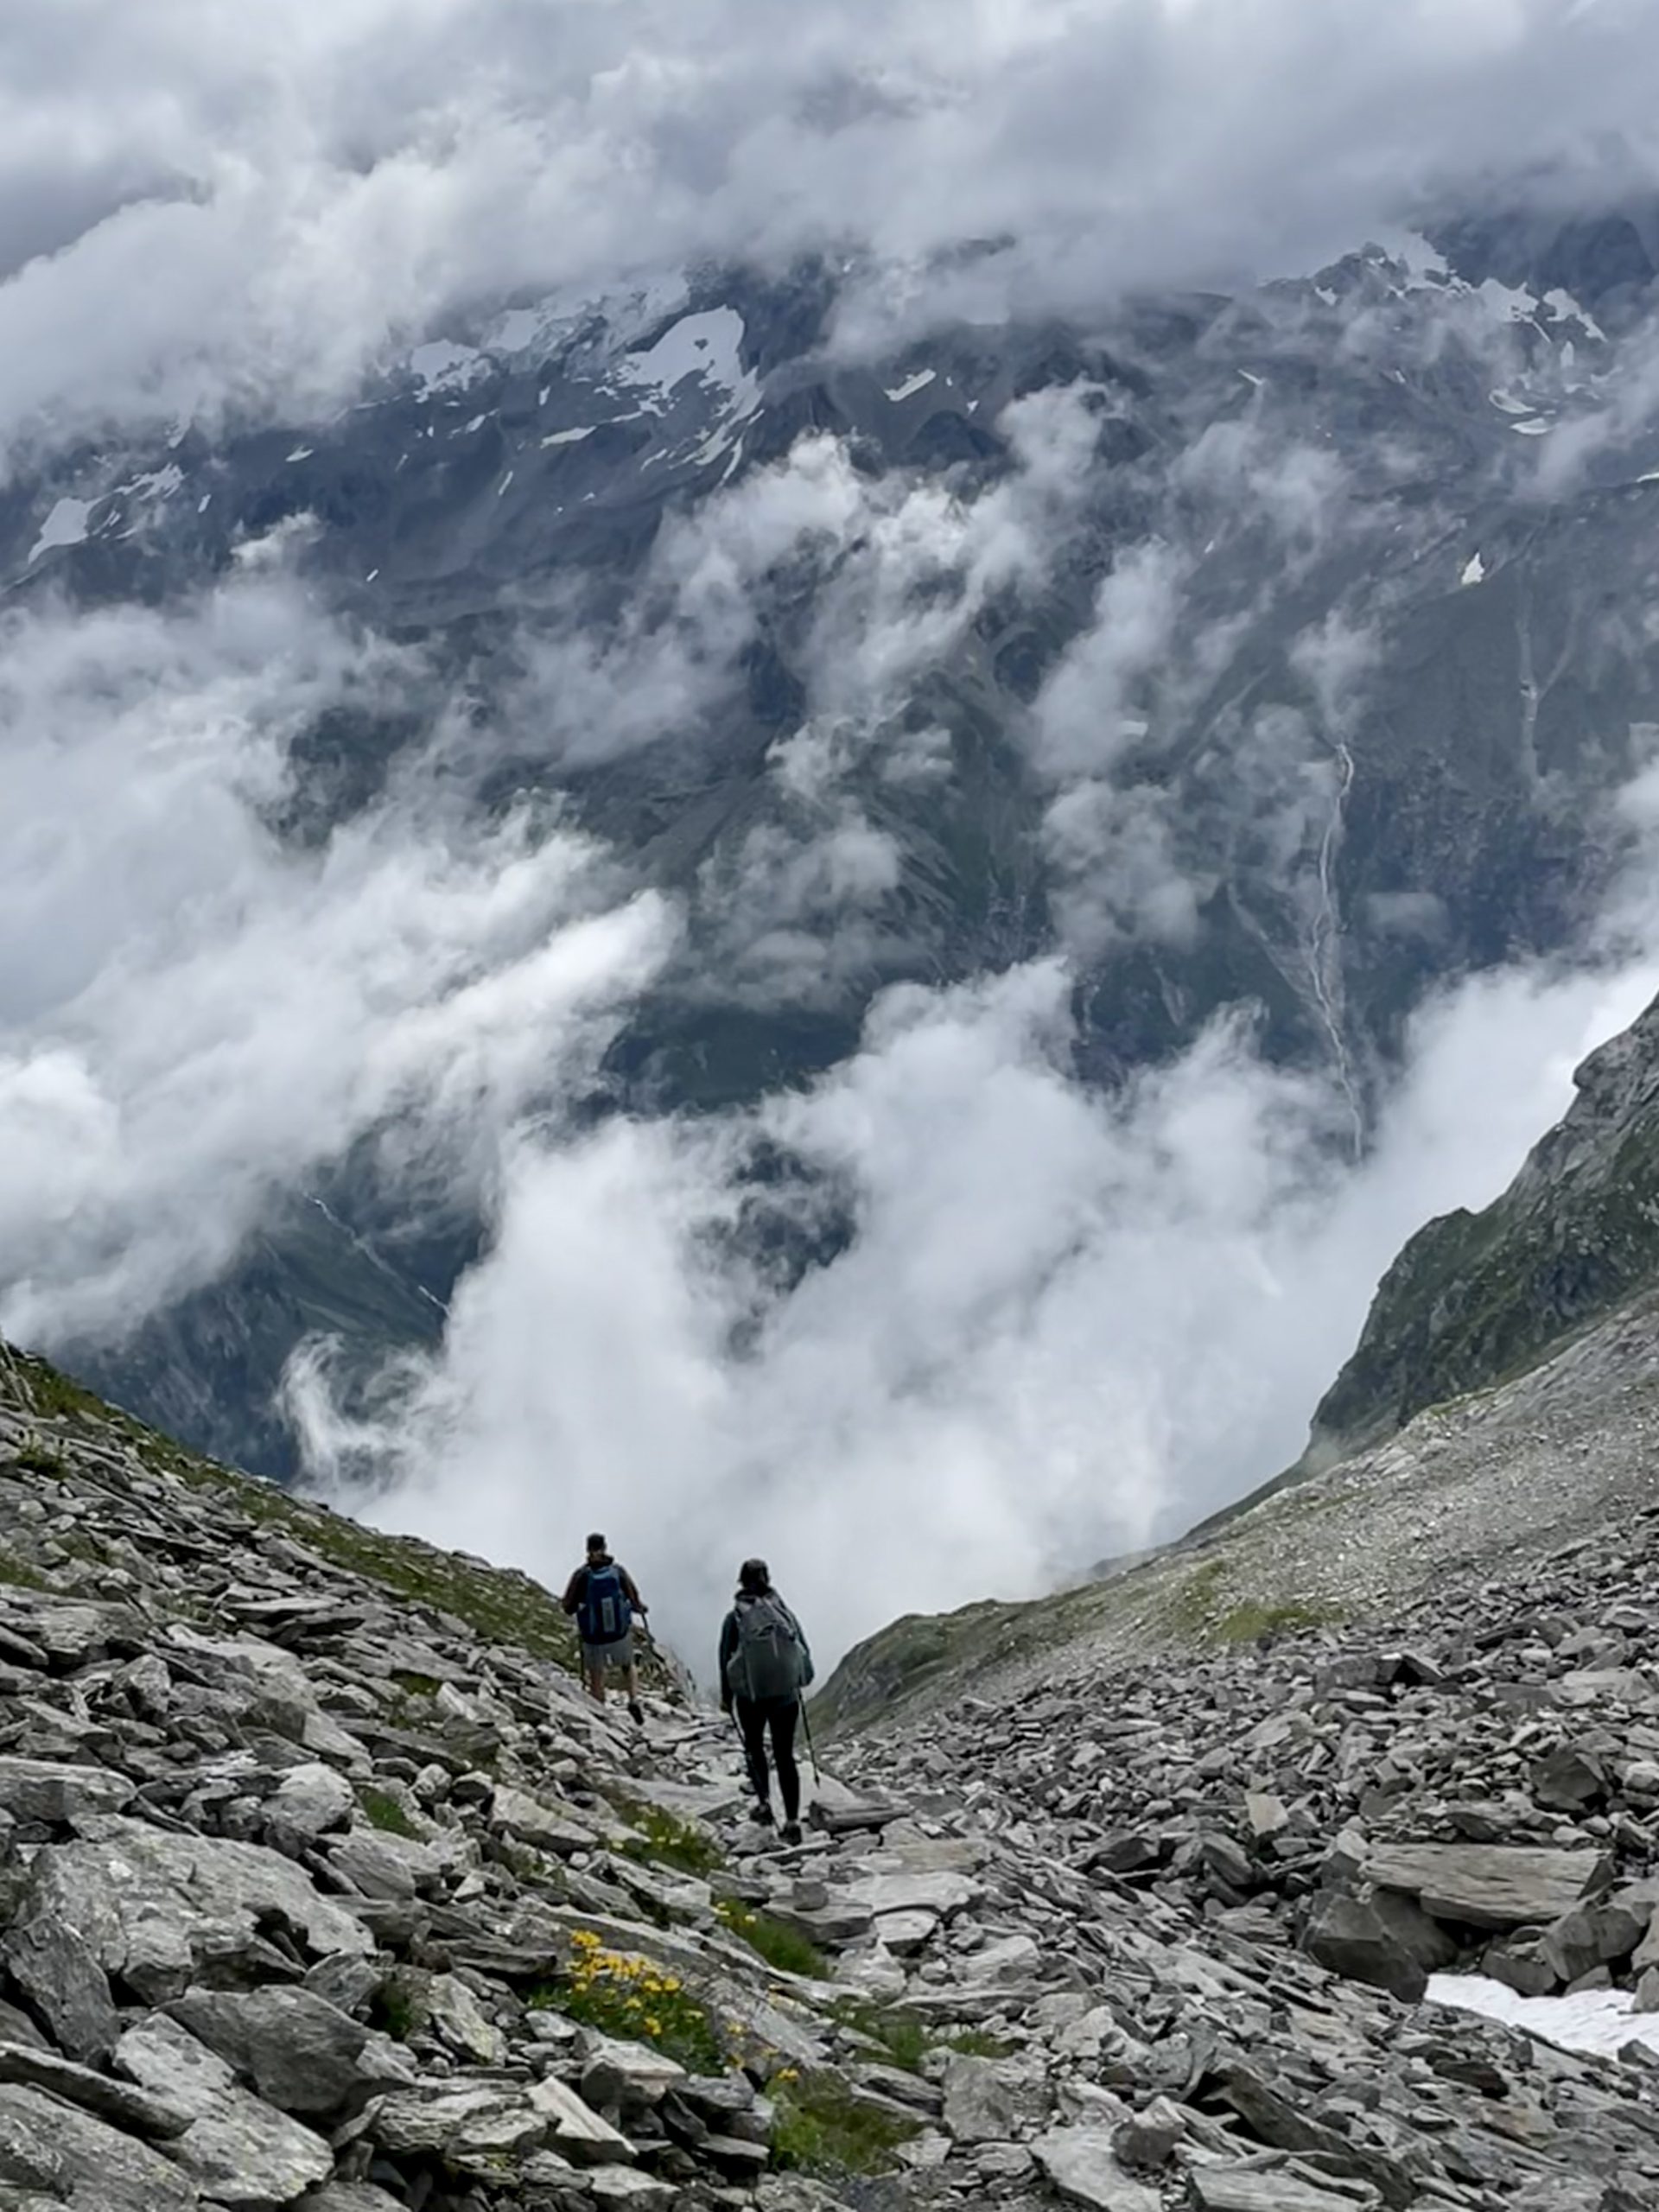
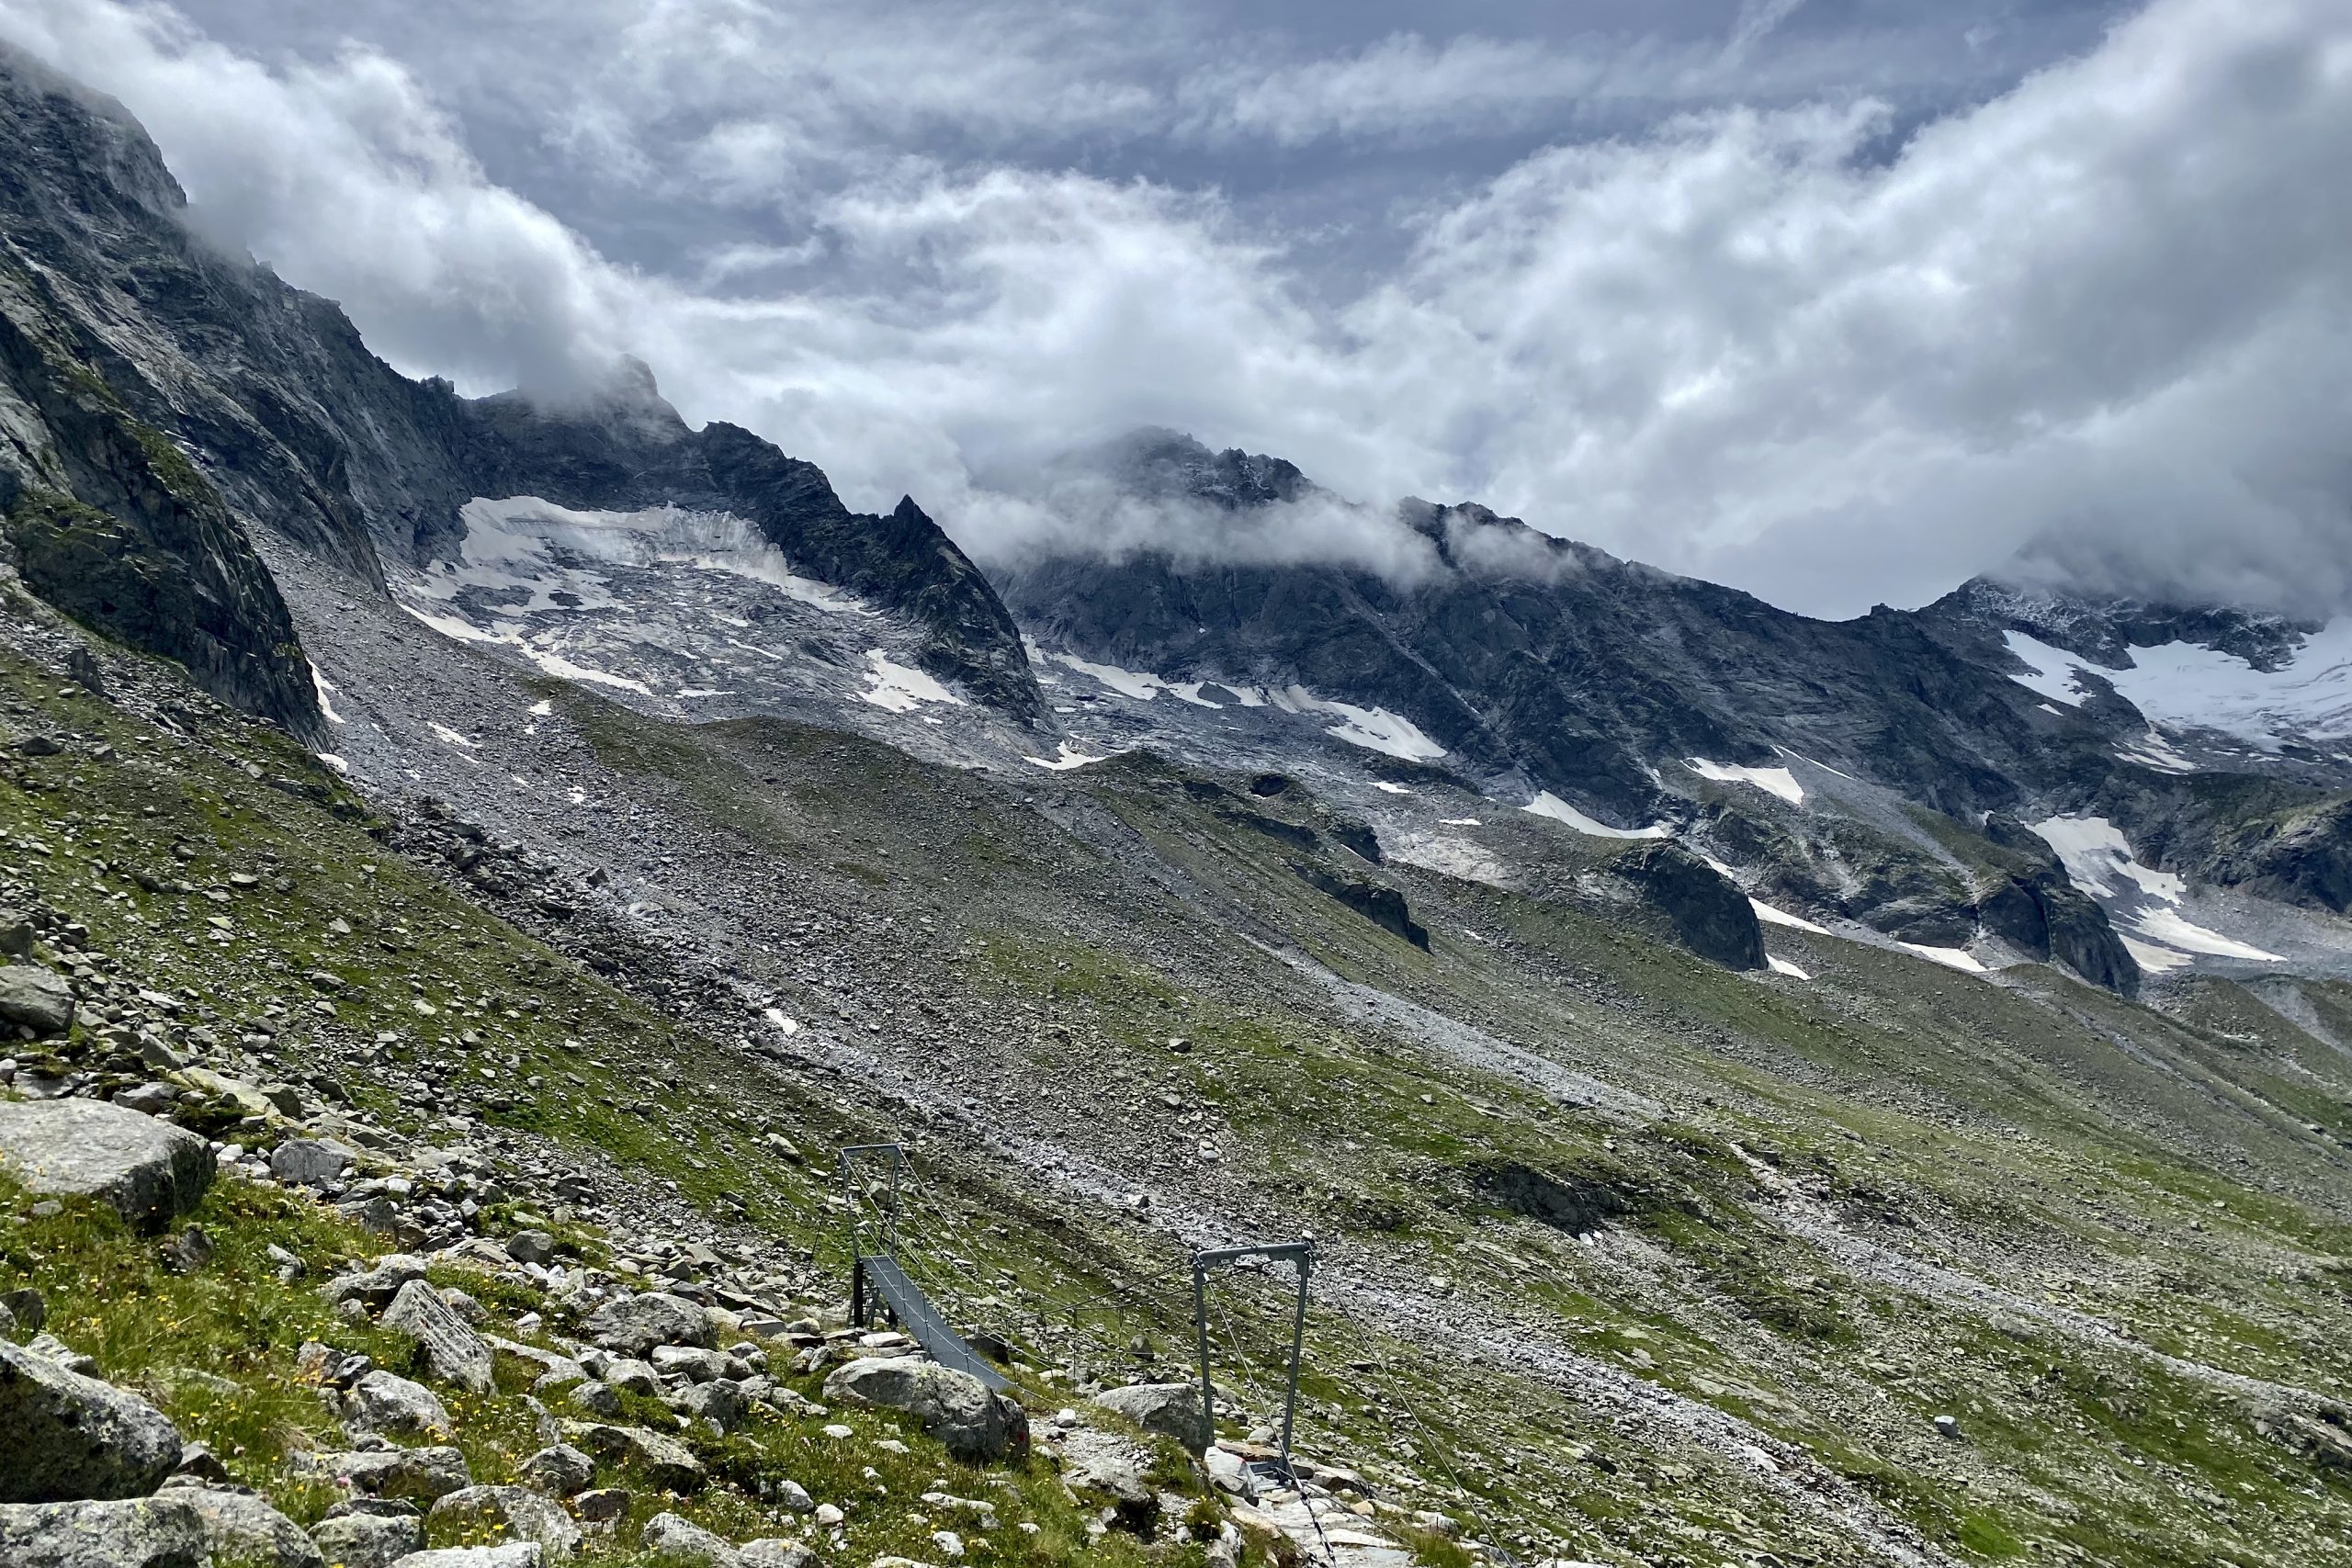
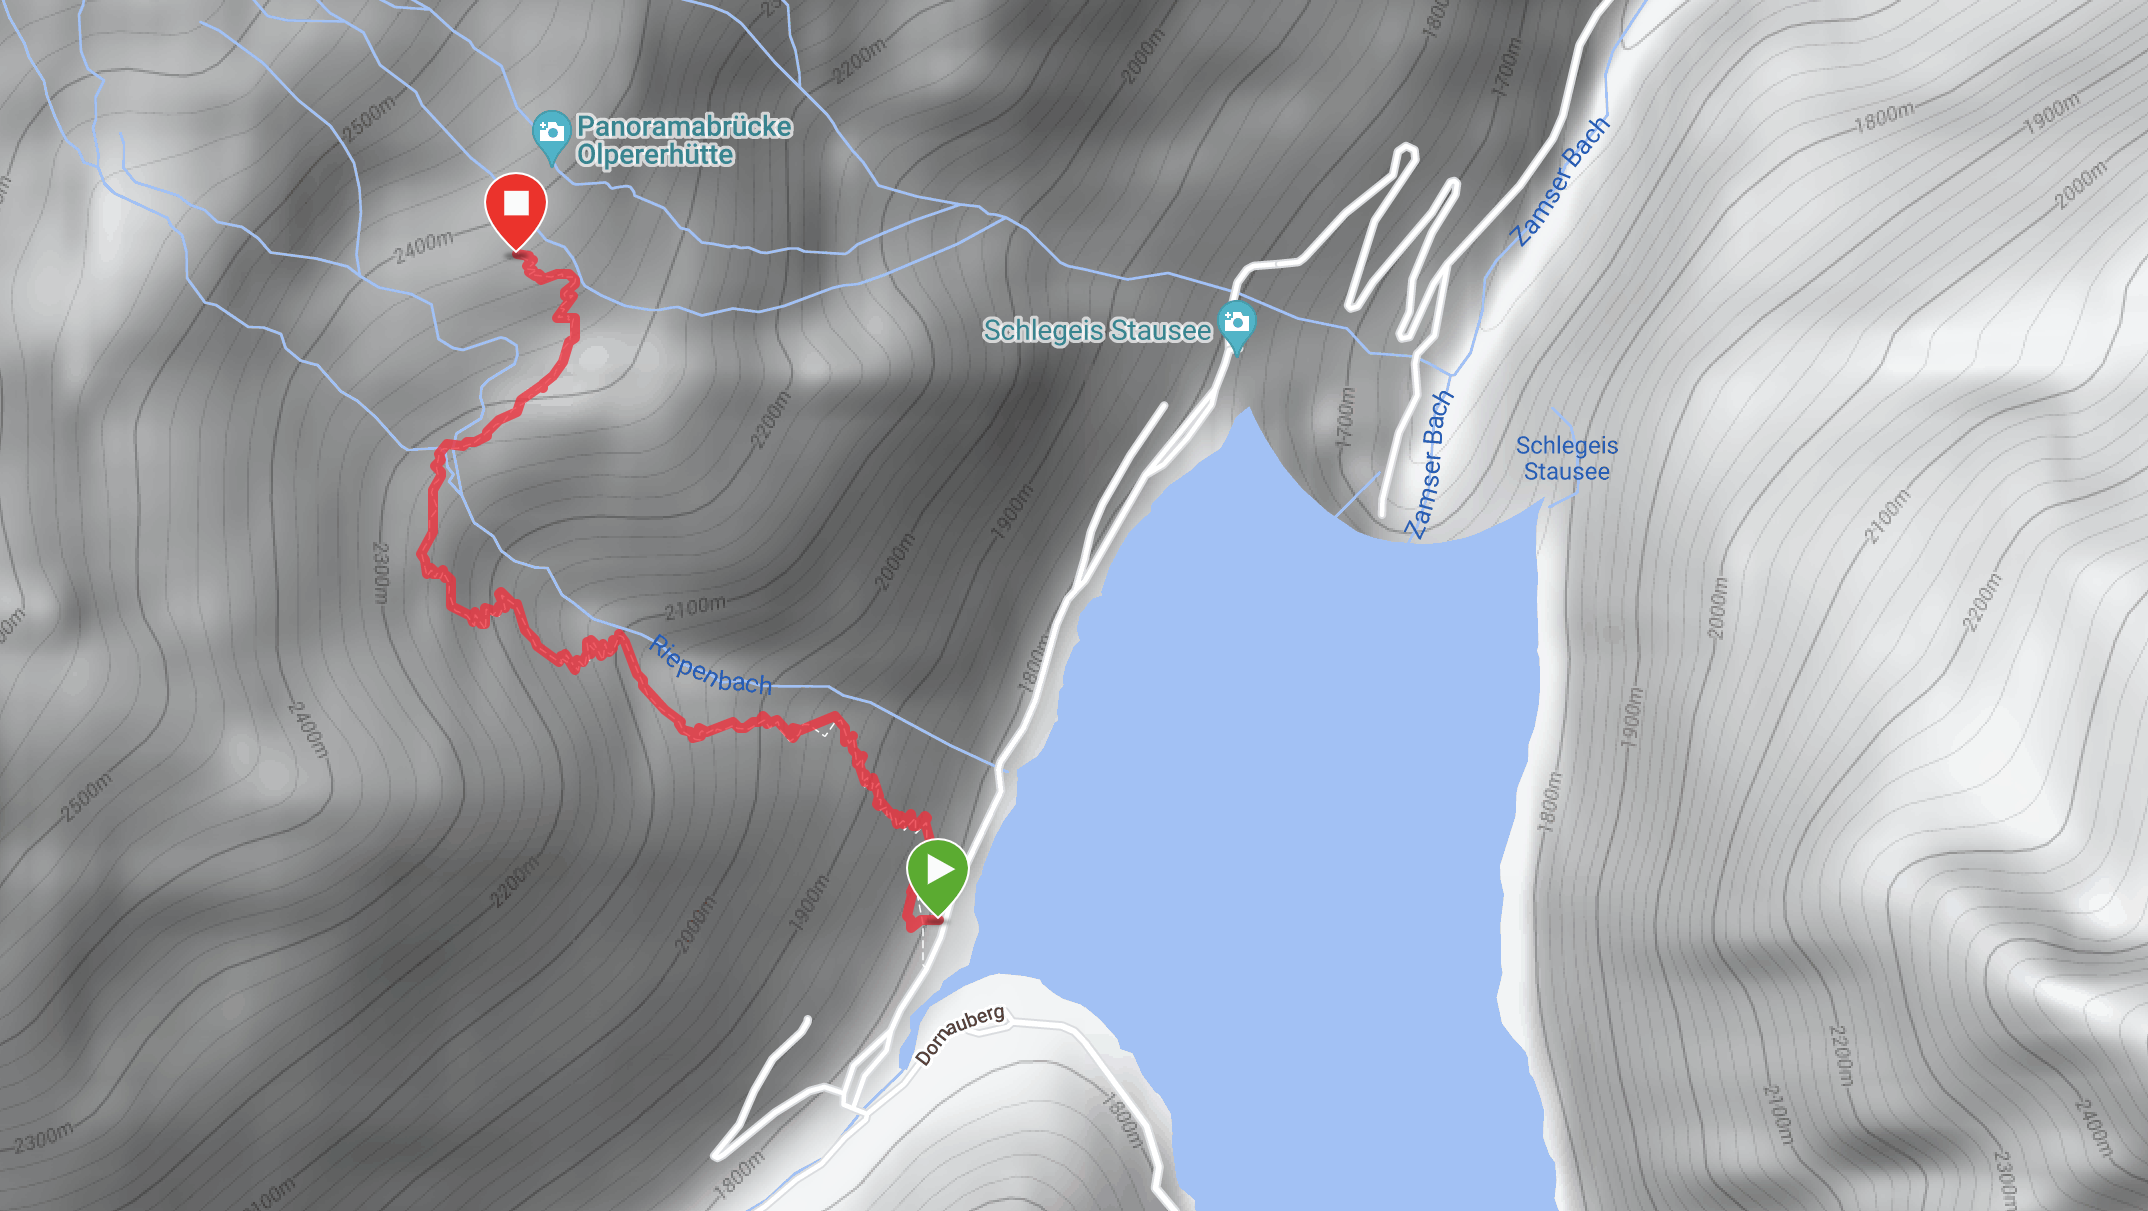
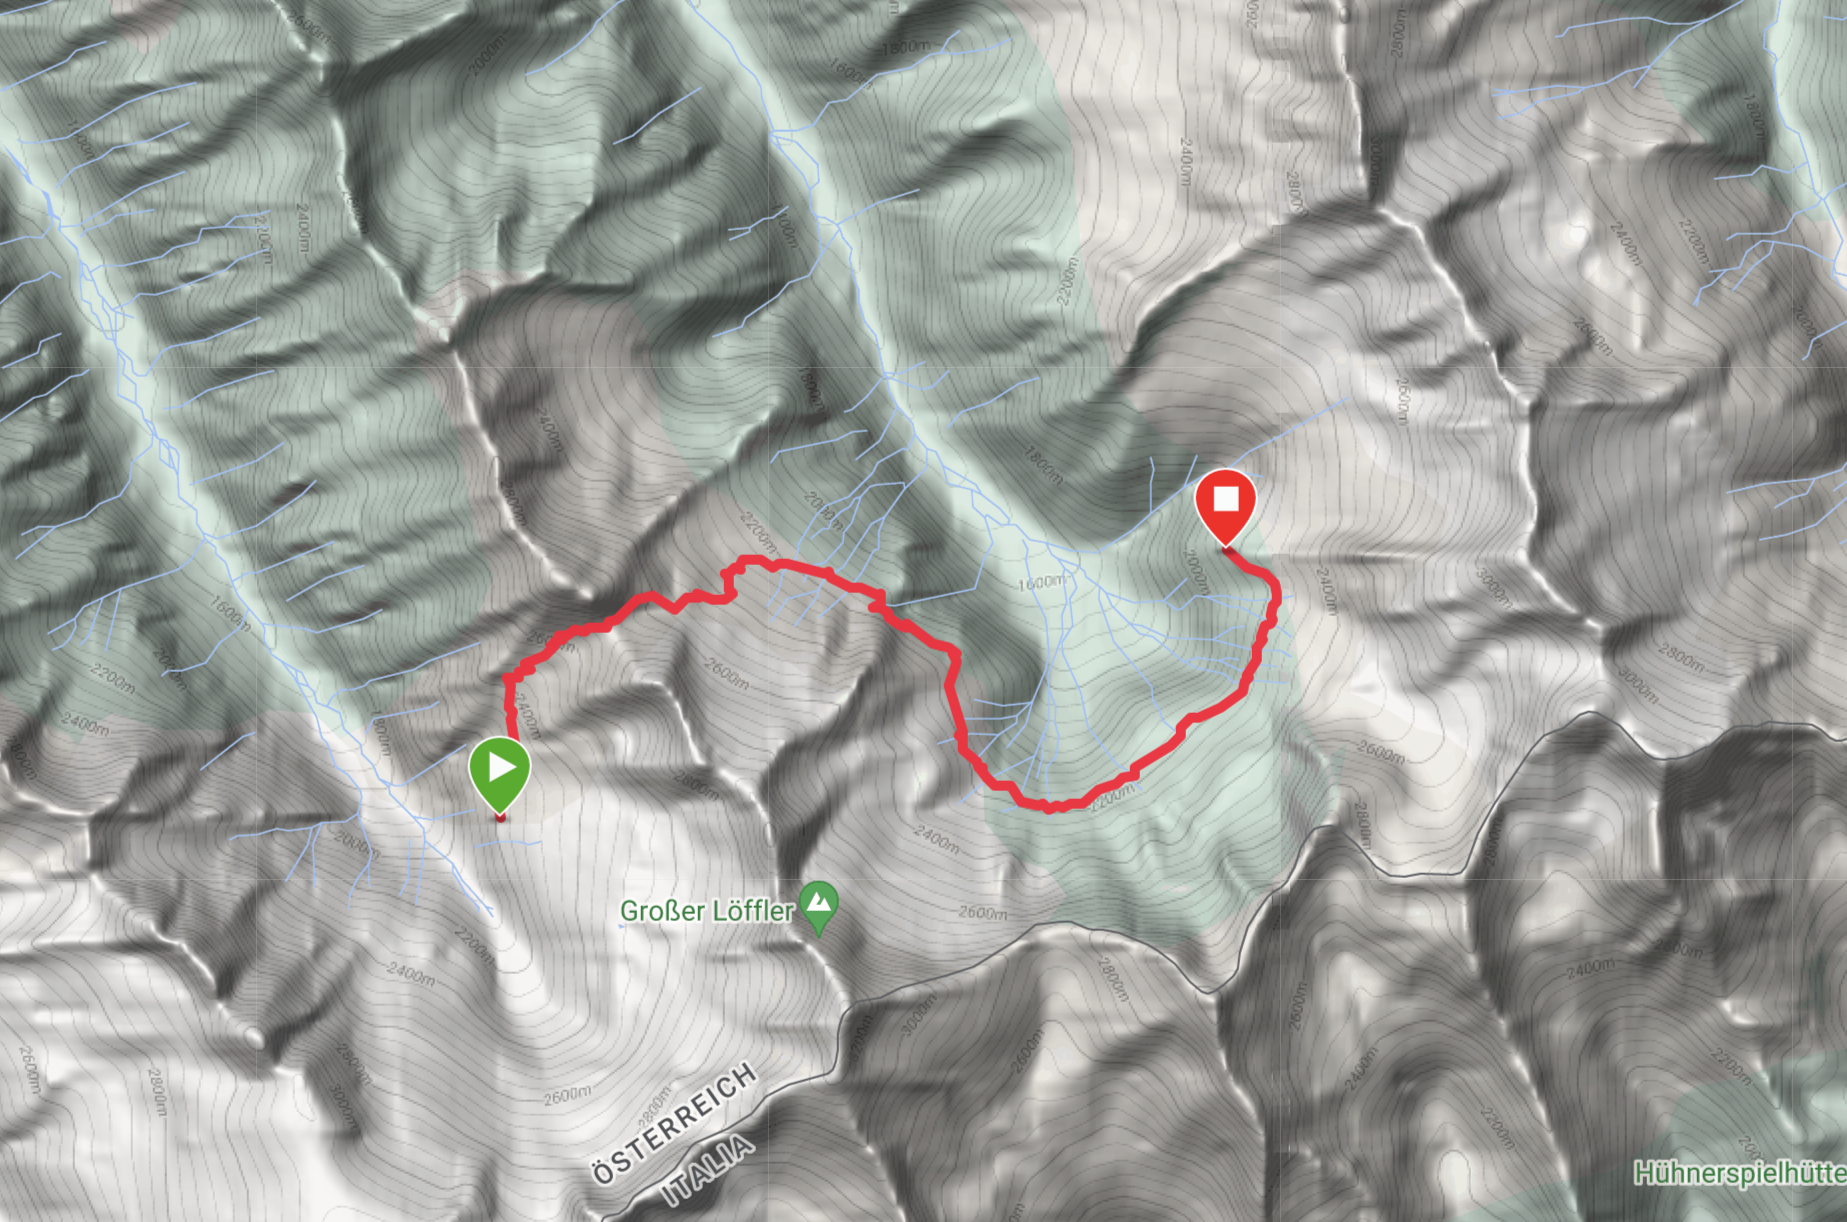
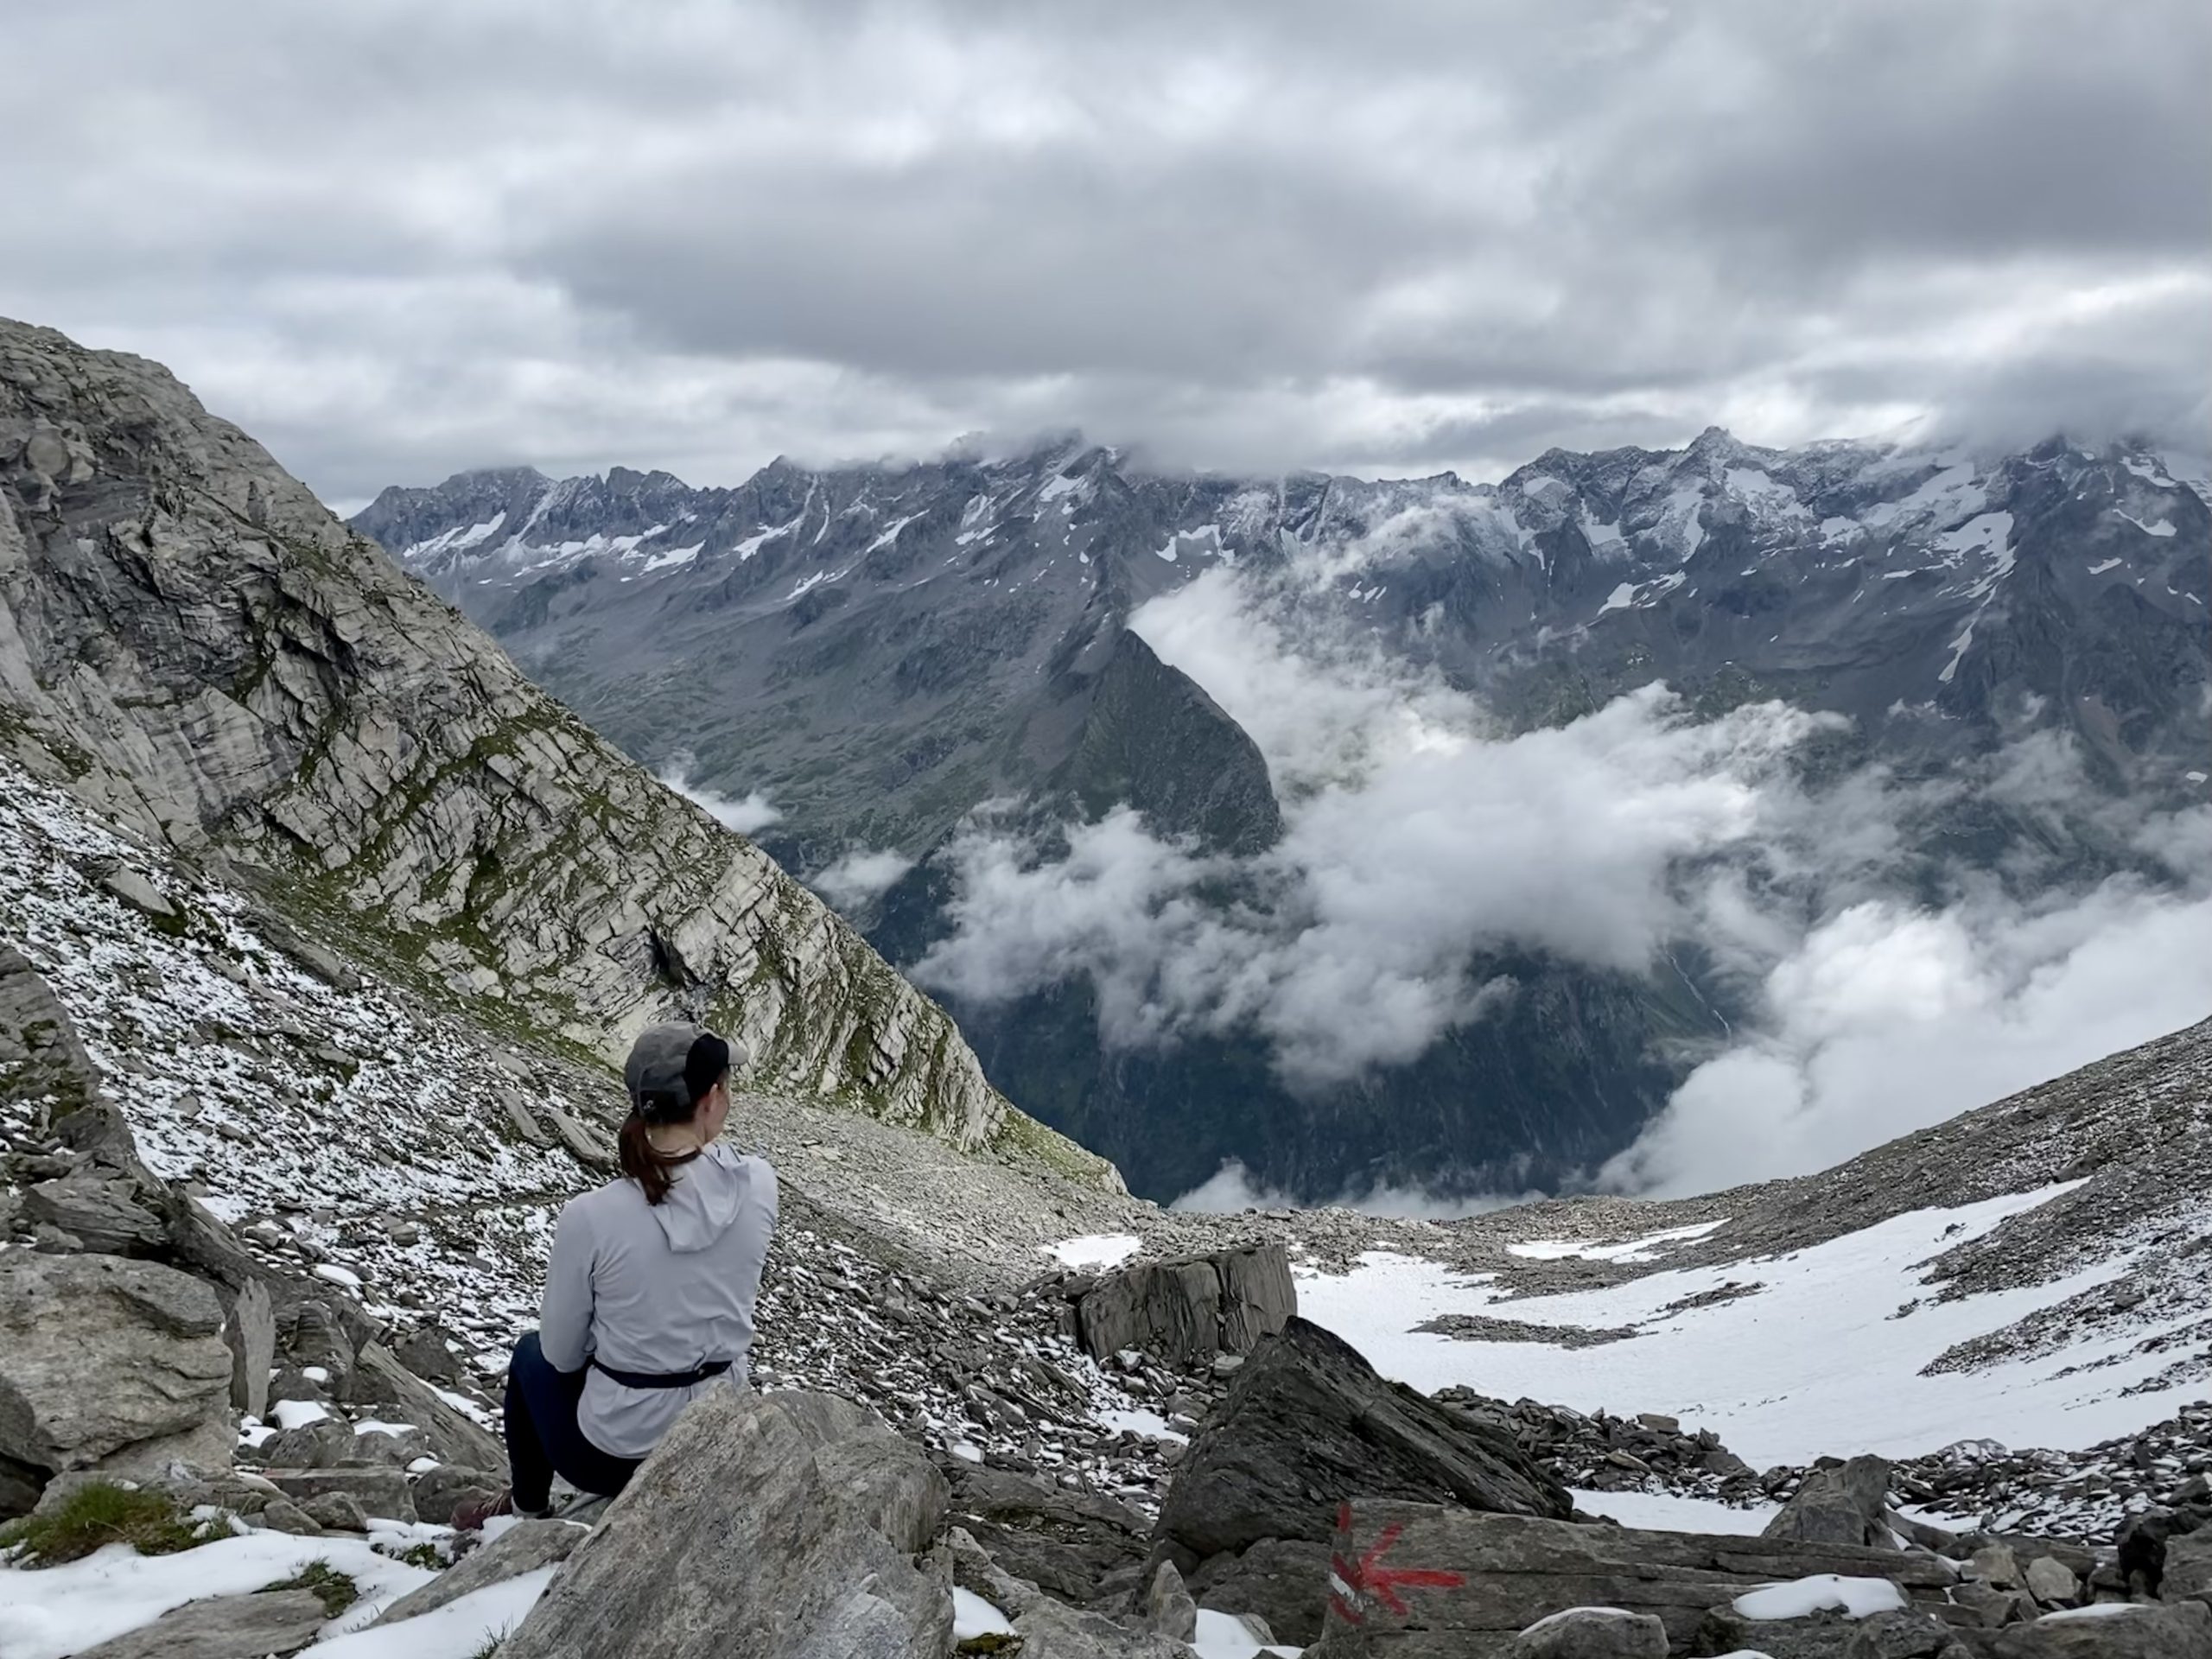
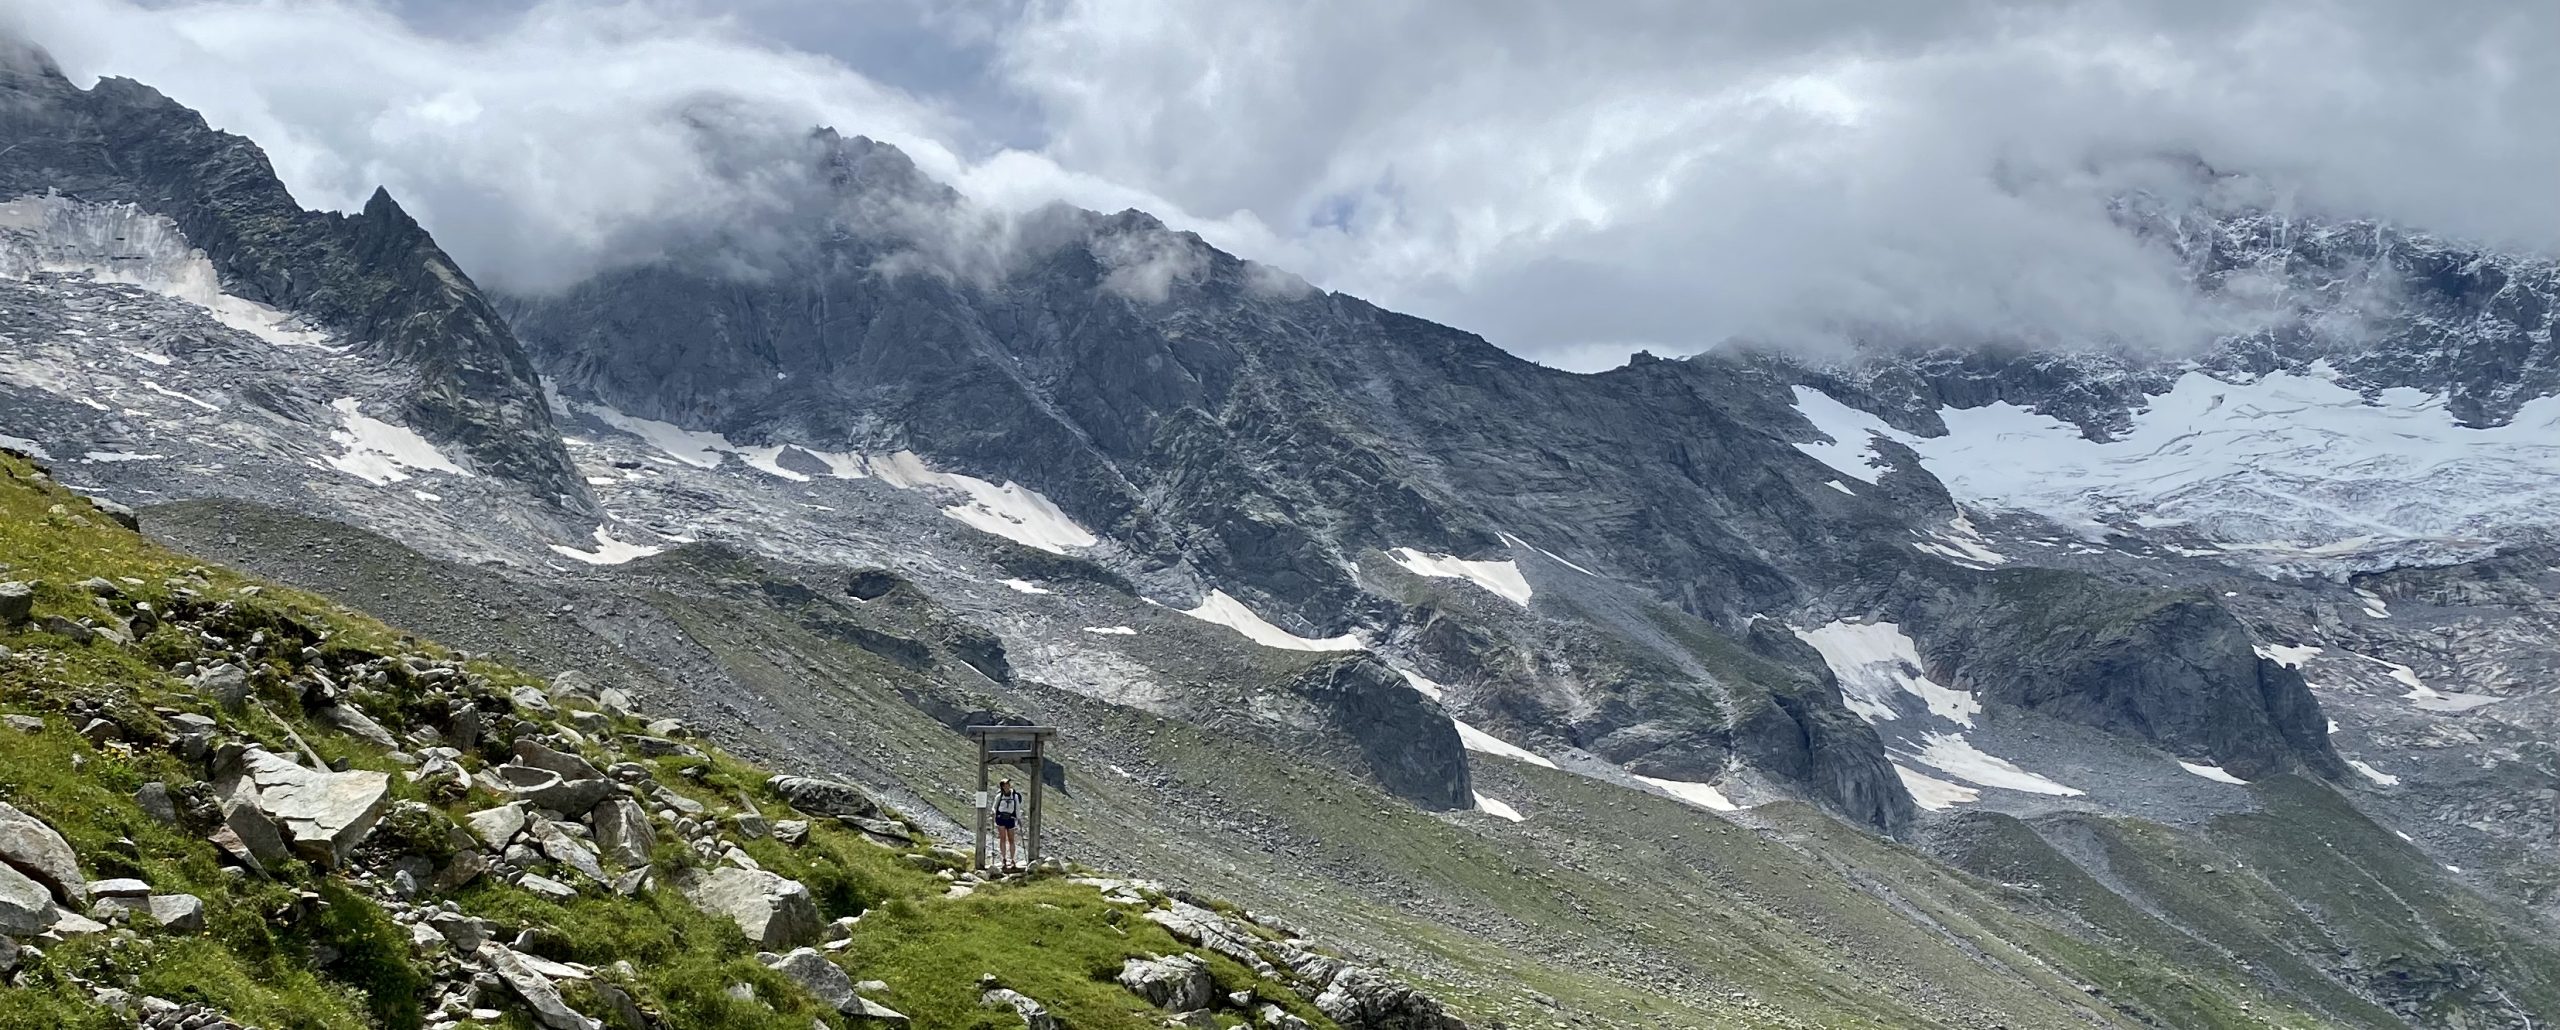
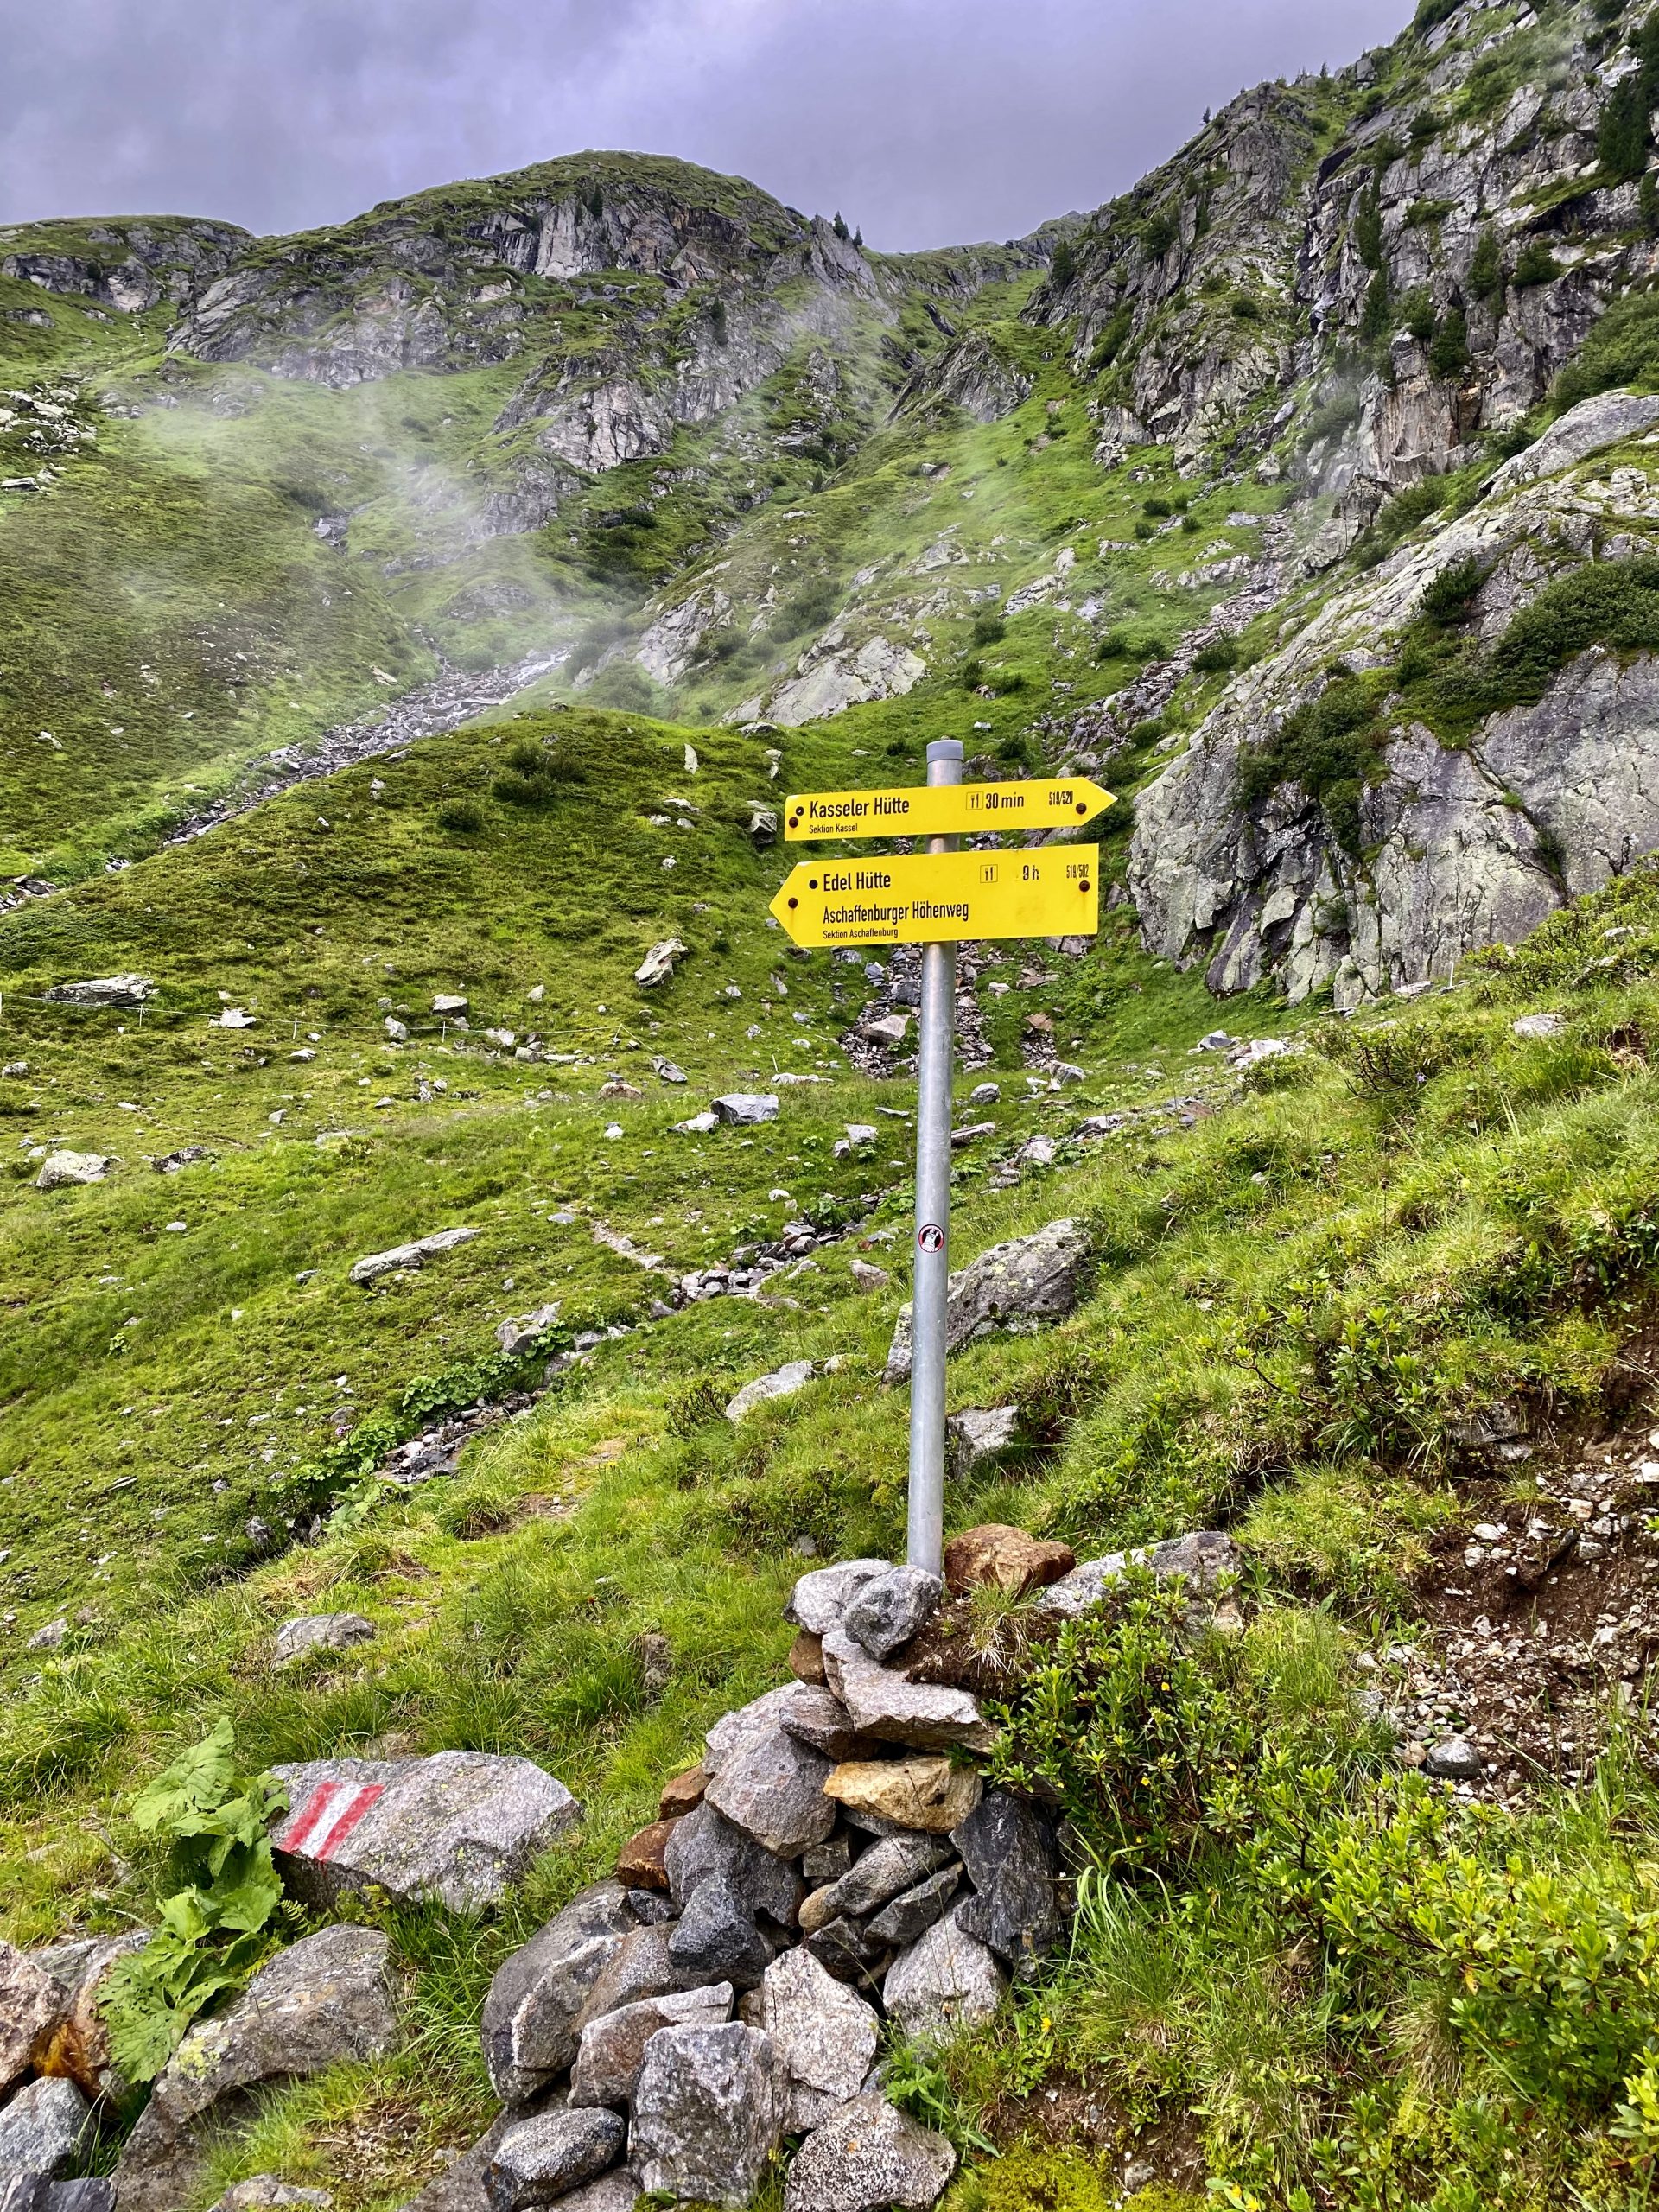
Navigation: The trail is marked very well and there are not many other paths to confuse you. You will follow the well-known red-white painted markings. The phone signal is sporadic, so I would recommend having offline means of navigation. If the weather is bad (we had a hail storm) it’s good to have backup navigation as the signs might be covered in snow. Yes, in summer you can still get plenty of snow (check out day 3 😄).

Berliner Höhenweg through pictures

Day 0

Day 1

Day 2

Day 3

Day 4

Itinerary & accommodation

Logistics to the start and back: The main town before the trail is Mayrhofen and no matter by what means you’re coming, you will pass it. If you’re flying, Innsbruck is the closest airport, from where you can take a train to Mayrhofen. 

As our trip was combined with a family holiday, we started in Schlegeis Stausee and had the luxury of getting to the start of the trail by car. We drove to the Schlegeis Stausee parking lot near Schelegeisspei dam and left the car there overnight as we spent a night in Olpererhütte. While parking is free, you need to pay a toll fee (14.5 Eur) on the way to the dam. 

For those without a car, you can get to Schlegeis Stausee from Mayrhofen by bus 4102. There are several time slots, giving plenty of flexibility to various hikers. For exact time slots, check out the official Mayrhofen website.

On our way back, we did not have the car anymore and from then on relied on public transport only. Our hike ended in Grüne Wand Hütte, from which we took a shuttle mini-bus (11 Eur per person) to Mayrhofen. I think we got lucky as the bus arrived just as we made it to the hut. It might well be that you need to call to arrange it, but I’m sure the staff of the hut can help you with that. It is also possible to hike to Stausee Stillup and get a bus to Mayrhofen from there. From Mayrhofen, we took a train to Innsbruck and from there a night train back to the Netherlands. 

Our 4-day itinerary:

Day 0: Schlegeis Stausee – Olpererhütte | 3 km

Day 1: Olpererhütte – Furtschaglhaus – Berliner Hütte | 21km

Day 2: Berliner Hütte – Greizer Hütte | 12km

Day 3: Greizer Hütte – Kasseler Hütte | 11km

Day 4: Kasseler Hütte – Grüne Wand Hütte | 5km

A few notes on our itinerary

Day 0 was a hike to Olpererhütte together with my family. I offered them an option to experience hiking in the mountains and staying in a mountain hut overnight and they said yes! 😄 While it is part of the Berliner trail, we went there from Schlegeis Stausee, which is in the opposite direction than the rest of the trail. It meant that we hiked to Olpererhütte, slept there, and then descended the same way the following day. If this hut is not on your bucket list, you can skip this day and start the hike from Schlegeis Stausee towards Furtschaglhaus or Berliner Hütte. 

Day 4 can be easily merged with day 3 as it was a short hike down the mountain. Unless you decide to walk to Stausee Stillup. In that case, it might be a long day with a long valley walk. 

Day 0 map
Day 0 elevation profile (in meters)
Olpererhütte

Day 0: Schlegeis Stausee – Olpererhütte

Distance: 3km

Hiking duration: 1h 00min

Total duration (hiking + rest): 2h 30min 

Total ascent: 457m

Total descent: 0m


Accommodation: Olpererhütte

Even though arrived at the hut around noon, we could already check in, which was very much appreciated by my tired parents. The hut is rather new and modern, with a massive window facing the lake and glaciers in the restaurant area (loved it!).

The five of us slept in an 8-person room with two other hikers. While the neighbors were quiet, our beds were the ones making the noise… The partitions between the mattresses were super sensitive and creaked with any movement, so we did not sleep that well. 

As for food, we opted for a la carte and did not regret it as portions were huge and we did not need three courses to feel full. The food was amazing as well, we enjoyed every dish. 

For our stay, we paid 27 Eur per person (bed in a lager room) and roughly 30 Eur per person for food and drinks. In this hut, you can pay by card as well as cash.


Overall impression: It was a good warm-up day with spectacular views all the way to the hut. This section is veeeery busy with day hikers who head to Olpererhütte for a famous bridge photo. If you’re looking for some solitude, go for the longer and less popular variant via Friesenberghaus. 

Most of the hikers will be able to reach the hut in less than 2 hours, while I took many breaks with my parents. They had no mountain hiking experience or preparation and they still made it in 2.5 hours. I’m very proud of them 😊

Day 1 map
Day 1 elevation profile (in meters)
Furtschaglhaus
The reception area inside Berliner Hütte

Day 1: Olpererhütte – Furtschaglhaus – Berliner Hütte

Distance: 21km 

Hiking duration: 7h 00min

Total duration (hiking + rest): 8h 45min 

Total ascent: 1332m

Total descent: 1699m


Accommodation: Berliner Hütte

This hut is definitely an experience itself. It’s the grandest hut I’ve been to with high ceilings, beautiful wooden stairs, and chandeliers. Berliner Hütte felt like a hotel for hikers. We had a room for ourselves (woohoo!) with a bed and a mattress. Yep, some rooms don’t have two beds, so one of the hikers sleeps on a mattress on the floor (me). We both slept like babies. 

This time we opted for half-board and were not disappointed again. The portions were good and we could even choose the main dish. Besides, an unlimited salad bar is part of the half-board deal, though many a la carte customers opted for it as well for an extra fee.  

For our stay, we paid 78.5 Eur per person (half-board + bed in a double room) + 3 Eur for a warm shower (3 min). It is possible to pay by card or cash. 


Overall impression: It was a long and challenging day since we didn’t get a spot in Furtschaglhaus and had to hike to Berliner Hütte instead. The first half of the trail was easy and relatively fast as we reached Furtschaglhaus before noon. We knew that it was very likely to rain in the afternoon, so we enjoyed the views of the glaciers before they hid behind the clouds. 

From Furtschaglhaus the climb got steeper and we constantly guessed where the trail will lead us since today we’re crossing the highest point of the whole trail – Schönbichler Scharte ridge (3133m). 

~30 mins before the ridge we met a few fellow hikers coming from the other side. They looked skeptically at our shorts and hiking shoes (because they were not boots) and told us to hurry up as the ridge is very steep and a storm is coming. Even though we tried to hike faster, the elevation and terrain took a lot of energy, so by the time we reached the top, it was hailing (yeeeey…). 

The descent looked horrible: metal cables attached to the side of a steep cliff. I pushed away thoughts of “what if I take a wrong step” and started to crawl/climb/scramble down. The weather definitely didn’t help, so I was super slow and it took me a lot of mental and physical energy to get down to a walkable section. With pouring rain, clouds, and cliffs all around us, the terrain looked somewhat apocalyptic. 

Once in a while we could see a side of a mountain or hear ferocious streams in the distance, but overall it was a “blind” descent with very limited views. At some point I got fed up with the terrain as it was all rocky and bouldery, it didn’t seem to get easier the more we descended. While, according to the guides, we should have seen the hut almost all the way descending, we saw it 1 min before reaching it. Not kidding. What a day.

Day 2 map
Day 2 elevation profile (in meters)
Greizer Hütte
Greizer Hütte on the other side

Day 2: Berliner Hütte – Greizer Hütte 

Distance: 12km

Hiking duration: 5h 00min

Total duration (hiking + rest): 7h 00min 

Total ascent: 1176m

Total descent: 972m

Accommodation: Greizer Hütte

Greizer Hütte is a bit more basic compared to other huts we stayed in, but I had the homiest feeling there. It’s quite small and has limited facilities (e.g. no shower). We slept in a lager (dormitory) room with several other hikers, but luckily it was not that busy so we at least didn’t have to sleep right next to others (there was always at least 1 mattress in between). I slept quite fine, but earplugs are highly recommended! 

We opted for a half-board deal and once again we could choose the main course out of several options. All the food was very good with huge portions, I couldn’t even finish my main dish.

For our stay, we paid 53 Eur per person (half-board and a bed in a lager room). This hut only accepts cash. 

Overall impression: We left Berliner Hütte the way we found it – in a cloud. Although it was supposed to be a fine day, we had bad weather until noon. As we ascended the mountain I could see fresh snow higher up and soon we got to enjoy it for ourselves. At around 2600m we got into a blizzard. Yes, a bloody blizzard. 

As we climbed up, we tried to cover our faces as much as possible since snow/hail/ice was damn painful. Soon the terrain turned into a full winter wonderland with snow everywhere. We followed the footsteps of earlier hikers as we climbed up the boulder fields, hoping that the path is correct. 

Thankfully the blizzard was over by the time we reached the top, but now everything was covered in wet snow. Besides, our hands were damn cold after scrambling up the boulders in bare hands (no gloves, oops). And guess what, more metal cables waited for us.

For some reason, I found this descent even more challenging than the one from yesterday as the gaps for feet were wide and required vertical climbing. As I slowly inched towards the ground, I cursed the trail and gave myself encouraging talk (“You got this”, “One step at a time”, etc.). Once the cables were over, we still had some slippery and steep switchbacks, but at least the weather was improving fast. Soon we were hiking in the full sun and could actually admire the landscape around us. 

Soon we saw the hut on the other side of the valley, which meant that we had to descend and then ascend the same height again. There were a few more cable and ladder sections on our way, but nothing as scary as the ones close to the top. As we climbed up to the hut, we kept on staring at the mountain we just descended from. It looked insanely steep with our path zigzagging all the way down. What a day, again. 

Day 3 map
Day 3 elevation profile (in meters)
Inside the Kasseler Hütte

Day 3: Greizer Hütte – Kasseler Hütte

Distance: 11km

Hiking duration: 4h 00min

Total duration (hiking + rest): 5h 30min 

Total ascent: 727m

Total descent: 800m

Accommodation: Kasseler Hütte

Kasseler Hütte is a cozy hut both in terms of atmosphere and space. We slept in a room made for ~30 people with 4 rows of mattresses. Luckily, once again it was not full, so most of the companies had at least one mattress separating them from the others. Maybe it was the beer the night before, maybe the earplugs, but I actually slept quite well. 

We opted from a half-board and it was fine. Again, we could choose the main dish and they offered quite a few vegetarian options. The only downside was that there was no desert. You could order the desert from the menu, but that’s like 7-10 Eur extra. 

For our stay, we paid 52 Eur per person (half-board & a bed in a lager room). Shower costs 1 Eur per minute and you can buy as many minutes as you want. This hut only accepts. cash.

Overall impression: Compared to the previous two days, this stage was a lot less strenuous. We reached the pass without any problem and from there the descent was fine. A few boulder fields, a bit of snow, but nothing crazy. There was a section with cables as we were crossing steep sides of a mountain, but it was more like walking while holding on to a cable instead of climbing with cable support. 

The whole time we could see the Kasseler Hütte, waiting for us on the other side of the valley. The rest of the path was fine, letting us speed up compared to previous days. We only slowed down while crossing numerous streams as it meant going down and up again through rocks and gravel. It was a beautiful day so we took several breaks to enjoy the weather and the views. 

Day 4 map
Day 4 elevation profile (in meters)

Day 4: Kasseler Hütte – Grüne Wand Hütte

Distance: 5km

Hiking duration: 1h 30min

Total duration (hiking + rest): 2h 00min 

Total ascent: 0m

Total descent: 675m

Overall impression: Day 4 could definitely be combined with the previous stage. However, as we had a night train on Sunday, we were not in a hurry to hike down to the valley on Saturday already. 

The descent is rather gradual and after ~1 hour reaches a valley road. From there the road leads all the way to Mayrhofen. We hiked only untill Grüne Wand Hütte. The road is rather narrow and both cars and hikers need to share it, so I did not feel like I missed a lot by not going the whole way down. 

Gear

Even though it was a multi-day hike, our backpacks were rather light as we stayed in mountain huts. It also meant that we need to carry sleeping bags, so I took my multi-day hiking backpack instead of a small one (Osprey Women’s Sirrus 26) to have enough space for everything. Actually, I took almost identical gear as I did for the Pyrenees trip in June and my base weight was 4.8kg

You can find the full gear list on my LighterPack page, where I store my hiking gear lists from different trips. Here’s a rough summary:

3 items I loved on this trip:

  1. Rain jacket – I love my new-ish rain jacket from Outdoor Equipment. It’s super light and served well during the rainy and snowy sections.
  2. Towel – I use Nabaiji size S (from Decathlon) and Edo teases me that it’s a cloth (in Dutch doekje) and not an actual towel 😄 well, I love it! It’s big enough to get myself dry after a shower and it dries very fast. Regardless of the size, the quality of the towel is pretty good and it doesn’t cost a fortune (for a towel).
  3. Sunglasses – while it’s a must for summer destinations anyway, I was glad to have sunglasses above 2500m due to the snow. Without sunglasses, after a while, the snow can easily irritate your eyes and even cause a headache.
 

2 items I should have left at home:

  1. Sandals – every hut provides shoes for walking inside, so having your own shoes in the hut is completely not needed.
  2. (maybe) Sleeping bag – every hut provided blankets so having a sleeping bag liner might have been enough, which is a tremendous weight saver. I did like to use my sleeping bag as a blanket since it was pretty warm and like to sleep in a “4” shape, which is much more difficult in a mummy liner. I’m still undecided, but just putting this option out as there were definitely other hikers who were fine with only a liner.
 

3 items I wish I had:

  1. Gloves – I completely forgot about the possibility of snow in the Alps even during the summer. It wasn’t my first summer blizzard either! Somehow, gloves were not on my radar when packing stuff and I wish I had them in those wet and cold cable sections. At times, my hands were very cold and there was no way to warm them up while scrambling down the snowy cliffs.
  2. Harness – I think the cable sections on the two peaks we passed were quite dangerous and I would have loved to have more support than only my arms to get myself safely down. A few fellow hikers had harnesses and they almost “chilled” on those sections while I was scared to slip and fall.
  3. (nice to have) Sleeping pillow – this item is for better comfort since the huts actually provide the pillows. However, some of them were so thin that I had to fold them to feel that I have one, so if you have a comfortable and lightweight pillow, that might be a better choice. Besides, I’m not sure if the pillow covers are washed every day and you might have some hygiene concerns. A fellow hiker remarked that either a pillowcase or their own pillow would have made their stay nicer.
My gear from the back

Budget

In total, for this trip (two people) we've spent roughly 1200 Eur. Staying in the huts is not cheap!

In this overview I've put half-board costs under food & drinks since it's perfectly feasible to only stay at the hut without eating there. I did not see anyone doing that, but hey, it's an option. Food in the Austrian huts is amazing, but it's also not that cheap.

As there were no valleys or villages on the trail, you either need to carry a lot of food or you'll end up indulging yourself in Austrian specialties that will quickly add up. We only carried some snacks and sometimes took an extra sandwich from breakfast. If we arrived at the hut early, it meant we'll eat there both lunch and dinner. And then I found out that I love Austrian Radler beer and that opened up another box of expenses... 😉

Travelling costs were mainly train tickets with the night train costing more than 250 Eur for the two of us. We got a own compartment in a couchette carriage for ourselves for a little extra fee, but even without this luxury it still sadly is an expensive affair.

For accommodation we’ve spent up to 30 Eur per person for a lager room (a big room with many beds). Once we scored a double room, but that one was 40 Eur per person, so those are naturally more expensive. You could reduce accommodation costs if you have an Alpine club membership as there’s a nice discount for the members. Though, I’d suggest checking if it pays off, depending on how many huts you’ll visit.

Tip! Some of the huts do not accept cards, so please take enough cash. I would aim for 50-70 Eur per person per day.