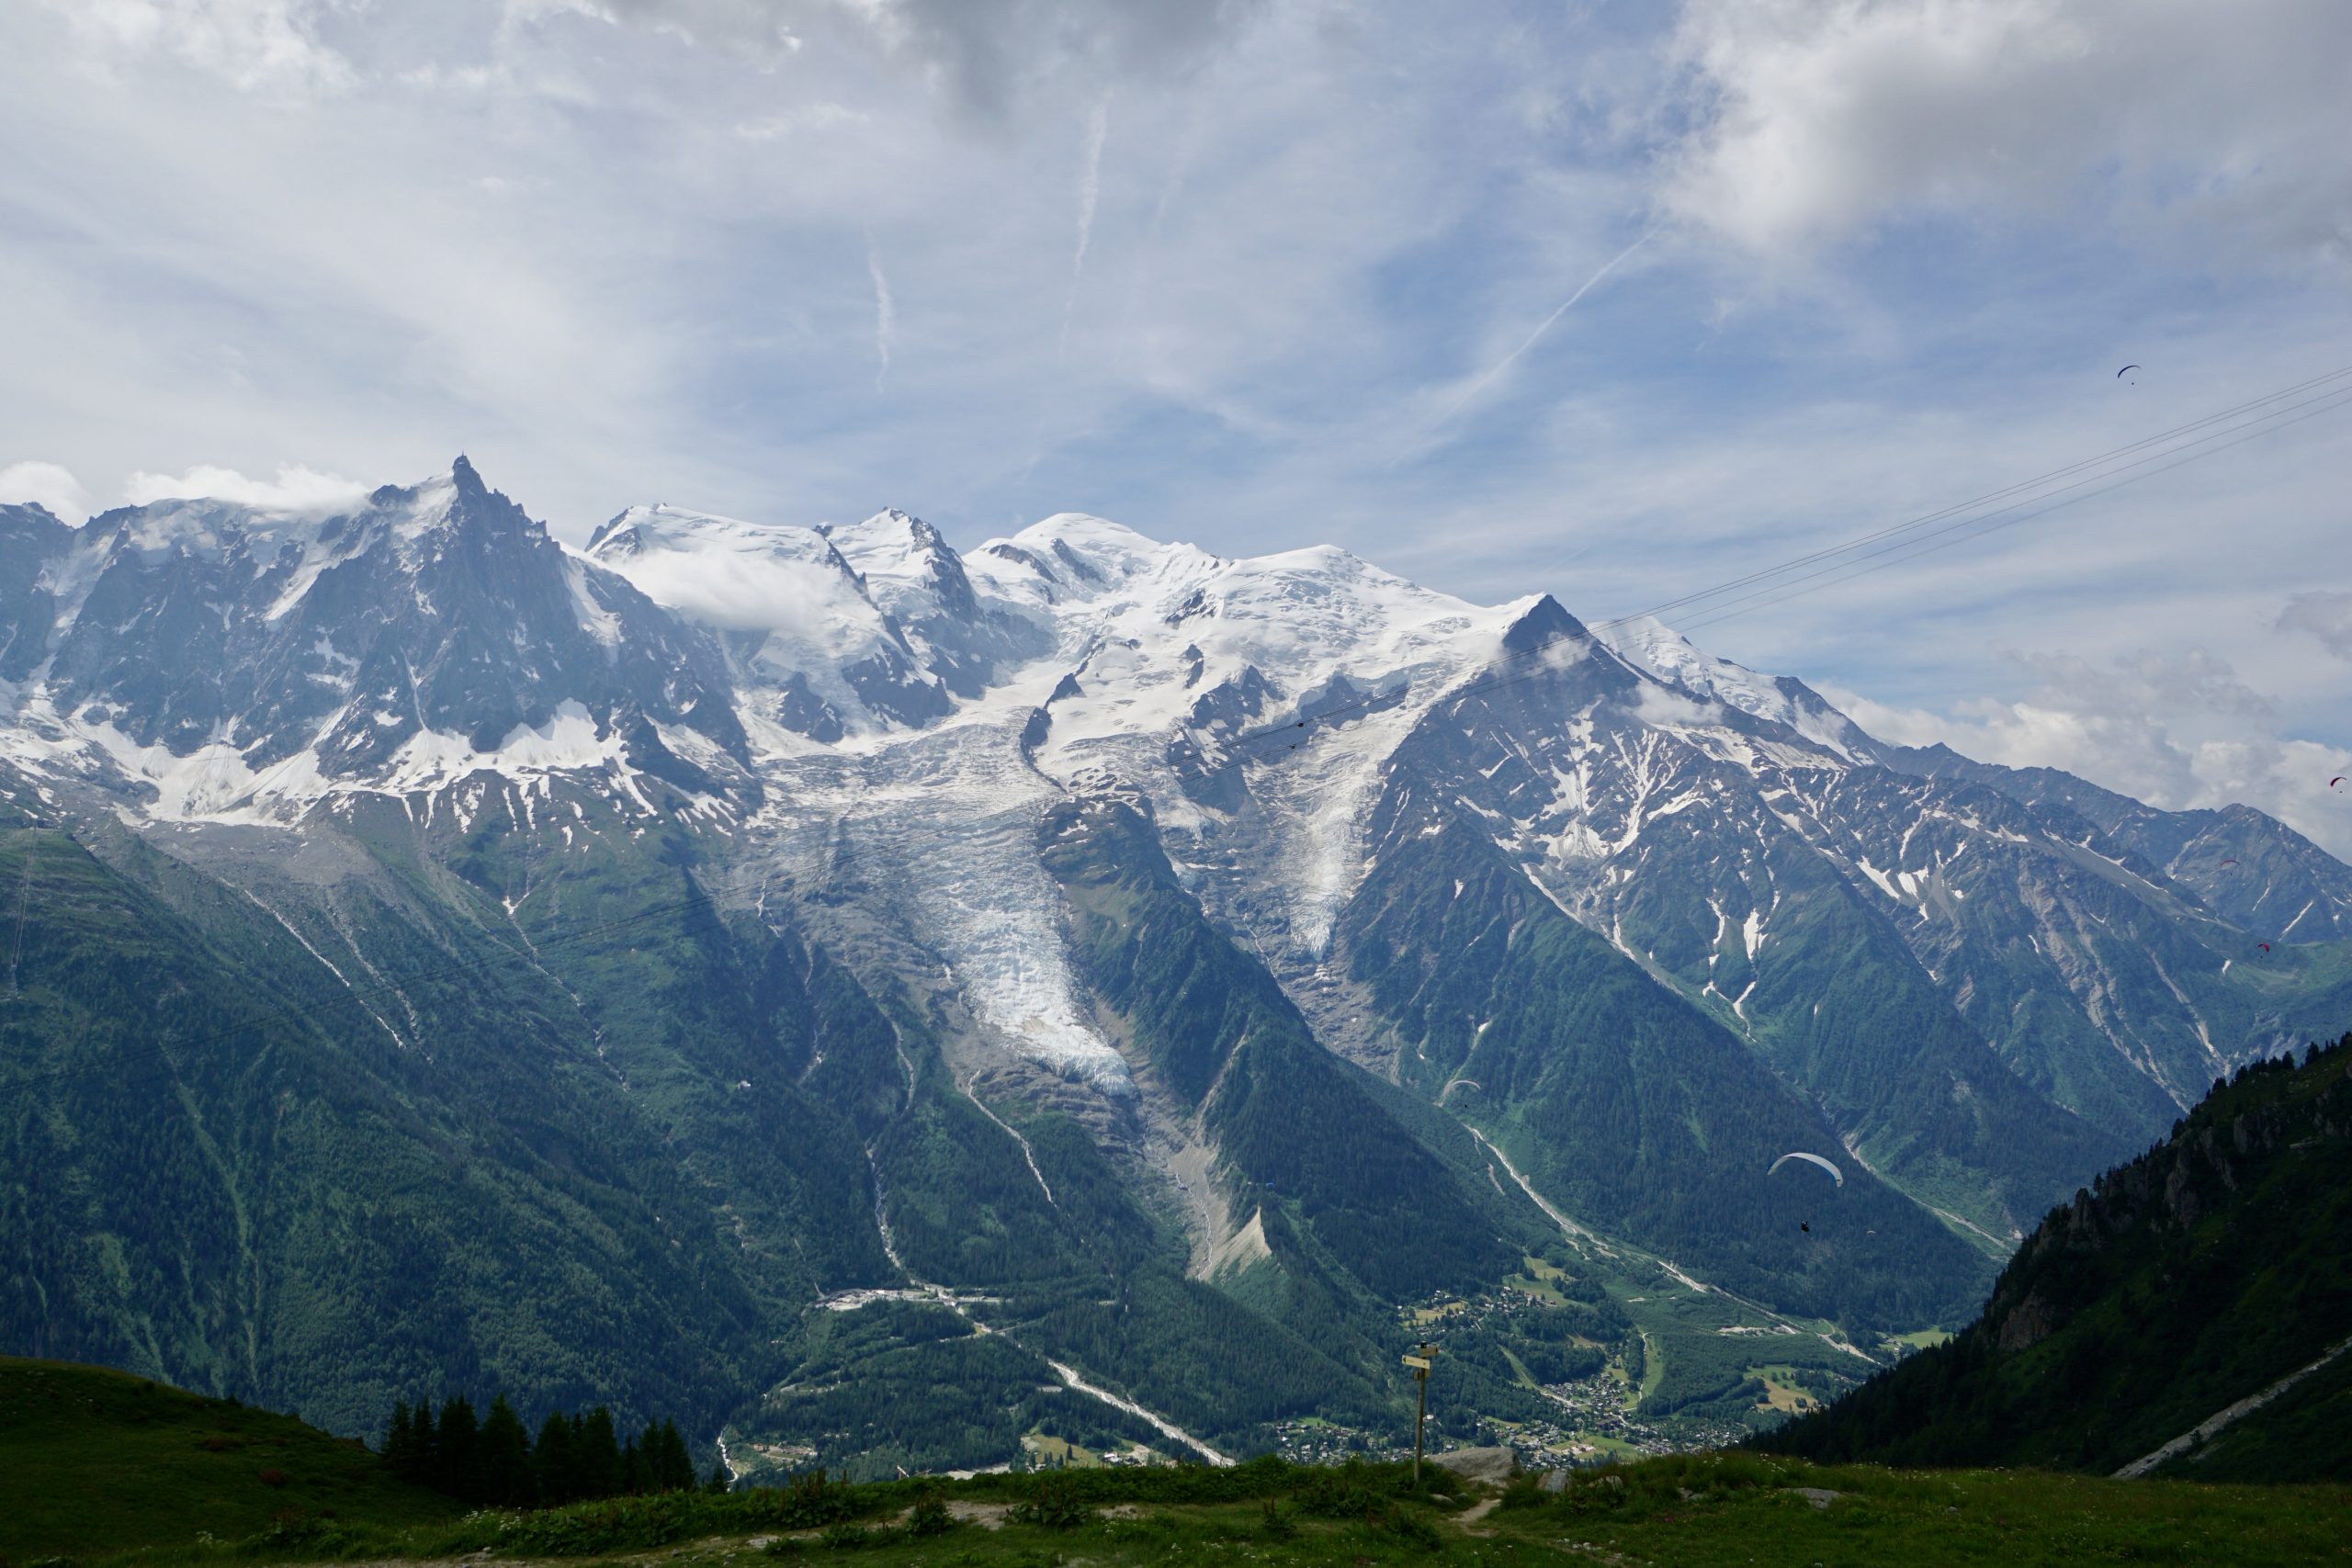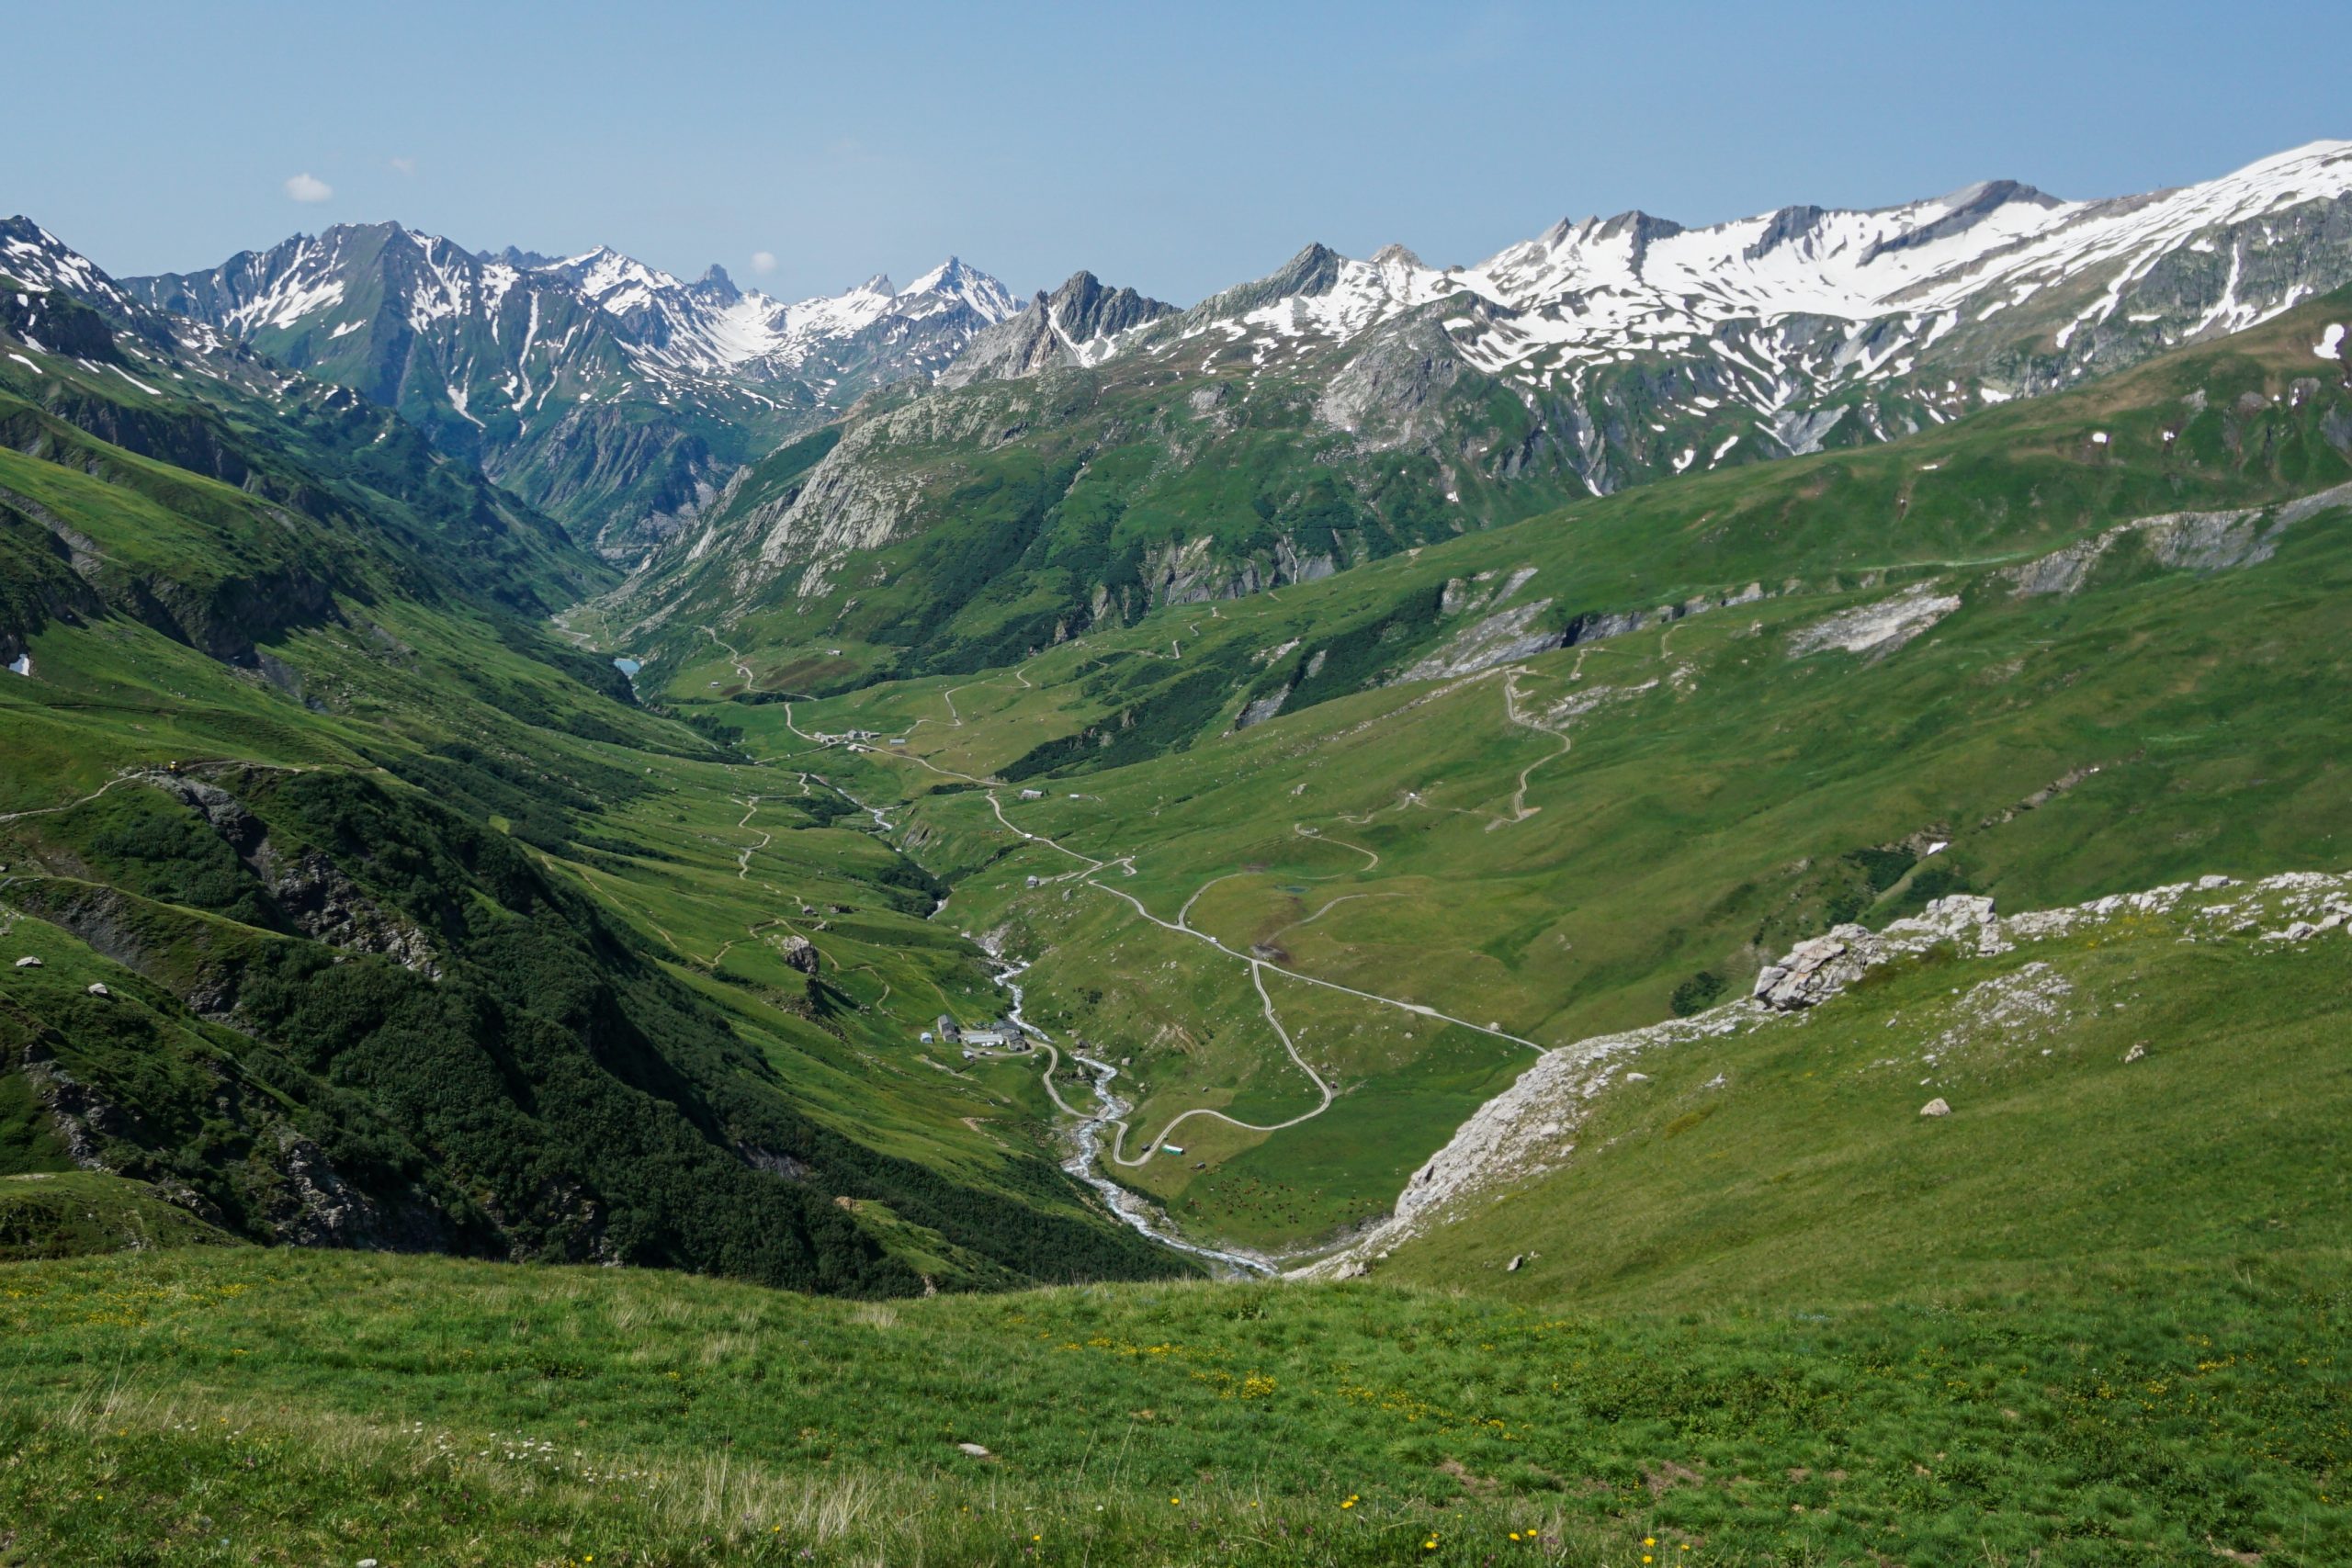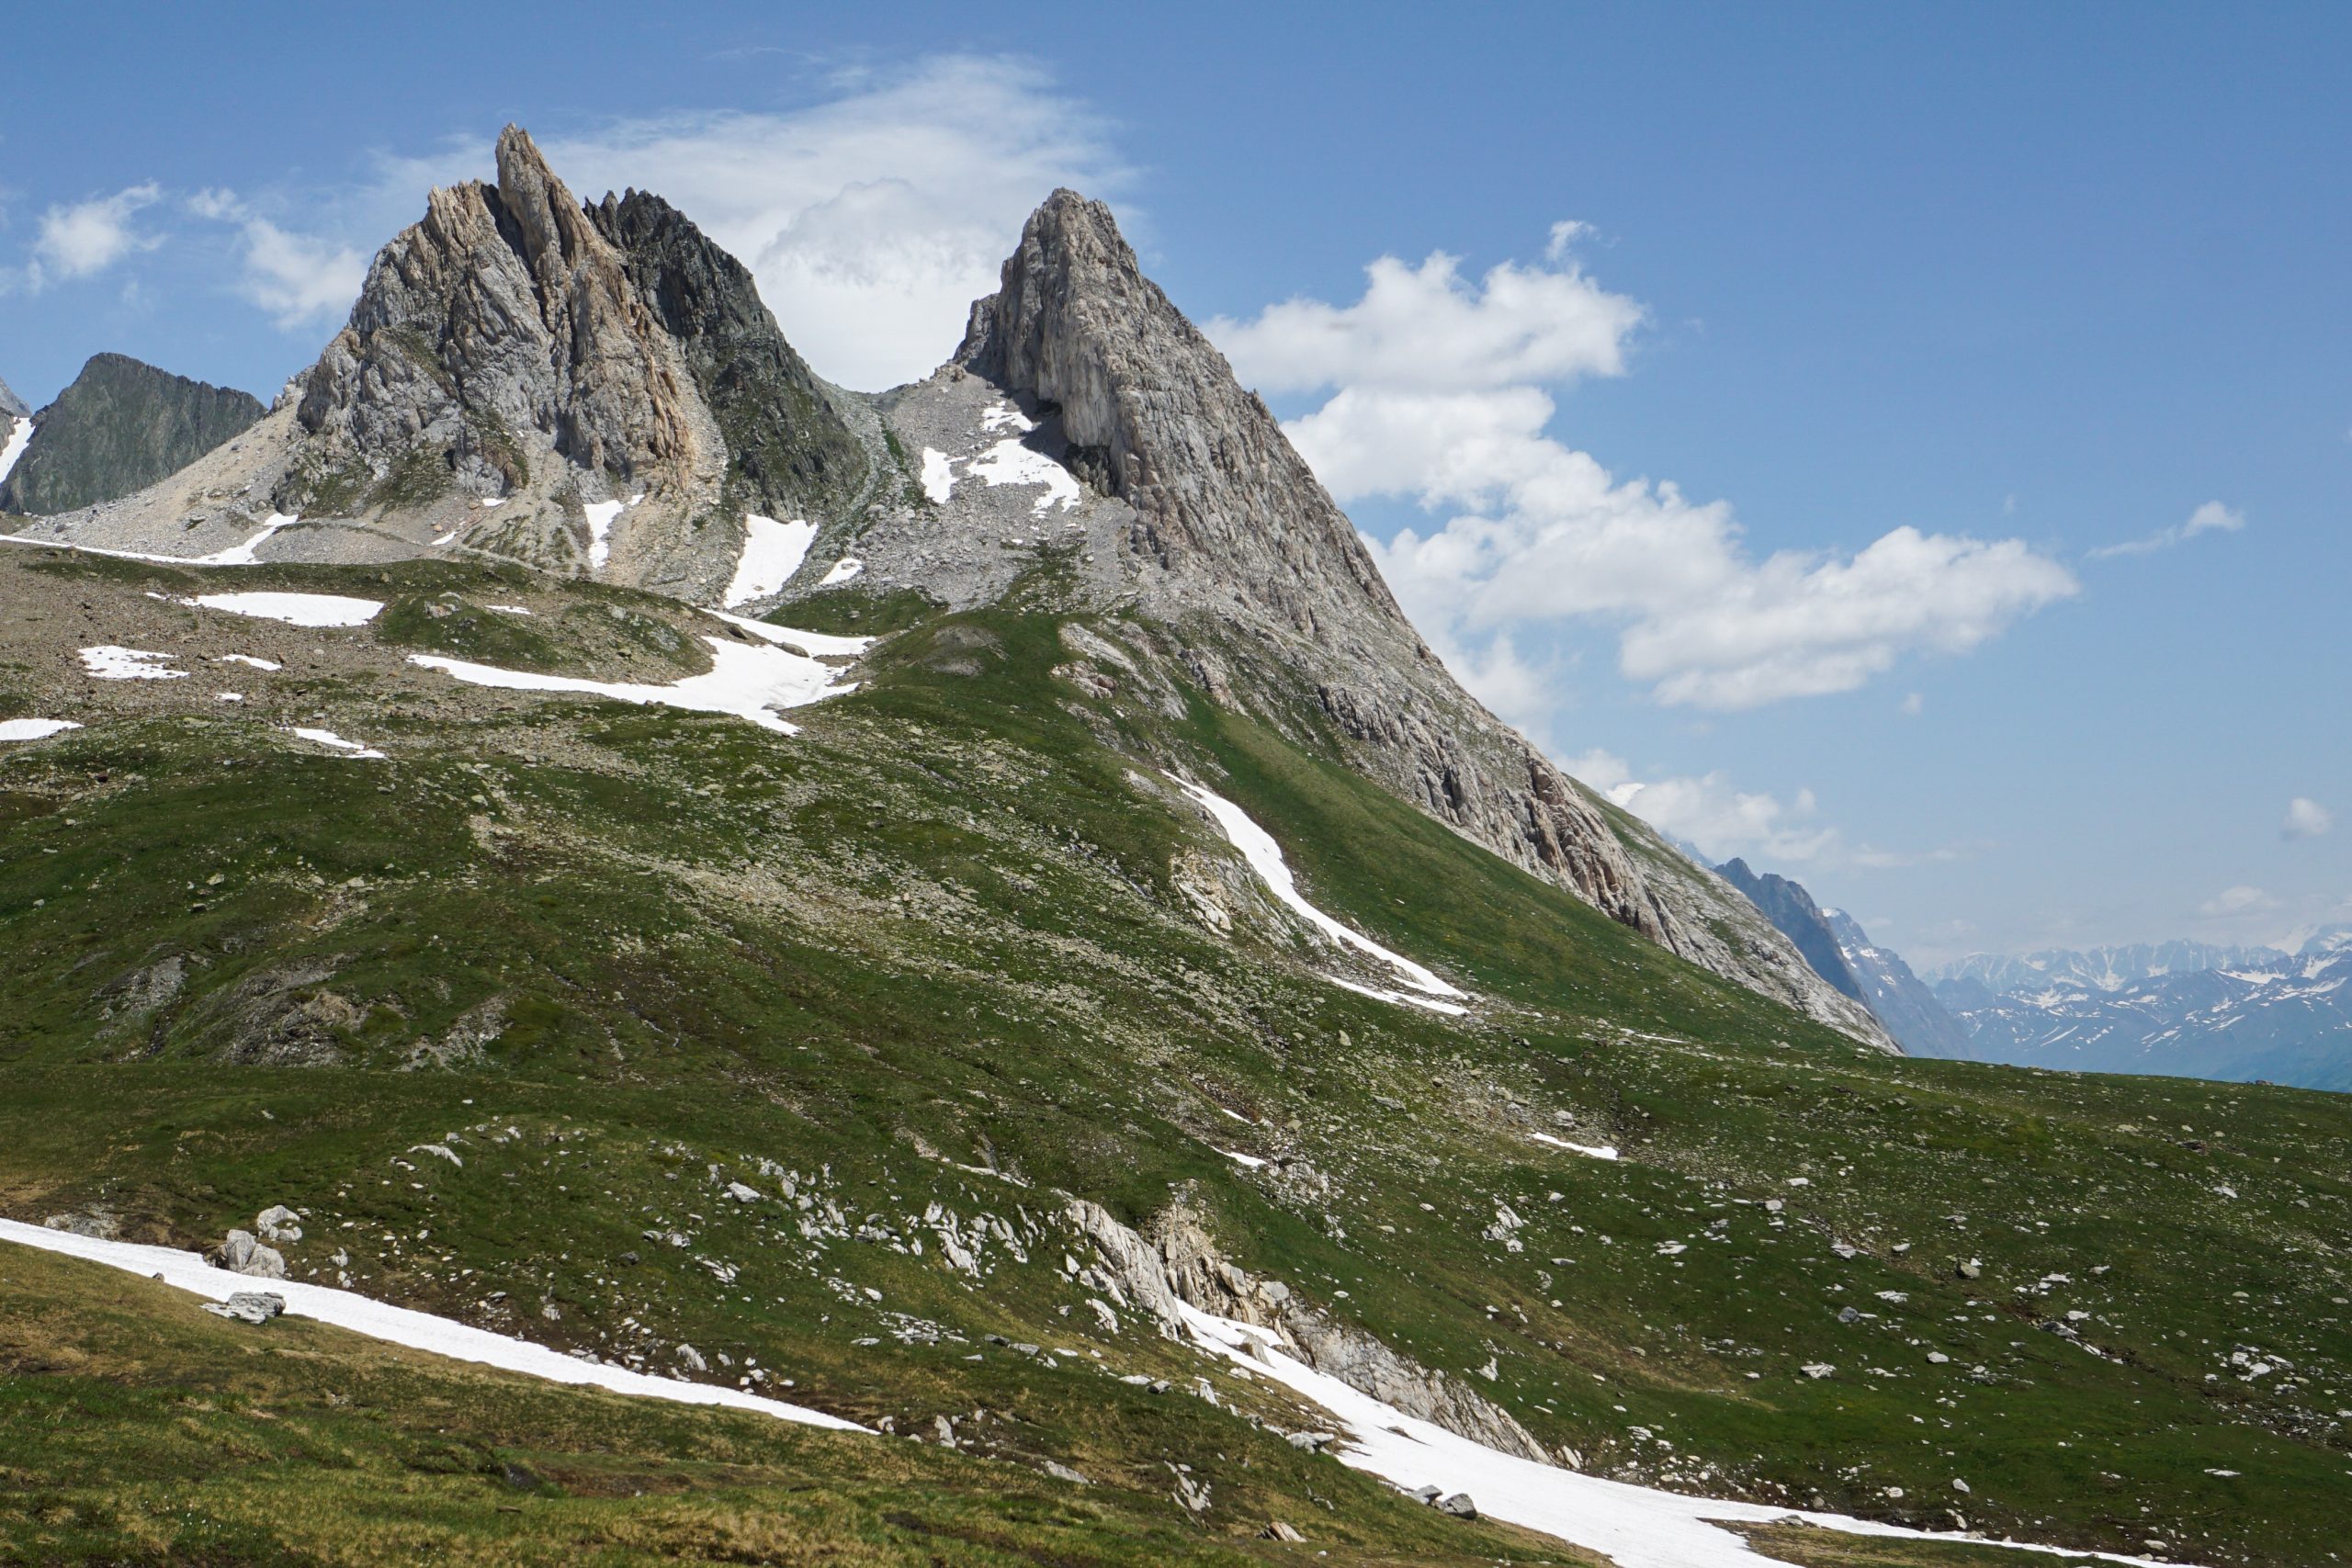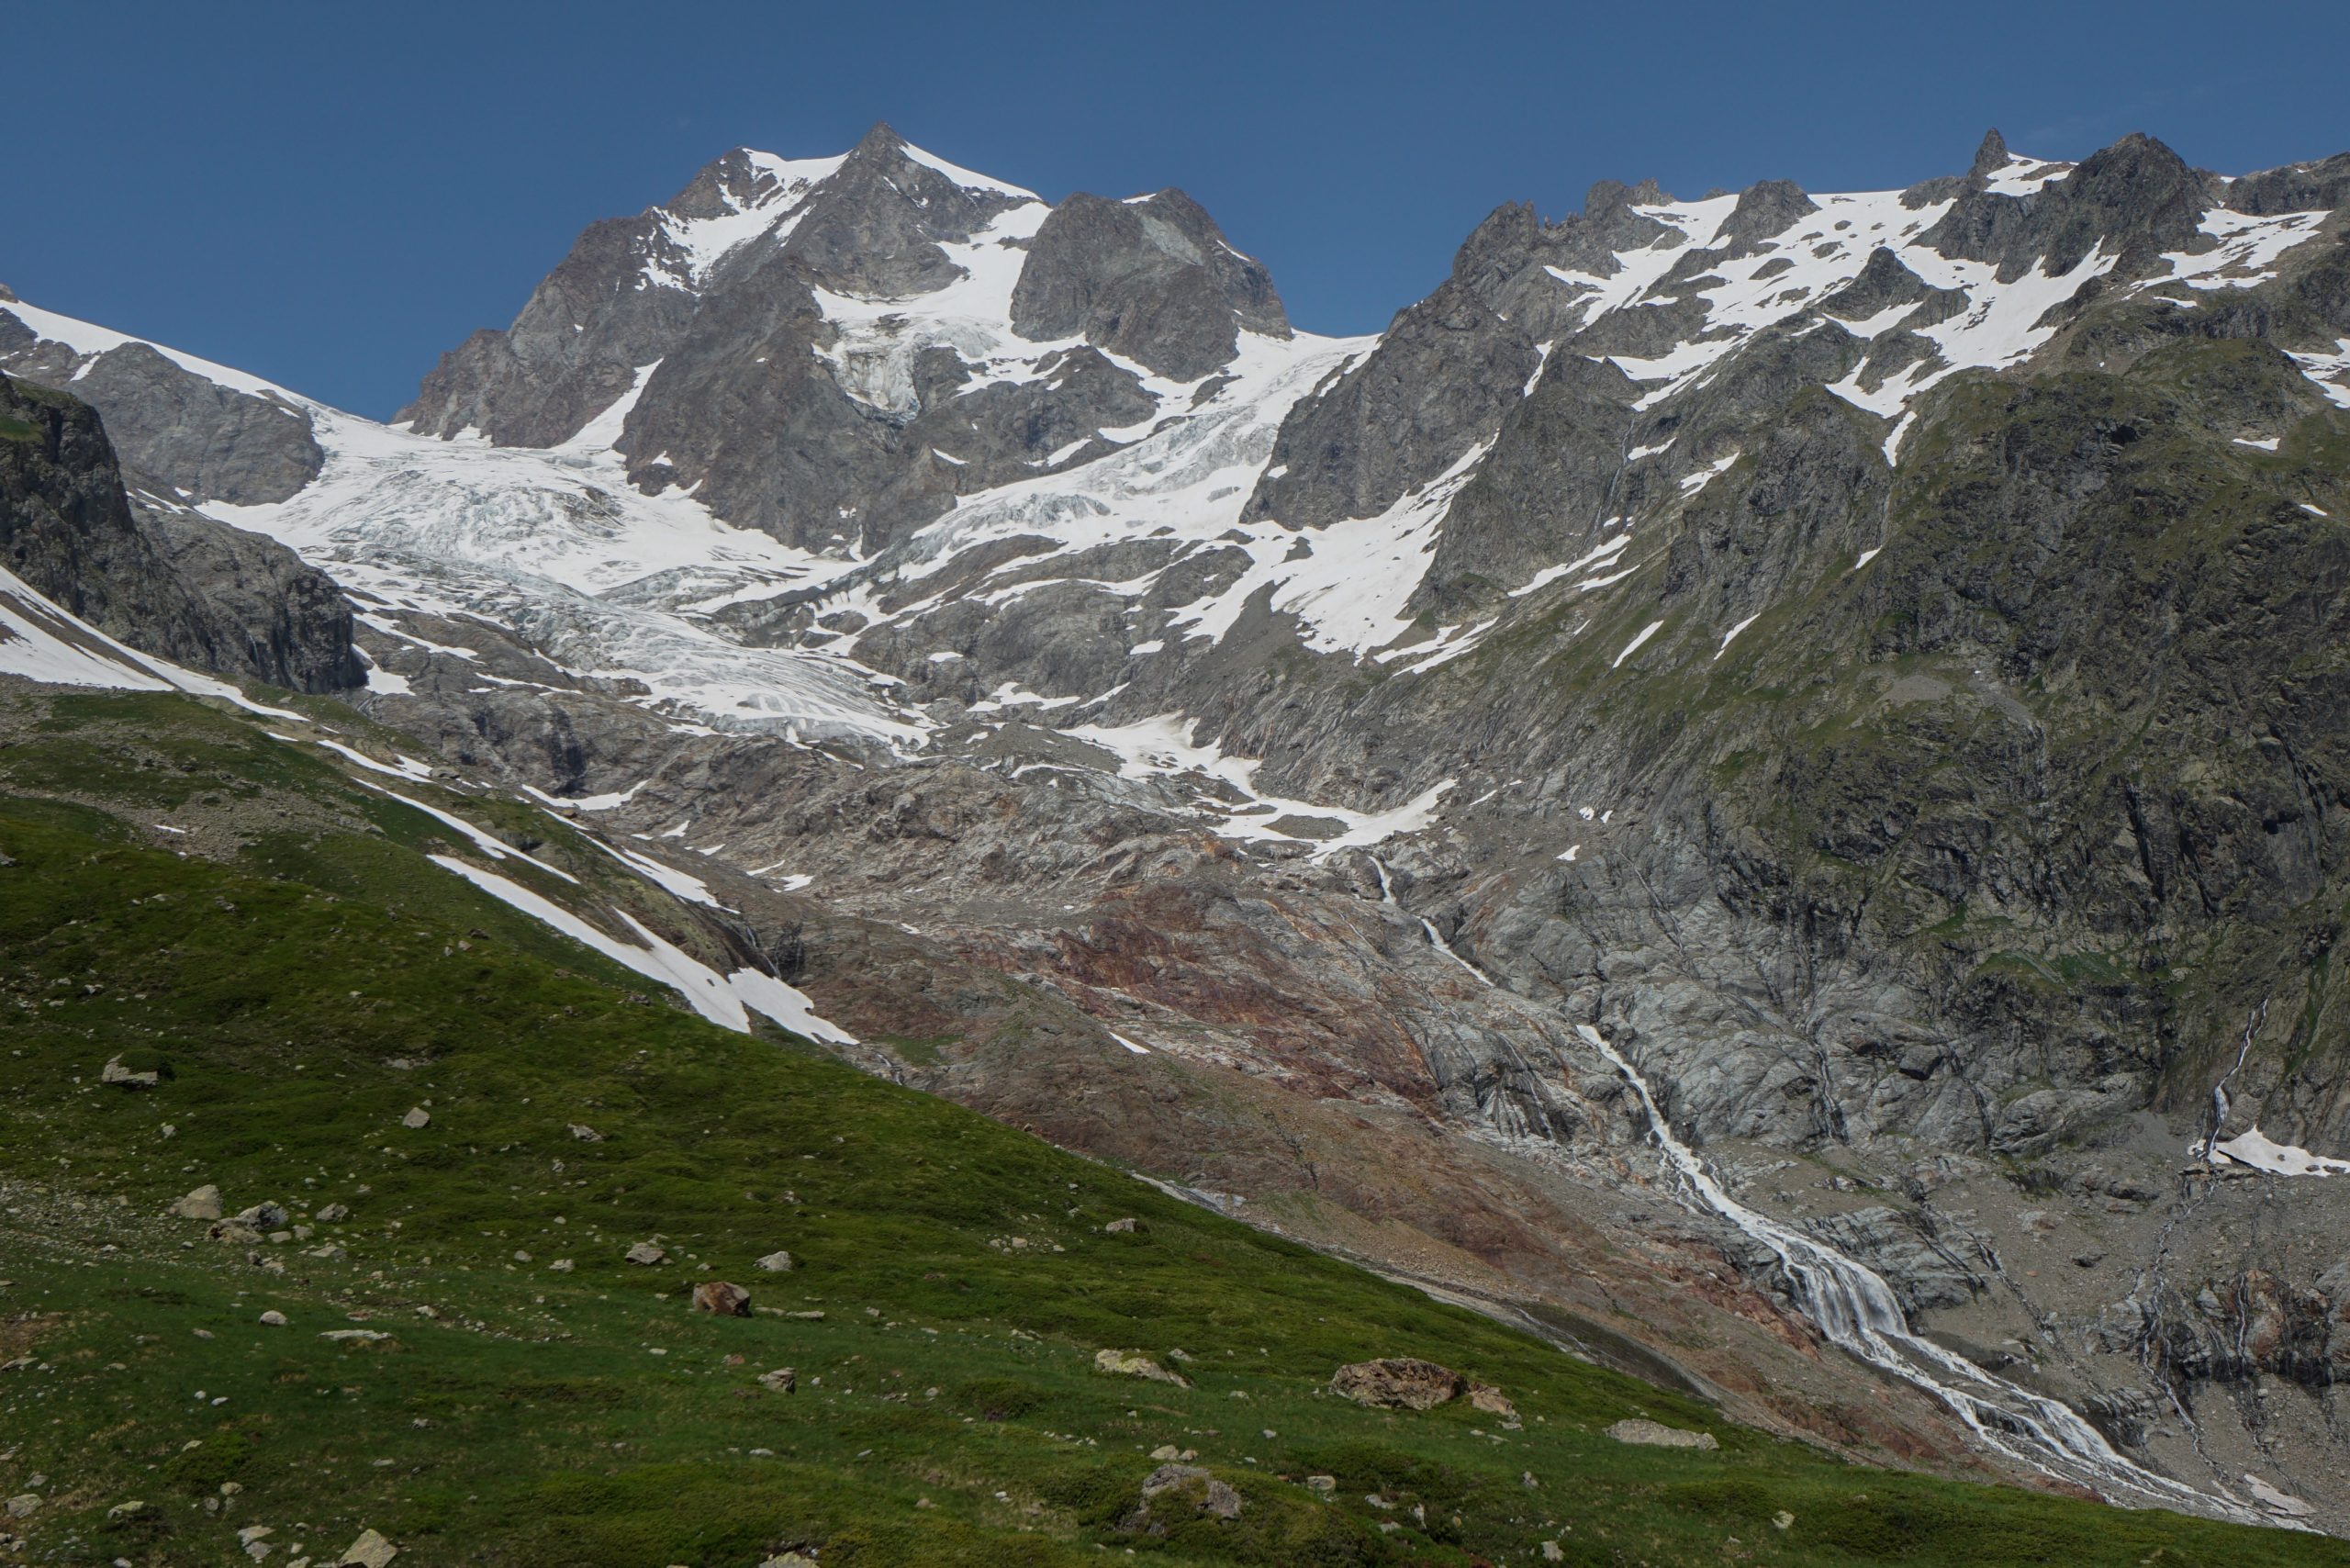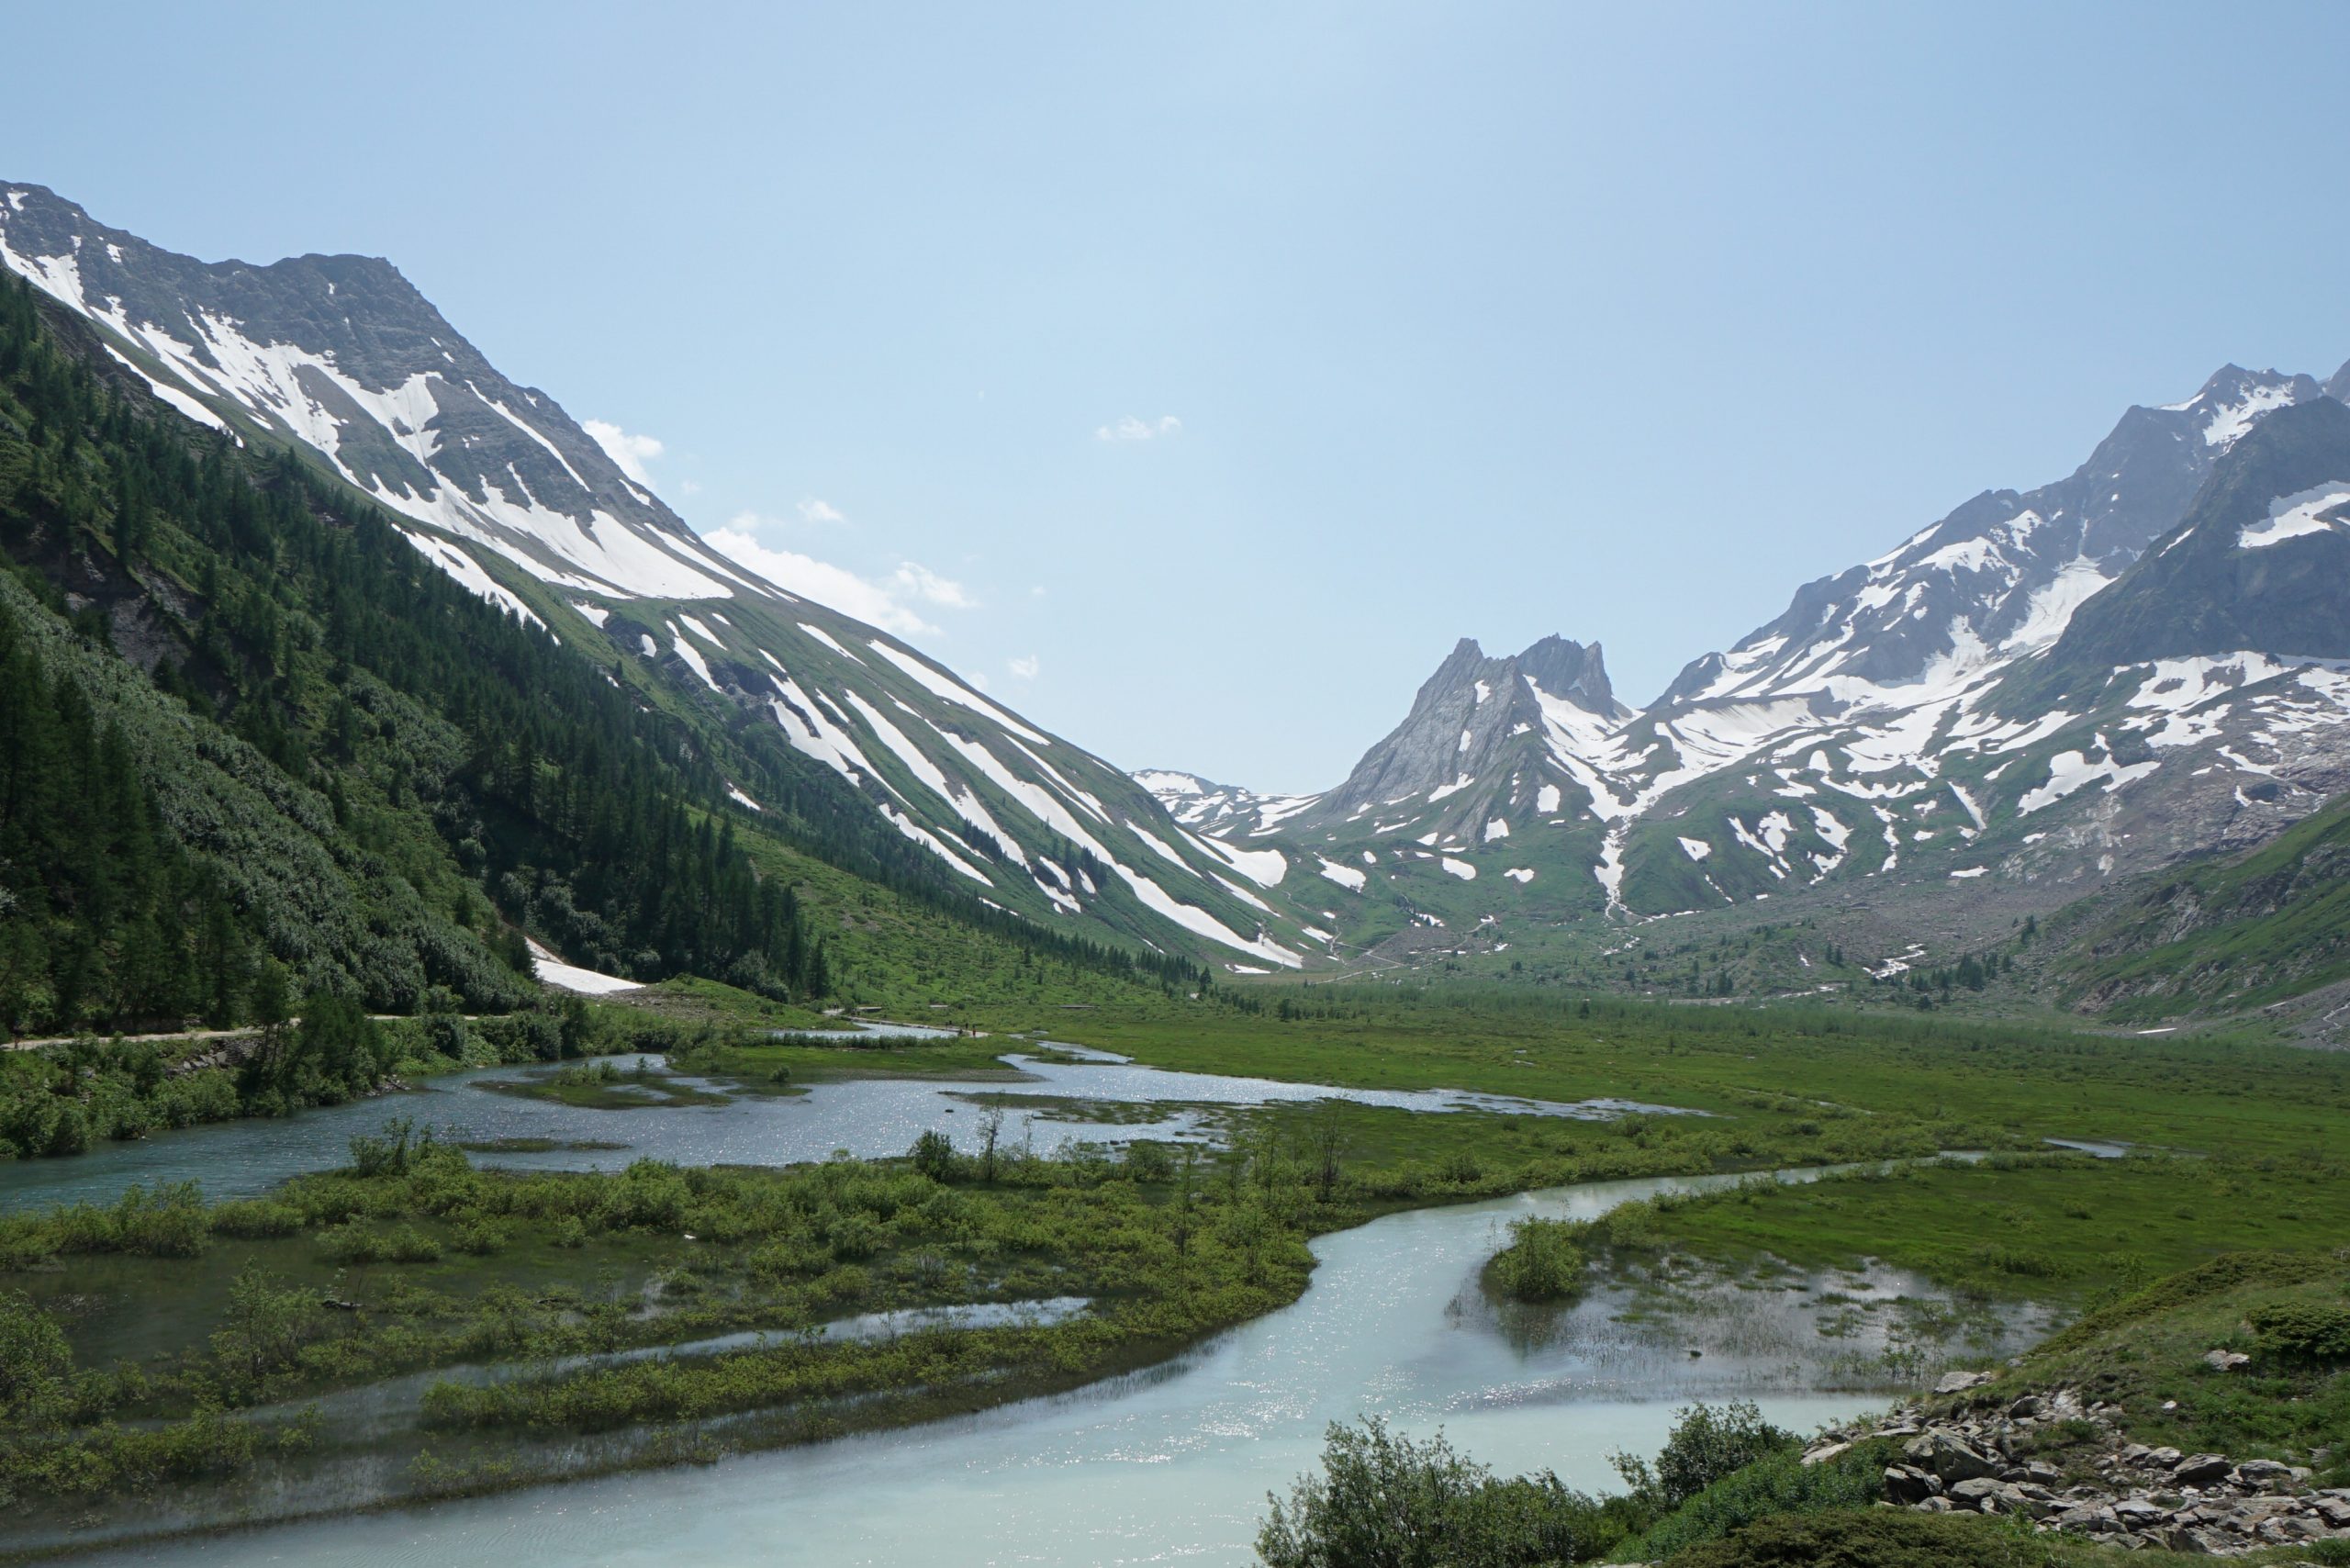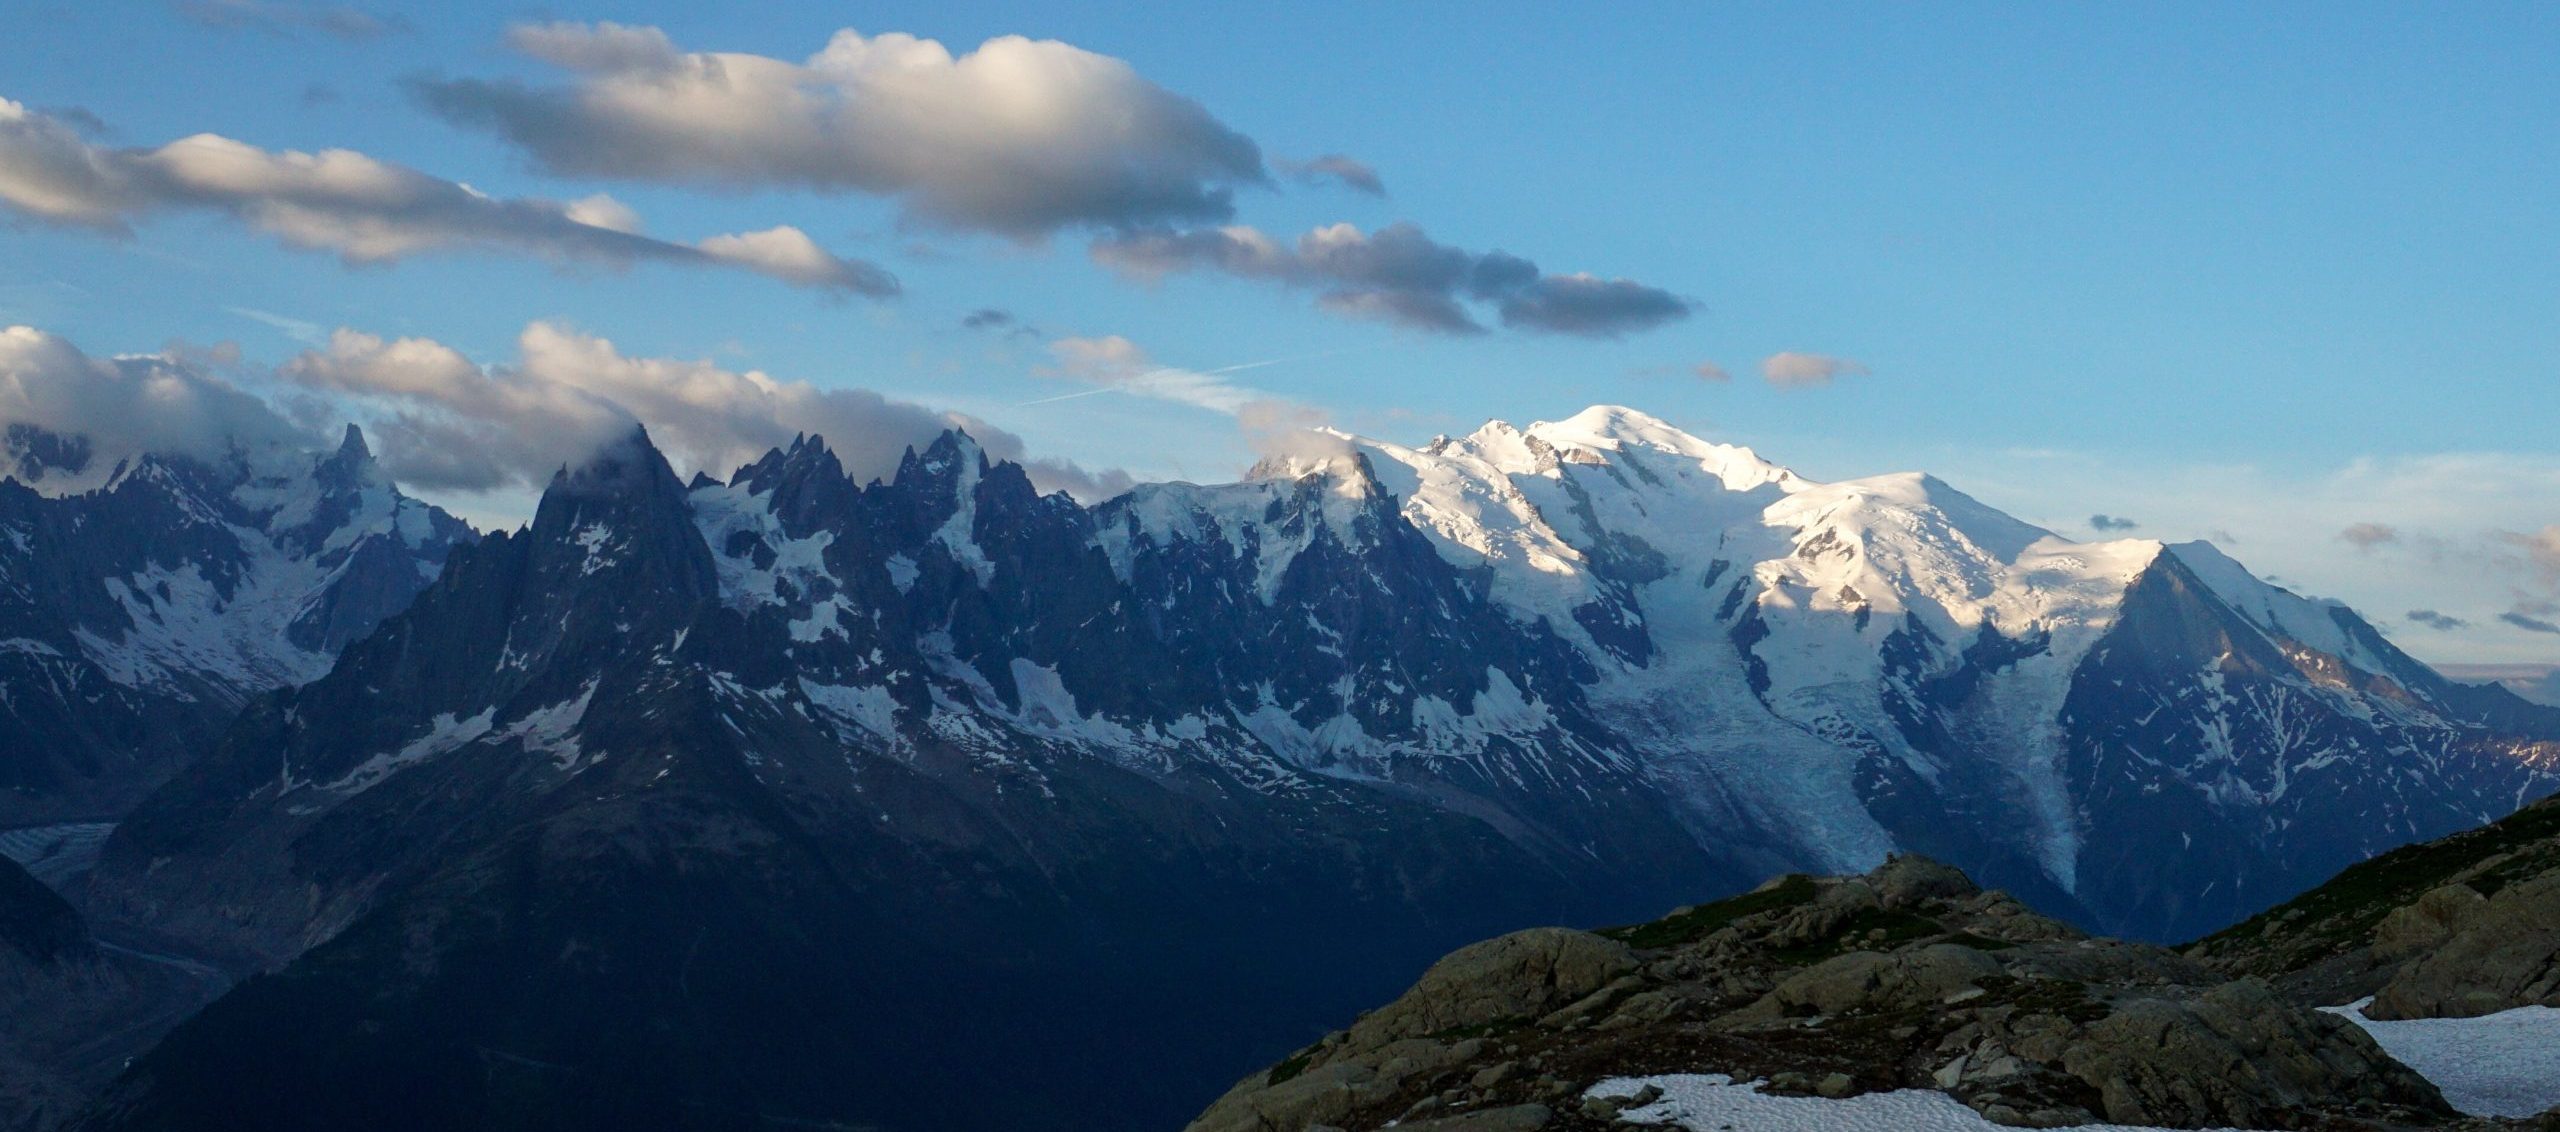
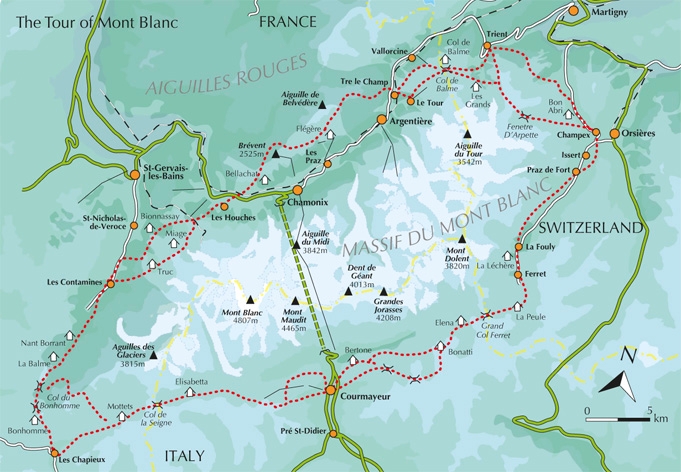
About Tour du Mont Blanc: Also known as TMB it is a circular trek around Massif of iconic Mont Blanc taking you through three countries: France, Italy and Switzerland. Pretty nice, right? It was indeed a spectacular hike. I knew that Alps are beautiful, but did not expect to be THAT impressed. As TMB is one of the most famous treks in Europe, it attracts a lot of people every year. Empty trails is the least you can expect.
How long does it take? The duration really depends on your physical shape and trail choices, Usually it takes from 8 to 12 days, but I can imagine that ultra-fast hikers do it even faster. There’s even an annual TMB marathon, so you can run the trail if you’re into it.
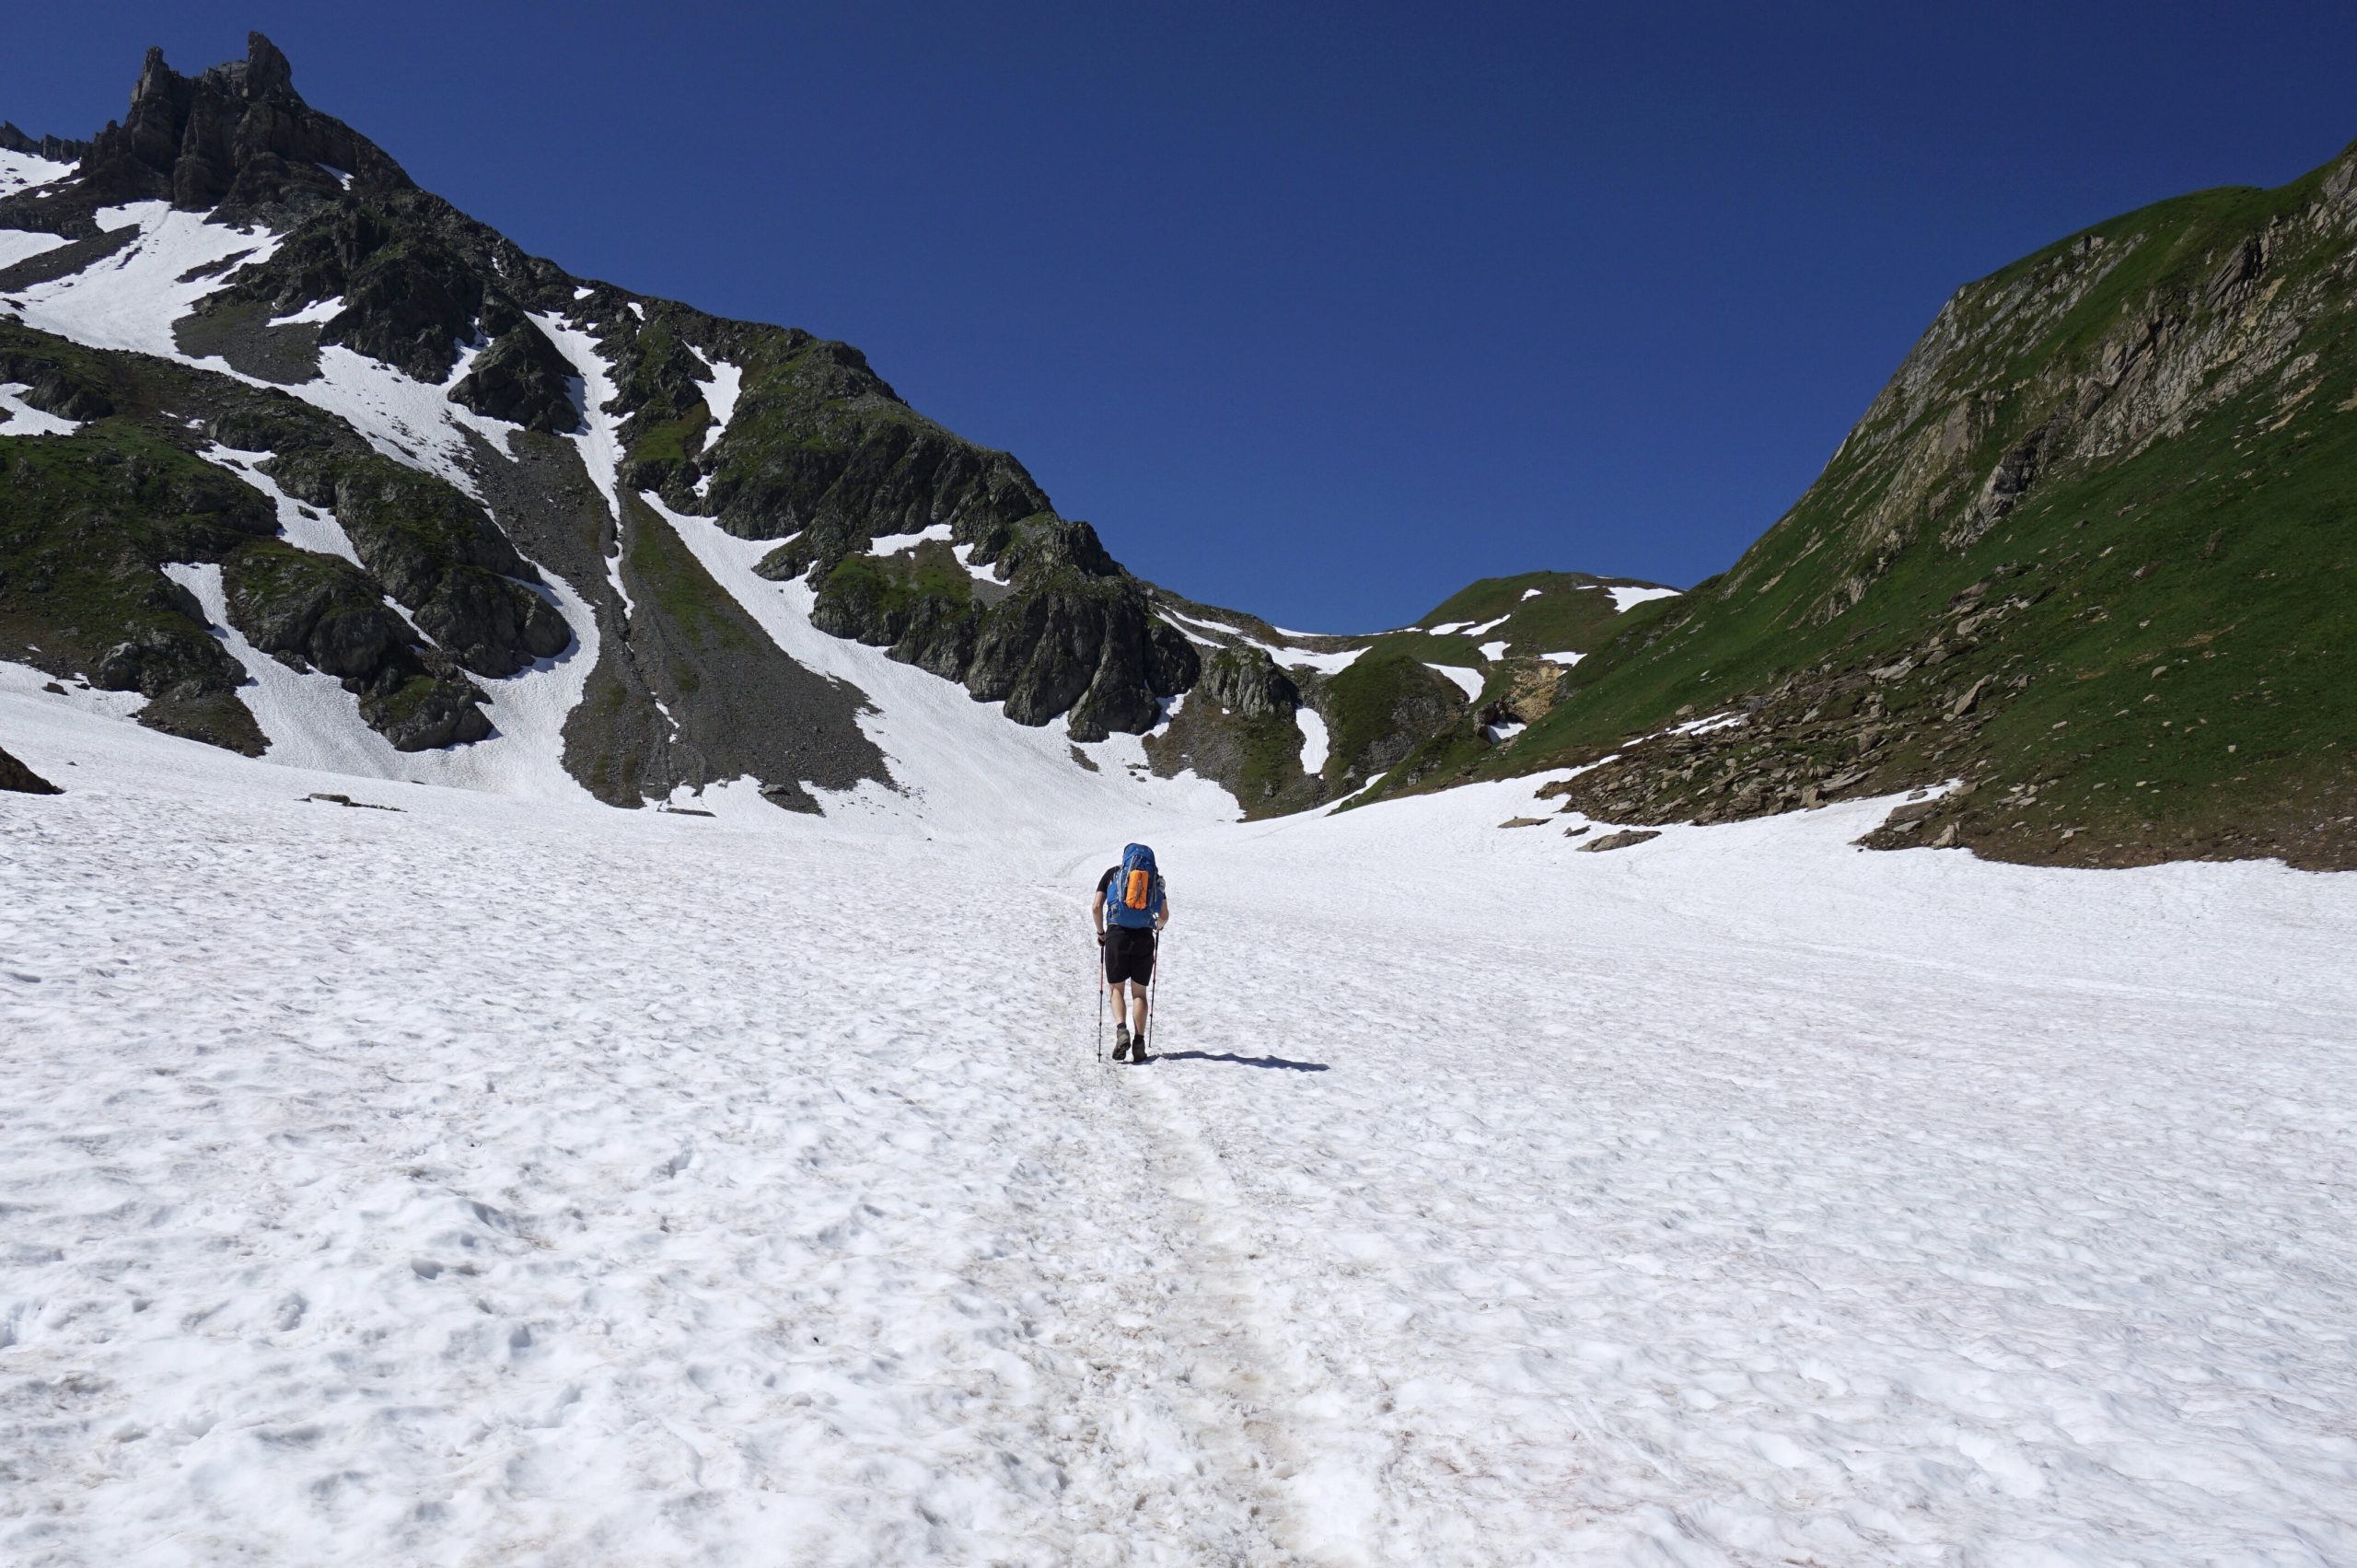
Difficulty: Some stages are quite easy, while others feature elevation gains and losses of ~1500m. I met so many different people that it’s hard to say whether this hike is for you. Let me put it this way – you should be fairly fit to hike the whole trail on your own (if you do not hire a travel operator and carry all your stuff on your back). It isn’t easy due to elevation jumps, but it is not technical either. It’s “simply” a StairMaster for 6 – 8 hours a day 
Independent or via tour operator? There are plenty of operators who would arrange accommodation and luggage transfers for you if you’re willing to pay. In that case you’ll just carry a day pack and focus on making to the destination, no other arrangements needed. We hiked independently, so did all logistical preparations upfront by ourselves and saved quite some money on that. There’s a lot of information online, so this trek is perfectly doable on your own. The information I’m sharing is also for those who wish to self-organize such a trip.
Overall impression: It was so great to lie in a bed after a gruelling first day. Our backs really appreciated it. Another reason why we enjoyed this place is a huge storm at night. We were glad to be inside.
Facilities: The room has a small bathroom with toilet and shower and even a table with two chairs to hang your (already) smelly clothes.
Food: We did not eat in the hotel.
Staff: We only met the hostess to check in and she was friendly 🙂
Price: 105 Eur + 1.8 Eur city tax
Free camping field
Overall impression: This was a free camping place, a spacious field behind the hamlet, so you will find a spot anytime you arrive. It is an exposed field at the bottom of the valley, so if there is a storm coming, you might want to stay closer to the Auberge, where buildings nearby might provide a shelter. We had a horrible storm raging in the valley when we stayed there and we were kind of in the middle of a flat field, which “added” to the experience.
Facilities: There is a free public toilet with a sink.
Food: In the hamlet, there is a very basic grocery store, where you can also order fresh bread for the morning. We got a spot for a dinner in the nearby Auberge de la Nova. It was our first Alpine hut dinner experience and I loved it. Long tables full of people, plenty of hearty food and hiking stories, we really enjoyed our evening there.
Staff: None
Price: Free!
Overall impression: It is a well-established campsite with little chalets and equipped tents for rent. Although the campsite is quite big, it is not noisy (or we were lucky). We had a spot between trees, so we got a much better cover from yet another storm. The next day we took a bus to Cormayeur, the bus stop is just outside the campsite, very convenient. As there are no camping places in Cormayeur itself, this place is a great alternative.
Facilities: They have everything you might need: showers, bathrooms, a restaurant, grocery store, even an ATM. Showers operate based on coin system, so you need to pay extra. It has warm water though and runs long enough to refresh after a long day of hiking.
Food: We had pizzas in their restaurant and it was really delicious. A true Italian pizza, awesome.
Staff: The staff is very helpful and friendly.
Price: 6 Eur for a tent + 8 Eur per person
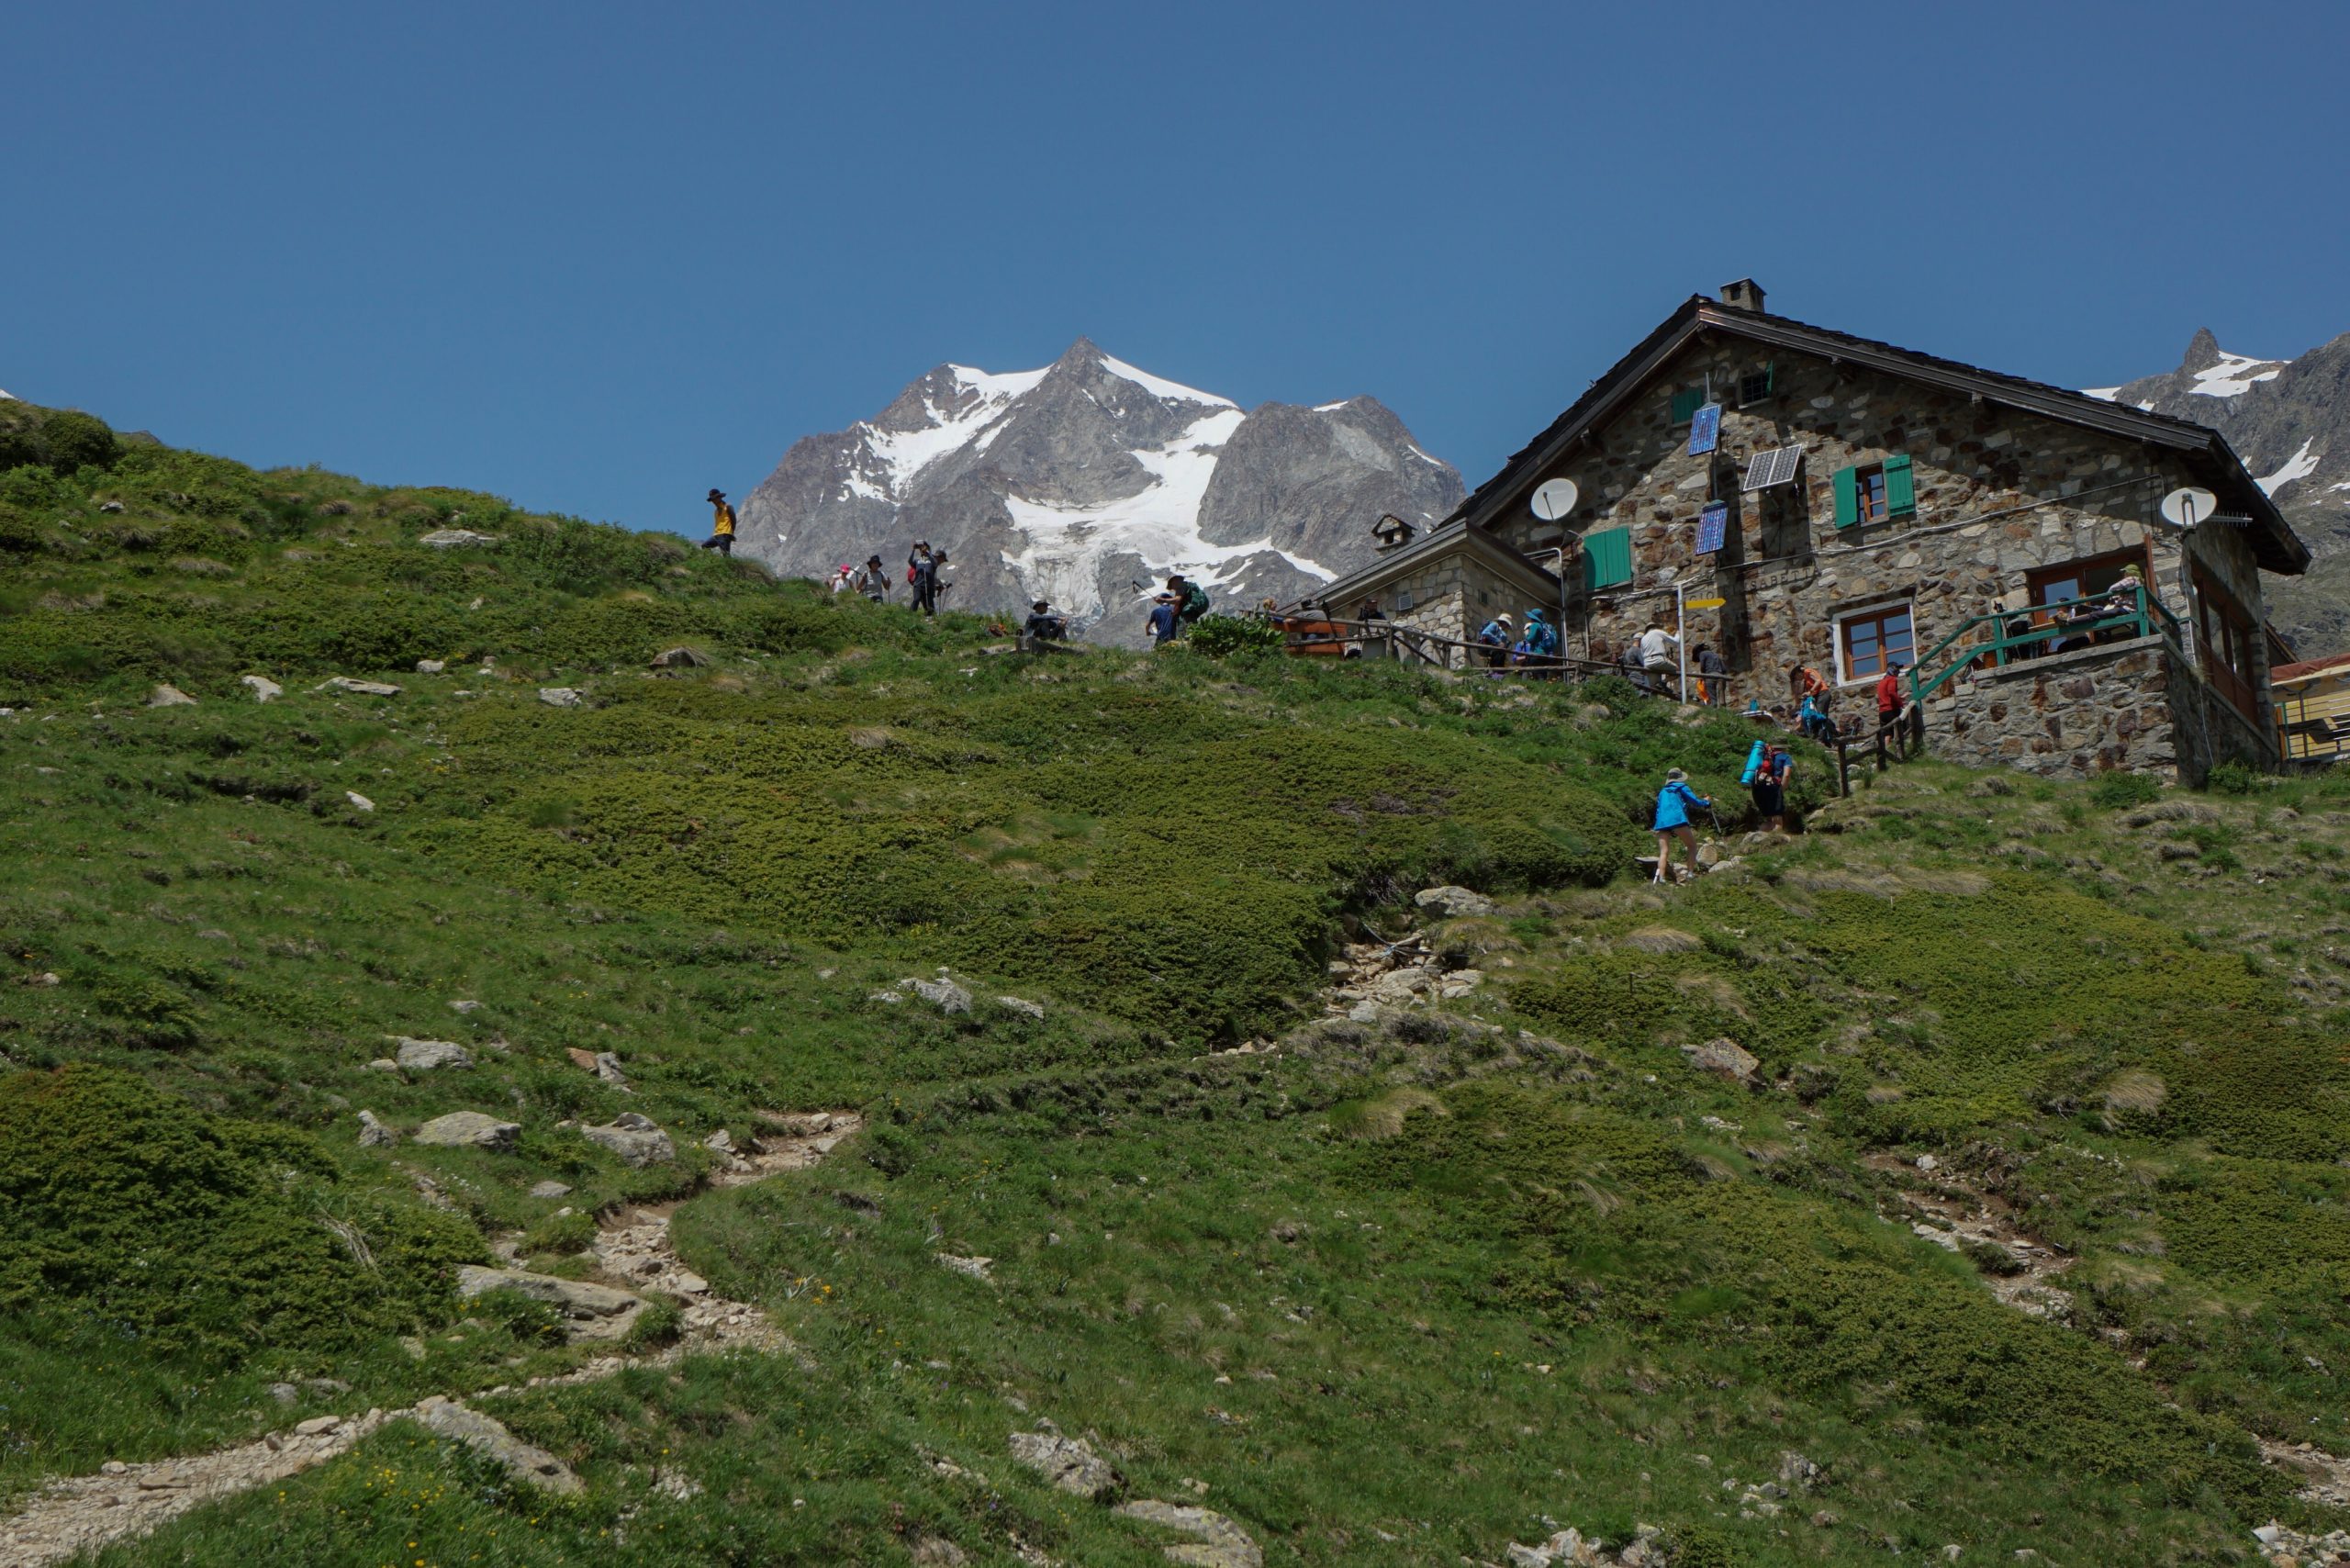
Overall impression: This refuge sits in a spectacular location – just opposite Glacier de Pre de Bar. It is a large refuge and we stayed in a room with at least 30 bunk beds. They also have double rooms, but these tend to get booked fast. Thanks to the earplugs I could rest quite well. It is not one of those laid back cozy mountain huts where you feel like home, it is a functional place for you to eat, rest and move on.
Facilities: There are shared showers and toilets for dormitory guests. The facilities are quite basic, but all works fine. We did not have to wait in long lines either.
Food: We had a half-board deal, so we got a three-course meal for dinner and a simple buffet type of breakfast.
Staff: As it is a huge refuge, the staff is focusing on managing everything swiftly. Don’t get me wrong, they are friendly, but they also make sure you are served/got your answer fast.
Price: 109,50 Eur for two people in a dormitory (half-board)
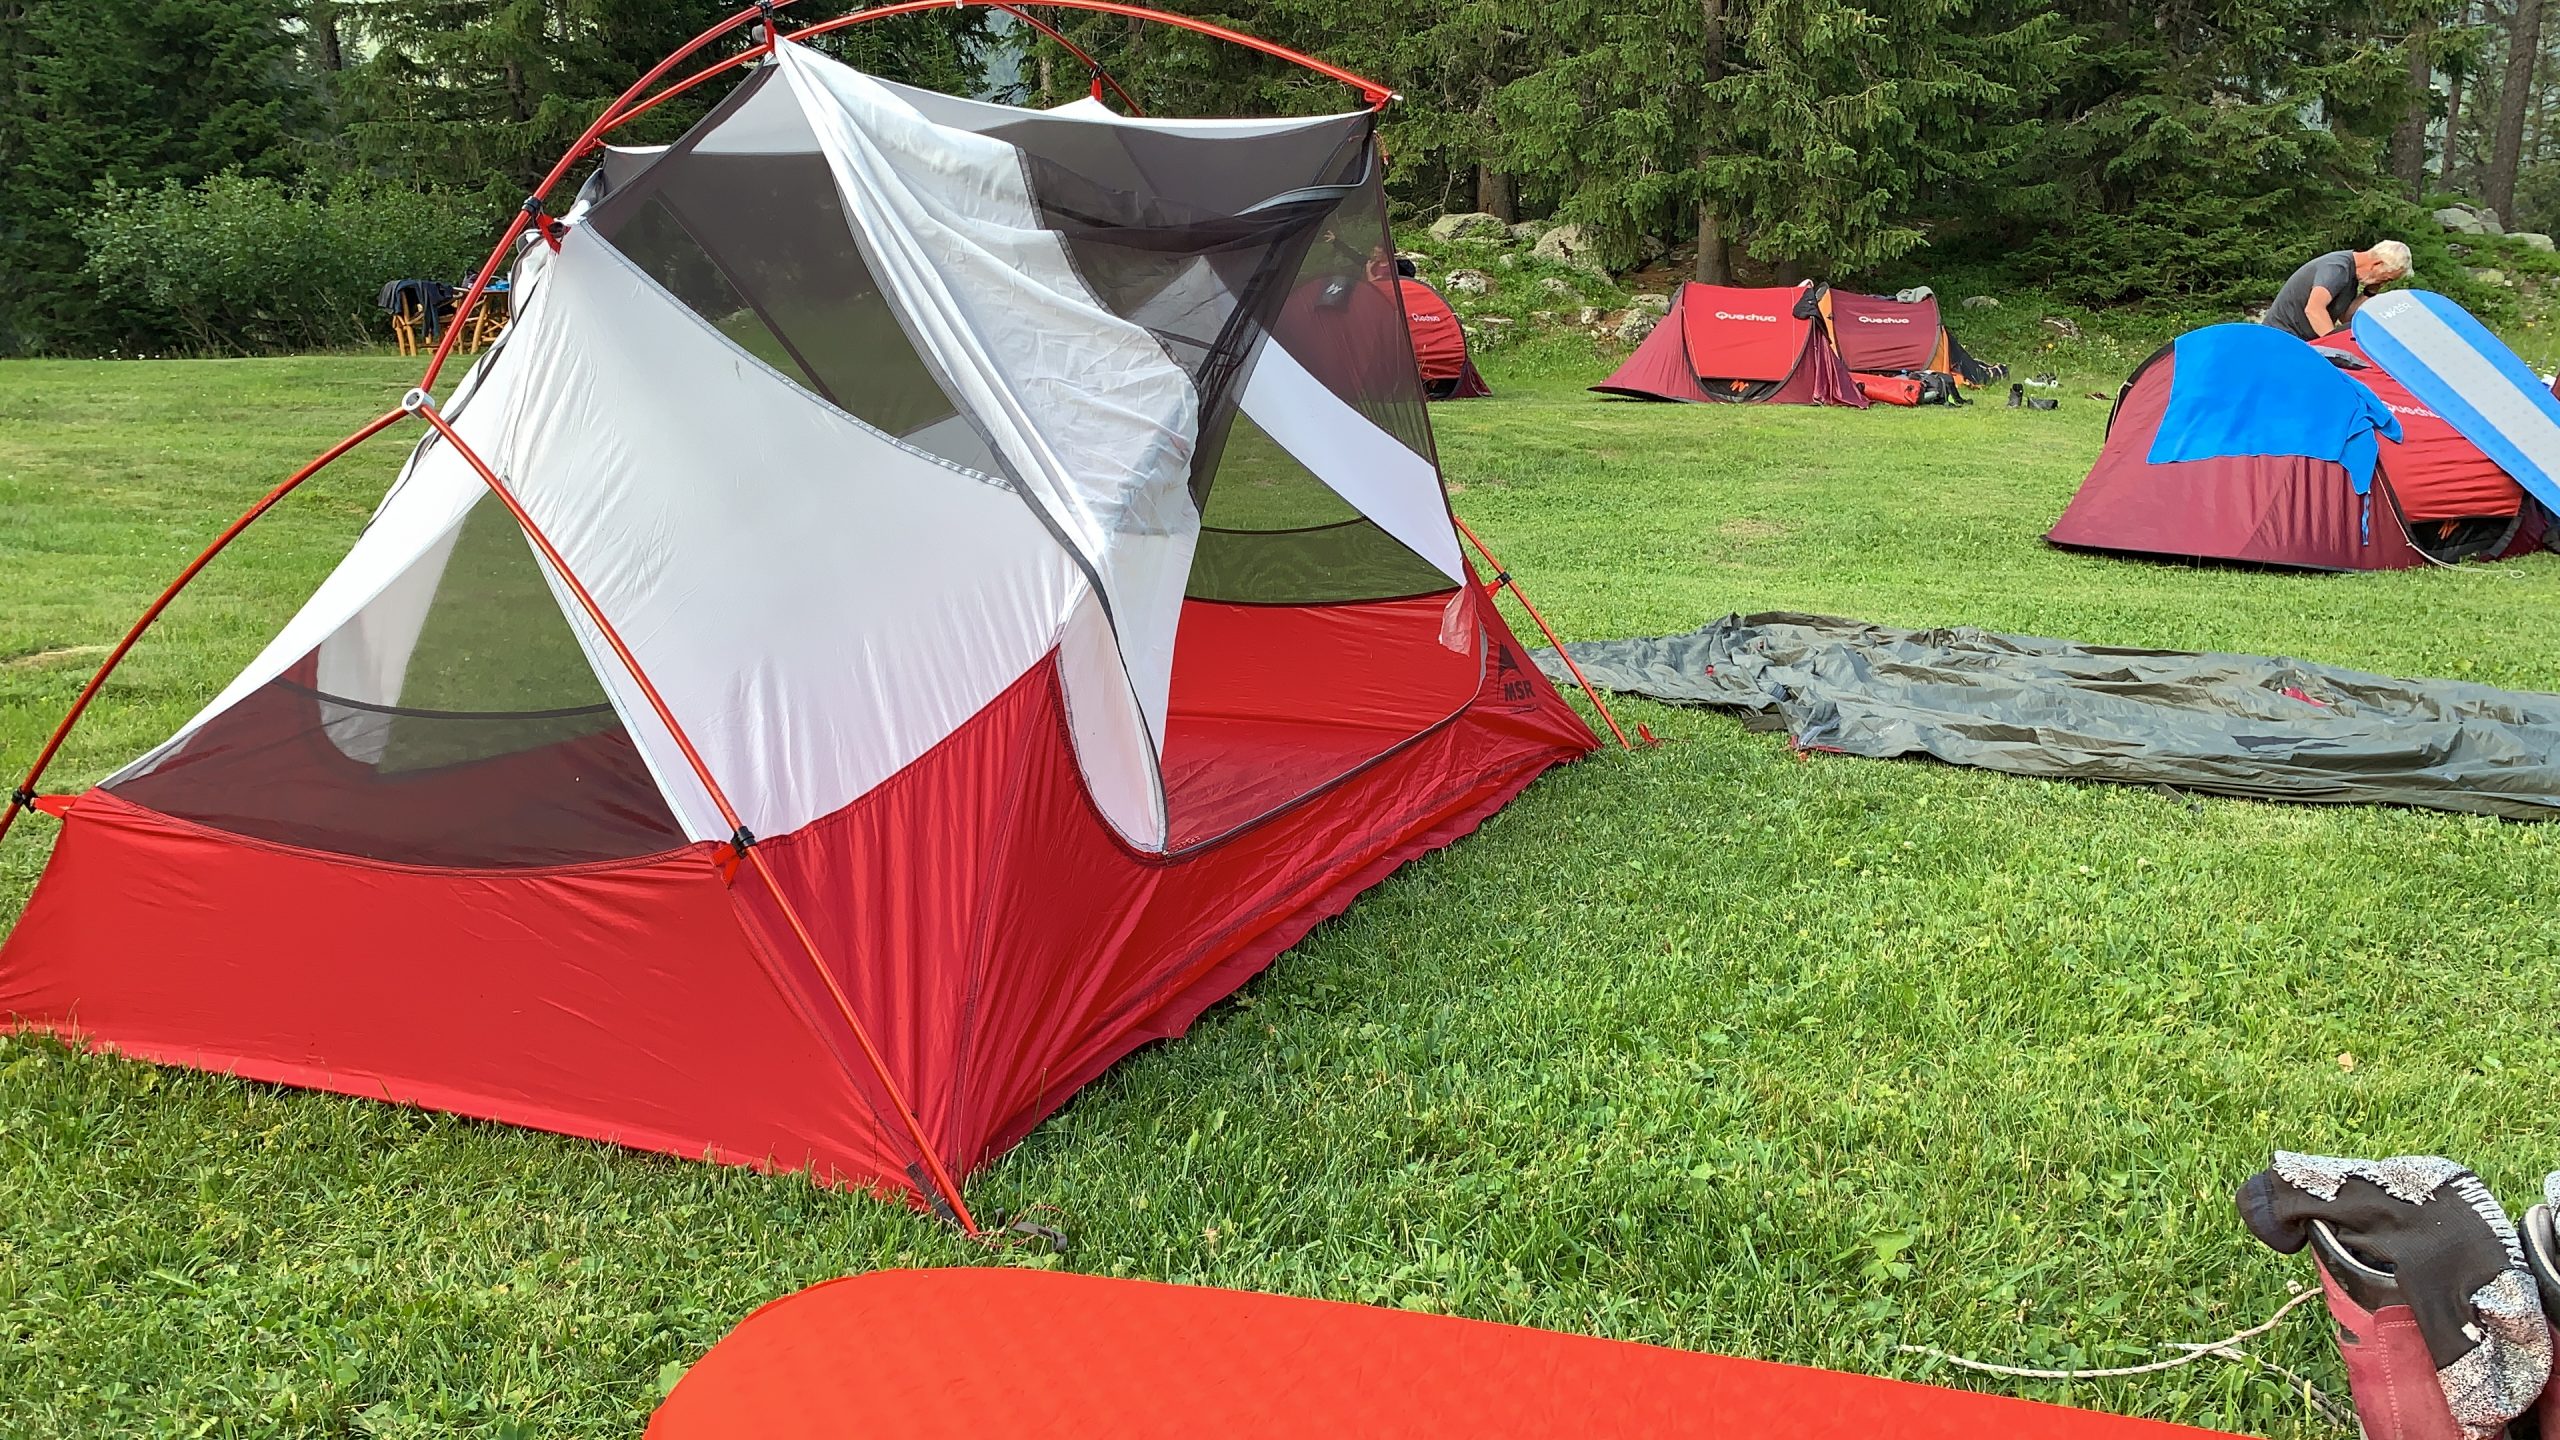
Overall impression: One of my favourite camping places. The campground is behind the refuge building in a spacious field. It doesn’t get super busy so everyone has enough space between tents. This also allows to scout for a suitable slope to pitch your house on and you don’t need to stress out about getting a spot if you arrive later.
Facilities: Clean showers and toilets are in the refuge building. In this area you can also find a few plugs to charge the electronics.
Food: Relais d’Arpette is known for its great kitchen and their restaurant gets fully booked quickly, so if you stay there, make sure to book dinner in advance. Sadly we didn’t book in advance, so we did not get to try their famous dinner.
Staff: The staff is helpful, just some of them struggle with English a bit, so knowledge of a few French words might come handy.
Price: 30 CHF for a tent and 2 people
Overall impression: We stayed at the back of a hotel building in a designated camping place. It is an unusual campsite as it consists of three or four levels, where tents are stacked in rows. It does get packed, so even if you arrive early, you might find yourself surrounded by various tents before the evening. I did enjoy staying there though, we arrived there early and could chill in the beautiful hotel area, surrounded by the mountains.
Facilities: There are designated toilet and shower facilities specifically for camping guests. Everything was clean, the only downside was the line for the shower. Opposite the hotel there is a very small grocery store, where we managed to get Nutella, jam and bread for the next day, nice!
Food: We ate in the restaurant of the hotel. This is the place where I tried rusti (traditional Swiss potato dish) for the first time and fell in love with it (potatoes, duh!). So the food was good, but quite expensive. We had a single late lunch/early dinner meal to save money.
Staff: Everyone is friendly and helpful.
Price: 22 CHF for a tent and 2 persons
Overall impression: This was hands down the cosiest place we stayed in. Initially we planned to camp in the premises of this Auberge, but stormy clouds and rambling thunder convinced us to try and get a space inside. We got the last place they had – an attic, which you can reach via a ladder. And we had this place all to ourselves! The whole Auberge was like a little Hobbiton with beds in various fun places. I really enjoyed staying there.
Facilities: There are shared showers and toilets for the guests, everything is clear.
Food: As we arrived a bit earlier, we had some celebratory drinks and could not resist to try their blueberry pie. It was soooo good. I also learned that it’s a traditional French pie. Very educative trip in terms of cuisine knowledge. For dinner we again had a half-board, it was a great outside feast with fellow hikers.
Staff: Everyone is very helpful and friendly. The staff created a relaxed mood in the hut, exactly what I was looking for.
Price: 106 Eur for two people, half-board
Overall impression: At 2352m, this was the highest and most spectacular place we stayed. The refuge sits next to Lac Blanc while also overseeing the whole Mont Blanc range – awesome views guaranteed. Even though we had a cloudy day, the whole area was just breath-taking, so I definitely recommend to at least take a hike past Lac Blanc. This refuge wasn’t in our original itinerary, we somehow decided to try our luck and inquire for a place a night before and got lucky.
Facilities: Due to the height, the facilities are quite limited. You need to pay for the shower and they don’t have potable water. You can buy 1,5l bottles for ~5 EUR (premium water!) if in need. We stayed in a dormitory room again, a bit smaller than in Rifugio Elena. Earplugs were essential again
Food: We had a half-board arrangement, classical hut food with soup, main dish and dessert.
Staff: People at the hut were friendly. If you want to reach them before visiting, best to call as there’s no reception in the hut.
Price: 60 Euros per person for a dormitory room (half-board)
Overall impression: This was our celebratory stay after finishing TMB. Very hip hotel with great atmosphere, we really enjoyed staying there.
Facilities: You can imagine that after more than a week of camping and staying in dormitory rooms, this was such a luxury – our own hotel room with own shower etc. I’ve spend probably 20 min just standing in the warm shower, washing away the dust and muscle pain accumulated in the past 9 days. There is even a sort of chill place in the premises where you can have drinks, eat our own food, play games and just chill 🙂
Food: The restaurant of the hotel was fully booked, but we managed to arrange a take-away. The food was really good, we enjoyed celebratory burgers and even got Magners ciders. Edo still remembers with envy those tasty burgers.
Staff: Everyone was super friendly and attentive.
Price: 89 Euros for a double room


Day 1: A better alternative & my poor back
Here we go! It’s 6:30 AM and we are ready to kick off the TMB, which officially starts in the centre of Les Houches (yes, it actually has a starting point).
")
Day 2: It's so beautiful here & hold the tent!
This was one of my favourite sections of the whole hike. Our backs recovered from yesterday and we were ready to conquer the trail again.

Day 3: Best food on the trail
The morning started on a fun note with hikers sharing survival experiences with the fellow “lucky” ones camping. We did not sleep a lot but could not linger.
")
Day 4: Our first stay in a rifugio
From Rifugio Bertone there is an option to take a higher variante path and I’ve heard it’s very beautiful. We debated for quite a while whether we should do it.

Day 5: Getting lost once in a while
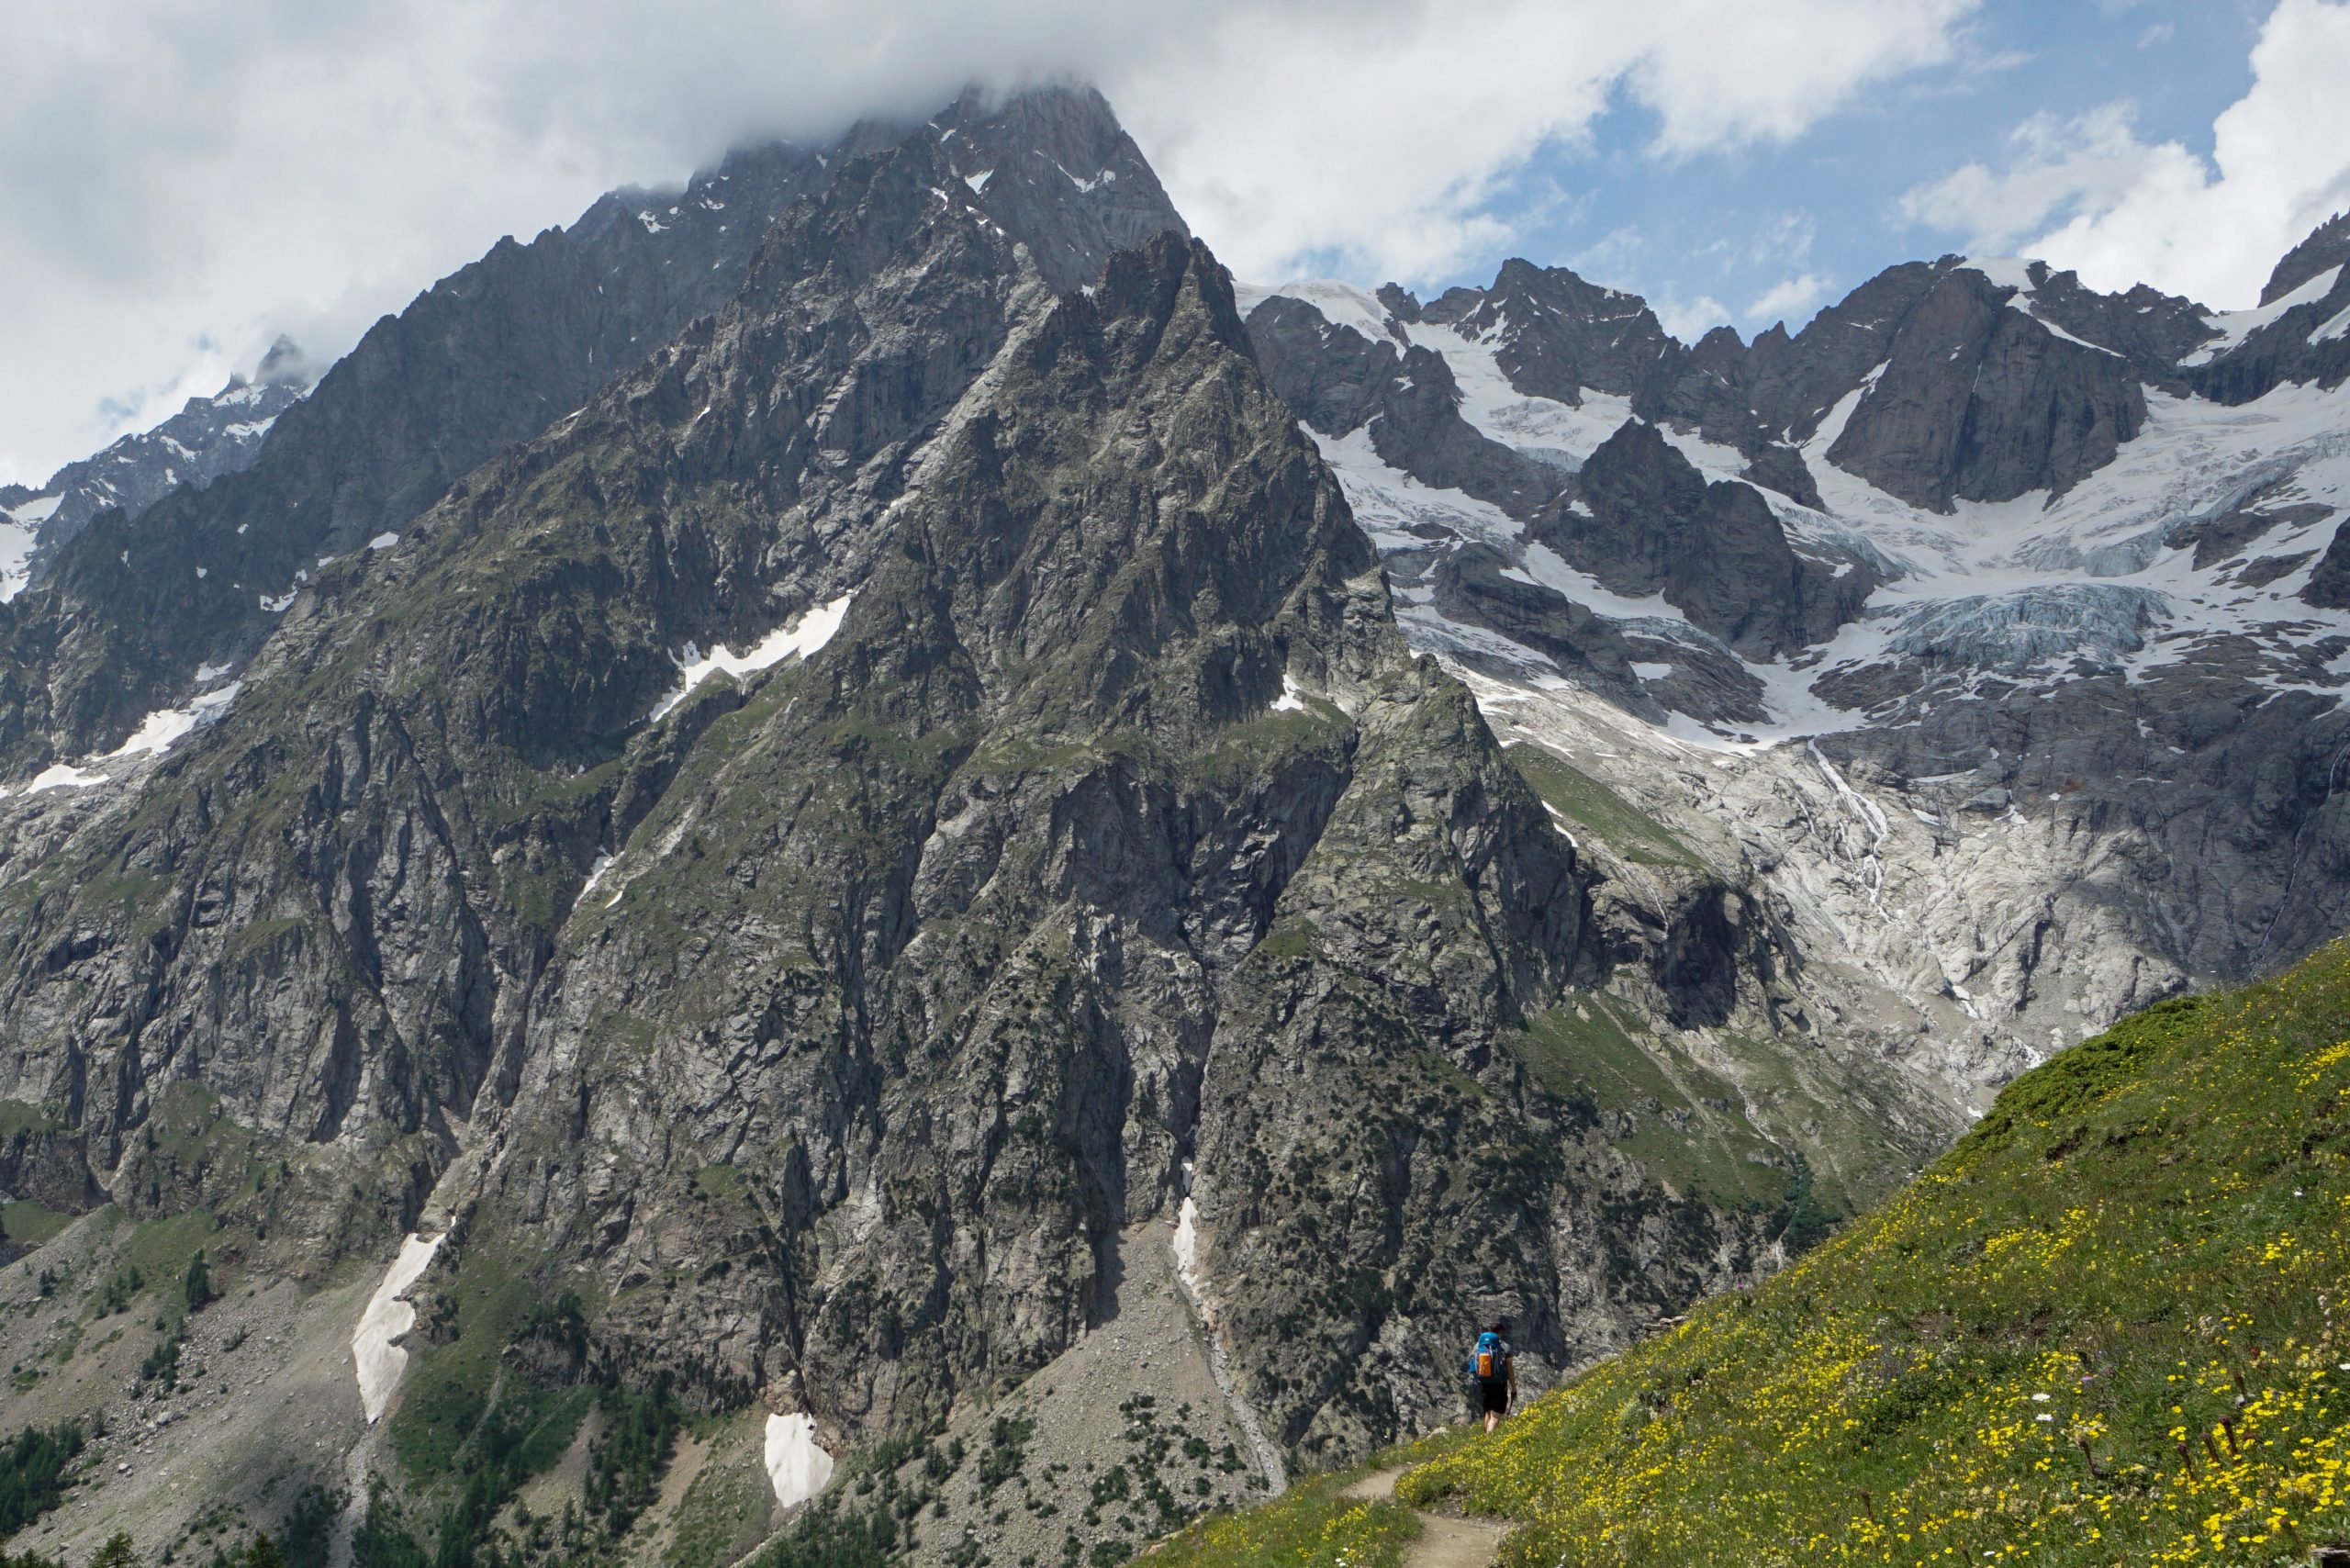
Today is the last day of combining two stages and so the last relatively long day. We said goodbye to the spectacular views at Rifugio Elena and moved on.

Day 6: Very modest corner of Switzerland
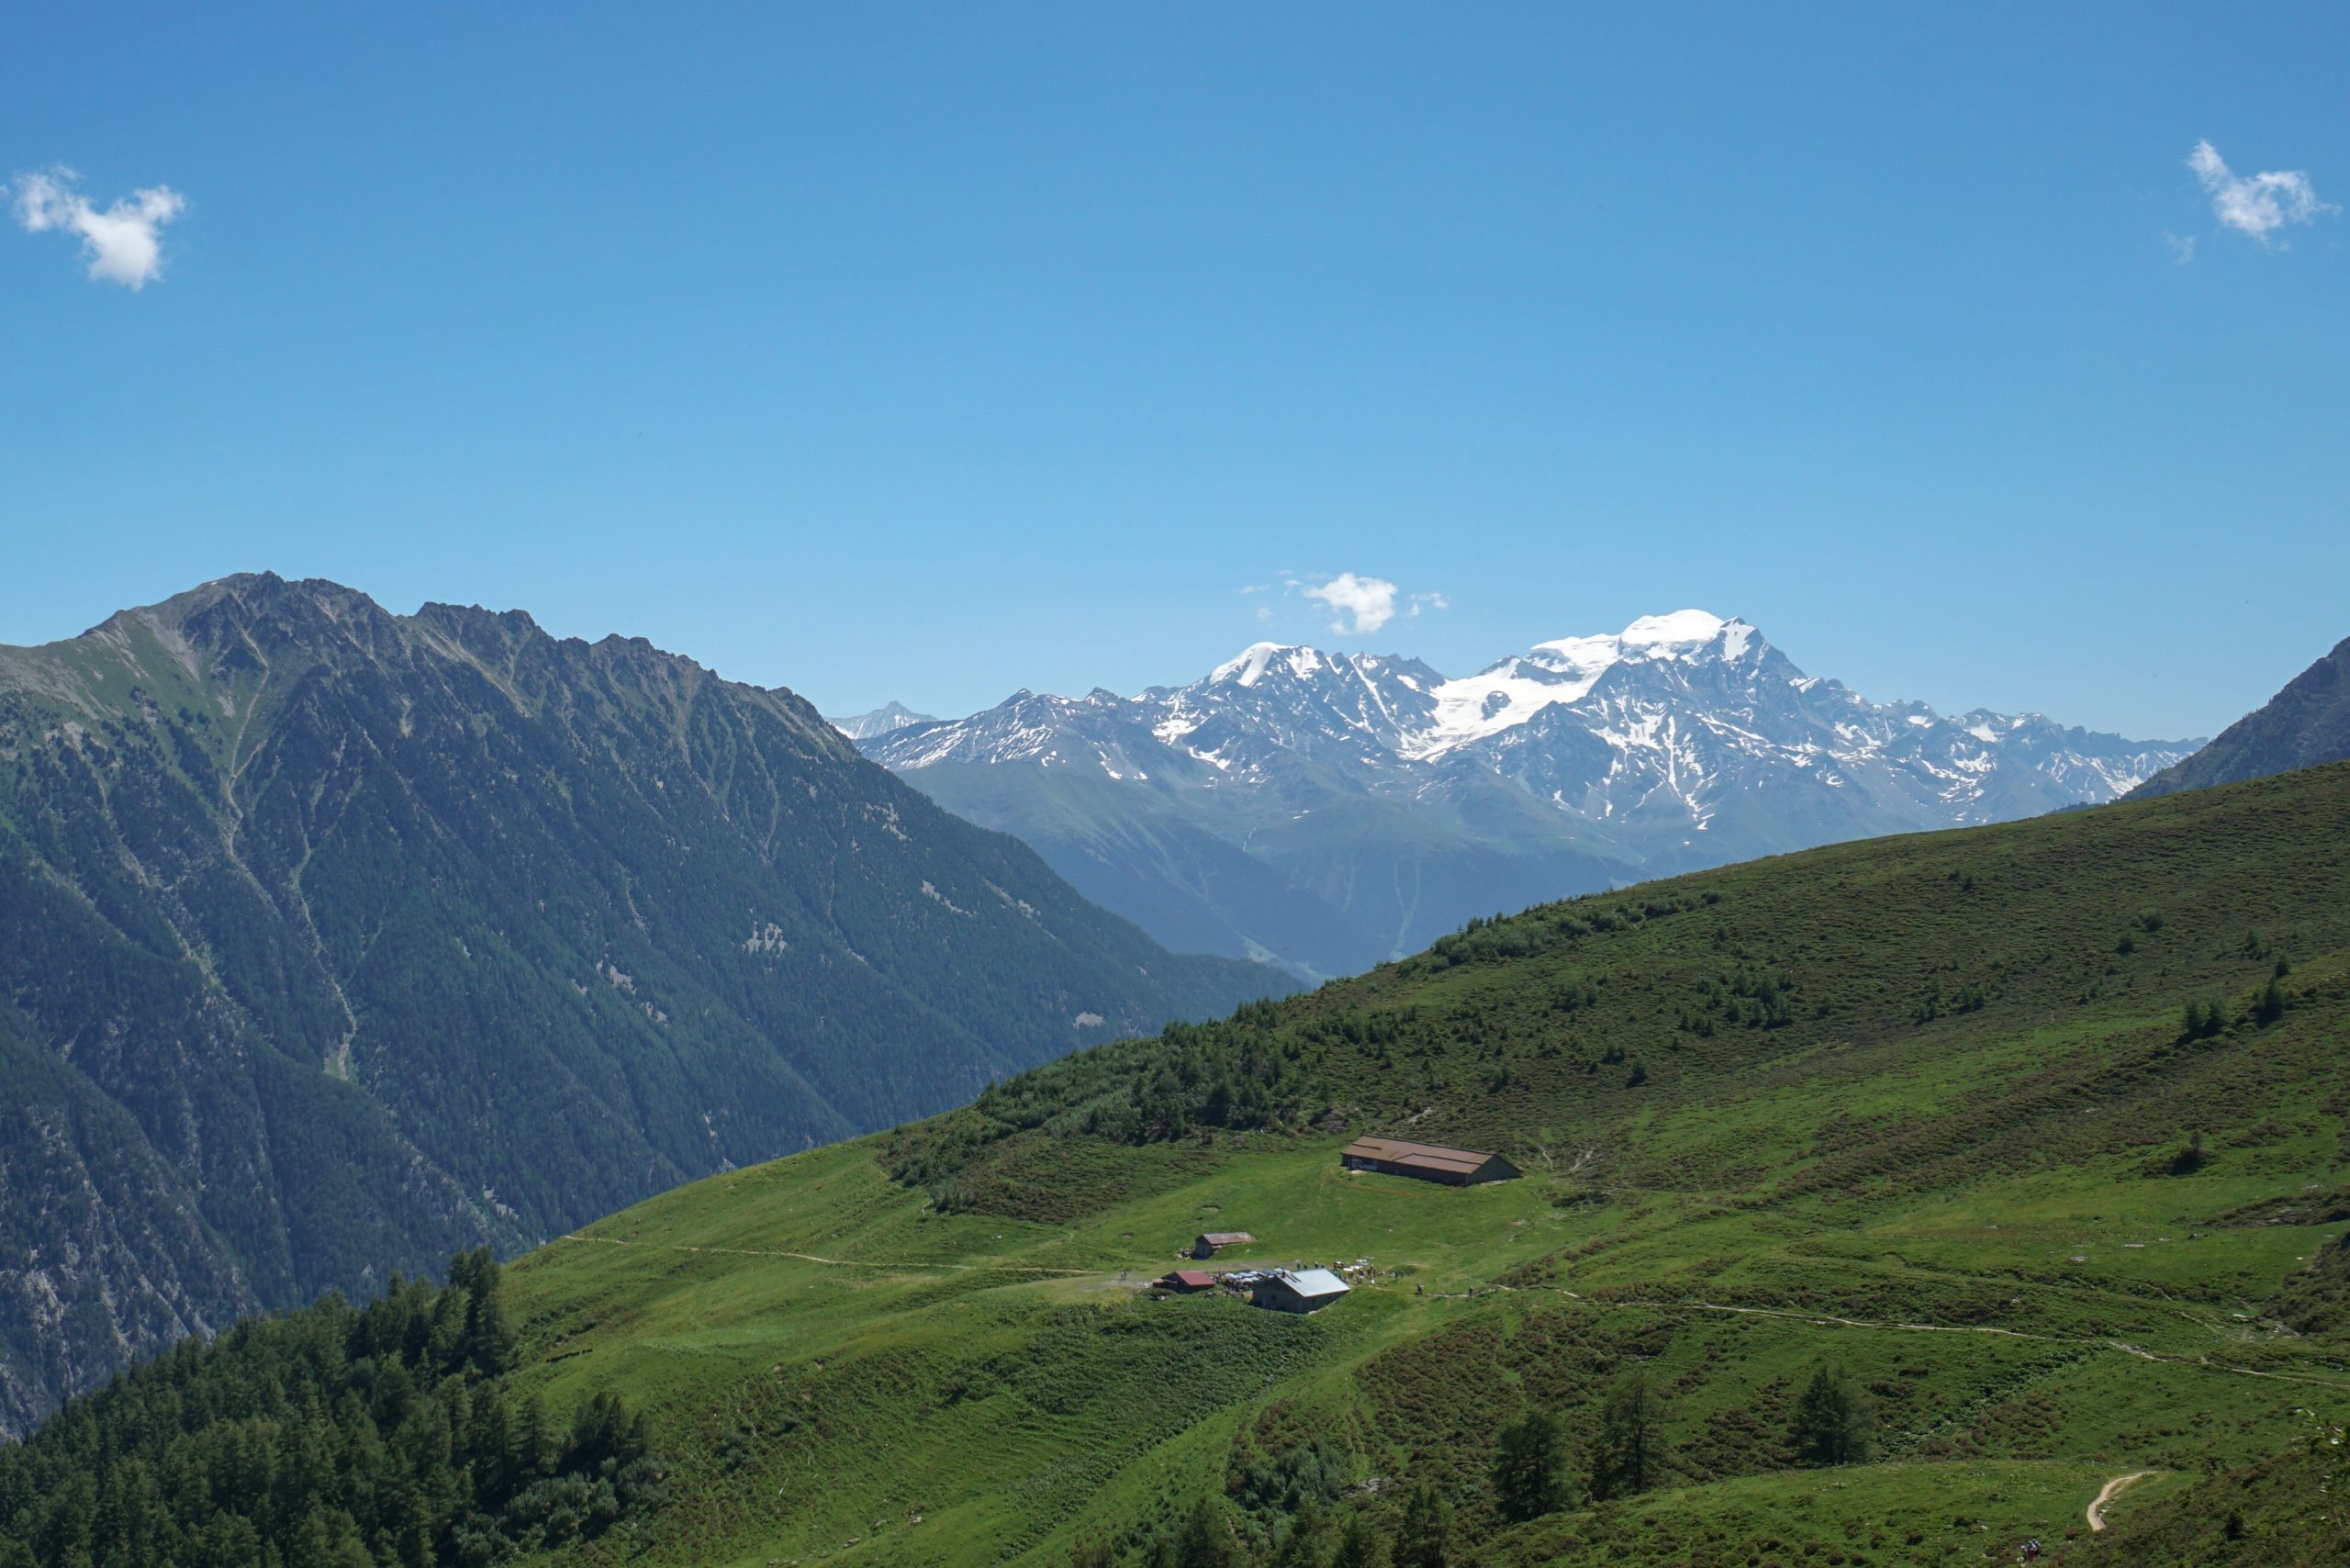
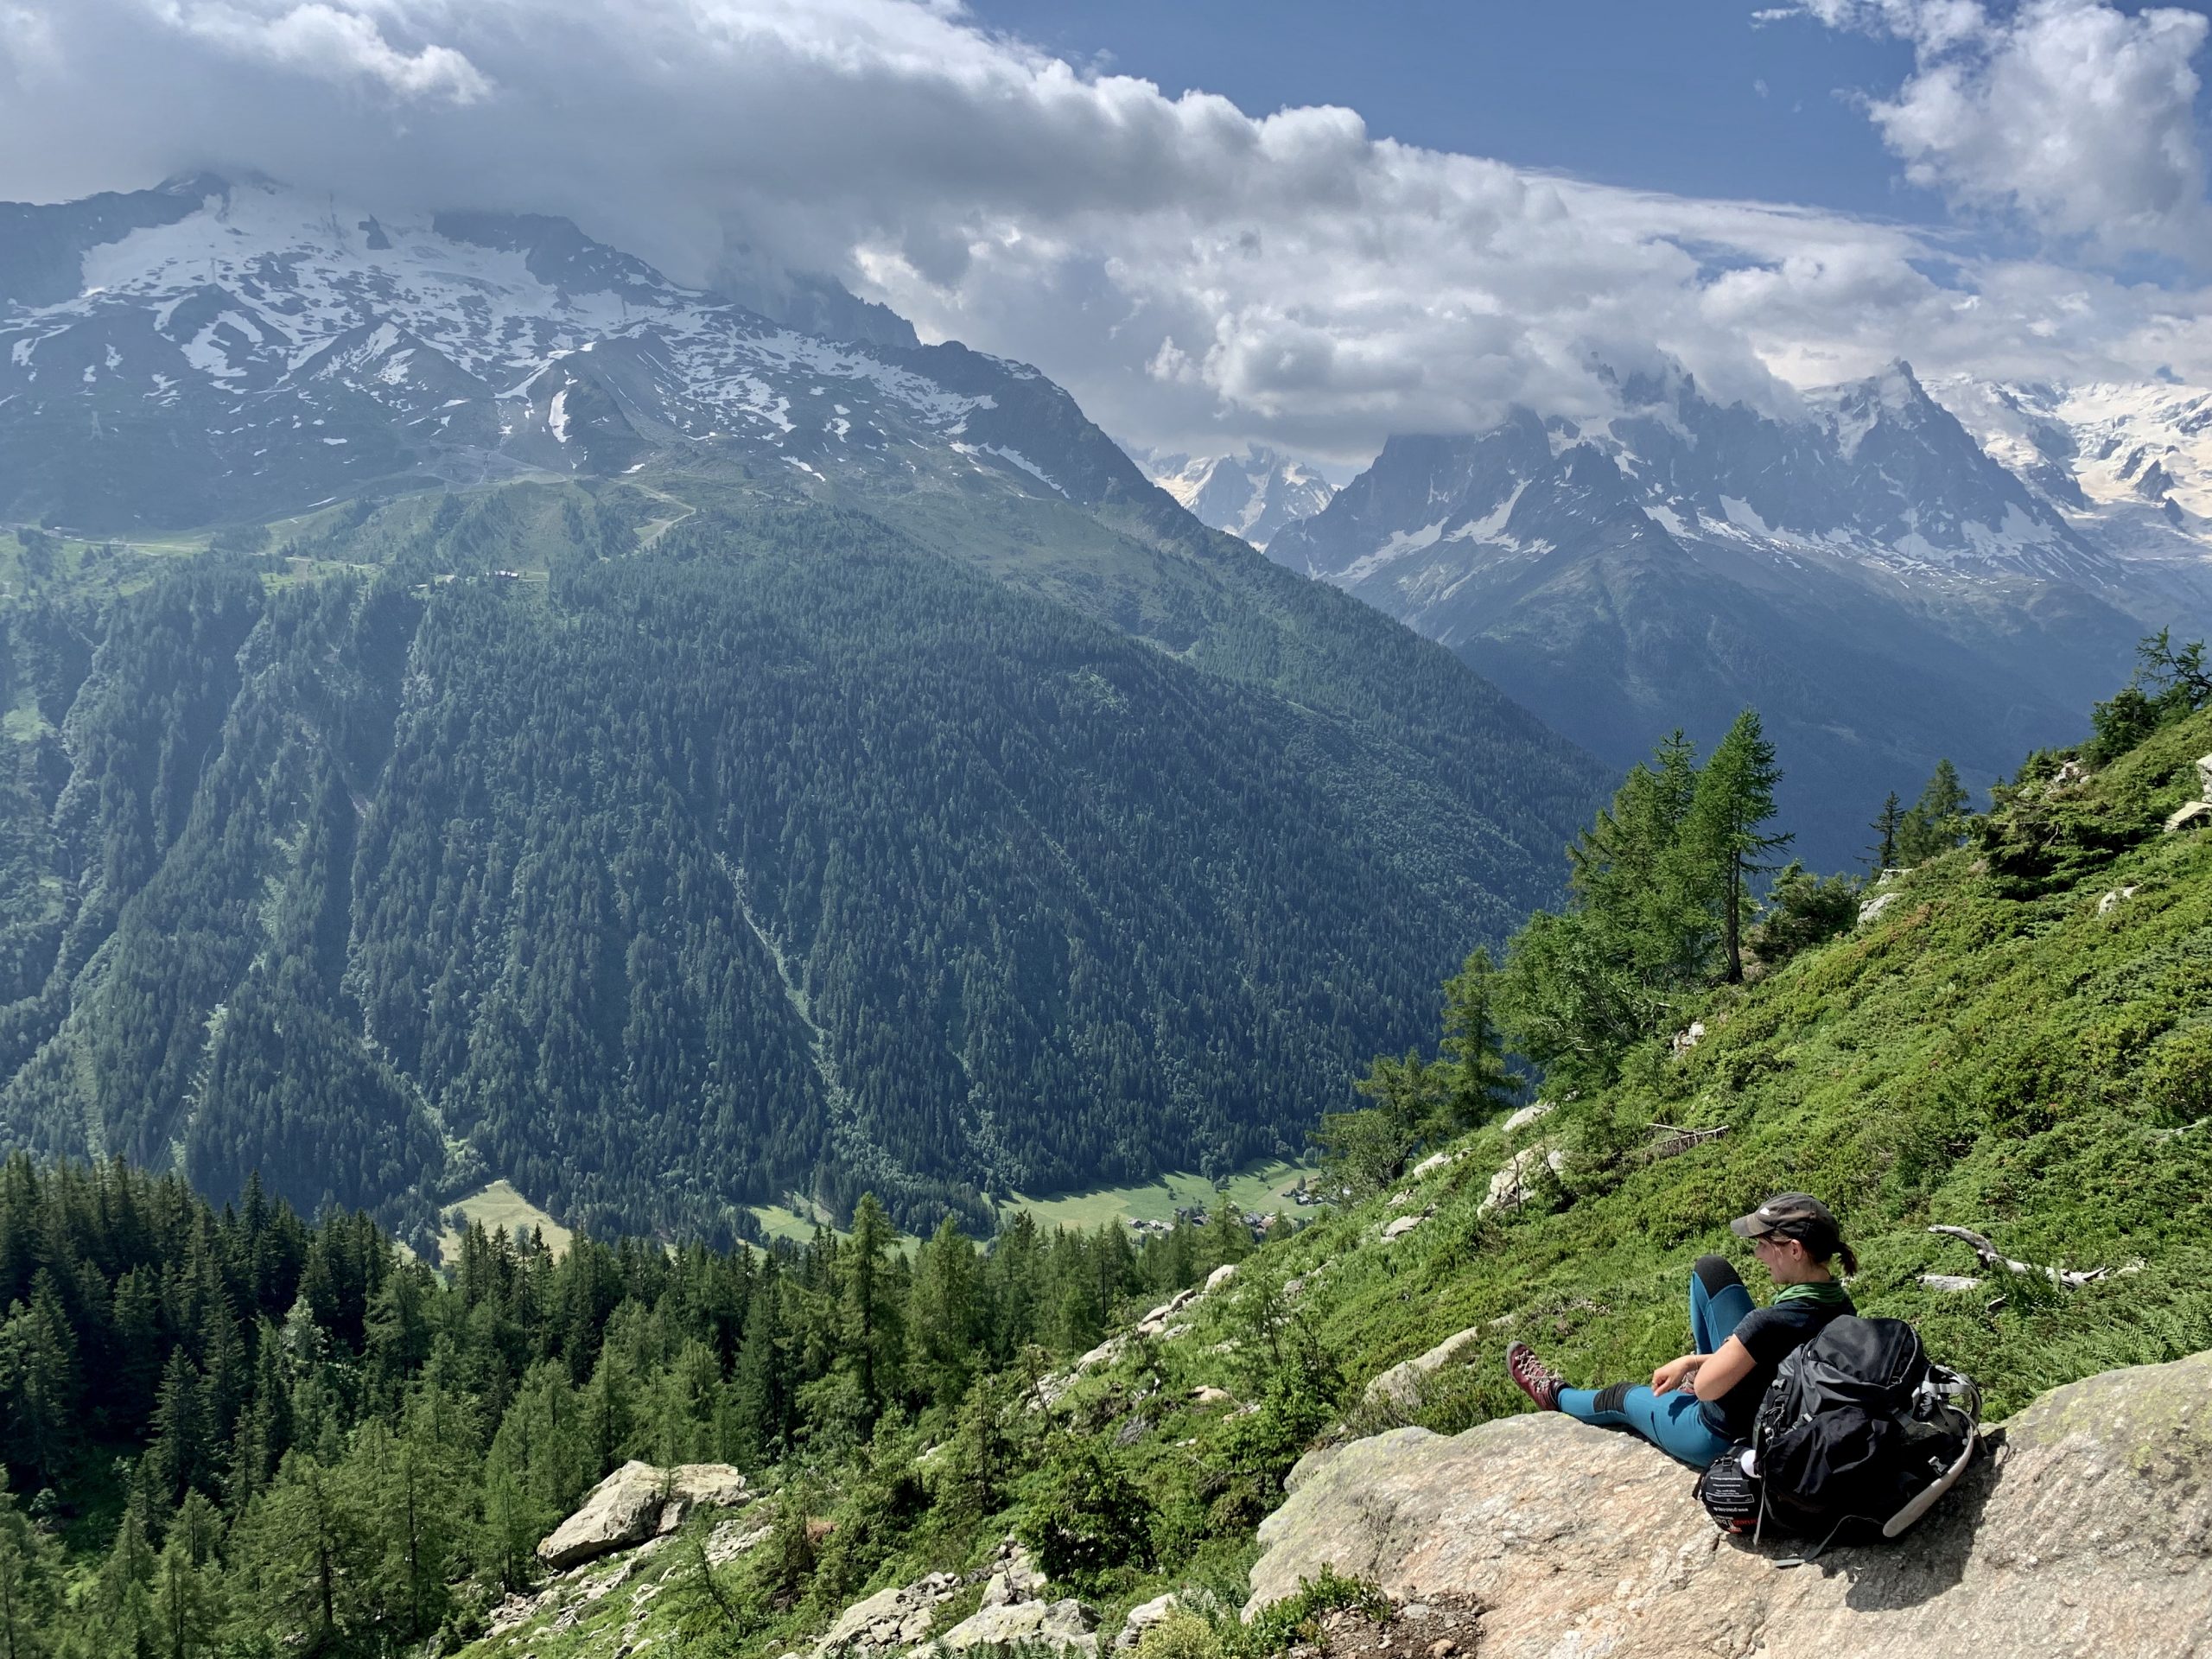
I think TMB only grazes Switzerland without showing a lot of dramatic landscapes this country is known for. The previous stages spoiled me.

Day 7: Take the alternative and the terror hill
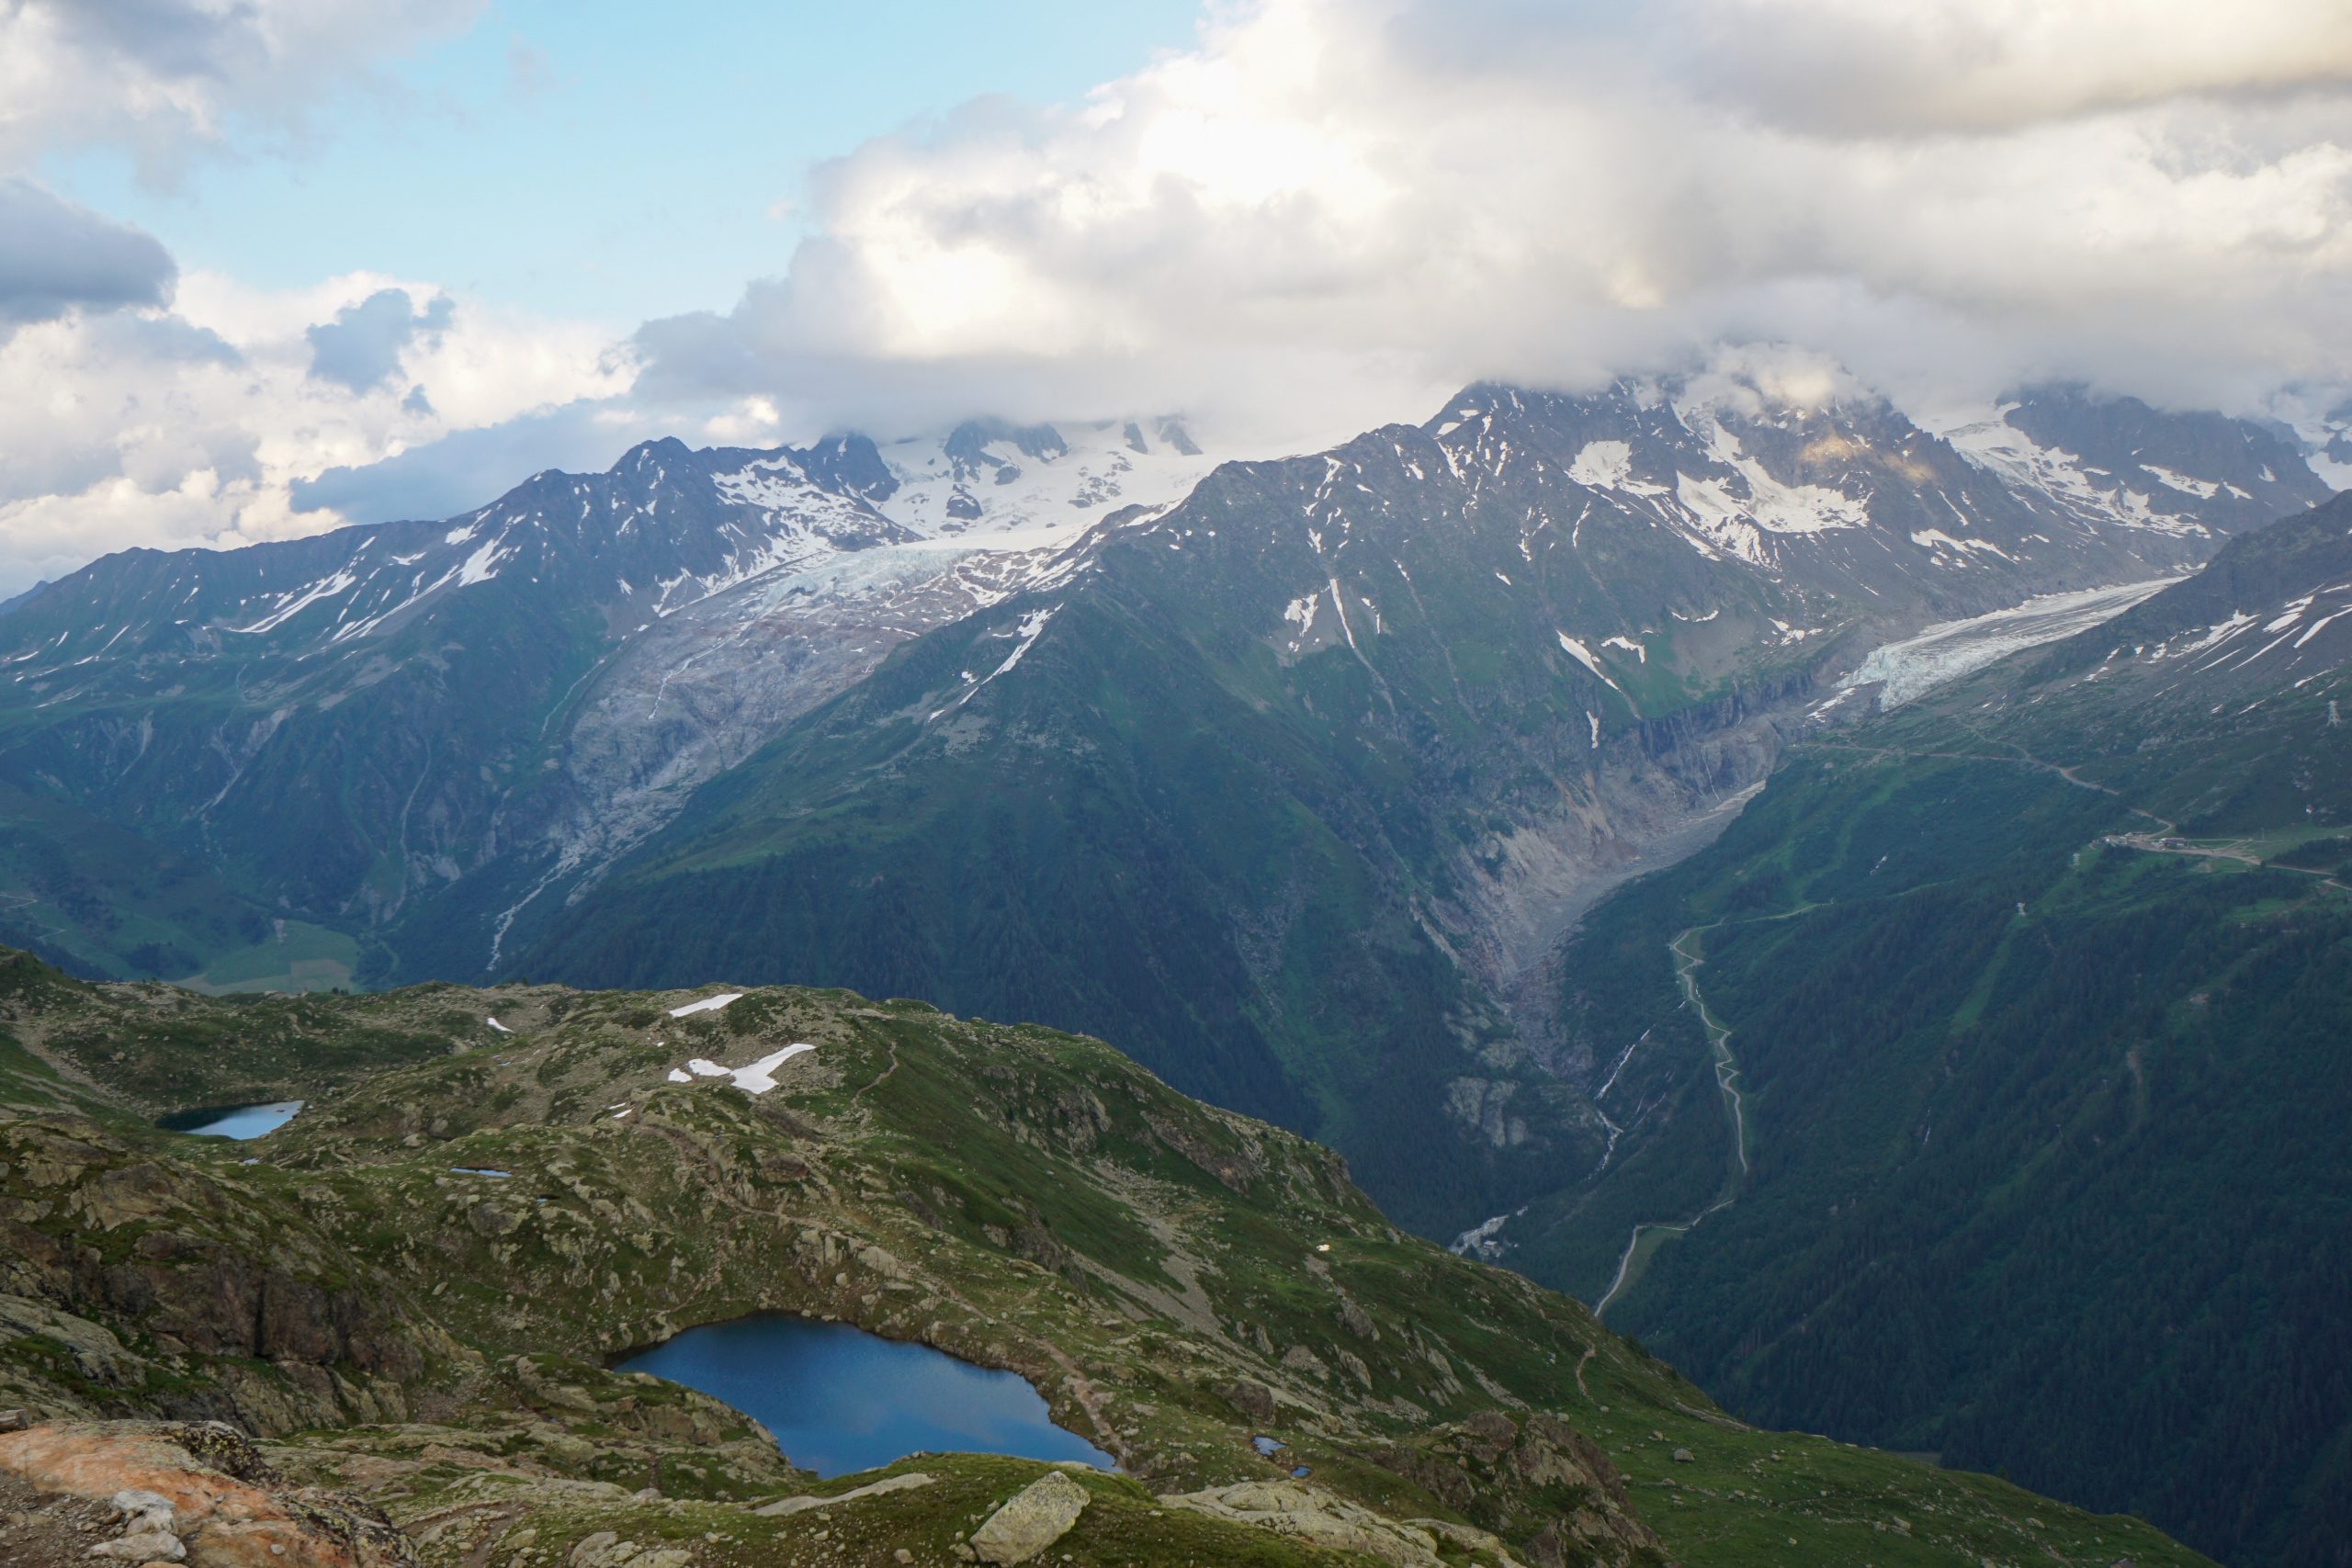
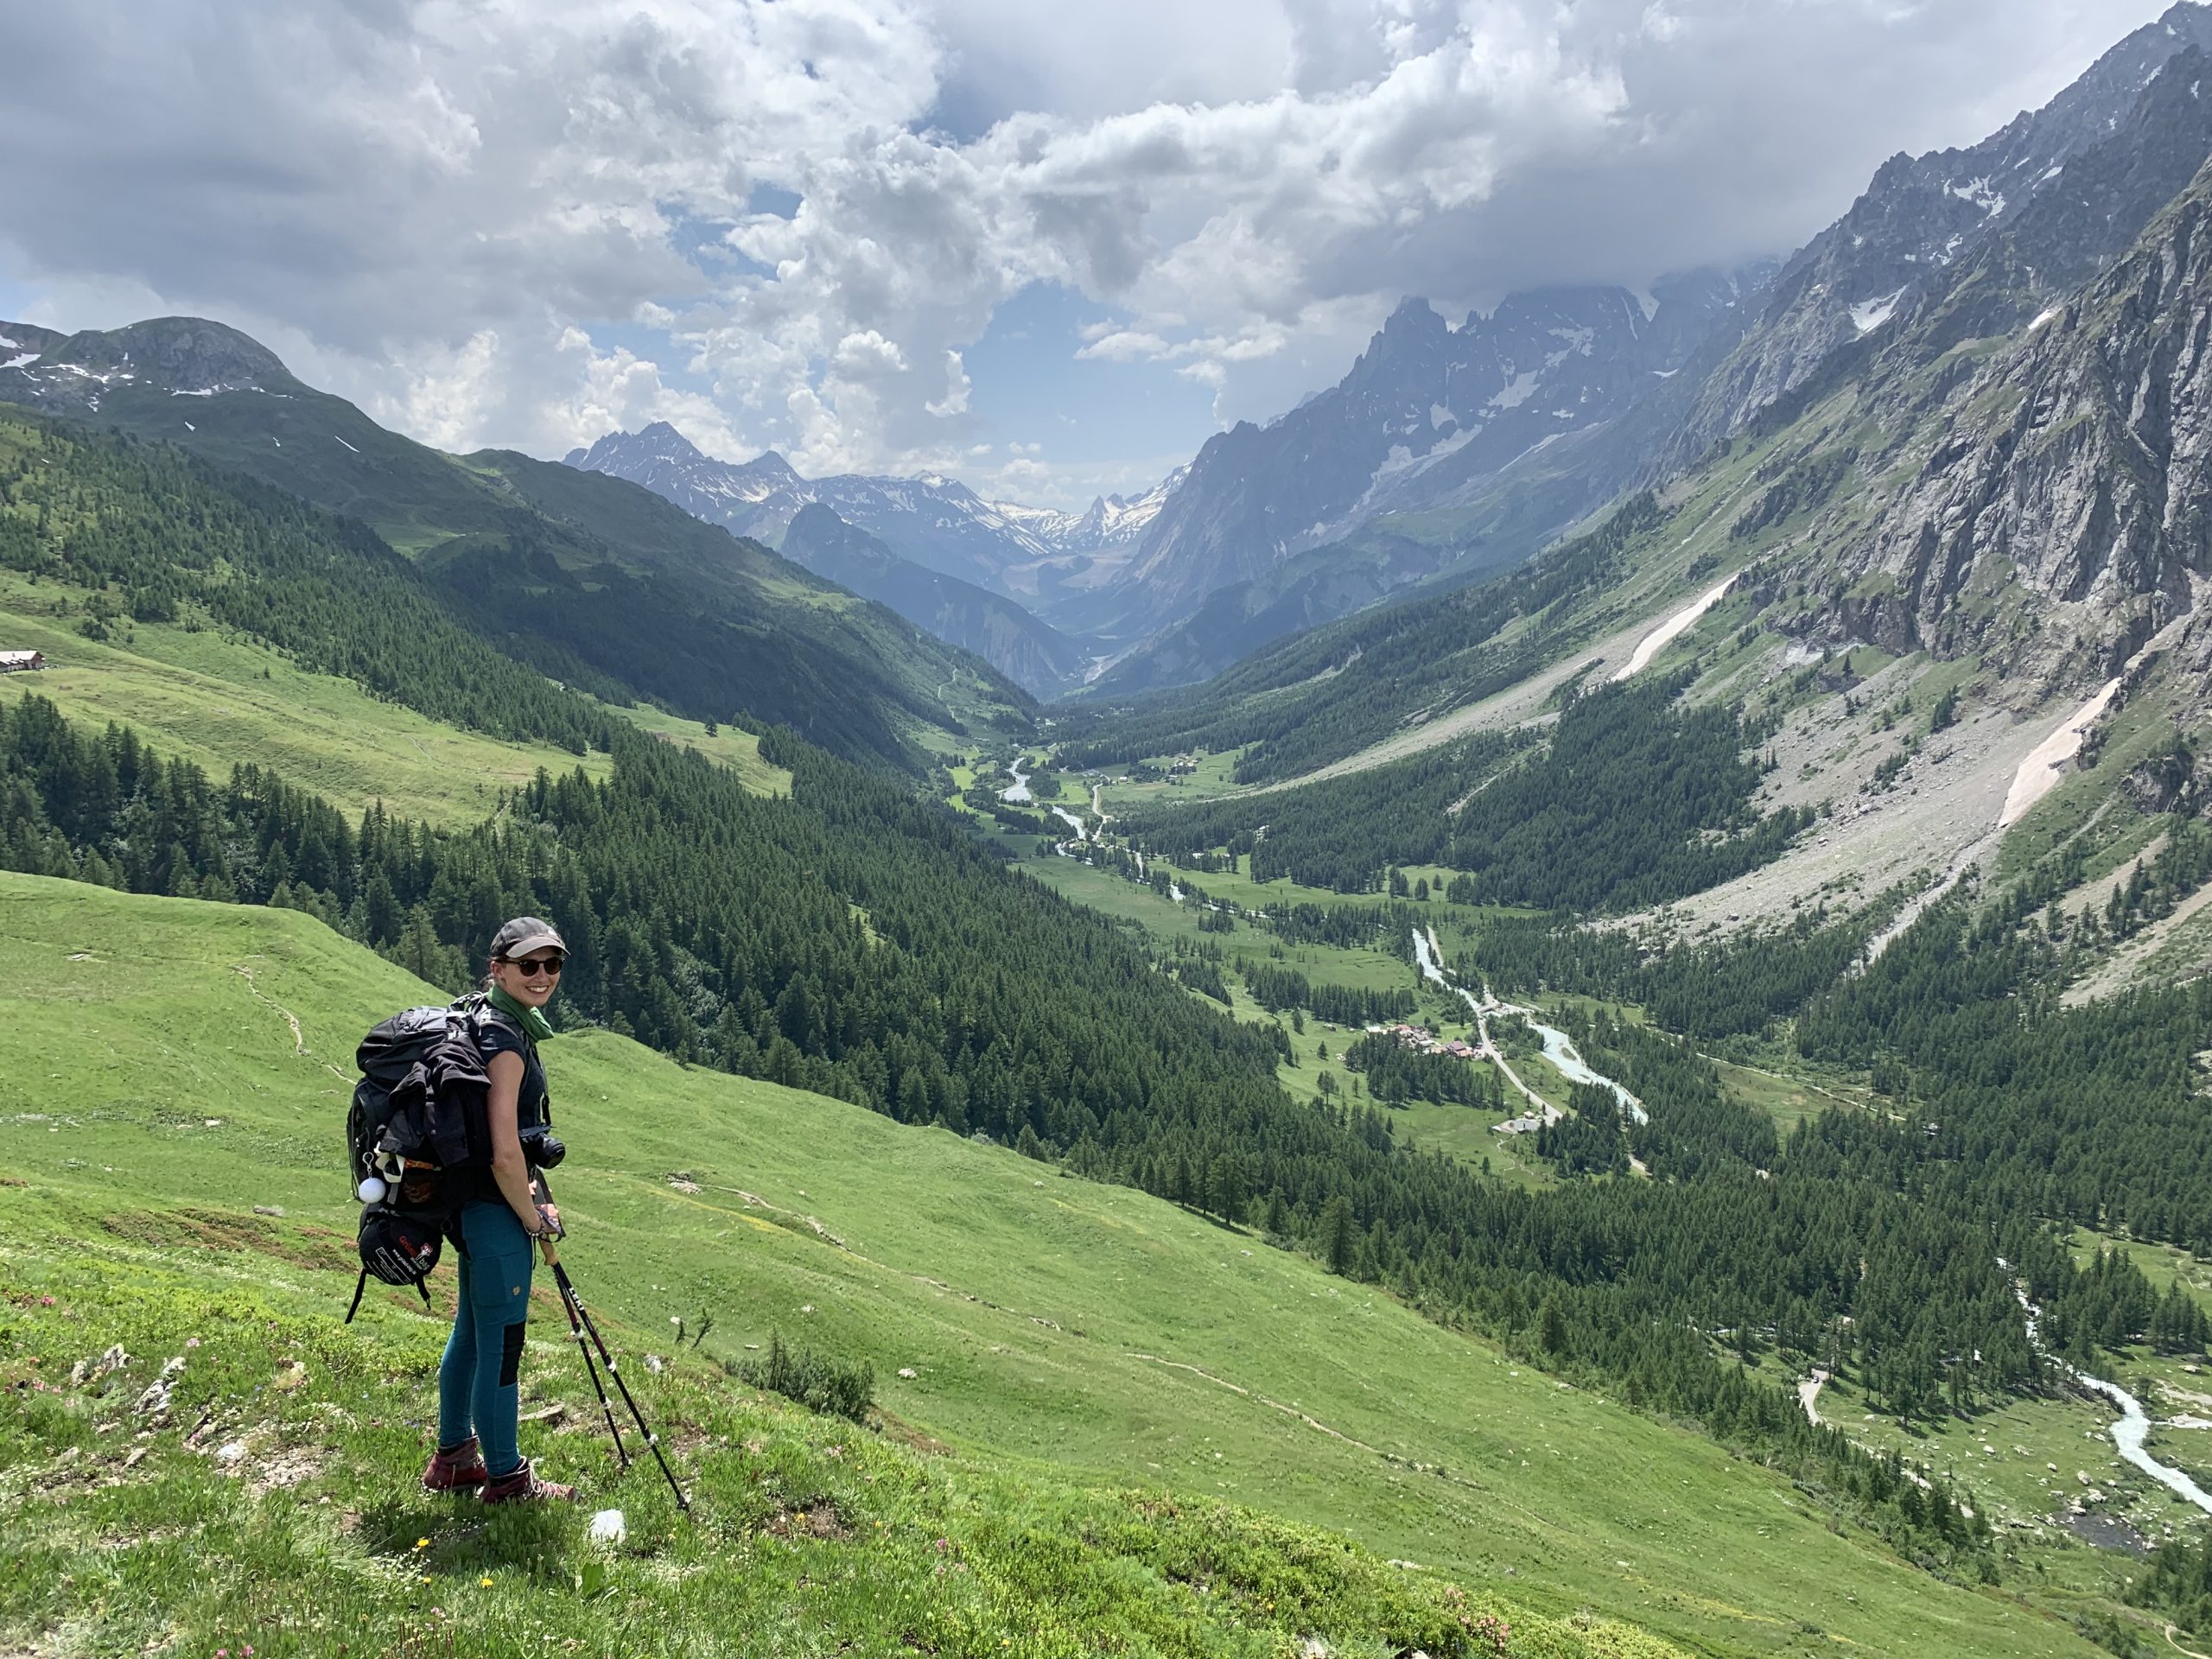
Today we decided to take the alternative route via Refuge Les Grands as it seemed to be more scenic and less crowded. It turned out to be absolutely true.

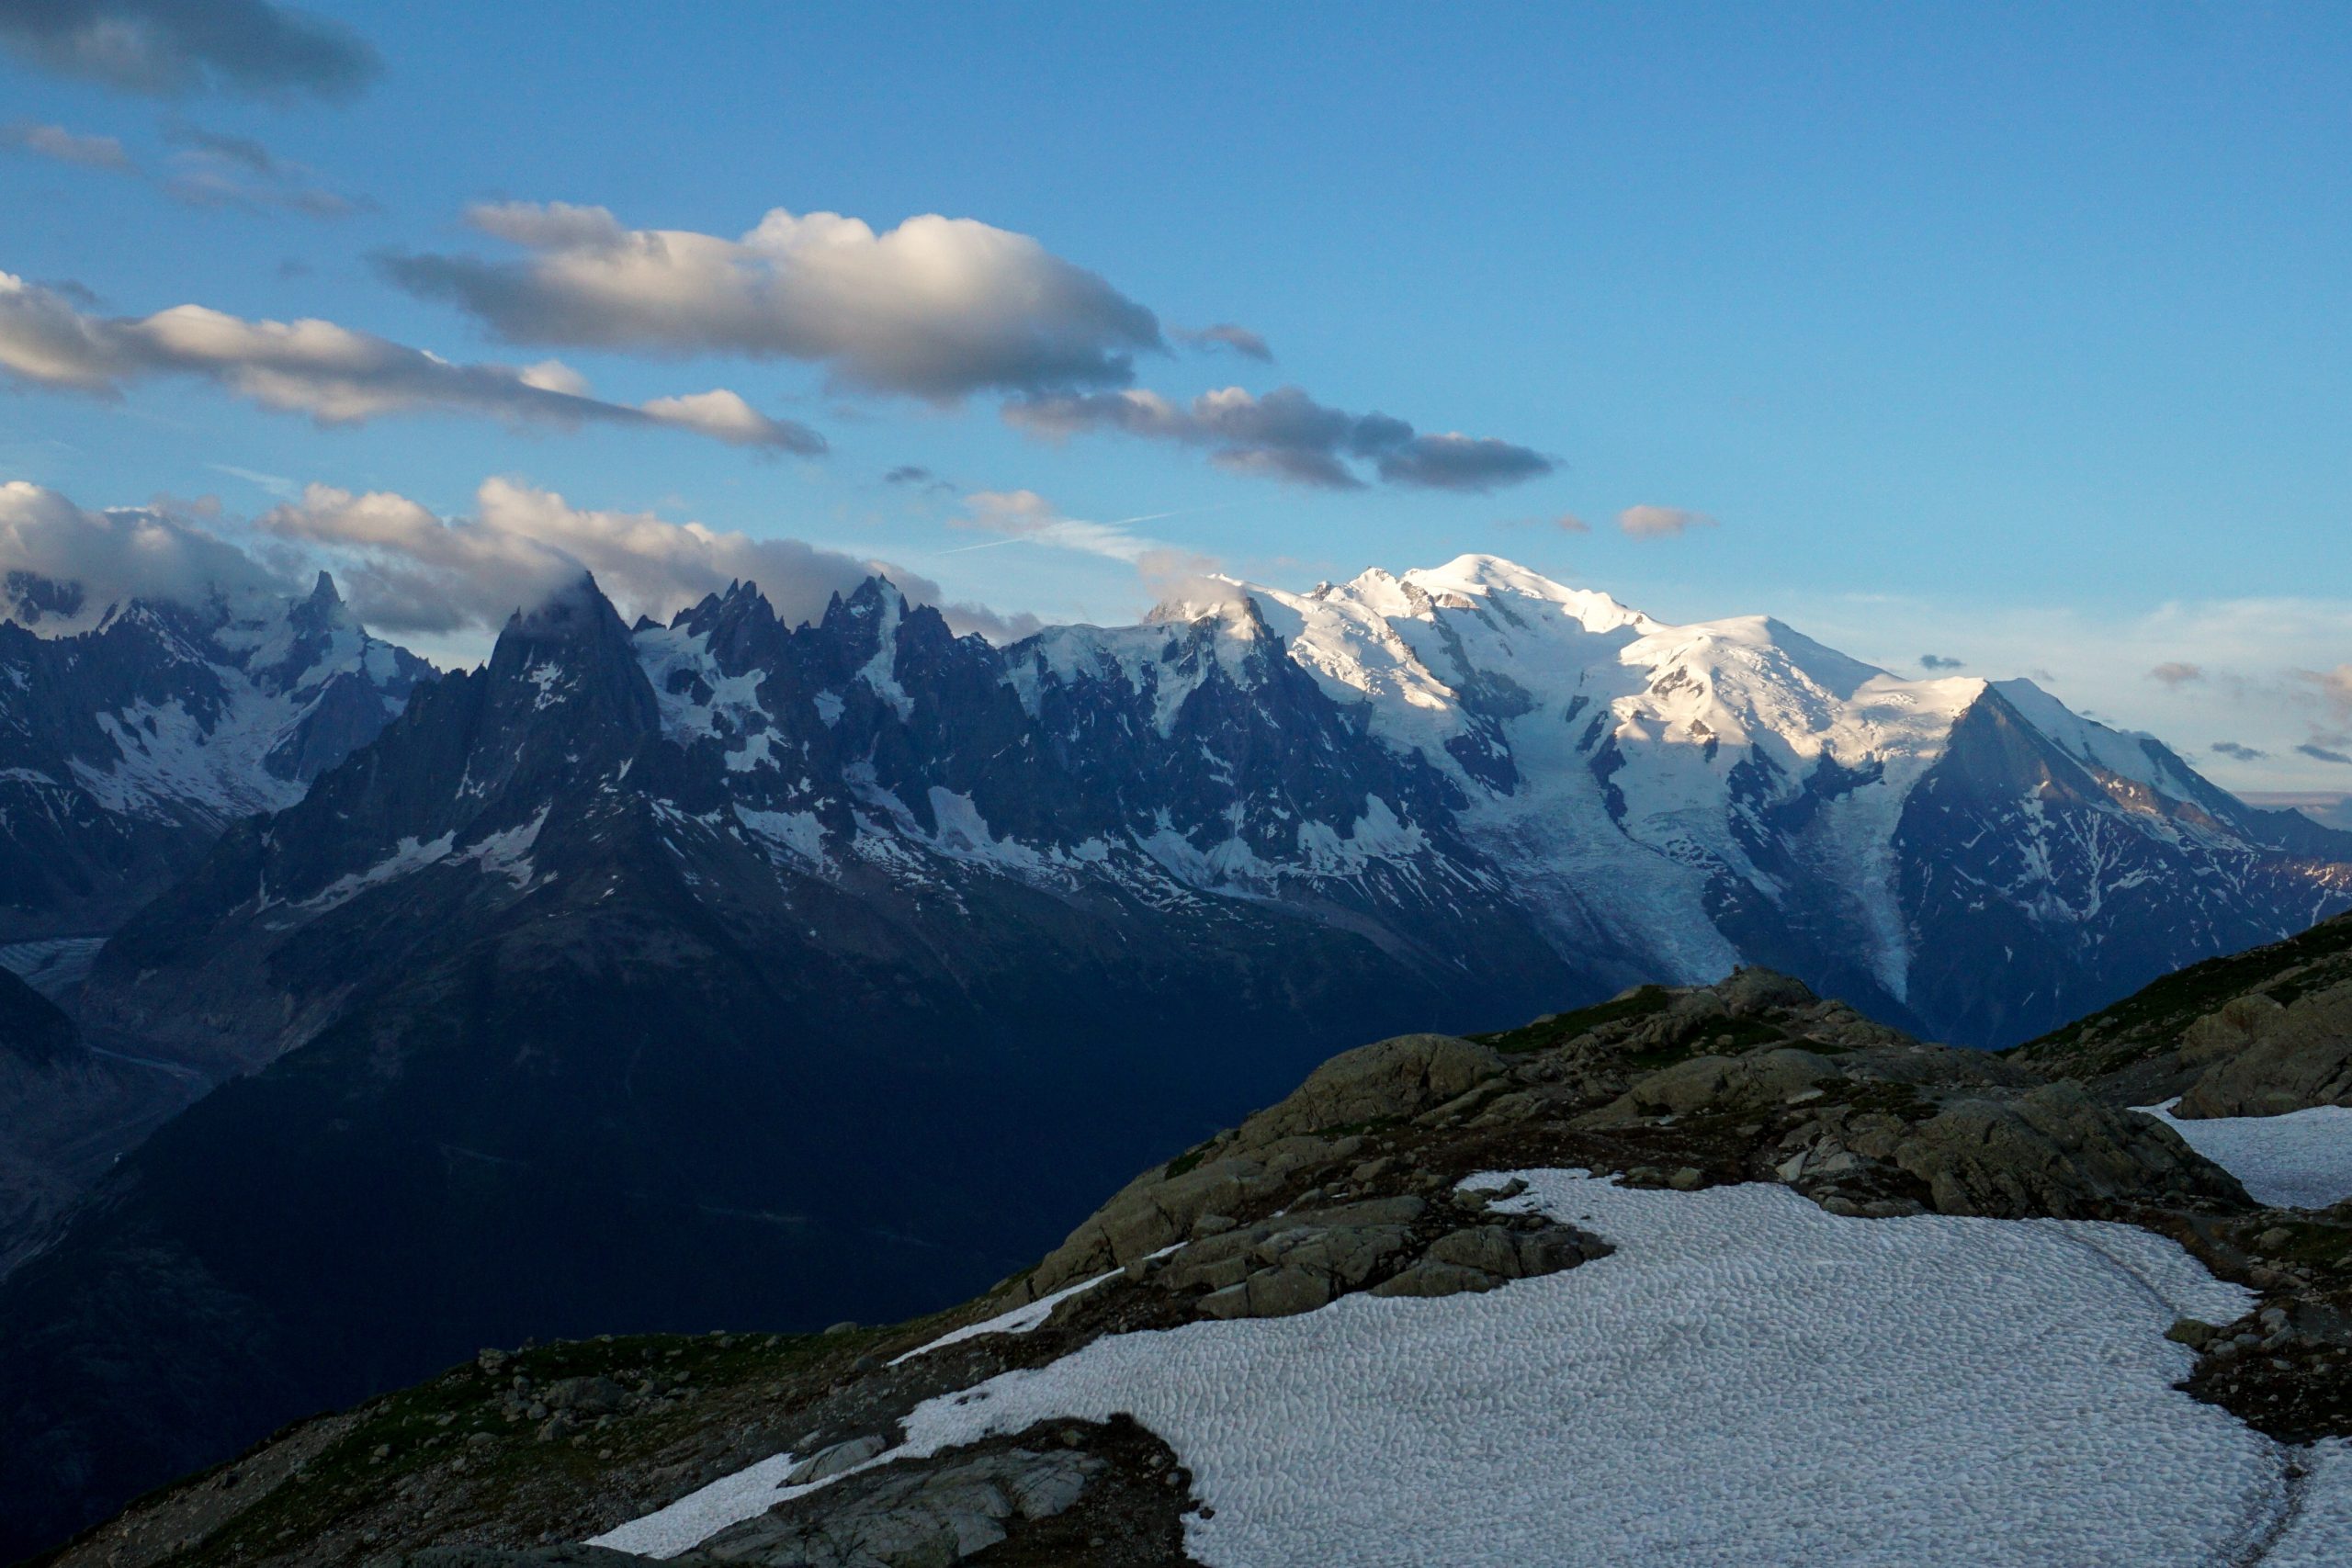
Day 8: The highest refuge on the trail
This section is rather challenging due to steep ascents AND ladders. For those scared of heights – as long as you don’t look down, it’s all fine.

Day 9: Never ending descents
Our final day! Mixed feelings as the prospect of ditching the backpack and sleeping in a nice comfy bed was very tempting, but I also started already missing the views.